Table of Contents
Advertisement
Quick Links
Advertisement
Table of Contents

Subscribe to Our Youtube Channel
Related Manuals for CyberView RP115 Series


Summary of Contents for CyberView RP115 Series
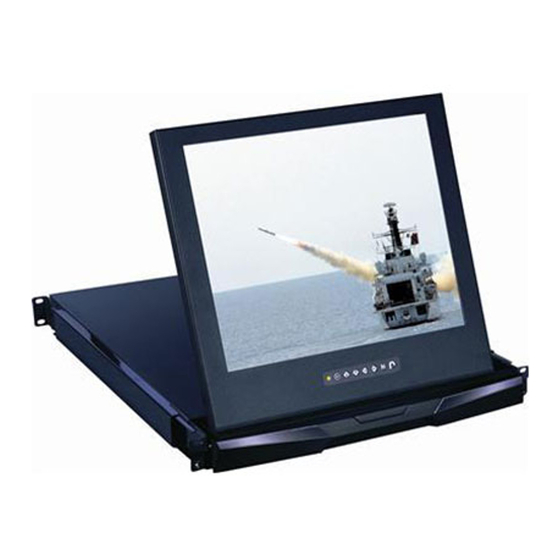
- Page 1 User Manual Rackmount LCD Drawer 15", 17", 19", 20" screen size Models RP115 / 117 / 119 Series Models RP1415 / 1417 / 1419 Series - Short depth version Models RP220 Series - Ultra high resolution 1600 x 1200 - 2U height Options : - AV / BNC - Touchscreen...
-
Page 2: Table Of Contents
Contents Chapter 1 Getting Started Important Safeguards............1 Regulatory Notice..............2 Package Contents...............3 Before Installation...............4 Unpacking................4 Optional Accessories............4 Peripheral Products.............5 Structure Diagram...............5 Installation................6 1.10 Connection.................7 Chapter 2 Operation On-screen Display Operation..........7 On-screen Menu..............8-9 Chapter 3 LCD Specifi cation ............10 Chapter 4 AV, BNC, DVI Options DVI-D Option..............11 S-Video + RCA Input Option..........11 S-Video + BNC Input Option..........11... -
Page 3: Important Safeguards
Chapter 1 1.1 Important Safeguards Please read all of these instructions carefully before you use the device. Save this manual for future reference. What the warranty does not cover ■ Any product, on which the serial number has been defaced, modifi ed or removed. ■... -
Page 4: Regulatory Notice
Chapter 1 1.2 Regulatory Notice Legal Information First English printing, October 2002 Information in this document has been carefully checked for accuracy; however, no guarantee is given to the correctness of the contents. The information in this document is subject to change without no- tice. -
Page 5: Package Contents
Chapter 1 1.3 Package Contents Rackmount LCD drawer x 1 pc Fasteners for rear L-bracket x 4 pcs 330mm rear mounting L-bracket x 1 pair * RP115 / 117 series mounting depth-adjustable from 210 to 795mm * RP119 series mounting depth-adjustable from 260 to 845mm * RP220 series mounting depth-adjustable from 350 to 830mm * RP1415 / 1417 series mounting depth-adjustable from 100 to 700mm * RP1419 series mounting depth-adjustable from 135 to 715mm... -
Page 6: Before Installation
Chapter 1 1.4 Before Installation ■ It is very important to locate the Rackmount LCD Drawer in a suitable environment. ■ The surface for placing and fi xing the Rackmount LCD Drawer should be stable and level or mounted into a suitable cabinet. -
Page 7: Peripheral Products
Chapter 1 1.7 Peripheral Products Item Model No. Description IP-802 / IP-1602 8 / 16-port IP PS/2 KVM CV-802 / CV-1602 8 / 16-port two console PS/2 KVM DB-15 KVM CV-401 / CV-801 / CV-1601 4 / 8 / 16-port PS/2 KVM CV-S801 / CV-S1601 8 / 16-port USB KVM UIP-1602 / UIP-3202... -
Page 8: Installation
Chapter 1 1.9 Installation ■ Install each rear L-bracket using two fasteners shown in Figure 1. ■ Leaving the fasteners slightly loose Figure 1. Installing the rear L-bracket to the LCD drawer. ■ Measure the front and rear mounting depth of the rack. -
Page 9: Connection
Chapter 1 1.10 Connection Internal power version Power External power version ( For short depth version - RP1415 / 1417 / 1419 ) The Rackmount LCD Drawer are hot-pluggable, but components of connected Caution : devices, such as the servers and KVM switch, may not be hot-pluggable. Plugging and un- plugging cables while servers and KVM are powered on may cause irreversible damage of the servers, KVM and Rackmount LCD Drawer. -
Page 10: On-Screen Menu
Chapter 2 2.2 On-screen Menu For RP115 / 117 / 119 / 1415 / 1517 / 1419 series MAIN MENU BRIGHTNESS/CONTRAST AUTO ADJUST PHASE/CLOCK H/V POSITION MISC RESET BRIGHTNESS / CONTRAST Brightness: Adjust background black level of the screen image. Contrast: Adjust the difference between the image background (black level) and the foreground (white level). - Page 11 Chapter 2 2.2 On-screen Menu For RP220 series Image Brightness: Adjust background black level of the screen image Contrast: Adjust the difference between the image background (black level) and the foreground (white level) Sharpness: Adjust the image from weak to sharp Saturation: Adjust the saturation of the image color Hue:...
- Page 12 Chapter 3 3.1 LCD Specifi cations Item Description 1U rack mounting on slide-out rails Form Factor LCD Manufacturer 15" TFT 17" TFT 19" TFT 20" TFT Diagonal Size 1024 x 768 1280 x 1024 1280 x 1024 1600 x 1200 Max.
-
Page 13: Dvi-D Option
Chapter 4 4.1 DVI-D Option DVI-D Internal power version External power version ( For short depth version - RP1415 / 1417 / 1419 ) Remarks ■ Package includes with a 6' DVI-D cable ■ The depth of RP1415 / 1417 will be extended from 440 mm ( 17.3" ) to 480mm ( 18.9" ) ■... -
Page 14: Audio Option
Chapter 4 4.4 Audio Option Speaker Internal power version Audio Power External power version ( For short depth version - RP1415 / 1417 / 1419 ) Remarks: ■ Audio input is 35mm audio plug ■ The speaker is sharing the same power with LCD. ■... -
Page 15: On-Screen Menu For Dvi, Bnc, S-Video & Rca Input
Chapter 4 4.5 On-screen Menu for DVI, BNC, S-Video & RCA Input Image Brightness: Adjust background black level of the screen image Contrast: Adjust the difference between the image background (black level) and the foreground (white level) Sharpness: Adjust the image from weak to sharp Saturation: Adjust the saturation of the image color Hue:... - Page 16 Chapter 4 4.5 On-screen Menu for DVI, BNC, S-Video & RCA Input Display mode Main menu Sub menu S-Video √ √ √ √ Brightness √ √ √ √ Contrast √ √ √ √ Image Sharpness √ √ Saturation √ √ √...
-
Page 17: Touchscreen Options
Chapter 5 5.1 Touchscreen Options Power USB interface Internal power version ( For short depth version - RP1415 / 1417 / 1419 ) External power version Serial Power Serial interface Internal power version ( For short depth version - RP1415 / 1417 / 1419 ) External power version e-Resistive Model... - Page 18 Chapter 6 6.1 DC Power Options DC Power input Model Input rating Input voltage: 12-Volt 24-Volt 48-Volt Input range: 9 ~ 18V 18 ~ 36V 36 ~ 75V Input current - No load 50 mA 50 mA 50 mA - Full load 4950 mA 2450 mA 1220 mA...
- Page 19 Chapter 7 7.1 Troubleshooting 1. How do I adjust the resolution? To change monitor resolution, click Start -> Control Panel -> Display. Select Setting tab to adjust the monitor resolution in Desktop Area. The available resolutions, "640 x 480", "800 x 600", "1024 x 768", "1152 x 864", "1280 x 1024", are deter- mined by the display card in your computer.
- Page 20 Weight Weight 442 x 550 x 44.2 mm 581 x 705 x 175 mm 10 kg 15 kg RP115 series 17.4 x 21.6 x 1.74" 22.9 x 27.8 x 6.9" 22 lb 33 lb 442 x 550 x 42 mm...
Need help?
Do you have a question about the RP115 Series and is the answer not in the manual?
Questions and answers