Table of Contents
Advertisement
Advertisement
Table of Contents

Related Manuals for Benelli TORNADO Tre Novecento 900


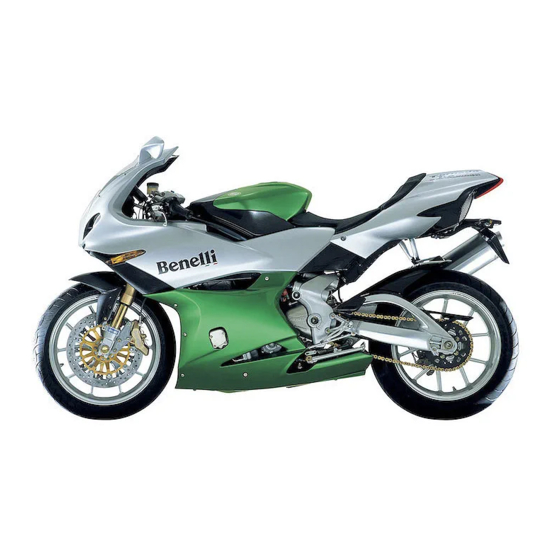
Summary of Contents for Benelli TORNADO Tre Novecento 900
-
Page 2: Table Of Contents
Adjusting the rearview mirrors ... 43 Ignition switch and steering lock ..21 Adjustments that has to be done by a Gear lever ..........23 Benelli Authorized Workshop..... 44 Instruments and warning lights ..24 5.4.1 Clutch lever play ........44 Checking the wear of the brake pads 70 Adjusting the front suspension...45... -
Page 3: General Information
Benelli SpA reserves the right to make any changes, whenever deemed, to its products and to this manual. Wherever you will find any dissimilarity between what is written on tihs Owner’s Manual and the... -
Page 4: Identification Data
Owner’s Manual, or contact the Customer Service Benelli calling 800342300, which will arrange to send to you the new update version. 2) engine serial number 1) vehicle identification number 3) homologation data Identification data 1. vehicle identification number 2. -
Page 5: Safety Information
Tornado! For any necessity or further information don’t hesitate to apply to your Benelli Distributor or to the nea- rest Benelli Authorized Workshop. You can find the Benelli Distributor and the Benelli Authorized Workshop list on the web site www.benelli.com or calling the Benelli Customer Service dialling... -
Page 6: Vehicle Load
As soon as possible and, kowever, before using your motorcycle after an accident, even if there are not any visible damages, it is necessary to have it inspected by a Benelli Authorized Workshop, in order to verify the absence of defects and/or damages that the owner could not be able to detect. -
Page 7: Use Of The Vehicle In Competitions
The use of such components is strictly limited to areas closed to traffic. Failure to observe this restriction constitutes a breach of the Highway Code for which Benelli cannot be held responsible. -
Page 8: Protective Clothing
vehicle, it is essential to adopt a “defensive” riding attitude, particularly in the adverse weather conditions described above. When riding down long hills, reduce the speed of your motorcycle by closing the throttle and using a low gear ratio to take advantage of engine braking. Use the front and rear brakes as little as possible to maintain your speed, in order to prevent brake overheating and fade. -
Page 9: Suggestions Against Theft
WARNING Protective clothes do not afford complete protection against the risk of personal injury in the event of an accident. It is therefore essential not be deceived by the false sense of security that you might perceive by wearing protective clothing. When riding, always adopt a cautious attitude and follow the recommendations given in the previous para- graphs. -
Page 10: Controls And Instruments
Controls and instruments Location of controls and instruments Instruments and warning lights Clutch lever Front brake lever Throttle twist grip Left handlebar electrical controls Ignition switch and steering lock Right handlebar electrical controls Fuel tank cap Left side Right side Sidestand Sidestand The sidestand is equipped with a safety switch that... -
Page 11: Handlebar Controls, Left Side
Handlebar controls, left side Clutch lever Move towards/away from the handgrip to release/engage the clutch. Control Lights Low or high beam on Lights on Lights out Low/high beam button Shift the light switch to the position Button not pressed in : low beam Button pressed in : high beam... -
Page 12: Handlebar Controls, Right Side
It is used to start the engine. To avoid damaging the electrical equipment, be sure not to hold down the button for lon- ger than 5 consecutive seconds. If, after some attempts, the engine does not start, contact your authorized Benelli service center. -
Page 13: Ignition Switch And Steering Lock
Ignition switch and steering lock WARNING Do not attach a ring or any other object to the ignition key as they may hinder the steering action. Never attempt to change the switch functions while rid- ing, as you may lose control of the vehicle. -
Page 14: Gear Lever
Gear lever WARNING Only operate the change gear with the 6° 6° 5° clutch lever fully pulled. 5° 4° 4° 3° 3° 2° 2° The N (neutral) position is indicated by the warning light on the instrument panel. To change into first gear, push the lever down. To change into second gear, lift the lever up. -
Page 15: Multifunction Display
• Improve our riding skills PROTECT THE ENVIRONMENT Benelli, in order to protect the interests of the community, awakens the Customers and the Technical Assistance operators to use the vehicle and dispose of its replaced parts respecting the laws in force concerning environmental pollution and waste disposal and... - Page 16 If any of the above-mentioned parts shows a failure during its operation, have it controlled and repaired by a Benelli Authorized workshop before using the motorcycle.
- Page 17 Running-in Failure to observe the indications provided below can reduce performance and shorten the life of the motorcycle. Running-in is generally considered to apply only to the engine. In fact, it should be regarded as an essential phase for other important parts such as the tyres, the brakes and the drive chain. During the very first miles, adopt a relaxed riding style.
- Page 18 Resetting the trip mileage counters Press twice the "Mode" button to reset the "Trip" function value. NOTE: The instrument panel has an integrated memory which retains all the parameters even when the engine is not running. Except for the clock, which is reset, all the parameters are retained even when the battery is disconnected.
- Page 19 Saddle disassembly driver Keys supplied Insert the key. Press the end part of the saddle and, at the same time, turn the key clockwise. Slightly lift the saddle from the rear, slide it back- wards and remove it. Keys Saddle disassembly passenger supplied Insert the key.
- Page 20 4.10 Refuelling Lift the dust cover. Insert the key into the lock, rotate it clockwise and lift the tank cap. After refuelling, press down the tank cap while rota- ting the key clockwise to facilitate the locking. Then release the key and remove it. WARNING Petrol and its fumes are highly toxic and flammable.
- Page 21 4.11 Starting the engine As you turn the ignition switch to the ON position, the instruments and the warning lights will go through the self-diagnostic cycle; during this phase, make sure that all the warning lights on the dashbo- ard come on. One of the following conditions must be verified, in order that the ignition switch system allows engine starting: The gears are in neutral.
- Page 22 All adjustments must be performed when the vehicle is stationary and, where not otherwise provided in this manual, they have to be done only by Benelli Authorized Workshop; in fact, some of these operations can cause a danger for the user’s safety if they are not properly done or if they are unappropriate.
- Page 23 Recapitulatory table of adjustments Adjusting rear suspension spring pre- Authorized Dealer TYPE OF ADJUSTMENT COMPETENCE load Front brake lever User Adjusting rear adjustment suspension rebound Authorized Dealer Clutch lever adjustment User damper hydraulic device Rearview mirrors Adjusting rear User adjustment suspension compression Authorized Dealer Rear brake lever...
-
Page 24: Clutch Lever Play
Adjustments that has to be done by a Benelli Authorized Workshop WARNING – The following adjustments are reserved to the Benelli Authorized Workshops. Never perform the adjust- ment while riding. 5.4.1 Clutch lever play Remove the adjustment cover cap. -
Page 25: Adjusting The Front Suspension
Adjusting the front suspension Rebound damper hydraulic device Spring preload Compression damper hydraulic device 5.5.1 Adjusting front suspension spring preload Adjusting of the spring preload is performed by counting the rule turns (A), either clockwise and anticlockwise. Giri Giri Turn clockwise for stiffer preload adjustment. Turn anticlockwise for softer preload adjustment. -
Page 26: Adjusting Front Suspension Compression Damper Hydraulic Device
5.5.3 Adjusting front suspension compres- sion damper hydraulic device Adjusting of the compression damper hydraulic device is made in jerks. Turn the rule (C) clockwise to increase the braking action, or turn anticlockwise to decrease it. Scatti Scatti FRONT SUSPENSION Standard configuration 7,5 turns Spring preload... -
Page 27: Adjusting Rear Suspension Spring Preload
WARNING The high temperature of the exhaust pipes can cause burns. Before adju- sting the rear suspension, shut off the engine and wait until the exhaust pipes have thoroughly cooled. The rear shock absorber contains highly compressed gas. Do not try to open or disassemble it in any way When you estimate the rear suspen- sion settings, never push or pull in any... -
Page 28: Adjusting Rear Suspension Compression Damper Hydraulic Device
PROTECT THE ENVIRONMENT Benelli, in order to protect the interests of the community, awakens the Customers and the Technical Assistance operators to use the vehicle and dispose of its replaced parts respecting the laws in force concerning environmental pollution and waste disposal and recycling. - Page 29 Owner’s Manual. In any other case have the opera- tions performed by a Benelli Authorized Workshop, whose list is available on the web site www.benelli.com or calling the Benelli Coustomer Service dialling 800342300.
- Page 30 COVERED 0 km Every Every After COMPONENTS OPERATION (0 mi) 5000 km 10000 km 1000 km predeli- (3000 mi) (6000 mi) (600 mi) very running-in Check Timing chain Replace Every 25000 km (15000 mi) Check / Replace Timing movable shoe Every 25000 km (15000 mi) Replace Every time timing chain is replaced...
- Page 31 COVERED 0 km Every Every After COMPONENTS OPERATION (0 mi) 5000 km 10000 km 1000 km predeli- (3000 mi) (6000 mi) (600 mi) very running-in Check level Every time vehicle is used Check level Brakes fluid Every 25000 km (15000 mi) Replace At least every two years Clutch control...
- Page 32 COVERED 0 km Every Every After COMPONENTS OPERATION (0 mi) 5000 km 10000 km 1000 km predeli- (3000 mi) (6000 mi) (600 mi) very running-in Check Front/rear wheel bearings Every time tyre is replaced Replace Ogni 50000 km (30000 mi) Check operation Prima di ogni utilizzo del veicolo Sidestand...
-
Page 33: Tools And Accessories Supplied
COVERED 0 km Every Every After COMPONENTS OPERATION (0 mi) 5000 km 10000 km 1000 km predeli- (3000 mi) (6000 mi) (600 mi) very running-in Fascette stringitubo O Check / Tighten General lubrication General test Tools and accessories supplied The motorcycle comes supplied with a kit containing the following tools: •... -
Page 34: Table Of Lubricants And Fluids
Drive chain lubrication oil O-RING * : For the availability of the suggested product, Benelli suggests to directly apply to the Authorized Dea- lers or Workshops. If the above described lubricant is not available, Benelli suggests to use a fully syn-... -
Page 35: Topping Up The Engine Oil Level
6.4.1 Topping up the engine oil level Oil filler plug To top up the engine oil level, remove the oil filler plug and pour an appropriate amount of engine oil of the recommended type. Never exceed the MAX level mark. At the end of the operation, place back the oil filler plug. -
Page 36: Checking The Coolant Level
Topping up the coolant level WARNING This operation has to be performed only by a Benelli Authorized Workshop. Perform the topping up of the coolant when the engine is off and cold. Never attempt to remove the coolant filler cap when the engine is hot, in order to avoid the risk of burns. The cooling... -
Page 37: Checking The Wear Of The Brake Pads
If the brake pads are excessively worn out, the effectiveness of the braking system decreases, increasing the risk of accidents. Check frequently, from a Benelli Authorized Workshop, the wear and tear of the linings and, wherever need, make them replaced. -
Page 38: Checking The Brake Fluid Level
The level of the brake fluid decreases as the brake pads wear down. Ensure that the fluid level is always between the MAX and MIN marks. If the level falls below the MIN mark, contact a Benelli authorized ser- vice center and have the brake system overhauled. -
Page 39: Checking The Tires And Rims
Benelli authorized service center and have the tyre replaced. With a provisio- nally repaired tyre, never exceed 60 km/h (37.2 Mph). Tyre repairing must never be per- formed if the tyre is punctured on its sidewall, or if the diameter of the puncture on the tread is greater than 6 mm (0.23 in). -
Page 40: Checking Of The Rims And The Wheel Rims
Before riding, always verify the absence of cracks, bending or buckling on the wheel rims. WARNING If you find that the wheel rim is damaged, have it replaced by a Benelli authorized ser- vice center. Never attempt to repair the wheel rim, even in case of slight damage. -
Page 41: Cleaning
6.9.2 Lubrification Chain lubrication has to be performed only by a Benelli authorized service center according to the inter- vals specified in the tables of scheduled maintenance. It is also necessary to perform this operation after riding under the rain and after cleaning the motor- cycle. -
Page 42: Replacing The Fuses
6.11 Replacing the fuses The replacement of the fuses has to be performed only by a Benelli authorized service center. Only in case of extreme urgency and if it is not possible to have a specialized technical assistance, the opera- tion can be carried out by the owner according to the indications provided below.. -
Page 43: Battery
In case of prolonged inactivity, to avoid shortening the life of the battery, it is essential to have it recharged by a Benelli authorized service cen- ter every 4-5 months, in order to guarantee its life in time. -
Page 44: Prolonged Inactivity
6.14 Prolonged inactivity If the motorcycle is not to be used for a long period, contact a Benelli authorized service center to have the following operations carried out: - Empty the fuel tank. -
Page 45: Technical Information
Technical information Benelli Spa reserves the right to make any changes to its models on the purpose of constantly conform them to the technological advance. Therefore the technical data that are shown below, can be different from those that can be checked on the vehicle. -
Page 46: Adjustments
Quantity with oil Liquid cooled with oil filter cartridge 2.9 lt (0.7 Gal) Cooling water heat exchanger replacement Filter oil Polyurethan dry sponge IGNITION - POWER SUPPLY Maximum net power 100 kW to 11500 rpm “SAGEM“ integrated ignition-injection system. Maximum net torque 96 Nm to 9750 rpm Inductive discharge Type... - Page 47 Type Single steel disc Progressive, single shock absorber Disc diameter 240 mm (9.5 in) with rebound- Type compression damping Caliper 2-piston and spring preload adjustment Calipers, piston 32 mm (1.3 in) diameters Swingarm Aluminium alloy Wheel travel range 115 mm (4.5 in) RIMS Front BRAKES...
- Page 48 This Manual is property of Benelli Spa. Any total or partial reproduction is forbidden. Version 2003 / 1 Benelli Spa Strada della Fornace Vecchia 61100 - Pesaro - ITALY www.benelli.com...
Need help?
Do you have a question about the TORNADO Tre Novecento 900 and is the answer not in the manual?
Questions and answers