Advertisement
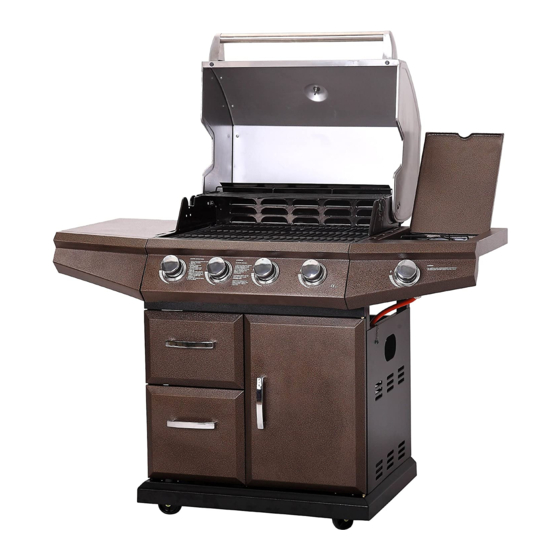
CLASSIC 500 5 BURNER BBQ
Propane Gas Barbecue User Manual
SAFETY INSTRUCTIONS TESTED IN ACCORDANCE WITH BS EN498: 2012 and
BS EN 484: 1998 STANDARD
Manufactured by:
SHINERICH INDUSTRIAL LTD.
8/F, NOBLE CENTER NO.1006, 3
FUTIAN DISTRICT, SHENZHEN, CHINA
Product code : SRGG41228
RD
FUZHONG RD.,
1
Ireland Importer/Distributor:
Home Store + More
Unit 4 Parkway House
Ballymount Drive
Dublin 12
Advertisement
Table of Contents

Related Manuals for Master cook CLASSIC 500


Summary of Contents for Master cook CLASSIC 500
- Page 1 CLASSIC 500 5 BURNER BBQ Propane Gas Barbecue User Manual Product code : SRGG41228 SAFETY INSTRUCTIONS TESTED IN ACCORDANCE WITH BS EN498: 2012 and BS EN 484: 1998 STANDARD Manufactured by: Ireland Importer/Distributor: Home Store + More SHINERICH INDUSTRIAL LTD.
- Page 2 PRIOR TO USE: IMPORTANT: Read the instructions before using the Hazardous fire or explosion may result if these appliance. instructions are ignored. It is the user’s responsibility to see that this Use outdoors only barbecue is properly assembled, installed, and Do not move the appliance during use taken care of.
-
Page 3: Table Of Contents
Table of Contents 1. Information.........................4 2. Safety instructions......................5 3. Explode view & Hardware..................6 4. Assembly instructions ....................8 5. Installing with gas supply system ................17 6. Operating instructions ....................18 7. Cleaning and maintenance ..................20 8. Troubleshooting .......................21 9. Limited Warranty…………………………………………………………………..22... -
Page 4: Information
1. Information SUPPLIED BY: Shinerich Industrial Ltd. 8/F, Noble Center No.1006, 3rd Fuzhong Road Futian District, Shenzhen, China Product Name OUTDOOR GAS BBQ Model No. SRGG41228 PIN Number 359CL1089 ∑Qn 15.2 kW (1105g/h) Main burners ∑Qn : 11.7 kW (850 g/h) Side burner 3.5 kW (255 g/h) Country... -
Page 5: Safety Instructions
2. Safety instructions Leak test all connections after each tank refilled or first use after a long period, by which the method is described in the “Operating instructions” part. This Barbecue is NOT for commercial use. Never use an LP gas tank with damaged body, valve, collar, or footing. Do not store a spare LP gas tank under or near this appliance. -
Page 6: Explode View & Hardware
3. Explode view & Hardware... - Page 7 Part List Hardware List...
-
Page 8: Assembly Instructions
4. Assembly instructions Please read these instructions carefully before assembly and use. Find a large, clean area to assemble your barbecue. Please refer to the parts list and assembly diagram as necessary. Assembly of the barbecue involves many large components; it is advisable to have two people assemble the unit. - Page 9 STEP 2 Install a non-locking caster (27) at the front side and a locking caster (28) at the back of the cart left panel (21). Tighten both casters with a wrench. See left-hand picture below. Also Install a non-locking caster (27) at the front side and a locking caster (28) at the back of the cart right panel (26).Again tighten both casters with a wrench.
- Page 10 STEP 4 STEP 5...
- Page 11 STEP 6 Install door magnet (20) onto cart horizontal bar (24) with two M3x10 bolt and two M3 nuts. M3 Nuts (2 pcs) M3 x 10 bolts (2 pcs) STEP 7 Install a door pivot (33) into the top and one into the bottom of each door (23). Install a door handle (22) each onto the two cart doors (23) with two M6x10 bolts.
- Page 12 STEP 8 Place cart horizontal bar (24) onto the top pin hinges of the cart doors (23). Then insert bottom pin hinges of the cart doors (23) into the installation holes on the cart base panel (29). Fix cart horizontal bar (24) to cart left panel (21) and cart right panel (26) with four M6x10 bolts.
- Page 13 STEP 10 Line up left side shelf handle (8) and left side shelf (9). Fix them together with two M6x10 bolts and two side handle washers (30). See picture below. M6 x 10 bolts (2 pcs) STEP 11 Attach left side shelf: deflector box (11) with the bolts previosly removed.
- Page 14 STEP 11 M5 x 12 bolt (1 pc) M5 x 12 bolts (2 pcs) STEP 12 Remove the two pre-installed M4x8 bolts from side burner (19). See picture below. Insert side burner valve (31) into the injection pipe of the side burner (19), place the other end through the hole on the front panel of the right side shelf (18).
- Page 15 STEP 13 Connect side burner ignition wire (see part 31) to the side burner electrode (see part 18) as illustrated in point G. See following picture. STEP 14 See picture below.
- Page 16 STEP 15 STEP 16...
-
Page 17: Installing With Gas Supply System
5. Installing with gas supply system Important Notes: To operate you will need a precision-filled standard G30/G31 barbecue LP gas cylinder with external valve threads. Use standard flexible tube with length less than 1.5 m. The tube shall be readily visible across its entire length for inspection after installation. -
Page 18: Operating Instructions
6. Operating instructions Warnings Before proceeding, make certain that you have assembled the appliance according to instructions. Use your Barbecue at least 100cm away from any wall or surface. Never use your gas barbecue in a building, garage, shed, breezeway, or any other enclosed area. Never obstruct the flow of ventilation air around your gas barbecue housing. - Page 19 End of cooking session After each cooking session, turn the barbecue burners to the “HI” position and burn for 5 minutes. This procedure will burn off cooking residue, thus making cleaning easier. Make sure the hood is open during this process. When you have finished using your barbecue, turn all the control valves fully clockwise to the “OFF”...
-
Page 20: Cleaning And Maintenance
7. Cleaning and maintenance Regularly clean your barbecue between uses and especially after extended periods of storage. Ensure the barbecue and its components are sufficiently cool before cleaning. Never douse the barbecue with water when its surfaces are hot. Never handle hot parts with unprotected hands. In order to extend the life and maintain the condition of your barbecue, we strongly recommend that the unit be covered when left outside for any length of time, especially during the winter months. -
Page 21: Troubleshooting
8. Troubleshooting Problem Possible Cause Prevention/Cure Burner will not light Battery needs to be charged Replace the AA battery. (Follow assembly instruction) using igniter Wires or Electrode covered with Clean wire and/or electrode with rubbing alcohol cooking residue Electrode and burners are wet Wipe dry with cloth Electrode cracked or broken –... -
Page 22: Limited Warranty
9. Limited Warranty We grant a warranty for the barbecue for the duration of one year, starting with the date of purchase. The warranty includes manufacturing deficiencies and defective parts; it extends to the replacement of these parts. Expenses for shipping, installation, replacement of worn parts and other cost are not covered by the warranty.
Need help?
Do you have a question about the CLASSIC 500 and is the answer not in the manual?
Questions and answers