Table of Contents
Advertisement
Quick Links
Advertisement
Table of Contents

Summary of Contents for Master cook SRGG806
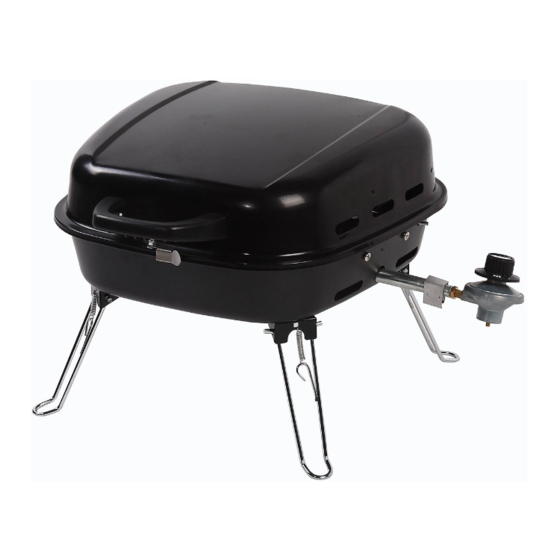
- Page 1 259-0003 Tabletop Gas Grill Model#SRGG806 Instructions Manual...
- Page 2 WARNING FOR YOUR SAFETY WARNING DANGER FOR YOUR SAFETY If you smell gas 1. Do not store or use gasoline or other flammable 1. Shut off gas to appliance. liquids or vapors in the vicinity of this or any 2. Extinguish any open flame. other appliance.
- Page 3 WARNING FOR YOUR SAFETY Do not install or use in or on boats or recreational You must follow all leak-checking procedures before vehicles. operating. To prevent fire or explosion hazard when Do not use grill in a vehicle trunk, station wagon, testing for a leak: mini-van, sport utility vehicle (SUV) or recreational a.
- Page 4 PACKAGE CONTENTS Parts List Lid Handle Bottom Bowl Lock Bottom Hinge 2pcs Heat Plate Warming Rack Heat Plate Support 2pcs Top Hinge 2pcs Wind Guard Burner Regulator/Control Valve Cooking Grid 4pcs...
- Page 5 HARDWARE CONTENTS Part Description Specification Quantity Screw M5 x 12 Nickel Plated Phillips Truss Head 14pcs Bolt M6 x 16 Wing Nut M5 Steel 2pcs Washer Ø6.4 Steel Washer Ø6.4 Heat Resistant 2pcs Lock Washer 6pcs Ø5.3 Steel Lock Washer Ø6.4 Steel Ø5 x 30 Zinc Plated 2pcs...
-
Page 6: Assembly Instructions
Assembly Instructions STOP DO NOT RETURN PRODUCT TO STORE. For assistance call 1-866-814-0585 toll free. Please have your owner’s manual and model number available for reference. For Easiest Assembly: • To avoid losing any small components or hardware, assemble your product on a hard level surface that does not have cracks or openings. - Page 7 Assembly Instructions Attach heat plate supports(K) to bottom bowl(H) with 4pcs M5x12 screws (AA) and 4pcs M5 nuts(J J). Attach bottom hinges(I) to bottom bowl(H) with 4pcs M5x12 screws(AA), 4pcs Ø5.3 steel small lock washers(FF) and 4pcs M5 nuts(JJ). AA JJ FF Hardware Used Screw 8pcs...
- Page 8 Assembly Instructions Place burner(F) into bottom bowl(H) corresponding position and fix it with 1pc M6x16 bolt(BB), 1pc Ø6.4 steel washer (DD) and 1pc Ø6.4 steel lock washer(GG). Hardware Used Screw Bolt Lock washer Attach wing guard to burner end by hand. Then finger-tighten regulator/control valve to burner end.
- Page 9 Assembly Instructions Insert top hinge(E) into bottom hinge(I) and secure them together with 2pcs Ø5x30 zinc plated pins (HH) and 2pcs Ø1.4x30 steel cotter pins(II). Note: If top hinge dose not fit into bottom hinge, gently squeeze top hinge tabs together. Hardware Used Ø5X30 Pin 2pcs...
- Page 10 Assembly Instructions Place heat plate (J) and cooking grid (G) into bottom bowl (H), in order as shown in drawing. Lock Lid Unlock Lid...
- Page 11 Operating Instructions Figure 1 This grill is designed to operate with a one pound 7.75” or 10.6” high disposable / 16.4 oz. or 14.1 oz. propane gas tank (DOT 39 Cylinder). (Figure 1)DO NOT ATTEMPT TO 1 lb REFILL ANY ONE POUND (16.4 oz. or 14.1 oz.) PROPANE GAS TANKS! 1 lb 453 g 453 g...
- Page 12 LIGHT INSTRUCTIONS Figure 7 Caution: Keep outdoor gas cooking appliance area clear and free from combustible materials, gasoline and other flammable vapors and liquids. Caution: Do not obstruct the flow of combustion and ventilation air. 1/2" Caution: Check and clean burner/venturi tubes for insects and insect nests. Flame 12,7 mm A clogged tube can lead to a fire beneath the grill.
- Page 13 1. Use the upper cooking grid (warming rack) for keeping cooked food warm, toasting breads or cooking delicate foods in aluminum foil pouches. 2. To keep food from sticking to the grids, spray or coat with cooking oil before lighting. 3.
-
Page 14: Trouble Shooting
TROUBLE SHOOTING Problem Possible Cause LP gas tank is low or empty Replace LP gas tank LP gas leak Follow “Checking for Leaks” instructions in the owner’s manual Wires or electrode covered with cooking residue Clean wire and/or electrode with rubbing alcohol Electrode and burners are wet Wipe dry with cloth Burner will not light using ignitor...


Need help?
Do you have a question about the SRGG806 and is the answer not in the manual?
Questions and answers