Advertisement
Table of Contents
- 1 Technical Data
- 2 Before You Start
- 3 Further Information
- 4 Proper Use
- 5 Tools Required
- 6 Operation
- 7 End of Cooking Session
- 8 Preparation before Cooking
- 9 Cleaning and Maintenance
- 10 Troubleshooting
- 11 Fixtures and Fittings
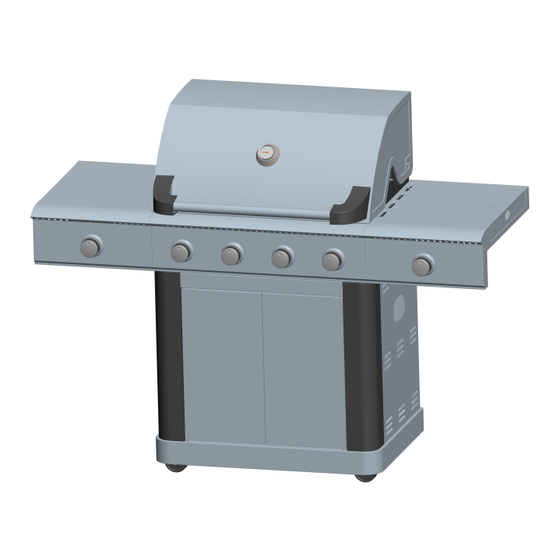
- 12 Getting to Know Your Product
- 13 Assembly Instructions
- Download this manual
Advertisement
Table of Contents

Related Manuals for Master cook SRGG41009


Summary of Contents for Master cook SRGG41009
- Page 1 4 + 2 BURNER GAS GRILL Model No.: SRGG41009 Product size assembled: User Manual H1189 x W1518 x D637 mm 0359 Keep the instructions for future reference.
-
Page 2: Technical Data
SUPPLIED BY: Shinerich Industrial Ltd. 8/F, Noble Center No.1006, 3rd Fuzhong Road Futian District, Shenzhen, China Product Name 4 + 2 BURNER GAS GRILL Model No. SRGG41009 PIN Number 0359CL1089 ∑Qn 22.5KW (1636 g/h) Left: 2.6KW (189g/h) Side burner Main burners ∑Qn : 16.4KW (1192 g/h) -
Page 3: Before You Start
Before you start WARNINGS Do’s • Read the instructions before using the appliance. Follow the KEEP THIS APPLIANCE CLEAN (follow instructions herein) - To help avoid fat flash fires/ flare ups and therefore possible injury steps in the order they are specified and please observe the or damage to property, it is vital that this appliance is clean safety warnings. -
Page 4: Further Information
Further information Proper use: The barbecue is a gas barbecue for outdoor use. It is designed • Never use charcoal, lighter fluid, lava rocks, gasoline, kerosene, to be used exclusively in accordance with these instructions for or alcohol within this product. preparing foods that are suitable for barbecue cooking. -
Page 5: Tools Required
• DO NOT lean over the barbecue when igniting the gas flame. Assembly • Close the valve on the gas bottle after each use: (Turn the valve clockwise). Also turn off the control knobs (Turn knob fully Please read these instructions carefully before assembly and clockwise). - Page 6 Connecting and disconnecting the gas bottle Parts and tools needed than excluded The tube shall be readily visible across its enti re length f inspection after installation. DANGER! IGNITION OF ESCAPING GAS Function setting or anti-clockwise opened rotate to the end Possible consequences: 1/4 position Safety measures:...
- Page 7 Connecting and disconnecting the gas bottle Shutting off the gas bottle (Fig.2-A, 2-B) Or anti-clockwise rotate the nut on regulator G1 to release the regulator G1. Use a standard leak detector to ensure all connections are tight. Confirm all barbecue control knobs are in the off positio “...
-
Page 8: Operation
Operation Warnings End of cooking session Before proceeding, make certain that you have assembled the After each cooking session, turn the barbecue control knob burners to the “Max” position and burn for 5 minutes. appliance according to instructions. This procedure will burn off cooking residue, thus making Use your Barbecue at least 100cm away from any wall or surface. -
Page 9: Cleaning And Maintenance
Cleaning and maintenance Regularly clean your barbecue between uses and 3. Barbecue Body Regularly remove excess grease or fat from the barbecue body especially after extended periods of storage. with a soft plastic or wooden scraper. Ensure the barbecue and its components are sufficiently cool It is not necessary to remove all the grease from the body. -
Page 10: Troubleshooting
Troubleshooting PROBLEM POSSIBLE CAUSE PREVENTION/CURE Burner will not light Wires or Electrode covered with Clean wire and/or electrode with rubbing alcohol using igniter cooking residue Wipe dry with cloth Electrode and burners are wet Electr ode cracked or broken – Replace electrode sparks at crack W ire loose or disconnected... -
Page 11: Fixtures And Fittings
Fixtures and Fittings Components supplied (not actual size) Components supplied (not actual size) Description Visual Description Visual Warming rack Cart bottom panel Locking caster Cooking grate* Non-locking caster Flame tamer Cart left door Fuse board Cart right door Main burner Cart horizontal bar Cover magnet Hood... - Page 12 Fixtures and Fittings Fittings supplied (actual size) Dimensions Visual M6x16 M6x14 M6x10 M4x10...
-
Page 13: Getting To Know Your Product
Getting to know your product Optional: 2-A:Cast iron cooking grate 1Pc Cast iron cooking plate 1Pc 2-B:Cast iron cooking grate 2Pcs 2-C:Stainless steel cooking grate 2Pcs... -
Page 14: Assembly Instructions
Assembly instructions CC x16 M6x10 supplied BB x2 M6x14 supplied... - Page 15 Assembly instructions BB x2 M6x14 EE x2 M4x10 supplied BB x7 M6x14 supplied...
- Page 16 Assembly instructions BB x5 M6x14 supplied BB x5 M6x14 supplied...
- Page 17 Assembly instructions BB x4 M6x14 supplied BB x4 M6x14 supplied...
- Page 18 Assembly instructions BB x2 M6x14 DD x2 supplied AA x4 M6x16 BB x2 M6x14 supplied...
- Page 19 Assembly instructions BB x2 M6x14 DD x2 supplied AA x4 M6x16 BB x2 M6x14 supplied...
- Page 20 Assembly instructions EE x2 M4x10 supplied EE x2 M4x10 supplied...
- Page 21 Assembly instructions EE x2 M4x10 supplied 3~5mm...
- Page 22 Assembly instructions EE x4 M4x10 supplied...
- Page 23 Assembly instructions 6&10...
Need help?
Do you have a question about the SRGG41009 and is the answer not in the manual?
Questions and answers
WE ARE STRUGGLING TO FIT THE CONNECTION TO THE SIDE SEARING BURNER
@david spencer the brass piece should be facing upwards
@david Spencer sorry to clarify - the brass bar that is on the part that gets screwed into the front (with the knob screws)
Where does the ignition rod go. There is nothing about this in the assembly instructions