Table of Contents
Advertisement
Quick Links
Advertisement
Table of Contents

Related Manuals for Tunstall liberty300


Summary of Contents for Tunstall liberty300
- Page 1 Liberty Installation manual...
-
Page 2: Table Of Contents
Systems ..................................18 Cellular (do not reprogram via unit) ......................20 Daylight savings (DLS) ............................20 Timers ..................................22 Reports ..................................22 Doorbell tunes ............................... 23 Exit programming mode ........................... 23 Specifications ........................24 Page | 1 Tunstall Liberty installation manual v1.0... -
Page 3: Equipment List
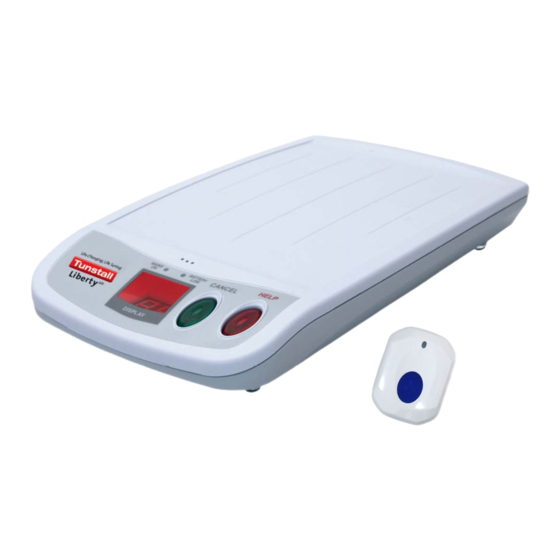
Equipment List A Tunstall Liberty consists of the following equipment: 1. Liberty alarm unit 2. Waterproof two-way pendant 3. Pendant wrist strap and neck chain 4. 9VDC 300mA regulated plug pack 5. Liberty user guide Liberty features Front view Page | 2... -
Page 4: Back View
When functioning correctly your Liberty base alarm unit will normally look like this: The ‘MAINS ON’ light and the ‘CANCEL’ (green) button should be on. The MAINS ON light and the CANCEL button should be ON. Page | 3 Tunstall Liberty installation manual v1.0... -
Page 5: Displays And Warnings
Displays and warnings Display Warning What to do Check the home unit is plugged into a AC power failure. working electrical socket. Check the home unit is plugged into a The alarm unit has a low working electrical socket and the battery battery. -
Page 6: Cellular Signal Quality
5. Press the HELP button to scroll to the correct month, then the CANCEL button to select. Set year 6. Press the HELP button to scroll to the correct year, then the CANCEL button to select. Page | 5 Tunstall Liberty installation manual v1.0... -
Page 7: Programming
Programming Note: Up/download programmer software is available from your supplier and can be used to program all unit options. This manual outlines the steps to program options via the unit. Programming rules To program the Liberty unit use the large CANCEL (green) button and the HELP (red) button on the Liberty unit. -
Page 8: Client Id
2-5 from the primary control centre sub-menu. 1. Press the HELP button to enter the primary personal recipient phone number sub-menu and repeat steps 2-5 from the primary control centre sub-menu. Page | 7 Tunstall Liberty installation manual v1.0... -
Page 9: Server Settings
1. Press the HELP button to enter the secondary personal recipient phone number sub-menu and repeat steps 2-5 from the primary control centre sub- menu. Warning! This will delete all n1 to n4 programmed phone numbers. 1. Press the CANCEL and HELP buttons together and the unit will beep three times to indicate that all phone numbers have been deleted. -
Page 10: Pendants
Panic initiates call or if rings are detected will answer the Answer incoming phone call Dementia 1 button blue pendant initiates call on inactivity. 1 button pendant where panic initiates doorbell tune one, Doorbell two or three. Erase Erase programmed pendant. Page | 9 Tunstall Liberty installation manual v1.0... -
Page 11: Detectors
1. Press the HELP button to enter the pendant 2 sub-menu or press the CANCEL button to scroll to another pendant sub-menu and repeat steps 2-6 from the pendant 1 sub-menu. To erase a pendant: 1. From the pendant menu ‘_u’ press the CANCEL button to scroll to the pendant you wish to erase (u1-u8) and press the HELP button to enter the pendant sub- menu. -
Page 12: Hardwired Inputs
Answer the phone call Doorbell Doorbell tune 1, 2 or 3 1. Press the HELP button to enter the hardwired input 2 sub-menu and repeat steps 2-5 from the hardwired input 1 sub-menu. Page | 11 Tunstall Liberty installation manual v1.0... -
Page 13: Hardwired Outputs
Warning! This will delete all hardwired inputs. 1. Press the CANCEL and HELP buttons together and the unit will beep three times to indicate that all hardwired inputs have been deleted. 2. Press the CANCEL button to exit the hardwired inputs menu. Note: Normally open common and inputs. - Page 14 Lockout 1. Press the HELP button to enter the lockout sub-menu. 2. Press the HELP button to select a programming option, as listed below. Page | 13 Tunstall Liberty installation manual v1.0...
- Page 15 3. To store an option selected, press the CANCEL and HELP buttons together. The unit will beep three times and display the selected option. 4. Press the CANCEL button to exit the lockout sub-menu. Display Programming option Information Alarm will lockout any detector activations (excluding Enabled those programmed to FIRE option) that have triggered more than twice in arm mode.
- Page 16 The unit will beep three times and display the selected option. 4. Press the CANCEL button to exit the answer call sub-menu. Display Programming option Information Auto-answer time Time after an activation where the alarm will auto- (minutes) answer any incoming call. Page | 15 Tunstall Liberty installation manual v1.0...
- Page 17 Call back options 1. Press the HELP button to enter the call back unit sub-menu. 2. Press the HELP button to select a programming option, as listed below. 3. To store an option selected, press the CANCEL and HELP buttons together. The unit will beep three times and display the selected option.
- Page 18 3. To store an option selected, press the CANCEL and HELP buttons together. The unit will beep three times and display the selected option. 4. Press the CANCEL button to exit the RS232 baud rate sub-menu. Display Information 115200 Disabled 9600 19200 Page | 17 Tunstall Liberty installation manual v1.0...
-
Page 19: Systems
38400 57600 Default values Warning! This will set all preference options to default values. 1. Press the CANCEL and HELP buttons together and the unit will beep three times to indicate that all preference options have been reset. 2. Press the CANCEL button to exit the preferences menu. Systems Display Instruction... - Page 20 1. Press the CANCEL and HELP buttons together and the unit will beep three times to indicate that all system options have been reset. 2. Press the CANCEL button to exit the systems menu. Page | 19 Tunstall Liberty installation manual v1.0...
-
Page 21: Cellular (Do Not Reprogram Via Unit)
Cellular (do not reprogram via unit) Display Instruction To program the cellular settings use the up/download programmer software. If you do not have access to the software, contact your supplier. Daylight savings (DLS) Display Instruction 1. Press the HELP button to enter the daylight savings sub-menu. DLS start ordinal 1. - Page 22 3. To store an option selected, press the CANCEL and HELP buttons together. The unit will beep three times and display the selected option. 4. Press the CANCEL button to exit the DLS end day sub-menu. Page | 21 Tunstall Liberty installation manual v1.0...
-
Page 23: Timers
Display Information Monday Tuesday Wednesday Thursday Friday Saturday Sunday DLS end month 1. Press the HELP button to enter the DLS end month sub-menu. 2. Press the HELP button to select a programming option, as listed below. Note: If ordinal is set to 0 (fixed), then days of the month are displayed at 0 to 31. 3. -
Page 24: Doorbell Tunes
Exit programming mode Display Instruction 1. Press the HELP button to exit programming mode. Note: The client ID and ‘n1’ phone number must be programmed in to exit programming mode. Page | 23 Tunstall Liberty installation manual v1.0... -
Page 25: Specifications
Specifications Liberty unit Weight: 590 g (including battery) Dimensions: (LxWxD) 286 x 174 x 38 mm Radio frequency: 915 - 928MHz frequency band Radio range: 100 - 300m in open air (subject to environmental conditions) Mains power: 9V DC 300mA with integral earth Standby battery: 4.8V 1600mAh rechargeable Ni-MH Backup battery time:... - Page 26 Our policy of continual development means that product specification and appearance may change without notice. Tunstall does not accept any responsibility for any errors or omissions contained in this document. © 2015 Tunstall Australasia Pty Ltd ® TUNSTALL is registered trade mark.
Need help?
Do you have a question about the liberty300 and is the answer not in the manual?
Questions and answers