
Related Manuals for Hefter TF MEGA-A

Summary of Contents for Hefter TF MEGA-A
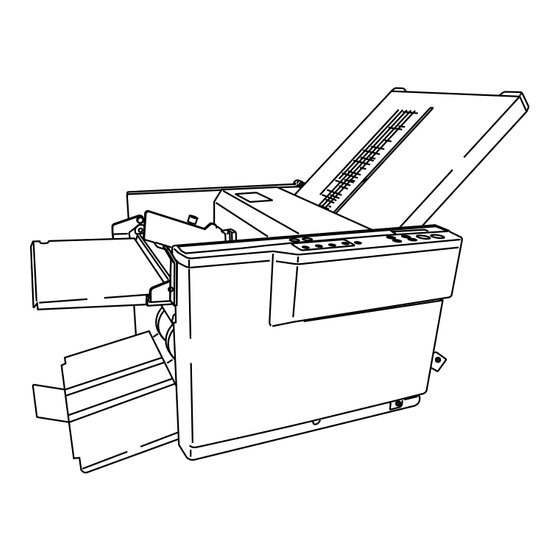
- Page 1 TF MEGA-A FOLDER Instruction Manual Be sure to read this manual prior to use. Please leave this manual at the site of use for easy reference.
- Page 2 Introduction Be sure to read this manual prior to using the product. After reading, leave the manual at the site of use for easy reference whenever questions related to the product arise in the future. Symbols In this manual, several symbols are used to indicate important warnings. Please make sure to read instructions accompanied by these symbols.
- Page 3 2008 EN61000-3-2: 2006 EN61000-3-3: 2008 KONFORMITÄTSERKLÄRUNG HEFTER Systemform GmbH, Am Mühlbach 6, 83209 Prien am Chiemsee, Deutschland, erklärt hiermit, dass das Produkt (oder die Produkte) die in den Vorschriften definierten Bestimmungen erfüllt. Die Bezugstabelle ist unten aufgeführt. Richtlinie Bezeichnung des...
- Page 4 For North America Note: This equipment has been tested and found to comply with the limits for a Class B digital device, pursuant to Part 15 of the FCC Rules. These limits are designed to provide reasonable protection against harmful interference in a residential installation. This equipment generates, uses and can radiate radio frequency energy and, if not installed and used in accordance with the instructions, may cause harmful interference to radio communications.
- Page 5 For EU Disposal of Old Electrical & Electronic Equipment Eliminación de residuos de aparatos eléctricos y electrónicos is symbol (the symbol of the crossed out wheeled bin) indicates that in European countries this product Este símbolo (un cubo de basura tachado) indica should not be disposed of as household waste.
-
Page 6: Safety Precautions
Safety Precautions Safety Precautions In this manual, operations and handling of the unit which are hazardous are described using the following marks to prevent personal injury or property damage to the user and others. Ignoring this mark could result in the possibility of serious injury or even death. -
Page 7: Operating Environment
Safety Precautions Operating Environment Operate this unit in the following environment. • where the temperature range is between 5 and 35°C/41 and 95°F (-10 to +50°C/14 to 122°F in storage) • where the humidity range is between 20 and 80% RH (10 to 90% RH in storage, however no condensation) •... -
Page 8: Maintenance / Other
Safety Precautions Maintenance / Other Do not damage the power cord or power plug. Do not scratch, alter, bend, twist, pull or place heavy objects on the power cord or power plug. This could result in damage, a fire or an electrical shock. Do not touch the power switch with wet hands. -
Page 9: Warning / Caution Labels
Safety Precautions WARNING / CAUTION Labels "WARNING" and "CAUTION" labels are pasted on the machine to ensure user safety. Do not remove or change them. When the labels become dirty or are lost, be sure to contact your dealer for a new one. North America When changing a fuse, make sure that the fuse rating is same... -
Page 10: Table Of Contents
Contents Contents Safety Precautions ..........i 6. Correcting Folding Misalignment ..3-20 Power Supply .................i 6-1. Correcting Folding Misalignment along Vertical Length of Paper ........3-20 Operating Environment ............ii 6-2. Correcting Folding Misalignment along Maintenance / Other ............... iii Sides of Paper ............3-23 WARNING / CAUTION Labels .......... -
Page 11: Chapter1 Before Operation
Accordion fold Gate fold (Fold out) (Z fold) The TF MEGA-A is also able to create cross single fold and cross letter fold as shown in the figure. Cross fold Cross single fold Cross letter fold Note that the finish of cross folding is not as accurate as that of the six folding modes mentioned... -
Page 12: Setting Up The Machine
Chapter1 Before Operation Setting Up the Machine 2-1. Components 120 V (For North America) 220 to 240 V (For EU) Name Qty. Remark First folding plate Attached to the right upper section on the operator's side. Second folding plate Attached to the right lower section on the operator's side. Instruction manual This manual Scale label... -
Page 13: Removing The Press Release Lever
Chapter1 Before Operation 2-2. Removing the Press Release Lever The press release levers are attached to the unit at shipment to prevent the rubber roll from becoming distorted. Be sure to remove them when setting up the machine. The two types of press levers are attached to either side of the rubber roll. Non-operator’s side Operator’s side Press release lever (A) -
Page 14: Locking The Bearing Support Levers
Chapter1 Before Operation 2-3. Locking the Bearing Support Levers The bearing support levers are released at shipment to prevent the rubber roll from becoming distorted. After removing the press release levers, be sure to lock the bearing. Unfold the paper receiving tray. Unfold the support paper feed plate. -
Page 15: Attaching The Parts
Chapter1 Before Operation Turn the bearing support lever on the non-operator’s side in the direction of Non-operator’s side the arrow. The bearing will be locked. Because the bearing support lever presses down the rubber roll, if it is not locked, Bearing support lever thick paper may not be folded properly. - Page 16 Chapter1 Before Operation Attach the first folding plate. Lock lever 1) Move the lock lever of the first folding plate LOCK to the position of “UNLOCK. ” 2) Slide the first folding plate to the machine UNLOCK along the shaft on each side of the frame, then insert the U-shaped gutter on the edge of each side into the shaft located on the back of the frame.
- Page 17 Memo Chapter1 Before Operation...
-
Page 18: Names And Functions
Chapter1 Before Operation Names and Functions Under the main cover [14] [13] [15] [11] [12] [10] [16] [17] Paper feed tray (operator’s side) [18]... - Page 19 Chapter1 Before Operation Name Function First folding plate Guide plate for deciding a paper folding position. First folding is made using this plate. Control panel Used when operating the machine. Error messages are also displayed on the LCD display. Second folding plate Paper folded at the first folding plate is sent to the second folding plate.
-
Page 20: Describing Control Panel
Chapter1 Before Operation Describing Control Panel [15] [14] [13] [12] [11] [10] Name Function Counter/LCD display A paper size, folding mode, the number of folded paper or error messages are displayed. When pressed, the machine stops. When pressed, the machine starts folding operations. •... -
Page 21: Screen Menus
Chapter1 Before Operation Screen Menus The top screen is a screen displayed first when you turn on the power. For EU Single fold Count:0 For North America Single fold Count:0 Name Function Folding mode Displays a currently selected folding mode. The default setting is [Single fold]. -
Page 22: Handling Paper
Chapter1 Before Operation Handling Paper 6-1. Paper Used • Make sure that the printing ink on the paper has dried completely prior to use. • If used without the ink completely dried, the folding roller or paper may become dirty. •... - Page 23 Chapter1 Before Operation • When stacking just a few sheets of Paper Guide plate paper on the paper feed tray, lower the paper set lever while pressing the lead edge of the paper against the guide plate. Paper set lever 1-13...
-
Page 24: Emergency Stop
Chapter1 Before Operation Emergency Stop Do not put neither hands nor fingers inside the machine during operation. You also need to be careful not to get your hair, accessories and wear caught in the machine. An emergency stop device to ensure safety has been installed to the top cover. Opening the cover during operations will stop the machine. -
Page 25: Chapter2 Basic Operation
Chapter2 Basic Operation Memo Chapter2 Basic Operation Standard Folding of Standard Paper 1-1. Standard Paper For EU There are six types of standard paper sizes; A3, B4, A4, B5, A5, and B6. Paper Size Long×Wide (mm) Paper Size Long×Wide (mm) 420×297 364×257 297×210... -
Page 26: Standard Folding
Chapter2 Basic Operation 1-2. Standard Folding There are six types of standard folding modes: single fold, double fold, irregular accordion fold (fold out), letter fold, accordion fold (z-fold) and gate fold. Paper is folded as shown below when the paper is placed on the paper feed tray with its print side facing upward. - Page 27 Chapter2 Basic Operation Raise the paper set lever and place Paper some paper on the paper feed tray. Guide plate Push in the paper until its lead edge touches the guide plate. The message "No paper" displayed on the LCD dispaly disappears.
- Page 28 Chapter2 Basic Operation following order with a figure: Single fold, Double fold, Fold out (irregular accordion fold), Letter fold, Z fold (accordion fold), Gate fold Move the paper feed pressure adjustment knob to "0." Move the knob to the right or left while pulling it upward.
- Page 29 Chapter2 Basic Operation Check the finish of test folding. Check for folding misalignment using the second test folded sample. If folding misalignments occur, refer to Chapter 3 "ADVANCED OPERATION"“5. Correcting Folding Misalignment” p.3-20 ). Depending on the count mode you choose, the procedures to follow will change.
- Page 30 Chapter2 Basic Operation Add count mode: Press the key to interrupt or stop the operations. Pressing the key again will resume operations. When there is no paper on the paper feed tray, the machine will stop automatically and the counted number and "No paper"...
-
Page 31: Chapter3 Advanced Operation
Chapter3 Advanced Operation Chapter3 Advanced Operation Standard Folding of Special Paper Do not put neither hands nor fingers inside the machine during operation. You also need to be careful not to get your hair, accessories and wear caught in the machine. 1-1. -
Page 32: Double Folding Thick Paper
Chapter3 Advanced Operation Operation Procedures ( p2-2). After completing single folding of thick paper, turn off and on the power to return the folding stopper to its original position. If thin paper is single-folded before doing this procedure, the thin paper will not be folded neatly. - Page 33 Chapter3 Advanced Operation Lower the paper set lever. The paper feed tray will be raised. Make sure that you lower the paper set lever. If you start operations without the paper set lever lowered, the paper feed rings will run idle, causing the machine to stop.
-
Page 34: Double Folding B6 Thin Paper (Eu)/Small Thin Paper (North America)
Chapter3 Advanced Operation Press the key again for test folding and check the finish of test folding. Check for folding misalignment using the second test folded sample. If folding misalignments occur, refer to Chapter 3 "ADVANCED OPERATION"“5. Correcting Folding Misalignment” p.3-20). - Page 35 Chapter3 Advanced Operation Attach the guide plate unit to the innermost center between the two paper ejection belts. Paper ejection belt Guide plate unit Guide plate unit Paper ejection belt Move the stacker rollers to "4." While pressing the key, press the key to change [SR set] to [4] from [5].
- Page 36 Chapter3 Advanced Operation After completing adjustments, set the count mode either to the add count or to the subtract count, then press the key to start folding operations. Refer to Chapter2 "Basic Operation" “1.Standard Folding of Standard Paper” "1-3. Operation Procedures ( p.2-2).
-
Page 37: Custom Folding Of Standard Paper
Chapter3 Advanced Operation Custom Folding of Standard Paper Do not put neither hands nor fingers inside the machine during operation. You also need to be careful not to get your hair, accessories and wear caught in the machine. Custom folding is the method of folding paper where you specify the folding stoppers of the first and second folding plates. - Page 38 Chapter3 Advanced Operation Lower the paper set lever. The paper feed tray will be raised. Make sure that you lower the paper set lever. If you start operations without the paper set lever lowered, the paper feed rings will run idle, causing the machine to stop.
- Page 39 Chapter3 Advanced Operation Move the stacker rollers to the appropriate position referring to the following Table of Stacker Rollers Position. Stacker roller While pressing the key, press the to set [SR set] to a disired value. Use the table just as a reference. You may need fine adjustments according to various conditions such as environmental conditions (temperature,...
- Page 40 Chapter3 Advanced Operation Table of Stacker Rollers Position (North America) Stacker Rollers Length of Folded Paper (C) Folding Mode Position 7.0 to 8.5 inches LD: single fold, irregular accordion fold (fold out), gate fold Single folded paper larger than LD 6.0 to 7.0 inches LG: Irregular accordion fold (fold out), gate fold 5.0 to 6.0 inches...
-
Page 41: Standard Folding Of Non-Standard Size Paper
Chapter3 Advanced Operation Standard Folding of Non-Standard Size Paper Do not put neither hands nor fingers inside the machine during operation. You also need to be careful not to get your hair, accessories and wear caught in the machine. Paper other than the standard size paper are called non-standard size paper. The paper size that can be used as non-standard size paper is as follows. - Page 42 Chapter3 Advanced Operation After pressing the side guide to each Side guide Fixing screw side of the paper lightly, tighten the screws to secure the side guides. Fixing screw Side guide Lower the paper set lever. The paper feed tray will be raised. Make sure that you lower the paper set lever.
-
Page 43: Cross Folding
Chapter3 Advanced Operation Check the finish of test folding. Check for folding misalignment using the second test folded sample. If folding misalignments occur, refer to Chapter 3 "ADVANCED OPERATION"“5. Correcting Folding Misalignment” p.3-20). Folded sample After completing adjustments, set the count mode either to the add count or to the subtract count, then press the key to start folding operations. -
Page 44: Cross Folding Standard Size Paper
Chapter3 Advanced Operation 4-1. Cross Folding Standard Size Paper The paper size that can be cross folded is A3, B4, A4 and B5 (EU)/ LD, LG and LT (North America). The following describes the cross single folding procedures of A3 (EU)/LG (North America) size paper. Only short edge feed is available for cross folding. - Page 45 Chapter3 Advanced Operation Lower the paper set lever. The paper feed tray will be raised. Make sure that you lower the paper set lever. If you start operations without the paper set lever lowered, the paper feed rings will run idle, causing the machine to stop.
- Page 46 Chapter3 Advanced Operation Take out the cross folding lever stored inside the top cover. Cross folding lever Close the top cover. Attach the cross folding lever to the Cross folding lever pillar located on the side guide of the Side guide non-operator' side.
-
Page 47: Cross Folding Non-Standard Size Paper
Chapter3 Advanced Operation Check the finish of test folding. Check for folding misalignment using the second test folded sample. If folding misalignments occur, refer to Chapter 3 "ADVANCED OPERATION"“5. Correcting Folding Misalignment” p.3-20). Folded sample After completing adjustments, set the count mode either to the add count or to the subtract count, then press the key to start folding operations. - Page 48 Chapter3 Advanced Operation Press along the folded line of the single- folded paper firmly with your fingers to prevent the paper from slipping and buckling in the horizontal direction when folded. Raise the paper set lever and stack the single-folded paper on the paper feed tray with the folded line facing the non- Side guide operator's side.
-
Page 49: Using Art Paper And Coated Paper
Chapter3 Advanced Operation Single fold Check if [Single fold] is displayed on the LCD display. If not, press the key to Count:0 select [Single fold]. While pressing the key, press the Paper length key to select the length measured in 297.0mm step 2. -
Page 50: Correcting Folding Misalignment
Chapter3 Advanced Operation If double-feed occurs, increase the paper separating pressure by 0.5 at a time. Paper separating pressure increases as the scale value increases. Do not use fine quality paper such as copy paper with the paper feed pressure and paper separating pressure settings for art paper and coated paper. - Page 51 Chapter3 Advanced Operation Adjusting Fine Adjustment Knob of the First Folding Plate Folding Style Fold Surface A Adjustment When A is While pressing the key, press the key. longer Feeding direction Single fold When A is While pressing the key, press the key.
- Page 52 Chapter3 Advanced Operation Adjusting Fine Adjustment Knob of the Second Folding Plate Folding Style Fold Surface A Adjustment Single fold The second folding plate is not used in single folding. When B is While pressing the key, press the key. longer.
-
Page 53: Correcting Folding Misalignment Along Sides Of Paper
Chapter3 Advanced Operation 6-2. Correcting Folding Misalignment along Sides of Paper When folded paper is misaligned along the sides of paper as shown in the figure, turn the slant correction Paper feeding knob to correct the misalignment. direction You may need fine adjustments according to various conditions such as environmental conditions (temperature, humidity), paper quality, paper thickness, paper fiber direction, cutting accuracy and printing conditions. - Page 54 Chapter3 Advanced Operation After finishing operations, be sure to turn the slant correction knob to align the round holes of the paper feed tray Round hole with the pin. The position at which the round hole meets the pin is the standard position. Slant correction knob 3-24...
-
Page 55: Chapter4 Troubleshooting Guide
Chapter4 Troubleshooting Guide Chapter4 Troubleshooting Guide Correcting Deformed Folding Check the following when deformed folding occurs. Deformed folding • Fan the paper well before stacking. • Check if the folding plates have been installed properly. ( p.1-5) • Spray a commercially-available air duster on the rubber roll because the static electricity may have resulted in deformed folding. -
Page 56: When Paper Has Slipped At The Paper Feed Section
Chapter4 Troubleshooting Guide Pull the jammed paper towards you. 2-2. When Paper Has Slipped at the Paper Feed Section • Increase the paper feed pressure. Increase the paper separating pressure gradually in steps of 1. Paper pressure adjustment knob • Fan the paper well before stacking. -
Page 57: When Paper Has Coiled Around The Rubber Roll
Chapter4 Troubleshooting Guide 2-3. When Paper Has Coiled Around the Rubber Roll Turn off the machine before following the procedures below. Open the top cover. Top cover Turn the two bearing support levers Non-operator’s side in the direction of the arrow to relase them. -
Page 58: When Paper Has Jammed At The First Folding Plate
Chapter4 Troubleshooting Guide 2-4. When Paper Has Jammed at the First Folding Plate Turn off the machine before following the procedures below. Control cable 1 Remove the control cable 1 from the connector 1 of the first folding plate. Connector 1 Move the lock lever to the position of Lock lever "UNLOCK."... -
Page 59: When Paper Has Jammed At The Second Folding Plate
Chapter4 Troubleshooting Guide Pull the jammed paper towards you. Close the top cover. Return the first folding plate. Move the lock lever to the position of "LOCK." Connect the control cable to the connector. • Check that the first folding plate has been installed properly. - Page 60 Chapter4 Troubleshooting Guide Move the lock lever to the position of "UNLOCK." Lock lever UNLOCK LOCK Second folding plate Remove the second folding plate from the machine. Second folding plate Pull the jammed paper towards you. Return the second folding plate. Move the lock lever to the position of "LOCK."...
-
Page 61: When Paper Has Jammed Near The Stacker
Chapter4 Troubleshooting Guide 2-6. When Paper Has Jammed Near the Stacker Remove the paper stuck in the stacker section towards you. Paper... -
Page 62: Error Messages
Chapter4 Troubleshooting Guide Error Messages When a paper jam has occurred or the top cover is open, an error message is displayed on the LCD display. Follow the procedures below to fix the error. If you cannot solve the trouble, contact your dealer. Message Cause Solution... -
Page 63: Troubleshooting
Chapter4 Troubleshooting Guide Troubleshooting When trouble has occurred, find the symptom from the table below and solve the trouble according to the solution. If you cannot solve the trouble, contact your dealer. Symptom Cause Solution The machine does not start The power cord is not inserted to Insert the power cord to the wall socket. - Page 64 Chapter4 Troubleshooting Guide Symptom Cause Solution Paper slips at the paper feed section The paper feed pressure is weak. Move the paper feed pressure frequently. adjustment knob to increase the paper feed pressure level. p.2-4) The separating pressure is strong. Turn the separating pressure adjustment dial to decrease the separating pressure.
-
Page 65: Chapter5 Cleaning The Unit
Chapter5 Cleaning the Unit Chapter5 Cleaning the Unit Cleaning Each Section The adherence of paper dust and printing ink on the rubber rolls and paper feed rings may cause problems such as paper feed errors and folding misalignment. Adherence of paper dust near sensors will also cause misdetection. -
Page 66: Cleaning The Paper Feed Rings
Chapter5 Cleaning the Unit Move the lock lever of the folding plate to Lock lever the position of “UNLOCK.” UNLOCK LOCK LOCK UNLOCK First folding plate Second folding plate Remove the first folding plate and second folding plate from the machine. Second folding plate First folding plate While turning the jam correction knob... -
Page 67: Cleaning The Paper Separator
Chapter5 Cleaning the Unit Rotate the rubber roll, and clean off the dirt with a cloth moistened with Paper feed ring alcohol. 1-3. Cleaning the Paper Separator Open the top cover. Top cover Insert a cloth moistened with alcohol between the paper feed ring (middle) Paper feed ring and the paper separator. -
Page 68: Cleaning The Paper Sensor
Chapter5 Cleaning the Unit 1-4. Cleaning the Paper Sensor Clean the paper sensor using an air duster or a cotton bud. Paper sensor 1-5. Cleaning the Ejection Gate Sensor Clean the ejection gate sensor, located on the back of the stacker rollers using an air duster. -
Page 69: Chapter6 Appendix
Chapter6 Appendix Chapter6 Appendix Specification Model TF MEGA-A Type Office use, desktop Paper size Min. 128 (W) x 182 (L) mm/5.04 (W) x 7.16 (L) inches that can Max. 297 (W) x 432 (L) mm/11.69 (W) x 17.00 (L) inches... - Page 70 Memo Chapter6 Appendix...
- Page 71 Memo Chapter6 Appendix...
Need help?
Do you have a question about the TF MEGA-A and is the answer not in the manual?
Questions and answers