Table of Contents
Advertisement
Advertisement
Table of Contents

Subscribe to Our Youtube Channel
Related Manuals for E.C.A. Confeo Premix CP 24 HST


Summary of Contents for E.C.A. Confeo Premix CP 24 HST
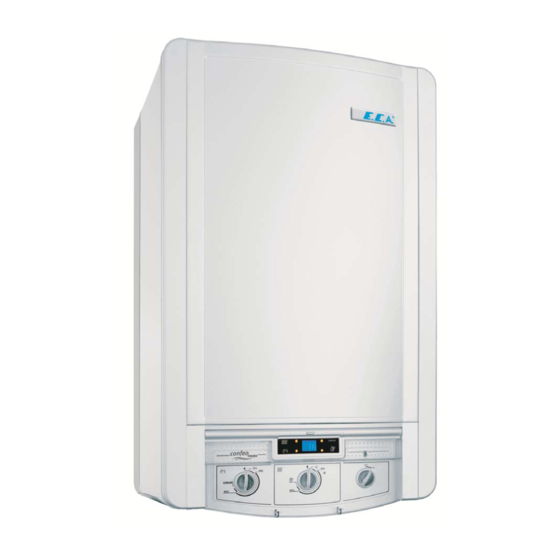
- Page 1 High-efficiency Condensing Boilers (compatible with external DHW tank) Confeo Premix CP 24 HST Confeo Premix CP 30 HST 24 kW Central Heating Output 30 kW Central Heating Output 26 kW Domestic Hot Water Output 31 kW Domestic Hot Water Output INSTALLATION AND USER’S OPERATING...
-
Page 2: Table Of Contents
CONTENTS PREFACE GUARANTEE & SERVICE SYMBOLS’ DEFINITIONS SAFETY INSTRUCTIONS AND WARNINGS PRODUCT General Specifications Product Notation Technical Data BOILER PACKAGING INSTALLATION Selection Of The Boiler Location Mounting The Boiler CONNECTIONS Condensate Connection Flue Connection Gas Supply & Water Systems Electricity Supply COMMISSIONING Final Checks And Operations Before Boiler Start-up Control Panel... -
Page 3: Guarantee & Service
PREFACE Confeo Premix high-efficiency condensing boilers have been designed for providing efficient, safe and comfortable central heating (CH) and domestic hot water (DHW). The boilers are suitable for room ventilated or room sealed operation and are supplied for use with either natural gas or LPG. This manual contains installation and user’s operating instructions. - Page 4 SAFETY INSTRUCTIONS AND PRECAUTIONS Safety Instructions When a gas leak is found or suspected: - Turn off the gas valve of the boiler and other appliances which operate with gas. - Shut off the oven, cooker and similar appliances to put their flame out. - Do not light match, lighter etc.
- Page 5 Boiler Start-up Boiler start-up must be performed certainly by qualified person. Gas type (natural gas / LPG), gas supply pressure (mbar) and electricity supply voltage (V) data which are detailed on the information plate must be suitable with mains supply conditions. This is checked by qualified person.
-
Page 6: Product
PRODUCT General Specifications Confeo Premix high-efficiency condensing boilers have been designed for providing efficient, safe and comfortable central heating (CH) and domestic hot water (DHW). The boilers are suitable for room ventilated or room sealed operation and are supplied for use with either natural gas or LPG. Main board provides all the functionality and safety of the boiler. - Page 7 1- Stainless steel heat exchanger 12- Igniter 2- Air / gas manifold 13- Ignition electrodes 3- Fan 14- Ionization electrode 4- Pump 15- Flue gas NTC sensor 5- Hydraulic circuit – flow manifold 16- Hydraulic circuit – return manifold 6- Gas valve 17- Manual air vent 7- Water pressure sensor 19- Expansion vessel (10 liters)
-
Page 8: Product Notation
Product Notation Table 1 Notation Description Confeo Premix High-efficiency Condensing Boilers - 24 kW Central Heating Output CP 24 HST - 26 kW Domestic Hot Water Output Confeo Premix High-efficiency Condensing Boilers - 30 kW Central Heating Output CP 30 HST - 31 kW Domestic Hot Water Output Technical Data Confoe Premix high-efficiency condensing boilers are suitable for room ventilated (B Type) or... - Page 9 Table 2 Unit CP 24 HST CP 30 HST Gas Category* 2H3P 2H3P Boiler Type 13(x) 33(x) 43(x) 13(x) 33(x) 43(x) 53(x) 63(x) 83(x) 53(x) 63(x) 83(x) Type of gas G 20 G 31 G 20 G 31 Performances CH Min. Heat Output (80/60 22,2 27,3 CH Max.
- Page 10 agram fig. 1...
-
Page 11: Boiler Packaging
BOILER PACKAGING CAUTION: The instructions on the boiler package should be considered during transportation and storage. - The product is covered with a cardboard box of which dimensions are 867x522x447 (HxWxL) mm and supported by upper and lower styrofoams (fig. 2a). fig. -
Page 13: Installation
INSTALLATION Selection Of The Boiler Location The boiler must be installed in accordance with gas safety regulations and relevant standards. Additionally, the clearances around the boiler should be as shown in fig. 4 in order to make service, maintenance and usage easier. ... - Page 14 WARNING: For room sealed operation, the boiler location and air/flue terminal position must obey national and local requirements, gas safety regulations and relevant standarts. The room sealed operation boiler is not suitable for external installation. It should be within in the building.
- Page 15 WARNING: For room ventilated operation, the boiler location and flue gas discharge connections must obey national and local requirements, gas safety regulations and relevant standarts. Room ventilated operation boilers must not be installed in a bedroom, bedsitting room, bathroom or in a room containing a bath or shower and also the installation room must not contain inflammable or explosive liquid or materials.
-
Page 16: Mounting The Boiler
Mounting The Boiler Having determined the boiler location, - Use the paper template to mark out the positions of the fixing holes of wall and mounting brackets (the mounting bracket is an optional part). - Drill the wall and fix the wall bracket to the wall with the 3 screws, then also the mounting bracket with the 2 screws. -
Page 17: Connections
CONNECTIONS Condensate Connection :All condensing boilers generate condensate discharge. The amount of condensate water depends on the working conditions of your appliance. This can be up to 1,7 litres of condensate water an hour. - A plastic pipe should be fixed to the outlet pipe of the siphon and the pipe should be connected to the drain line. -
Page 18: Flue Connection
Flue Connection 4 different types of air/flue system can be designed for Confeo Premix high-efficiency condensing boilers: a) The air/flue system is designed by horizontal concentric ducts b) The air/flue system is designed by vertical concentric ducts c) The air/flue system is designed by two separate ducts (twin connection) d) Room ventilated operation (air supply from boiler room) : The air/flue kit, given with your appliance, is only suitable for horizontal air/flue design. - Page 19 fig. 9...
- Page 20 for CP 24 HM-P 4 m for CP 30 HM-P and 5 m for CP 35 HM-P models. fig. 10...
- Page 21 fig. 11...
- Page 22 fig. 13 (a)
- Page 23 fig. 13...
- Page 24 fig. 14...
- Page 25 fig. 15...
- Page 26 If the air/flue kit length is insufficient, additional flue accessories should be ordered through qualified service. Do not use any other type / brand name of flue parts. - The twin kit accessories (fig 16): a) Concentric extension, L=500 mm Concentric extension, L=1000 mm b) 90 Concentric elbow, φ80 mm...
- Page 27 The total length of the air ducts and flue ducts must not exceed 32 m. [Lmax = a (air supply) + b (flue discharge) = 32 m] fig. 17 [Lmax = a (air supply) + b (flue discharge) = 32 m]...
- Page 28 Room ventilated operation (air supply from boiler room) B type kit: room air dependent application. Combustion air is provided from This kit is suitable for the installation room and products of combustion is discharged by means of the flue gas ducts. a) Concentric vertical adapter with flange, (φ80/125mm) b) 90 Concentric elbow, (φ80/125mm) [(a) + (b) ...
-
Page 29: Gas Supply & Water Systems
Gas Supply & Water Systems - Water & gas connections as shown in fig. 19. fig. 19 a) CH flow 3/4’’ b) DHW tank flow 3/4’’ c) Gas inlet 3/4’’ d) Water supply 1/2" e) DHW tank return 3/4’’ f) CH return 3/4’’ - A suitable valve should be mounted on the gas inlet, water supply and CH connections. -
Page 30: Electricity Supply
Electricity Supply Electrical installation should be made according to the national and local instructions. The boiler must be earthed and a standard 230 V AC - 50 Hz supply is required. WARNING: Disconnect power supply to prevent electrical shock before connecting the electricity supply. -
Page 31: Commissioning
COMMISSIONING Final Checks And Operations : Having completed the installation and connections (condensate, flue, electricity, supply, gas supply and water circuits) of the boiler according to the authorized gas company regulations and relevant standards, the final checks and operations must be carried out by qualified person. - Page 32 Open hot water tap to check DHW circuit. Check any leakage water pipes. Check whether flue kit is comprised of original parts or not according to the instructions and regulations. In addition, Electricity connections of boiler must be earthed and suitable with main supply conditions (230 V AC - 50 Hz).
-
Page 33: Control Panel
Control Panel The control panel shown in fig. 24 consists of the following parts as detailed below. fig. 24 ON/OFF Switch The appliance is turned ON/OFF using the ON/OFF switch. Display Panel: Blue Backlight LCD Display and 3 Yellow Status LEDs a) Blue Backlight LCD Display (2-Digit) Operation modes, actual and setpoint CH temperature, setpoint DHW temperature, error codes and CH water pressure value can be seen on LCD display (Table 3). - Page 34 Table 3 Stand-by Mode: When there is no heat demand for central heating (CH) or domestic hot water (DHW). LCD display shows actual CH flow temperature (default). CH mode: LCD display shows actual CH flow temperature and status LED CH is ON. DHW mode: While DHW mode is active, status LED DHW is ON.
- Page 35 c) The service mode is activated by turning the CH potentiometer fully clockwise. This function is only for qualified person (not for users). : Service mode can be used only by qualified person. DHW Temperature Control Potentiometer The DHW potentiometer has 2 functions (fig. 26): a) to set the DHW water temperature between 35 C (min.) and 60 C (max.).
-
Page 36: Operating The Boiler
Operating The Boiler Start Up / Shut Off The Boiler - Turn the ON/OFF switch to ‘ ON ’ position (fig. 27a). LCD display will turn ON and, Power-on sequence will be monitored for several seconds. After the power-on sequence is completed successfully, LCD display shows actual CH flow temperature. - Page 37 - Adjust any CH water flow temperature between 30 C and 80 C with the CH potentiometer. The setpoint value appears on the LCD display and left dot is flashing. After 10 seconds, actual CH water temperature will appear instead of the setpoint and left dot is disappeared. The boiler will modulate to the desired temperature (fig.
- Page 38 DHW mode is active SERVICE fig. 29a - When water temperature in the tank reaches the DHW setpoint, the boiler stops producing hot water for the DHW tank. And then, the appliance goes back to the previous mode (fig. 29b – fig.
- Page 39 Frost Protection The appliance goes on and off automatically depending on actual water temperature values measured by the sensors for protecting water circuits against freezing. This function protects both CH and DHW systems. - When the appliance in stand-by mode and the CH flow sensor measures a low water temperature in the system (less than 5 °C), the boiler starts as if there was a CH demand.
-
Page 40: Combustion Check & Gas Valve Adjusments
Combustion Check & Gas Valve Adjusments - Connect the flue gas analyzer to the sampling point which is located on the air/flue system (in the elbow, vertical adapter or twin adapter). - Operate the boiler at maximum load (see page 42, Service Mode). - Be sure that boiler is running at maximum load (→... - Page 41 a) Flow Adjusment b) Offset Adjustment fig. 30 fig. 31...
- Page 42 Service Mode - Turn the CH potentiometer fully clockwise. Status LED Service will be ON (see Table 3). - The softstart function (fan speed=2520 rpm) will be actice 90 seconds (for CP 24 HST) or 120 seconds (for CP 30 HST). - After the softstart time ends, the boiler will run at the min.
-
Page 43: Gas Type Conversion
GAS TYPE CONVERSION : Gas type conversion from LPG to natural gas or from natural gas toLPG must be carried out only by qualified person. - Gas type conversion can be divided in 3 sections: replacement of the gas valve and gas restrictor, installation of the BCC and combustion check. - Page 44 fig. 32 Installation Of The BCC The BCC is a plug, which contains a programmed memory. The BCC is used to update the parameters of the main board when the appliance is converted to the another gas type. - Shut off the boiler by turning the ON/OFF switch to OFF position. - Undo the 2 screws which are located on the lower edge to remove the front panel.
- Page 45 The following steps are necessary to update the parameters of the main board: - Power on the boiler by turning the ON/OFF switch to ON position. - Burner LED will turn RED. The code “ 50 ” is flashed on the LCD display. - Push the reset button to start copy process.
- Page 46 FAULT/ERROR FINDING Several checks are included to protect the boiler and its environment. In case of error condition, the error code is flashed on the LCD display (Table 7), Burner LED shows failure indication (it turns RED) and heat demands will be disabled. ...
- Page 47 Table 7 Error/fault Error/fault definitions Codes Temperatures Lockout exhaust fume (flue gas) overtemperature Lockout boiler overtemperature Boiler overtemperature Failure CH flow sensor (NTC) Failure flue gas sensor (NTC) Failure DHW tank sensor (NTC) Failure CH return sensor (NTC) Flame Detection No flame signal Flame loss Flame simulation...
- Page 48 Table 8 Cause Solution Fault/Error and error code The boiler does not start - Lack of electricity. Check electricity up by turning the ON/OFF connections. switch to ‘ ON ‘ position. (LCD is not ON). Lockout exhaust fume (flue - Insufficient flue draught. - Check the flue connections.
- Page 49 Table 8 Cause Solution Fault/Error and error code Failure DHW tank sensor - A relevant wiring cable may - Consult qualified service. (NTC) break off or become seperated from its connection. - Relevant wiring cables may be on contact. Failure CH return sensor - A relevant wiring cable may - Consult qualified service.
- Page 50 Table 8 Cause Solution Fault/Error and error code Failure flow-return - Insufficient or no water - Check circuits for leaks. supervision flow. - Check the CH inlet valve - The pump is damaged or not whether it is open or not. connected.
- Page 51 Table 8 Cause Solution Fault/Error and error code Failure BCC during - If there is a failure during - Consult qualified service. installation the installation of the BCC. If the temperature at the boiler - CH NTC’s temperature is Frost Protection sensor (Flow temperature) falls below 0°C.
-
Page 52: Maintenance
MAINTENANCE - The boiler should be checked and serviced for general maintenance once a year. Maintenance and service operations must be carried out only by qualified person. - Only a damp cloth should be used for cleaning the outer space of the boiler and then the surfaces should be dried completely.
Need help?
Do you have a question about the Confeo Premix CP 24 HST and is the answer not in the manual?
Questions and answers