E.C.A. PROTEUS PREMIX 14 HM NG ERP UK Installation And Maintenance Instructions Manual
Hide thumbs
Also See for PROTEUS PREMIX 14 HM NG ERP UK:
- Operating instructions manual (20 pages) ,
- Installation and user instructions manual (40 pages)

Related Manuals for E.C.A. PROTEUS PREMIX 14 HM NG ERP UK


Summary of Contents for E.C.A. PROTEUS PREMIX 14 HM NG ERP UK
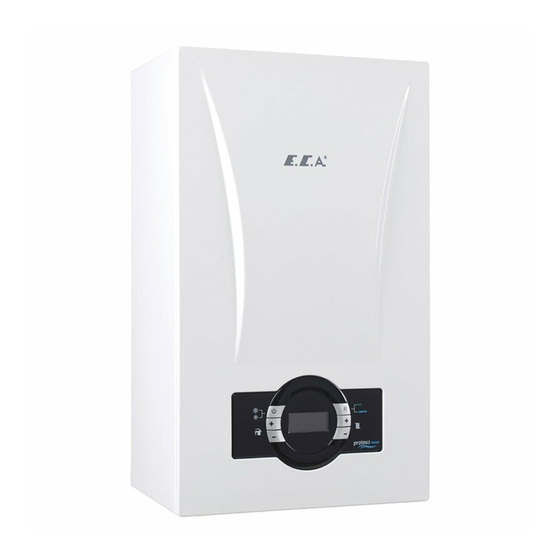
- Page 1 PROTEUS PREMIX CONDENSING BOILER PROTEUS PREMIX PPR 14/20/24/28/30/35 HM-HCH-HST INSTALLATION AND MAINTENANCE INSTRUCTIONS...
- Page 3 INDEX 1- SAFETY RULES AND WARNINGS 2- TECHNICAL DATA 3- NOTES ON THE DOCUMENTATION 4- SETUP 5- CONNECTIONS 6- INSTALLATION 7- OPERATION 8- INSPECTION AND MAINTENANCE 9- PART DEFINITIONS & MAINTENANCE INSTRUCTIONS 10- INSPECTION AND MAINTENANCE CHECKLIST...
-
Page 4: Safety Rules And Warnings
1-SAFETY RULES AND WARNINGS The boiler must be installed in indoor spaces under normal conditions. However, it can be operated in a suitable cabinet in places such as garage, open balcony. Please consult 1.1. Safety Instructions E.C.A for proper cabine sizes. When a gas leak is found or suspected;... -
Page 5: Technical Data
2- TECHNICAL DATA PROTEUS PROTEUS PROTEUS PROTEUS PROTEUS PROTEUS PREMIX 14 PREMIX 20 PREMIX 24 PREMIX 28 PREMIX 30 PREMIX 35 Product type Unit HM-HCH- HM-HCH- HM-HCH- HM-HCH- HM-HCH- HM-HCH- Gas Category I2H, I3P, I2Esi, I2E(S), II2L3P, II2H3P, II2ELL3P, II2Esi3P Flue Types (X), C (X), C... - Page 6 Domestic Hot Water (only valid for HM) Min. Domestic flow for operating L�min 2 (±%10) 2 (±%10) 2 (±%10) 2 (±%10) 2 (±%10) 2 (±%10) Min. Domestic flow for closing L�min 1,5 (±%10) 1,5 (±%10) 1,5 (±%10) 1,5 (±%10) 1,5 (±%10) 1,5 (±%10) 12 ±%15 14 ±%15 10 ±%15 (ΔT...
-
Page 7: Notes On The Documentation
Code of Practice which is available from the Heating and Hotwater Industry Council who manage and promote the scheme. Visit centralheating.co.uk or installersfirst.co.uk for more information PRODUCT NAME PRODUCT CODE GC NUMBER PROTEUS PREMIX 14 HM NG ERP UK 8116941010 47-814-30 PROTEUS PREMIX 20 HM NG ERP UK 8116944010 47-814-29... -
Page 8: Definition Of Symbols
HM Model (Boiler) : Both Central Heating (CH) and Domestic Hot Water (DHW). It means that you may connect HCH Model (Heat Only) : Only for Central Heating ground wire. (CH). HST Model (System Boiler) : Both for Central Heating (CH) and Domestic Hot Water (DHW) with external storage 3.2. - Page 9 3.3.2 HST Model (System Boiler) 3.3. Main Components and Description 3.3.1 HM Model (Boiler) 11 12 Figure 2. HST Boiler Figure 1. HM Boiler 1- Main Exchanger 1- Main Exchanger 2- Silencer 2- Mixer 3- Mixer 3- Fan 4- Fan 4- Silencer 5- 3 Way Valve 5- Pressure Sensor...
-
Page 10: Safety Devices
3.3.3 HCH Model 3.4. Safety Devices Flame Failure Safety System Boiler Over-Heat Safety System (95 °C) DHW (Domestic Hot Water) Over-Heat System (71°C) High Water Pressure Protection System (3 bar) Low Water Pressure Protection System (0.4 bar) ... - Page 11 4.2.2. HCH-HST Model I- Distance from the inner corner of the building L- From the ground or from the floor M- Vertical distance of two flue outlets N- Horizontal distance of two flue outlets Table 4. Flue Connection Information 5-CONNECTIONS 5.1 Flue Connections 5.1.1 Flue Sizes a) CH flow ¾ʺ...
-
Page 12: Plume Management Kit
5.1.3. Plume Management Kit Do not disassemble this part "A" in Standard plume management kit lenght is 1m. It is case of single horizontal flue kit an accessory part code 7006991251. The usage. minimum distance between nearest window and air inlet side of the flue must be bigger than 150 mm. -
Page 13: Mounting The Boiler
6.3. Mounting The Boiler Since the outside temperature of the boiler does not rise above 85 ° C at the maximum heating power, Having determined the boiler location, no special protective measures are required against the combustible construction materials and ... -
Page 14: Electrical Connection
Condensate discharge must be installed CAUTION: If the supply cord is correctly, otherwise operation of the damaged, it must be replaced by the gas boiler will be affected negatively. safe engineer in order to avoid a hazard. It is recommended to make condensate discharge internally into the household drainage system. - Page 15 6.8. Installation for HCH Boiler Expansion Vessel Figure 15. Installation for HCH Boiler (Heat Only Type Installation) **External WRAS appoved filling loop must be added during installation.
-
Page 16: Controller Installation
6.9. Controller Installation MAINBOARD DETAIL B DETAIL A Outdoor sensor is Timer cables are Boiler sensor cables Room thermostat Solar system installed by connected to relevant connected to relevant connection is connection cables therminal points. terminal points. connecting its cables installed by after are connected to to free terminals. -
Page 17: Operation
C-Domestic Hot Water Increase Temperature 7- OPERATION Button 7.1. Control Panel The temperature of the domestic water can be increased up to 65 °C thanks to the domestic water temperature increase button. D-Central Heating Water Increase Temperature Button The temperature of the heating water can be increased up to 80 °C thanks to the heating water temperature increase button. - Page 18 7.3.7. Annual Maintanence 7.3. Operation Functions Reminder: This mode reminds user 7.3.1. Standby (OFF Mode): that “annual maintanence time is very The mode where boiler soon”. When this mode is active, only can be set to standby mode. In this mode, no requests for heating water and domestic water can be made.
-
Page 19: Access To Menu
7.4. Access to Menu DHW (+) (C) and DHW (-) (E) buttons make parameter changes. CH(+)(D) and CH (-) (F) buttons are used for selecting and changing the value of any parameter. Such values are automatically saved. There are 2 ways to exit from “tS” parameters. You may exit from settings if no button is pressed in 2 minutes, or by pressing ON/OFF “A”... - Page 20 The service personel may access to and amend only “P00, P01, P26, P27, P33, P37, P38, P39, P42, P43, P44” parameters out of the following parameters. LIST OF SERVICE PARAMETERS E2prom parameters Category Unit PREMIX PREMIX PREMIX PREMIX PREMIX PREMIX Parameter Description 1=Instant...
-
Page 21: Ch Return Water Temperature
When “In” is selected by pressing on “B” button in the • CH Burner OFF Duration: The boiler stays turned menu, “i00” is displayed on screen. It is possible to select off for this period when it is turned off at hysteresis. At the any parameter wished by pressing on DHW(-)(E) and end of this period, if the water temperature drops below DHW(+)(C) buttons. - Page 22 Code Description Range CH Supply Water Sensor Temperature (°C) Range of 00 - 125 CH Return Water Sensor Temperature (°C) Range of 00 - 125 DHW Sensor Temperature (°C) Range of 00 - 125 DHW Sensor Temperature (°C) – Storage Tank Bottom Range of 00 - 125 Solar Panel Temperature (°C) Range of 00 - 125 Flue Gas Sensor Temperature (°C)
-
Page 23: Error Codes And Description
7.5. Error Codes and Description Error Error Description Description Code Code Ignition Lockout indication Flame lost too many times in recent past Flue sensor temperature too high error False flame indication High limit temperature protection Remote reset volatile lockout (supply or return sensor) No frequency feedback from fan after 1 Electronic Card Fault minute... - Page 24 'IGNITION FAULT' correct whether e ate trap and check conde a connected at are proper e ate trap, if it electrode electrode. float. If electrode contact with water, replace electrode. connector. the power...
- Page 25 Dismount the gas valve connector. Connect the Shut down the power of Check whether the power to the boiler. Check the boiler. Measure the Ignition and whether the resistance at the connector resistance between connecting Ionization Electrode ends coming from the circuit board is in pins of gas valve.
- Page 26 Open If not proper, replace Open the valves. at least 1 radiator them. Press ''Reset'' Button. valve Press ''Reset'' Button Press ''Reset'' Button. It occurs when supply If boiler gives Temperature sensors may be or return temperatures this error in winter mode, broken.
- Page 27 Fan modulation cable connector is not mounted, or there is a loose ''FAN Replace the fan cables. contact.Check related cables at FEEDBACK the fan and circuit FAULT'' board side Replace the main board. Replace the fan Check whether ignition Remove igniton electrode Check whether cable electrode cable (electrode and and check is there any...
- Page 28 Replace the gas Replace the gas valve Replace the main valve. cable groups. board. Dismount the gas Gas valve may be valve connector. broken.Shut down the power Check whether Connect the power to the boiler. Check of the boiler. Measure the gas valve cable whether the resistance at the ''NO FEEDBACK FROM...
- Page 29 Check whether Main board may be ''TEMPERATURE temperature sensors are broken.Replace main SENSORS MEASUREMENT mounted and sensors board. DEVIATION FAULT'' work properly. Replace temperature sensors for CH supply and CH return waters. Check whether Replace CH supply ''SUPPLY WATER supply water temperature water temperature sensor is mounted and TEMPERATURE SENSOR...
- Page 30 Check whether return Replace CH return ''RETURN WATER water temperature sensor water temperature TEMPERATURE SENSOR is mounted and sensor sensor. FAULT'' works properly. Main board may be broken.Replace main board. Temperature change on temperature sensor is too much Replace the cables in ''TEMPERATURE (>30°C).
- Page 31 Press '' Reset'' button. ''ANALOG-TO- If fault doesn't disappear DIGITAL CONVERTER after reset, replace main board. (ADC) FAULT'' Replace CH return Replace the main water temperature board. cables in case of any problem. Check whether there is Replace CH return temperature sensor. not any rusting, corrosion or ''RETURN WATER Check whether cable connections...
- Page 32 Replace supply water Replace the main temperature cables in board. case of any problem. Check whether there is not any rusting, corrosion or ''SUPPLY WATER Check whether cable connections deformation inside where it TEMPERATURE SENSOR are proper and without touches to copper pipe or check damage FAULT'' whether resistance of sensor...
- Page 33 Adjust the gas settings Dismount flue and check its according to ''gas joints and seals; ensure there setting chart'' in the is no clogging in the exhaust manual gas and suction lines. Check flue connections and ''FLAME LOSS FAULT installation conditions described Check whether gas settings (MORE THAN 3 in the manual.
- Page 34 Dismount the gas valve connector. Connect the power Check the CO2 values to the boiler. Check whether the at maximum and minimum Replace the main Replace the gas resistance at the connector ends capacity. Check whether board. valve . coming from the circuit board is in the CO2 value is stable or not.
- Page 35 Replace the main board Pertinent intervention is Check Error history. ''OVER- applied according to the Shut down the power of the last fault in Fault history. RESETTING boiler. Check whether F13 is disappeared. FAULT'' Replace main board. Check the error history and ''Electronic Card The problem is turn the boiler off and on...
- Page 36 Replace main board. Unless voltage returns to It occurs when normal value, the system ''LOW SUPPLY supply voltage is under remains blocked and the 170V. Check whether the VOLTAGE FAULT'' heat demand is not supply voltage is below fulfilled. 170 V. Check pressure inside expansion There may be a puncture on heat Check all water...
- Page 37 Replace them in case The problem is of any problem. outdoor sensor. Outdoor air sensor cables Replace the outdoor sensor. ''OUTDOOR may be not mounted, or there may Check whether fault is be a loose contact. SENSOR FAULT'' gone. Check the cables. Check whether P33=0 when Replace the main outdoor sensor is not...
- Page 38 Replace the cables in Replace the main case of any problem. board. Replace the main board. Remove electrical It occurs when water Pressure sensor connector on water pressure sensor pressure sensor is below than cables may be not when the power of the boiler is still on, ''HIGH WATER (0.4 bar).
- Page 39 If cable is not mounted, mount it. If there is any damage,place the cable. Pressure sensor cables Replace the pressure Replace the main may be not mounted, or there ''WATER PRESSURE sensor. board. may be a loose contact. SENSOR FAULT'' Check the cables.
- Page 40 Fix them if not Replace sensor in mounted, replace them if there is any case of any problem. damage. Ensure that P00=1 for HM PT1000 sensor cables may be Check whether any problem Replace main '' PT1000 SOLAR model. not mounted, or there may be on PT1000 sensor.(Resistance board.
- Page 41 Fix them if not mounted, replace Replace sensor in case them if there is any of any problem. damage. Check whether Flue gas temperature sensor cables '' FLUE GAS Replace main any problem on may be not mounted, or there may board.
- Page 42 Fix them if not Replace sensors in mounted, replace case of any problem. them if there is any damage. Turn off electricity and waiting 5 minutes. Turn on electricity and check the fault is '' TEMPERATURE Check whether any problem Replace main disappeared.
-
Page 43: Inspection And Maintenance
8- INSPECTION AND MAINTENANCE 8.1.Gas Conversion Gas conversion (Natural Gas-LPG) by replacement of gas throttle washer, amending gas pressure settings (capacity settings) by gas valve, and changing P01 parameter from service parameters are performed. Natural gas and LPG parameters are given below. There will be a stamping of the diameter and the last 3 digits of stock code on gas throttle washer (if there is no stamping, marking with colored pen). - Page 44 8.4. Dissambly Unscrew 4 screws holding side panels, bottom chassis, and the main housing. Dismounting Front Cover: Undo 2 screws holding the front panel, side panels and the bottom chassis, and The pump picture dismount the front panel. is representetive. ...
- Page 45 Dismounting Control Panel: Detach the connecting CONNECTOR FUNCTION terminal of the room thermostat, and ignition and NAME ionization cables Mounted to the notches on the control Condensate Trap panel. Open the cover by unlatching the notches of the control panel. Earth Outdoor Temperature Sensor OpenTherm (3.0) / Room Thermostat...
- Page 46 Dismounting/ mounting flue gas sensor: Mount the Dismounting/ mounting fan cables: Mount the flue gas sensor to the point shown in the photo. cables of fan modulation and fan supply as shown in the photo. High Voltage; FAN SUPPLY CABLE Low Voltage;...
- Page 47 Dismounting/ Mounting flow sensor and cable: Flow Dismounting/ Mounting surface-type NTC and sensor (Hall Effect sensor) in the tap water line shown in the cable: There are 2 surface type NTC on CH Supply and photo. CH Return pipes in boiler. ...
- Page 48 Mounting/ dismounting motorized valve: Dismounting/ Mounting condensate trap and Remove the motorized valve by unlatching the clip condensate trap hose: holding the manifold and the motorized valve. Remove 2 hoses on condensate trap. Remove 2 screws on the lower chassis for complete Dismounting of condensate trap.
- Page 49 Mounting/ dismounting 3 bar Safety Valve: Dismount the water pressure sensor using a wrench. Remove firstly the hose at the end of safety valve. Pay attention to put the seal when remounting. Remove the connecting screw of lower chassis to the side panel.
- Page 50 Mounting/ dismounting Venturi: Remove the clip Mounting/ dismounting Gas Valve: Undo 2 nuts fastening the gas pipe and venturi. Undo the nut fastening the gas valve to the lower chassis. fastening silencer to the burner housing. After removing the silencer, dismount the venturi by rotating.
- Page 51 After removing the silencer, dismount the venturi by Remove the gripper brackets of expansion tank. rotating. Mounting/ dismounting the Main Exchanger group: Undo the screws of fan and manifold connections using an Allen tool. Remove the clips of CH Supply/Return pipes.
- Page 52 Remove the Duroboard as shown in the photo. Undo the ignition /ionization electrode screws using an Allen tool. Remove 4 nuts fastening the burner and the cover using an Allen tool. Remove 4 screws of the burner door. Follow the order of operations (shown as wrench symbol) inscribed on the burner door when dismounting and remounting.
- Page 53 Mounting/ dismounting the main board: Remove Connection of Controller: Remove the passage the main board by flexing the notches holding the rubber on the bottom console. main board on the control panel. Cut the end of passage rubber and slip it on the controller cable.
- Page 54 Mounting/ dismounting of flow sensor: Remove it Remove CH return manifold. using a wrench. Remove the screws fastening the pump and to bottom consol. Dismounting of tap water filter: Remove the filter on tap DHW inlet pipe using a fine hand tool.
-
Page 55: Condensate Trap
9-PART DEFINITIONS & MAINTENANCE INSTRUCTIONS CONDENSATE TRAP Subject Description It is the component allowing the discharge of condensate and rain Part Function water without allowing the exhaust gas discharge 1- Raise of water in condensate trap due to clogging of condensate Impact in case of Faulty trap Operation... -
Page 56: Gas Valve
MAIN BOARD Subject Description Control every electronic and electromechanical component. Indicates overall Part Function operation status of boiler as well as sensor data. Impact in Case of 1- In general, PCB failure gives an error code on LCD screen and does not Faulty Operation fulfill heating necessity. -
Page 57: Testing Method
Testing Definition Testing Method Cut off the power of the boiler. Measure the resistance between Gas Valve Resistance connecting pins of gas valve. Check whether it is in the range of Control 110-120 Ohm. Cut off the power of the boiler. Dismount the gas valve connector. Measuring Gas Valve Connect the power to the boiler. -
Page 58: Maintenance Method
Maintenance Definition Maintenance Method 1- Unscrew 4 nuts and open the burner door 2- Suck any deposits on pipes using a vacuum cleaner. 3- Clean any deposits on pipes using a brush (with non-metallic wires). Exchanger Inner Pipe 4- Flush rinse inside of the exchanger with water. Cleaning 5- Complete the maintenance after cleaning the condensate trap since dirt will accumulate in the condensate trap after washing with... - Page 59 Maintenance Definition Maintenance Method 1- Dismount the plate exchanger. 2- Fill the holes of plate exchanger with a lime remover agent (HN03) and wait for 10 minutes. Inner Cleaning of Plate 3- Rinse inside the plate exchanger after emptying the lime remover agent.
- Page 60 Testing Definition Testing Method When the power is on, the voltage between pump’s high voltage supply Pump Voltage Control connector pins (brown is the phase and blue is the neuter). Check whether it is in the range of 215-240 V AC. There is automatic blockage function in energy efficient pumps.
- Page 61 IMMERSION TYPE NTC Subject Description It is the component measuring the water temperature in the tap Part Function water circuit. 1- There may be a inconformity and hot water rippling because Impact in Case of Faulty of difference between the temperature set by user and actual Operation temperature.
-
Page 62: Flue Gas Sensor
FLUE GAS SENSOR Subject Description It is the component protecting the boiler from overheating by Part Function measuring flue gas temperature. 1- Where ingress or egress surface type NTC sensors Impact in Case of Faulty malfunction, the boiler continues to burn without giving Operation overheating warning and cause deformation of exchanger. -
Page 63: Water Pressure Sensor
WATER PRESSURE SENSOR Subject Description It is the component measuring water pressure in the central heating Part Function circuit. 1- The boiler gives low or high water pressure error. Impact in Case of Faulty 2- It detects water pressure different from user’s actual value. Operation 3- It may not detect pressure increase even if user fills water into the system. - Page 64 3 WAY VALVE MOTOR Subject Description It is used for directing water to the central heating and tap water Part Function circuits. 1- Boiler remains only in the central heating mode. 2- When in the summer mode, radiators may got warm. Impact in Case of Faulty 3- During changing of motorized valve modes, noise may come Operation...
- Page 65 Testing Definition Testing Method Turn on the tap water when the power on the boiler is on. Measure 3-Way Motorized Valve the voltage between B-C on the motorized valve connector in the tap Voltage and Mode Control water heating mode. Check whether the voltage is in the range of 215- (Tap Water Heating) 240 V AC.
- Page 66 IGNITION – IONIZATION ELECTRODE Subject Description 1- To ignite and start burning the gas-air mixture coming from the Part Function burner. 2- To detect whether flame is formed in the burner. 1- No ignition and burning as result of that the distance between electrode ends is too much or too narrow Impact in Case of 2- Noisy burning (explosion burning) as result of late ignition...
-
Page 67: Expansion Vessel
EXPANSION VESSEL Subject Description Cold water filled into the central heating system expands as it gets warm. Part Function It is used for preventing the increase of the water pressure in the system. Impact in Case of Pressure increase in the central heating circuit and discharging water Faulty Operation through safety valve Primary Relevant... -
Page 68: Flow Sensor
FLOW SENSOR Subject Definition It is the component allowing that tap water demand may be Part Function detected by boiler. Impact in Case of Faulty Boiler cannot detect tap water demand; even if there is any tap Operation water demand, it always runs in the CH mode. Primary Relevant Error Codes Visual Inspection and Testing:... -
Page 69: Troubleshooting
FLOW TURBINE Subject Description In case of tap water demand, its turbine structure starts rotating to form Part Function the magnetic field that flow sensor will detect. Impact in Case of Boiler can not detect tap water demand; even if there is any DHW water Faulty Operation demand, it always runs in the central heating mode. - Page 70 WRAS APPROVED FILLING LOOP Subject Description Part Function It is used for filling water to the central heating system. 1- No water is filled into combi boiler. 2- It cannot be turned off when filling water to boiler, and it causes water discharge by opening safety valve.
-
Page 71: Inspection And Maintenance Checklist
10- INSPECTION AND MAINTENANCE CHECKLIST Maintenance work Interval Record all of the analysis results in the Benchmark service record in Annually these instructions Ask the end user whether any significant problems occur when operating Annually the product Use the diagnostics system to check the product's fault history Annually Visually inspect whether the air/flue pipe and its opening have been in- Annually... - Page 72 Check the water flow rate (domestic hot water). Insufficient water flow Annually rate → Check the incoming water supply. Incoming water supply sufficient, water flow rate too low → Clean or replace the strainer in the cold water inlet Check the impeller sensor for dirt/damage and, if required, replace it Annually Reassemble the product After each time maintenance...
- Page 76 PRODUCTION EMAS MAKİNA SANAYİ A.Ş Organize Sanayi Bölgesi 3. Kısım Mustafa Kemal Bulvarı No:13 45030 MANİSA/TÜRKİYE Phone: + 90 236 213 00 21 Fax: + 90 236 213 08 59 E-mail: emas@emas.com.tr www.emas.com.tr SALES & TECHNICAL SUPPORT Call Center Tel : +44 800 640 9988 Office Tel : +44 20 3978 1212 Adress...
Need help?
Do you have a question about the PROTEUS PREMIX 14 HM NG ERP UK and is the answer not in the manual?
Questions and answers