Advertisement
Quick Links
Thank you for choosing the Wattage Hawk EP ARF. Whether you have built and flown other electric air-
planes in the past, or if this is your first, you will appreciate the high quality, easy final assembly and excellent
flight characteristics of the Hawk EP.
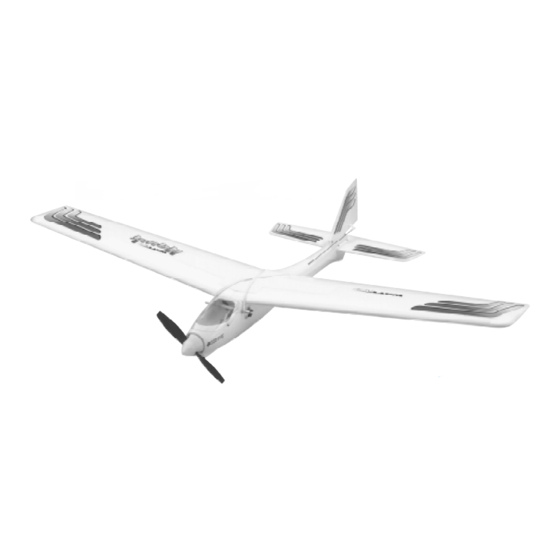
The Hawk EP is a small electric-powered sport airplane built specifically for direct drive speed 380 motors
and micro servos. Features such as a blow-molded fuselage, molded foam wing panels and molded foam flying
surfaces add up to make a lightweight, yet durable structure. And because of its light weight, performance using
the included stock speed 380 motor is excellent. The airplane is quite fast, yet is very stable throughout the
entire speed range, making it a perfect choice for both the experienced pilot and for those just graduating from
their first airplane.
When you open the box, you will notice that you won't have much left to do or to purchase to finish your
new airplane. Included is a direct drive speed 380 motor, a propeller adapter and propeller, threaded wire
pushrods with clevises and control horns and a colorful decal sheet. The Hawk EP requires only minor gluing
to put together, so assembly will go very quickly.
We hope you enjoy your new Wattage Hawk EP ARF as much as we have enjoyed designing and building
it for you. If you have any questions or comments, please feel free to contact us. We have also included a
product survey in the back of this manual. After you have finished building the Hawk EP, please take a minute
to fill it out and send it to us. We enjoy hearing any comments or suggestions that you may have.
The Wattage Hawk EP ARF is distributed exclusively by Global Hobby Distributors
All contents copyright © 2000, Global Hobby Distributors Version V1.0 10/00
18480 Bandilier Circle, Fountain Valley, CA 92728
1
Advertisement

Related Manuals for WattAge HAWK


Summary of Contents for WattAge HAWK
- Page 1 If you have any questions or comments, please feel free to contact us. We have also included a product survey in the back of this manual. After you have finished building the Hawk EP, please take a minute to fill it out and send it to us.
- Page 2 (800) 435-9262 www.modelaircraft.org Wattage guarantees this kit to be free from defects in both material and workmanship, at the date of purchase. This does not cover any component parts damaged by use, misuse or modification. In no case shall Wattage's liability exceed the original cost of the purchased kit.
- Page 3 The following section describes our recommendations to help you in deciding which types of accessories to purchase for your new Wattage Hawk EP ARF. We have tested all of these items with the airplane and found that these products will offer the best in performance, reliability and economy.
- Page 4 Peak Charger such as the Promax Activator Digital Peak Charger (part # 885650) to charge the flight battery. It is vital to the Hawk EP's flying performance that the battery pack be fully charged every flight, so using a peak charger is very important.
-
Page 5: Tools And Supplies Required
You will still be able to install the motor into the air- plane even with the ESC soldered in place. If you are TOOLS AND SUPPLIES REQUIRED using the Wattage IC-14 ESC, soldering is not required. Needle Nose Pliers 4) Set the motor between the handles of a pair of... -
Page 6: Items Required
6) With the motor turned off, test the operation of the two servos. Both servos should move when you move 1) Test fit the wing panels together. They should the control stick. fit together with few or no gaps between the two, and the leading edges and trailing edges should line up evenly. - Page 7 7) Remove the wing center section reinforcement 4) Push one nylon sleeve into each of the four holes. board from its protective backing. Carefully stick the re- Slide the 4mm x 70mm aluminum tube through the two inforcement board to the top of the wing, making sure front holes and slide the 4mm x 60mm aluminum tube that it's centered over the wing's center section.
- Page 8 1) Using a modeling knife, carefully cut out each 4) Using a modeling knife, carefully trim away the side of the horizontal stabilizer mounting slot in the back extra plastic left over from drilling the holes. of the fuselage. See photo # 7 below. 5) Slide the horizontal stabilizer into place in the Photo # 7 fuselage.
- Page 9 17) Slide the stabilizer back into place and realign it. When satisfied with the alignment, use a couple pieces of masking tape to hold the stabilizer in place. 10) Using a modeling knife, carefully cut out the vertical stabilizer mounting slot in the top of the fuselage. 18) Install and lightly tighten the four 1mm x 4mm wood screws to hold the stabilizer firmly in place.
- Page 10 5) Mount the motor to the fuselage using the alu- Cutting open the hole in the air-scoop will allow air minum motor plate and two 2.5mm x 4mm machine to flow through the fuselage, cooling the motor, ESC screws. Tighten the machine screws firmly to hold the and flight battery.
- Page 11 5) Install the servo tray into the fuselage. To align TOOLS AND SUPPLIES REQUIRED the servo tray properly, the back edges of the servo tray # 0 Phillips Head Screwdriver mounting sides should be pushed up against the front of Modeling Knife the aluminum wing mounting tube, and the tops of the Wire Cutters...
- Page 12 7) Slide one of the pushrod wires up through the back of the fuselage, making sure that the wire enters the ITEMS REQUIRED servo compartment above the servos. Snap the clevis into the elevator control horn. See photo # 20 below. {1} Molded Clear Canopy Photo # 20 {1} Velcro Strip...
- Page 13 C.G. be located any farther back than 1-7/8" behind the leading edge of the wing. The Hawk EP should be balanced with the flight bat- tery mounted in the fuselage. 2) Install the wing onto the fuselage and place two short pieces of masking tape on the bottom of the wing, 1-5/8"...
- Page 14 2) After you have become familiar with the flying Epoxy: A two-part glue containing a resin and a hard- characteristics of the Hawk EP, you may want to increase ener. Epoxy is available in several drying times and is the control throws to the settings listed below.
- Page 15 ODUCT EV ODUCT EV A L U A L U A A A A A TION SHEET A L U TION SHEET TION SHEET P R ODUCT EV ODUCT EV ODUCT EV A L U A L U TION SHEET TION SHEET ODUCT EV ODUCT EV...
- Page 16 ___________________________ Post Office will ___________________________ not deliver without proper ___________________________ postage (Return Address Here) Global Hobby Distributors Attn: Wattage Customer Care 18480 Bandilier Circle Fountain Valley CA 92728-8610 Fold along dotted line...
Need help?
Do you have a question about the HAWK and is the answer not in the manual?
Questions and answers