Table of Contents
Advertisement
Quick Links
Product Part Number 128436
FOR YOUR INFORMATION
To make your modeling experience totally enjoyable, we recommend that you get experienced, knowledgeable help with
assembly and during your first flights. Your local hobby shop has information about flying clubs in your area whose
membership includes qualified instructors. If there is no hobby shop in your area, we recommend that you contact the
AMA at the address below. They will be able to help you locate a flying field near you.
The Wattage Tubby Cubby EP is distributed exclusively by Global Hobby Distributors 18480 Bandilier Circle, Fountain Valley, CA 92728
All contents copyright © 2002, Global Hobby Distributors Version V1.0 January 2002
Visit our website at http://watt-age.globalhobby.com for information on other Wattage products
INSTRUCTIONS FOR FINAL ASSEMBLY
Academy of Model Aeronautics
5151 East Memorial Drive
Muncie IN 47302-9252
(800) 435-9262
www.modelaircraft.org
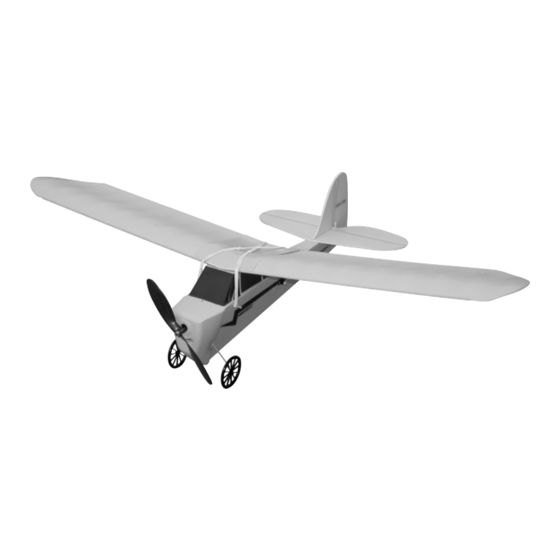
Specifications:
Wing Span: 37 Inches
Wing Area: 250 Square Inches
Length: 24.5 Inches
Weight RTF: 10 - 11.5 Ounces
Functions: Elevator, Rudder & Throttle
Power: 370 Motor w/3.7:1 Gear Box
Radio: 3 Channel Micro System w/2 Micro Servos
1
Advertisement
Table of Contents

Related Manuals for WattAge Tubby Cubby


Summary of Contents for WattAge Tubby Cubby
-
Page 1: Specifications
(800) 435-9262 www.modelaircraft.org The Wattage Tubby Cubby EP is distributed exclusively by Global Hobby Distributors 18480 Bandilier Circle, Fountain Valley, CA 92728 All contents copyright © 2002, Global Hobby Distributors Version V1.0 January 2002 Visit our website at http://watt-age.globalhobby.com for information on other Wattage products... -
Page 2: Table Of Contents
OUR GUARANTEE Wattage guarantees this kit to be free from defects in both material and workmanship, at the date of purchase. This does not cover any component parts damaged by use, misuse or modification. In no case shall Wattage's liability exceed the original cost of the purchased kit. -
Page 3: Introduction
INTRODUCTION Thank you for purchasing the new Wattage Tubby Cubby EP. Before completing the final assembly of your new airplane, please carefully read through this instruction manual in its entirety. Doing so will ensure your success the first time around! -
Page 4: Section 1: Our Recommendations
SECTION 1: OUR RECOMMENDATIONS This section describes the items you will need to purchase for your new Tubby Cubby EP. These suggestions are not set in stone, but they should provide you with a good starting point. IMPORTANT The Tubby Cubby EP is a lightweight, slow-flying electric-powered model. When choosing accessories like servos, ESC, and receiver, it's very important to take the weight of these items into consideration. -
Page 5: Section 2: Kit Contents
(2) Nylon Control Horns w/Backplates (3) 1.5mm x 4mm Wood Screws (2) Nylon Clevises (1) Double-Sided Foam Tape (1) Servo Mounting Board - 2 Parts (1) Velcro ® Strip (1) Decal Sheet Visit our website at http://watt-age.globalhobby.com for information on other Wattage products... -
Page 6: Section 3: Tools And Supplies Required
WARNING The Tubby Cubby EP is constructed of EPS and Closed Cell Foam. It is very important that you use no solvents, Cyanoacrylate (C/A) glue, or paint that can damage foam. If any of these chemicals comes in contact with the foam parts, the parts will be destroyed and will not be covered under warranty. -
Page 7: Section 5: Replacement Parts
We suggest ordering directly from your local dealer. If your dealer does not stock Wattage products, you can order directly from us at the address shown below:... - Page 8 Remove one piece of reinforcement board from its protective backing. Look carefully at the ends of the reinforcement board. You will notice one end is cut straight and one end is cut at an angle. The angled end goes toward the front of the fuselage. Carefully adhere the reinforcement board to the fuselage.
-
Page 9: Section 7: Stabilizer Installation
The elevator hinge is the 13" long strip with the guide marks on each end. For a more appealing look when the hinge is applied to the stabilizer and elevator, cut out the hinge inside the black outline. Visit our website at http://watt-age.globalhobby.com for information on other Wattage products... - Page 10 Hinge the elevator to the horizontal stabilizer using the clear decal. Apply the decal to the top of the parts, making sure there is a 1/16" gap between them to allow for the up and down movement of the elevator. Use the guide marks on the ends of the decal to help you set the correct hinge gap.
- Page 11 Visit our website at http://watt-age.globalhobby.com for information on other Wattage products...
-
Page 12: Section 8: Gear Box & Landing Gear Installation
While holding the vertical stabilizer in place, use a builder's triangle to check to ensure that it is aligned 90º to the horizontal stabilizer. When satisfied with the alignment, remove the vertical stabilizer. Mix a small quantity of 5 minute epoxy and apply a thin layer to only the bottom edge of the vertical stabilizer. - Page 13 Remove the gear box assembly and set it aside. Using a drill with a 1/16" drill bit, drill pilot holes through the motor plate at each of the three marks you drew. Visit our website at http://watt-age.globalhobby.com for information on other Wattage products...
-
Page 14: Section 9: Cowling & Propeller Installation
Set the gear box assembly back into place and realign it. Install and tighten the three 3mm x 12mm wood screws to hold the gear box assembly securely to the fuselage. Be careful not to overtighten the screws or you might strip the plywood motor plate. Step 2: Installing the Main Gear Wheels Slide one wheel onto one of the axles. - Page 15 The top of the cowling will be pushed above the top of the fuselage by the plywood plate. This is normal. It is done to make a space for hot air to exit the cowling so the motor and gear box do not overheat. Visit our website at http://watt-age.globalhobby.com for information on other Wattage products...
-
Page 16: Section 10: Elevator & Rudder Control System Installation
IMPORTANT The cowling is held in place using three wood screws. One screw should be located on top of the cowling and thread into the plywood plate and two screws (one on each side) should be located just below the landing gear wire cutout and thread into the edge of the plywood motor plate. - Page 17 Mount the servos using the servo mounting screws provided with your servos. To make it easier to install the screws, use the tip of your modeling knife to make small pilot holes in the servo mounting board. Visit our website at http://watt-age.globalhobby.com for information on other Wattage products...
- Page 18 Step 4: Installing the Elevator and Rudder Pushrods Plug the elevator and rudder servo leads into their proper slots in the receiver. Plug the ESC lead into the receiver and plug the flight battery into the ESC . Turn on the radio system and center both of the servos using the elevator and rudder trim levers on the transmitter.
-
Page 19: Section 11: Wing Assembly & Installation
When satisfied with the fit, use 220 grit sandpaper with a sanding block to carefully sand the edges of the wing mount smooth and straight. Visit our website at http://watt-age.globalhobby.com for information on other Wattage products... - Page 20 Using a pair of scissors, carefully cut out the plastic wing brace along the molded upper edges. When cutting out the wing brace, make sure not to leave any molded radius around the edges. Using 220 grit sandpaper with a sanding block, sand the edges of the wing brace smooth and straight. Step 2: Joining the Wing Panels Use a pair of scissors to cut one 1/2"...
- Page 21 Remove the piece of protective backing from the double-sided tape that you just attached to the wing root. Visit our website at http://watt-age.globalhobby.com for information on other Wattage products...
- Page 22 Mix a small quantity of 5 minute epoxy and apply a thin layer to the leading edge of the second wing panel. Carefully press the two wing panels together at the root, being careful to make sure that the leading and trailing edges line up evenly.
- Page 23 Secure the wing into place using the two long rubber bands as shown. If you try to use a single rubber band it will stretch so tightly that it will damage the wing. Visit our website at http://watt-age.globalhobby.com for information on other Wattage products...
-
Page 24: Section 12: Final Assembly
SECTION 12: FINAL ASSEMBLY YOU'LL NEED THE FOLLOWING PARTS: (1) Double-Side Foam Tape (1) Decal Sheet (1) Velcro ® Strip YOU'LL NEED THE FOLLOWING SUPPLIES: Excel Modeling Knife Pencil Scissors K&S Soldering Iron - Optional Ruler Solder - Optional IMPORTANT The locations of the radio equipment shown in the next few steps is only approximate. - Page 25 If any air bubbles form in the decal you can "prick" the bubble with a straight pin to release the air. Repeat the procedures above to apply the remaining decals. Rub each decal down thoroughly to adhere it into place. Visit our website at http://watt-age.globalhobby.com for information on other Wattage products...
-
Page 26: Section 13: Balancing The Tubby Cubby Ep
Balance the Tubby Cubby EP with the flight battery installed. Install the wing assembly onto the fuselage. Make sure the edge of the wing mount is pushed against the back edge of the cowling. -
Page 27: Section 14: Control Throws
WARNING So that the Tubby Cubby EP will fly straight and level at full power the elevator must be trimmed down 3/8" from center. This is the "neutral point". The elevator control throws should be measured from the neutral point. If you don't trim the elevator down 3/8", the airplane will climb excessively after launch or take off or any time you're at full power. - Page 28 Check every glue joint in the Tubby Cubby EP to ensure that everything is tight and well-bonded. Double-check the balance of the airplane. Do this with the flight battery installed. Check the control surfaces. They should move in the correct direction and not bind.
-
Page 29: Section 16: Flying The Tubby Cubby Ep
In the Air In the air the Tubby Cubby EP is smooth and predictable. With full power, climb-out is crisp and fast. When at full power you will probably notice that the airplane is more sensitive to elevator control than some airplanes you might be familiar with. - Page 30 Dihedral: The upward angle of each wing panel. Dihedral creates more stability which makes learning to fly much easier. Elevator: The elevator is the control surface on the back of the airplane that moves up and down. This surface controls pitch.
-
Page 31: Product Evaluation Sheet
If you checked any of the boxes above, did you other manufacturers? contact our Customer Service Department to Better As Good resolve the problem? Not as Good Additional Comments: ______________________________________________________________________ ________________________________________________________________________________________ ________________________________________________________________________________________ ________________________________________________________________________________________ ________________________________________________________________________________________ Visit our website at http://watt-age.globalhobby.com for information on other Wattage products... - Page 32 _____________________________ _____________________________ Post Office will not deliver _____________________________ without proper postage (Return Address Here) Global Hobby Distributors Attn: Customer Service 18480 Bandilier Circle Fountain Valley CA 92728-8610 Fold along dotted line Need help or have any questions? Call us at 1-714-963-0329 or send us an email to service@globalhobby.net...
Need help?
Do you have a question about the Tubby Cubby and is the answer not in the manual?
Questions and answers