Table of Contents
Advertisement
Quick Links
) ) ) ) ) ) ) ) ) )
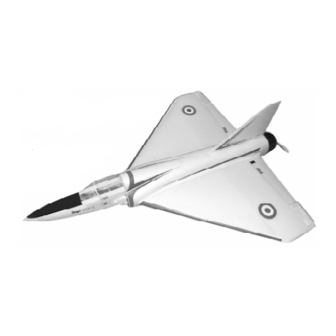
Mirage 2000-5
Electric Powered
Radio Control
Flying Model
Assembly Manual
The Mirage 2000-5 is the latest interceptor jet in a long line of Mirage designs that find their begin-
nings back in the 1950's. Speed, maneuverability, and payload capacity put it in a class with the
infamous F-16 and F-18. A delta wing panform and sleek lines make it one fast and agile jet. Our
model of the venerable Mirage is no different. This model adaptation has great slow speed character-
istics yet at full throttle, the 400 size electric motor powers this Mirage at amazing speeds. The assem-
bly is very simple which means you will be in the air in no time. 400 size electric aircraft are afford-
able and fly great yet are very economical to own and operate. We know you'll enjoy flying this fast
and agile semi-scale pusher jet. Just remember, this plane is quick and not suitable for inexperi-
enced pilots. Thank you for choosing the Mirage 2000-5 for your next project.
Items Needed (Not included in kit)
)
3 Channel Radio (with mixing or use the Wattage
Electronic Mixer) Hitec Focus 3FM/Micro receiver shown.
)
Micro Servos (CS 10 or 20's)
)
Speed control for 380 motors with BEC and Auto
cut-off. Some speed controls require additional plugs
)
6x2, 6x3 or 6x4 propeller (APC or Graupner)
)
Flat 7 or 8 cell 500A or 600AE Nicad battery pack
)
Appropriate battery charger for the flight battery. The
Promax Activator is an AC/DC input, versatile charger.
1
Advertisement
Table of Contents

Related Manuals for WattAge Mirage 2000-5


Summary of Contents for WattAge Mirage 2000-5
-
Page 1: Radio Control
Flying Model Assembly Manual The Mirage 2000-5 is the latest interceptor jet in a long line of Mirage designs that find their begin- nings back in the 1950’s. Speed, maneuverability, and payload capacity put it in a class with the infamous F-16 and F-18. -
Page 2: Optional Items
This instruction manual is designed to help you build a straight, great flying airplane. Please read this manual thoroughly before beginning assembly of your new Mirage 2000-5. Use the parts listing below to identify and separate all of the parts before beginning assembly. - Page 3 In that Wattage has no control over the final assembly or material used for final assembly, no liability shall be as- sumed for any damage resulting from the use by the user of the final user-assembled product. By the act of using the...
- Page 4 )6. Spray motor cleaner into the opening on Motor Break-In and Radio Prep the side of the motor. The cleaning solution should be dark in color as it runs out of the mo- For better motor life, follow this section on tor.
-
Page 5: Wing Assembly
)2. Trial fit one wing half to the side of the Install Plates (4) fuselage. Notice the flat surface of the wing matches the fuselage side. Align the wing with the molded wingfoil shape. If the wing shape does not match the fuselage, try the other wing half. -
Page 6: Radio Installation
Bottom View Note: Not all parts shown need to be installed in this step. Use this drawing Control Horn as guide to better understand the assembly order. Retaining Plate Wood Firewall (motor mount) Plastic Exhaust Cone Elevon 1.5mm Hex Wrench Set Screw provided. -
Page 7: Vertical Stabilizer Installation
tem to run the motor. Looking at the motor, the Draw a centerline. shaft should turn clockwise. If it does not turn clockwise, reverse the motor polarity. )9. To reduce the chance of failure as well as reducing the voltage loss from plugs, we rec- ommend direct soldering the motor wires to the speed control. - Page 8 Note: For best results, you should balance the Finishing Details propeller. We recommend a propeller normally )1. Use the photo and numbering system to made for a "tractor" airplane (engine in front). Make sure the front of the propeller faces for- help position the colored trim.
- Page 9 Radio Set-up and Control Throws Trimming for Best Performance ) 1. Neutral Fine tuning the balance point (CG) and elevon Position elevator trim in the neutral position. Then adjust the linkage to elevon is 2 mm neutral point will result in better, more predict- bring the elevon up 1-2 mm up at the inner able flight characteristics.
-
Page 10: Motor Maintenance
Motor Maintenance Battery Use Good battery usage and maintenance is crucial For longer motor life and better performance, for the great performance you expect from your regular cleaning is necessary. Follow these new Mirage. steps for regular maintenance. 1. Remove the propeller and propeller assem- Much has been written about Nickel Cadmium bly. - Page 11 Simply fold this form on the dotted lines, seal with tape and mail it to us. Do not use staples and make sure our address faces out. 7) Was any of the assembly difficult for you? If 1) Kit: Wattage Mirage 2000-5 yes, please explain. 2) Where did you learn about this kit?
- Page 12 Post Office will not deliver without proper postage Complete Return Address Information Here Watt Age Attn: Customer Service Department 18480 Bandilier Circle Fountain Valley, CA. 92728 Fold along dotted line...
Need help?
Do you have a question about the Mirage 2000-5 and is the answer not in the manual?
Questions and answers