Table of Contents
Advertisement
Quick Links
I N S T R U C T I O N S F O R F I N A L A S S E M B LY
The Wattage Hyper Wing 400 EP is distributed
exclusively by Global Hobby Distributors
18480 Bandilier Circle, Fountain Valley, CA 92708
All contents copyright © 2003, Global Hobby
Distributors Version V1.0 May 2003
Kit Product Numbers:
128445 Standard Kit w/Motor & Prop
128446 Deluxe Kit w/Motor, Prop, ESC & Battery
Need help or have any questions? Call us at 1-714-963-0329 or send us an Email at service@globalhobby.net
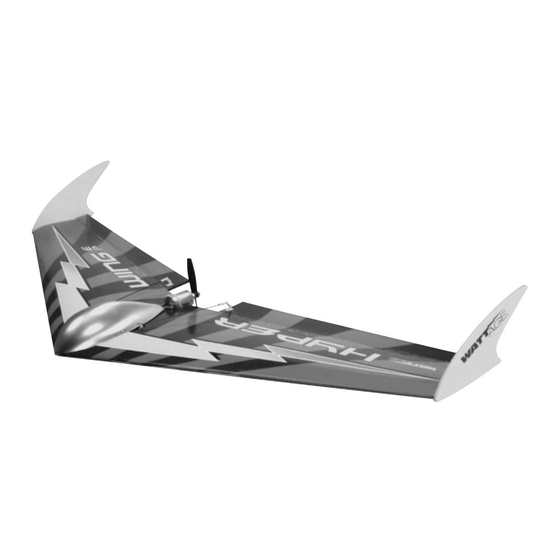
Awesome. That's what everyone is saying
about the Hyper Wing from WattAge. Flies great
in wind, flies great in the calm, will fly just
about anywhere because of its wide speed
range! And, you'll get it to the field quick too,
because the Hyper wing is super-easy to finish.
Specifications:
Wing Span: 39.2 Inches
Wing Area: 321.5 Square Inches
Length: 18 Inches
Weight RTF: 13 - 15 Ounces
Wing Loading: 5.75 - 7 Ounces Per Square Foot
Functions: Ailerons, Elevator (Elevons) & Throttle
Power: 380 Direct Drive w/5 x 2.5 Propeller
Radio Required: 3Ch or More Micro w/2 Micro Servos
ESC Required: 8 Cell 15 Amp Micro
Battery Required: 8Cell 800Mah 5/4AAA NiMH
1
Advertisement
Table of Contents

Subscribe to Our Youtube Channel
Related Manuals for WattAge Hyper Wing


Summary of Contents for WattAge Hyper Wing
- Page 1 Awesome. That’s what everyone is saying about the Hyper Wing from WattAge. Flies great in wind, flies great in the calm, will fly just about anywhere because of its wide speed range! And, you’ll get it to the field quick too, because the Hyper wing is super-easy to finish.
-
Page 2: Table Of Contents
In no case shall Wattage's liability exceed the original cost of the purchased kit. In that Wattage has no control over the final assembly or material used for final assembly, no liability shall be assumed for any damage resulting from the use by the user of the final user-assembled product. -
Page 3: Introduction
INTRODUCTION Thank you for purchasing the new Wattage Hyper Wing 400 EP. Before completing the final assembly of your new airplane, please carefully read through this instruction manual in its entirety. Doing so will ensure your success the first time around! WATTAGE HYPER WING 400 EP FEATURES Includes 380 Direct Drive Motor and Matching 5 x 2.5 Nylon Propeller... -
Page 4: Section 1: Our Recommendations
Wattage 10 cell 5/4AAA NiMH flight battery (P/N 128539), your Hyper Wing 400 EP will be a speed machine. Who says you even need a motor? The Hyper Wing 400 EP flies great as a non-powered glider. Just assemble it per our instructions, but don't install the power system or ESC. -
Page 5: Section 2: Tools And Supplies Required
Your Wattage Hyper Wing 400 EP comes with four self-adhesive decal "skins" that can be used to cover the entire surface of the top and bottom of your airplane. By using this decal material, the weight of the Hyper Wing 400 EP is kept to a minimum while adding strength to the structure and making the airplane look good. -
Page 6: Section 3: Kit Contents
WARNING The Hyper Wing 400 EP is constructed of foam. It is very important that you use no solvents, Cyanoacrylate (C/A) glue, or paint that can damage foam. If any of these chemicals comes in contact with the foam parts, the parts will be destroyed and will not be covered under warranty. -
Page 7: Section 4: Motor Break-In
SECTION 4: MOTOR BREAK-IN While not "mandatory," we do strongly suggest taking some time to break in the motor. This accomplishes two very important things: breaking in the motor will maximize its performance and, most importantly, you will be able to verify that the motor is working properly before installing it into the airplane. -
Page 8: Section 5: Joining The Wing Panels
Hyper Wing 400 EP. Using this reinforcement tape is optional. We suggest using the reinforcement tape if you are going to be landing your Hyper Wing 400 EP on rough surfaces or if you aren't a very proficient flyer. If you are going to be landing on soft grass, we don't suggest applying the reinforcement tape. - Page 9 STEP 3: COVERING THE WING PANELS If you have decided to apply a covering to your airplane (refer to "Information About Covering Your Hyper Wing 400 EP" on page # 5), it's easier to do it now than after the wing panels have been glued together. Follow the basic steps outlined below if you are going to cover your airplane using the included self-adhesive decal "skins".
- Page 10 Mix a generous amount of 5 minute epoxy and carefully apply a thin layer to the root end of both wing panels. WARNING For maximum wing strength, make sure to cover the entire surface of each root end. Fit the wing panels back together and realign them. Remove any excess epoxy that squeezes out of the joint using a paper towel and rubbing alcohol, and hold the wing panels together firmly until the epoxy sets up - about 10...
-
Page 11: Section 6: Motor Installation
IMPORTANT If you are planning on using a more powerful power system than we recommend, the airplane is obviously going to fly much faster than intended. We suggest cutting the cord of both ailerons 3/16" shorter to make the airplane less sensitive at higher speeds. This is not necessary if you're using the stock power system or a gear box. Carefully push the leading edge of the aileron up against the trailing edge of the wing. - Page 12 Using thick C/A, carefully glue the three plywood motor rails to one side of the fiberglass motor plate, making sure to roughen the fiberglass first so that the C/A will stick to it. Use the centerline you drew to help position the rails. There should be a 5/8"...
-
Page 13: Section 7: Control Systems Installation
With the motor in position, carefully pull the two zip-ties tight to secure the motor firmly in place. Using wire cutters, cut away the excess zip-tie material, making sure to leave enough extra so that you can remove and reinstall them to solder the ESC motor leads onto the motor later. - Page 14 Carefully install the two servos into the wing using double-sided foam tape. When positioned properly, the servos should be centered within the molded servo bays and the servo horns should be toward the trailing edge of the wing, as shown. STEP 2: INSTALLING THE CONTROL HORNS, CLEVISES &...
- Page 15 Repeat the previous procedures to install the second control horn and pushrod assembly on the other side of the wing. IMPORTANT The center-trim position of the ailerons described previously is a general position given to allow installation of the pushrods. We will adjust them later to the correct center-trim position after the wing tip fences are glued into place.
-
Page 16: Section 8: Final Assembly
STEP 4: INSTALLING THE FLIGHT BATTERY Install your flight battery on the centerline of the molded ® radio bay, using the strip of self-adhesive Velcro Before removing the flight battery, we suggest allowing ® the adhesive on the Velcro to cure for 24 hours. This will ®... - Page 17 Using a modeling knife, carefully cut an air-intake hole and an air-exit hole in each side of the hatch cover, as shown. IMPORTANT You must cut air-intake and air-exit holes in the hatch cover to properly cool the flight battery and ESC.
- Page 18 Install the hatch cover by squeezing it together slightly and sliding the slots underneath the heads of the two wood screws. If necessary, adjust the height of the wood screws to allow the hatch cover to slide underneath them, but still hold it down firmly.
-
Page 19: Section 9: Balancing The Hyper Wing 400 Ep
C/G forward or aft from its initial location. Doing so can result in very erratic flight characteristics. Balance the Hyper Wing 400 EP with the flight battery installed. Measure and draw two marks on the bottom of the wing, 6-1/8" back from the leading edge, measured at the centerline of the wing. -
Page 20: Section 10: Control Throws
We recommend setting up the Hyper Wing 400 EP using the control throws listed below. These control throws are suggested for initial test-flying because they will allow the airplane to fly smoother and make it easier to control. -
Page 21: Section 12: Hand-Launching The Hyper Wing 400 Ep
If not, there will be limited forward thrust produced by the power system and the airplane will not fly. SECTION 12: HAND-LAUNCHING THE HYPER WING 400 EP IMPORTANT Before your first flight, take a moment to double-check the following points: Carefully double-check the balance of the airplane. -
Page 22: Section 13: Replacement Parts List
We suggest ordering directly from your local dealer. If your dealer does not stock Wattage products, you can order directly from us at the address shown below:... -
Page 23: Product Evaluation Sheet
Your privacy is important to us. Was any of the assembly difficult for you? If yes, Kit: Wattage Hyper Wing 400 EP Standard # 128445 please explain. Wattage Hyper Wing 400 EP Deluxe # 128446... - Page 24 _____________________________ _____________________________ Post Office will not deliver _____________________________ without proper postage (Return Address Here) Global Hobby Distributors Attn: Global Services 18480 Bandilier Circle Fountain Valley CA 92728-8610 Fold along dotted line Visit our website at http://watt-age.globalhobby.com or for Customer Service at http://globalservices.globalhobby.com...
Need help?
Do you have a question about the Hyper Wing and is the answer not in the manual?
Questions and answers