Table of Contents
Advertisement
Quick Links
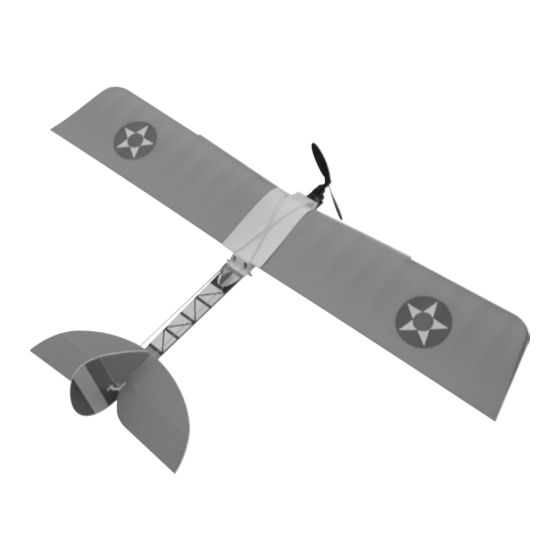
Thank you for choosing the Wattage Mini-Max EP for your next E-power project. The Mini-Max EP is
a small, lightweight, slow-flying electric-powered airplane built specifically to be flown indoors or in small
fields or parks - even in your backyard!
The Mini-Max EP features a prebuilt sheet-foam fuselage, molded foam wing panels and sheet-
foam flying surfaces that add up to make a lightweight, yet durable structure that is very easy to repair
in the event of a mishap. And because it is lightweight, performance using the included 280 size motor
and gear box is excellent. The airplane can fly very slowly, yet has enough power for loops and other
simple aerobatics. Because of its broad flight envelope, the Mini-Max EP is a perfect choice for both the
experienced pilot and for those just learning to fly.
When you open the box, you will notice that you won't have much left to do or to purchase to finish
your new airplane. The Mini-Max EP includes a 280 size motor with a gear box, a propeller, threaded wire
pushrods, clevises, control horns, a prebent landing gear wire, custom lightweight wheels and a colorful
decal sheet.
We hope you enjoy your new Wattage Mini-Max EP as much as we have enjoyed designing and
building it for you. If you have any questions or comments, please feel free to contact us. We have also
included a product survey in the back of this manual. After you have finished assembling the Mini-Max EP,
please take a moment to fill it out and send it to us. We always enjoy hearing any comments or suggestions
that you may have.
The Wattage Mini-Max EP is distributed exclusively by Global Hobby Distributors 18480 Bandilier Circle, Fountain Valley, CA 92728
All contents copyright © 2001, Global Hobby Distributors Version V1.0 March 2001
1
Advertisement
Table of Contents

Subscribe to Our Youtube Channel
Related Manuals for WattAge Mini-Max EP


Summary of Contents for WattAge Mini-Max EP
- Page 1 When you open the box, you will notice that you won't have much left to do or to purchase to finish your new airplane. The Mini-Max EP includes a 280 size motor with a gear box, a propeller, threaded wire pushrods, clevises, control horns, a prebent landing gear wire, custom lightweight wheels and a colorful decal sheet.
-
Page 2: Table Of Contents
Wattage guarantees this kit to be free from defects in both material and workmanship, at the date of purchase. This does not cover any component parts damaged by use, misuse or modification. In no case shall Wattage's liability exceed the original cost of the purchased kit. -
Page 3: Our Recommendations
The following section describes our general recommendations to help you in deciding which types of accessories to purchase for your new Wattage Mini-Max EP. We have tested all of these items with the airplane and found that these products will offer the best in performance, reliability and economy. -
Page 4: Mini-Max Ep Setup Information
The Mini-Max EP can be set up to be flown either indoors, such as in a large gymnasium, or outdoors in a small park or field - even in your backyard. Depending on where you will be flying, you might want to adjust the setup to meet your needs. -
Page 5: Additional Items Required
The 650Mah NiMH batteries listed above come with a Tamiya style battery connector. The IC-5A ESC comes with a BEC style battery connector. If you don't want to solder a new connector onto the flight battery, you can purchase and use a Wattage Tamiya - BEC adapter (P/N 131153). TOOLS AND SUPPLIES REQUIRED... -
Page 6: Kit Contents
{1} Decal Sheet REPLACEMENT PARTS Wattage carries a complete line of replacement parts for your Mini-Max EP. Listed below are the replacement parts that are available along with their respective part numbers for easy ordering convenience. These replacement parts can be... -
Page 7: Fuselage Assembly
FUSELAGE ASSEMBLY Rub the decal down completely to remove any air bubbles or wrinkles, and to make sure that the decal is ITEMS REQUIRED stuck firmly to the fuselage. INSTALLING THE {1} Foam Fuselage Assembly FUSELAGE REINFORCEMENT BOARD {1} 3mm x 70mm Dowel {1} 3mm x 60mm Dowel 3) Using the tip of your modeling knife, carefully {1} Fuselage Reinforcement Board... -
Page 8: Installing The Wing Dowels
INSTALLING THE WING DOWELS TOOLS AND SUPPLIES REQUIRED Kwik Bond 5 Minute Epoxy 7) Using a 1/8" drill bit, drill four holes through the fuselage sides using the die-cut holes in the sides of Excel Modeling Knife the fuselage reinforcement board for reference. See Ruler photo # 6 below. -
Page 9: Mounting The Horizontal Stabilizer
MOUNTING THE HINGING THE RUDDER HORIZONTAL STABILIZER 10) Using the tip of your modeling knife, carefully remove the piece of die-cut foam from the rudder. See 5) Using a ruler and a pencil, draw a centerline photo # 13 below. across the top of the horizontal stabilizer. -
Page 10: Installing The Control Horns
PUSHROD INSTALLATION 17) While holding the vertical stabilizer in place, use a builder's triangle to check to ensure that it is aligned ITEMS REQUIRED 90º to the horizontal stabilizer. See figure # 1 below. Figure # 1 {2} 1.5mm x 400mm Threaded Pushrod Wires {2} Nylon Clevises TOOLS AND SUPPLIES REQUIRED Excel Modeling Knife... -
Page 11: Motor Installation
6) Carefully snap the clevis on one pushrod into the 11) Install the rudder pushrod wire using the same elevator control horn. See photo # 18 below. technique as with the elevator pushrod wire. The Z-Bend should be installed into the third hole out from the center Photo # 18 of the servo horn as well. -
Page 12: Installing The Gearbox Assembly
3) Slide the back half of the gear box over the back 7) Remove the gearbox assembly and set it aside. of the motor and use two 2.5mm x 9mm wood screws Using a drill with a 1/16" drill bit, drill pilot holes through and one 3mm x 10mm self-tapping screw to secure the the motor plate at each of the three marks you drew. -
Page 13: Wing Assembly
WING ASSEMBLY 4) Using a pair of scissors, carefully cut out the molded plastic wing brace along its top edge. Also cut ITEMS REQUIRED the brace along the two molded scribe lines in the top of the brace. See photo # 29 below. {1} Molded Foam Right Wing Panel Photo # 29 {1} Molded Foam Left Wing Panel... -
Page 14: Installing The Wing Dowels
14) Remove the protective backing from the two 10) Using a pair of scissors, cut out a piece of pieces of double-sided tape on the bottom of the plastic double-sided tape to the approximate shape of the wing wing brace. root. -
Page 15: Mounting The Wing
TOOLS AND SUPPLIES REQUIRED If you're using the Hitec HAS-3MB receiver and the Excel Modeling Knife Wattage 6 or 7 cell 270Mah NiCD flight battery, you will Adjustable Wrench need to move the receiver back so that there is room to Scissors install the flight battery. -
Page 16: Installing The Flight Battery
12) Using a sharp modeling knife, carefully trim the sheet-foam along the outer edges of the decal. Apply the 9) If you are using the Wattage 6 or 7 cell 270Mah second decal to the opposite side of the sheet-foam. -
Page 17: Balancing
Mini-Max EP's flying characteristics, feel free to increase the control throws as necessary. So that the Mini-Max EP will fly straight and level the elevator must be trimmed down 3/8" from center. This is the "neutral point". The elevator control throws should be measured from the neutral point. -
Page 18: Glossary Of Terms
2) Do not test fly your model for the first time with- Epoxy: A two-part glue containing a resin and a hard- ener. Epoxy is available in several drying times and is out first having it safety-checked by an experienced stronger than C/A glue. -
Page 19: Product Evaluation Sheet
ODUCT EV ODUCT EV A L U A L U A L U A A A A A TION SHEET TION SHEET TION SHEET P R ODUCT EV ODUCT EV ODUCT EV A L U A L U TION SHEET TION SHEET P R ODUCT EV ODUCT EV... - Page 20 _____________________________ Post Office will _____________________________ not deliver _____________________________ without proper postage (Return Address Here) Global Hobby Distributors Attn: Wattage Customer Care 18480 Bandilier Circle Fountain Valley CA 92728-8610 Fold along dotted line...
Need help?
Do you have a question about the Mini-Max EP and is the answer not in the manual?
Questions and answers