Table of Contents
Advertisement
Quick Links
OPERATING INSTRUCTIONS
The Wattage Extra 300 RTF is distributed exclusively by
Global Hobby Distributors 18480 Bandilier Circle,
Fountain Valley, CA 92708
All contents copyright © 2002, Global Hobby
Distributors Version V1.0 August 2002
Product Number 128312
The Wattage Extra 300 RTF electric airplane is intended for individuals 12 years of age or older. Children under 12 years of age
should always be accompanied by an adult when either assembling or flying the Extra 300 RTF.
The Wattage Extra 300 RTF electric airplane is NOT A TRAINER. It is designed for individuals who have flying experience with radio
control airplanes. If this is not you, please return the model unbuilt in the original packaging to the store you purchased it from.
WARNING
Do not leave your model in an extremely hot environment (like the back of a car in direct sunlight) for any length of time.
The extreme heat could cause damage to the plastic and/or foam your model is made from.
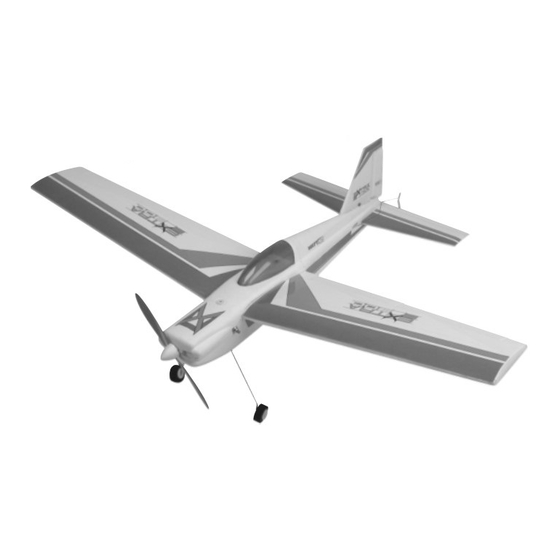
Thank you for purchasing the Wattage Extra 300 RTF electric
airplane. These Operating Instructions are provided to help
you enjoy your new Extra 300 RTF without any of the hassles
you might expect. Please read through these instructions in
their entirety. Doing so will help you become familiar with
how your airplane and radio system operate.
IMPORTANT INFORMATION - PLEASE READ!
1
Advertisement
Table of Contents

Related Manuals for WattAge Extra 300 RTF


Summary of Contents for WattAge Extra 300 RTF
-
Page 1: Operating Instructions
IMPORTANT INFORMATION - PLEASE READ! The Wattage Extra 300 RTF electric airplane is intended for individuals 12 years of age or older. Children under 12 years of age should always be accompanied by an adult when either assembling or flying the Extra 300 RTF. -
Page 2: Section 1: Kit Contents
INTRODUCTION Thank you for purchasing the Wattage Extra 300 RTF electric airplane. Before completing the final assembly of your new airplane, please carefully read through this instruction manual in its entirety. Doing so will ensure your success the first time around! -
Page 3: Section 2: Tools And Supplies Required
SECTION 2: TOOLS AND SUPPLIES REQUIRED The tools and supplies listed below will be necessary to finish the final assembly of your Extra 300 RTF. You will need to have these items on hand before beginning. Small Phillips Screwdriver Eight AA Alkaline Batteries... -
Page 4: Section 4: Extra 300 Rtf Final Assembly
SECTION 4: EXTRA 300 RTF FINAL ASSEMBLY Step 1: Installing the Transmitter Batteries Remove the battery cover by pushing down with your thumbs at the two marks shown. Install 8 fresh AA Alkaline batteries, being careful to watch that the polarity is correct for each battery. -
Page 5: Step 2: Charging The Flight Battery
Step 2: Charging the Flight Battery Plug the flight battery connector into the battery charger connector. When plugged in properly the connectors should "click" together. Note that the plugs can be plugged in only one way. Plug the charger into a 110V AC wall outlet. Charge the flight battery for 1-1/2 to 2 hours, being careful not to overcharge the battery. -
Page 6: Step 4: Installing The Landing Gear
To hold the vertical tail in place, thread the short wood screw into the predrilled hole in one side of the plastic mount, through the vertical tail, and into the predrilled hole in the opposite side of the plastic mount. Do not overtighten the screw or you might strip the plastic mount. -
Page 7: Step 5: Installing The Wing
Step 5: Installing the Wing Set the wing onto the fuselage, making sure the small dowel in the front of the wing engages the predrilled hole in the plastic mount at the front of the wing saddle. Push the back of the wing down firmly against the wing saddle. -
Page 8: Step 7: Installing The Propeller
Push the front of the top deck down and align it with the front of the fuselage and the fuselage sides. Secure the top deck into place by installing and tightening two long wood screws through the predrilled holes in the top deck. IMPORTANT If, after tightening the screws, there is a gap between the top deck and fuselage, remove the top deck and peel away the protective backing from the strips of double-sided tape on the bottom of the top deck and the top of the... -
Page 9: Step 8: Installing The Flight Battery
Push the flight battery into the battery tray. Snap the battery cover into place. IMPORTANT The Extra 300 RTF does not have an on/off switch. When you plug in the flight battery, the receiver and servos are powered up. CAUTION! Do not press the red motor arming switch at this time. -
Page 10: Section 5: Testing The Extra 300 Rtf
Before each flight it's important to check to make sure that each control surface is exactly even with the tail. If they are not, the Extra 300 RTF will not fly properly. If the control surfaces are not exactly even with the... -
Page 11: Step 2: Checking The Motor
To check that the control surfaces move in the proper direction, do the following: Looking from the back of the Extra 300 RTF, move the right-hand transmitter control stick completely to the left. The vertical control surface should move left. -
Page 12: Section 6: Getting Ready To Fly
The flying field you choose should be a large, open field with grass. There should not be any vehicles, buildings, power lines, trees, large rocks - or anything else for your Extra 300 RTF to crash into. Until you are proficient with the Extra 300 RTF, we don't recommend taking off or landing from hard surfaces like asphalt or concrete. -
Page 13: Section 8: Flying The Extra 300 Rtf
To make the Extra 300 RTF pitch up more, slide the up/down trim lever back just a little bit. To make the Extra 300 RTF pitch down more, slide the up/down trim lever forward just a little bit. In most cases, keeping the up/down trim lever centered will result in excellent power-off glide performance. -
Page 14: Section 9: Replacement Parts
Before attempting to land make sure that the Extra 300 RTF is flying straight into the wind with the wing level. Pull the motor on/off switch back toward you to turn the motor off. At this point the Extra 300 RTF will begin to descend. -
Page 15: Section 10: Troubleshooting Guide
This troubleshooting guide has been provided to help you diagnose and solve most problems that you may encounter with your Extra 300 RTF. Most problems encountered can be solved by carefully following the problem-cause-solution sections below. If you cannot solve the problem using this troubleshooting guide, please feel free to contact us at the address or phone number listed on page # 3. -
Page 16: Warranty Service
If your Wattage Extra 300 RTF is out of the warranty period you may request an estimate of services at the time you return your airplane for service. An omission of this request implies permission for Global Services to service your airplane at our discretion.
Need help?
Do you have a question about the Extra 300 RTF and is the answer not in the manual?
Questions and answers