Table of Contents
Advertisement
Quick Links
Instructions for Final Assembly
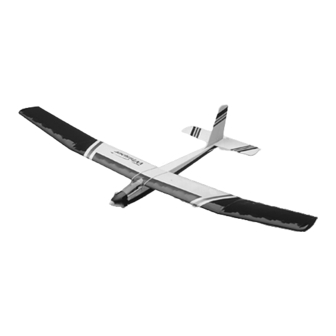
The Wattage Whisper is a 2-meter electric powered glider utilizing all balsa and plywood built up
construction techniques. The polyhedral wing design is a flat bottom, Phillips Entry style that is incredibly
stable throughout the entire flight envelope and produces good lift. The wing is built of true D-Tube
construction with balsa sheeting and shear webbing for great strength. The fuselage is built up light
plywood and balsa and the tail feathers are built up of lightweight balsa. Lightening holes have been
strategically placed to remove unnecessary weight without compromising strength. All this adds up to
an airplane that climbs out with authority and will also do well in the thermals. Included is a 540 direct
drive electric motor with folding propeller assembly and all wiring preinstalled at the factory. All necessary
hardware is included to finish the kit, including clevises, pushrods, control horns and all of the necessary
nuts and bolts, even a molded cowling and canopy! We hope you will enjoy building and flying the
Whisper as much as we have enjoyed designing it for you. Please fill out the Product Evaluation Sheet
at the end of this manual. We would love to hear your comments regarding the Whisper.
Version
V1.0
9-99 MTN
All Contents © Copyright 1999
1
Advertisement
Table of Contents

Related Manuals for WattAge Whisper


Summary of Contents for WattAge Whisper
- Page 1 We hope you will enjoy building and flying the Whisper as much as we have enjoyed designing it for you. Please fill out the Product Evaluation Sheet at the end of this manual. We would love to hear your comments regarding the Whisper.
-
Page 2: Table Of Contents
In that Wattage has no control over the final assembly or material used for final assembly, no liability shall be assumed for any damage resulting from the use by the user of the final user-assembled product. By the act of using the final user-assembled product, the user accepts all resulting liability. -
Page 3: Our Recommendations
1100Mah and 2000Mah. A premade R/C car battery such as the Trinity 1400Mah flat pack (part # 842010) works very good. A 6 cell battery pack will fly the Whisper, however climb out will be slower than if you use a 7 cell pack. -
Page 4: Kit Contents
This instruction manual is designed to help you build a straight, great flying airplane. Please read this manual thoroughly before beginning assembly of your new Wattage Whisper ARF. Use the parts photos below to identify and separate all of the parts before beginning assembly. -
Page 5: Additional Items Required
{1} Molded Landing Skid Hitec Focus 3 AM Single Stick Radio w/2 Servos Requires 8 AA Batteries # AC8AA Wattage ESC with BEC and Brake Trinity 7 Cell 1400 Mah Amp Max Battery # 842010 Promax Black Widow Peak Charger # 350360... -
Page 6: Full Size Hardware Drawings
Listed below are full size drawings of the hardware included with the Whisper. Use these drawings to familiarize yourself with each piece. Please refer back to this page to locate the proper hardware items when they are needed for a particular assembly step. -
Page 7: Motor Break-In
**NOTE** Please trial fit all of the parts. Make sure you have the correct parts and that they fit and are aligned properly before gluing! This will assure proper assembly. Since the Whisper is hand made from natural materials, every airplane is unique and minor adjustments may have to be made. However, you should find the fit superior and assembly simple. -
Page 8: Wing Assembly
10) After the battery has discharged and the mo- 3) Carefully place the brace, glue side down, tor has stopped, spray motor spray through the motor onto the second brace. Line up the edges of the two opening until the fluid runs clear. Apply oil to both braces and use clamps to hold them together tight. -
Page 9: Joining The Outboard Wing Panels
8) Working with one outer wing panel and one Figure # 2 outer dihedral brace for now, test fit the dihedral Outboard brace into the plywood box in the outer wing panel. Wing Panel Inboard Wing The brace should slide into the wing panel up to the Panel centerline. -
Page 10: Installing The Striping Tape
23) Mix a generous amount of Kwik Bond 5 18) Working with the right wing half for now, Minute Epoxy. Apply a thin layer of epoxy to the test fit the dihedral brace into the plywood box in exposed half of the dihedral brace, the inside of the the root rib. -
Page 11: Installing The Wing Hold Down Strip
2) Test fit one of the 6mm x 32mm front wing INSTALLING THE WING HOLD DOWN STRIP hold down dowels into the predrilled hole in one 30) Using a ruler and a pen, measure and mark front wing hold down dowel mounting block. One the center of the 15mm x 100mm white plastic strip. -
Page 12: Installing The Rear Wing Dowel
5) Remove the assembly and mix a small amount These two marks will help you align the wing of Kwik Bond 5 Minute Epoxy. Apply a thin layer of when you install it onto the fuselage. You may glue to the inside of the predrilled hole in the fuse- wish to make these marks in permanent ink so you lage side and to the gluing surfaces of the block. -
Page 13: Mounting The Horizontal Stabilizer
3) Using a ruler and a pen, locate and mark the 6) When you are satisfied with the alignment, centerline of the fuselage at both the front and the hold the stabilizer securely in place with masking tape, rear of the stabilizer mounting platform. See photo but do not glue it in place at this time. -
Page 14: Vertical Stabilizer Installation
11) Apply a couple of drops of lightweight ma- The top of the rudder should be as close to the chine oil to the pivot point of each hinge. See figure tip of the vertical fin as possible without actu- # 6 below. -
Page 15: Mounting The Vertical Stabilizer
You may find that the sides of the fairing ex- MOUNTING THE VERTICAL STABILIZER tend beyond the trailing edge of the vertical sta- 6) When you are sure that everything is aligned bilizer. Use a modeling knife and cut the sides of the correctly, mix up a generous amount of Kwik Bond fairing so they are flush with the trailing edge of the 5 Minute Epoxy. -
Page 16: Servo Installation
Photo # 18 Rudder PARTS REQUIRED Servo Elevator Servo {1} Servo Tray {1} Servo Tray Support Output Shaft INSTALLING THE SERVO TRAY 1) Test fit the servo tray and the servo tray sup- port into the fuselage. The support is installed into the two precut notches in the bottom of the fuselage Because the size of servos differ, you may need sides. -
Page 17: Installing The Elevator Control Horn
4) Pull the pushrod housings through the servo are directly in-line with the hinge line. The control compartment until 1/4” of each housing extends be- horn should also be perpendicular to the hinge line. yond the outside of the pushrod exit slots. See figure # 9 below. -
Page 18: Installing The Elevator Pushrod
13) Mount the control horn to the rudder by in- 18) Install one adjustable servo connector serting the two 2mm x 15mm machine screws through the second hole out from the center of one through the control horn mounting base, through the servo arm. -
Page 19: Installing The Rudder Pushrod
30) Plug the rudder servo lead into the receiver. INSTALLING THE RUDDER PUSHROD Plug the battery into the motor controller and turn on 23) Slide the second threaded pushrod wire into the radio system. Center the rudder trim tab on the the rudder pushrod housing from the top of the fuse- transmitter. -
Page 20: Cowl And Propeller Installation
The term for this angle is down-thrust. The When aligned properly the front and back edges of Whisper has 5º of down-thrust built into the firewall. the cowl should be even and the seam should be flush. 5) While holding the motor in position, mark... -
Page 21: Installing The Propeller
5) Using a modeling knife, carefully cut out the 10) Slide the hub assembly over the threaded two molded air ducts in the sides of the cowl. See adapter. Install the washer and the propeller nut. photo # 30 below. Tighten the nut snug, but do not overtighten it. -
Page 22: Canopy Installation
7) Install the wing onto the fuselage and set the canopy back in place. Using a pen, mark where the canopy needs to be cut to clear the front radius PARTS REQUIRED of the wing. {1} Molded Plastic Canopy {4} 2mm x 12mm Wood Screws 8) Using a modeling knife, cut the canopy at ALIGNING THE CANOPY the mark made. -
Page 23: Landing Skid Installation
PARTS REQUIRED INSTALLING THE RECEIVER {1} Molded Landing Skid 1) Install the receiver in front of the servo tray. Use a scrap piece of wood laid over the receiver and INSTALLING THE LANDING SKID glued to the fuselage sides to hold the receiver se- 1) Using a modeling knife, carefully cut out the curely in place. -
Page 24: Balancing
1) It is critical that the Whisper be balanced cor- justable servo connectors. The servo arms should be rectly. Improper balance will cause your plane to lose centered also. -
Page 25: Preflight Check
3) Check every nut and bolt and every glue joint meet the other flyers and find out who might be the in the Whisper to ensure everything is tight and well right person to help you learn to fly. bonded. This should include all of the control sur- face hinges as well. -
Page 26: Basics Of Flight
1) Launching the engine is off, gravity pulling the plane down can 2) Climb-out act as thrust. This is how the Whisper flies when the 3) Level Flight motor is shut down. The wing flies through the air as 4) Standard Turns... - Page 27 1) Stalling. Stalling is when the air stops flowing Now continue level flight, which will be a small se- over the wing properly. For the Whisper, this only ries of tiny corrections of elevator and rudder to keep happens when the airplane is flying very, very slow.
-
Page 28: Basics Of Thermal Flying
These are things you Typically, you will need very little down elevator as will notice as you fly the Whisper more and more. well. Remember to move the stick in only small You need to be familiar with the plane so that you amounts at a time. -
Page 29: Glossary Of Terms
It turns the with the motor to give the airplane the correct length. forward thrust. The propeller on the Whisper folds back when the motor is off. This allows less drag and C/A Glue: An acronym for Cyanoacrylate. It dries prevents the propeller from breaking during landing. -
Page 30: Notes
Polyhedral Wing: A wing that has dihedral in three Vertical Stabilizer: Mounted on the rear of the air- different points on the wing. The Whisper utilizes a plane, it works with the rudder to turn the airplane. It polyhedral wing. -
Page 31: Product Evaluation Sheet
Simply fold this form on the dotted lines, seal with tape and mail it to us. Do not use staples and make sure our address faces out. 7) Was any of the assembly difficult for you? If 1) Kit: Wattage Whisper Electric Glider yes, please explain. 2) Where did you learn about this kit? - Page 32 Post Office will not deliver without proper postage Global Hobby Distributors Attn: Wattage Customer Care 18480 Bandilier Circle Fountain Valley, CA. 92728 Fold along dotted line...
Need help?
Do you have a question about the Whisper and is the answer not in the manual?
Questions and answers