Table of Contents
Advertisement
Advertisement
Table of Contents

Related Manuals for La Spaziale S1 Mini Vivaldi


Summary of Contents for La Spaziale S1 Mini Vivaldi
- Page 1 I N S T R U C T I O N M A N U A L L SC 014 -UK- REV. 01...
-
Page 2: Conformity Declaration
ADDRESS: HEREBY DECLARES THAT: On the espresso coffee machine S1 Mini Vivaldi the pressure assembly is composed of a boiler complete with safety and adjustment devices, used for rapid preparation of espresso coffee, steam and infusions. This assembly conforms to the essential requirements of the Directive 97/23/EC and to national laws acknowledging it, following the conformity assessment procedure below: UNI 9887 Regulations, ISPESL collection rev. -
Page 3: Table Of Contents
CONTENTS Chap. 1 KEY TO SYMBOLS, WARNINGS, INSTALLATION ............p. 5 RATING PLATE .........................5 MACHINE EQUIPMENT ....................6 WARNINGS FOR THE INSTALLER ..................6 INSTALLATION .........................7 Chap. 2 STARTING UP THE APPLIANCE ..................p. 8 FILLING THE WATER TANK .....................8 SWITCHING ON AND HEATING THE APPLIANCE ............8 PREPARING COFFEE ......................9 Chap. -
Page 4: Chap
Chap. 7 ROUTINE APPLIANCE MAINTENANCE TO BE PERFORMED BY THE CUSTOMER ..............p. 22 Chap. 8 DIAGRAMS........................p. 23 WIRING DIAGRAM ......................23 POWER DIAGRAM ......................24 TRIAK DIAGRAM ......................24 LED CIRCUIT ........................24 KEY TO WIRING DIAGRAMS ..................25 PARTS ..........................26 KEY TO PARTS .......................27 INSTRUCTION MANUAL LSC 014 -UK- REV. -
Page 5: Key To Symbols, Warnings, Installation
( UCIMAC ) via E. Duse, 8 40033 Casalecchio di Reno BOLOGNA N.F. 2007 Espresso coffee machines MOD. S1 MINI VIVALDI VOLT WATT IPX2 BOILER Litres 1.2 Disposal of the equipment by the users within the European Community (WEEE) in compliance with the article 13 of the legislative decree issued on 25 July 2005, nr151 ”Implementation of... -
Page 6: Machine Equipment
MACHINE EQUIPMENT 1 coffee doser 1 2-cup filter holder 1 manual coffee tamper 1 set of filters 1 brush 1 set of shower heads 1 wrench for shower head removal CAREFULLY READ THE FOLLOWING WARNINGS, WHICH OFFER IMPORTANT GUIDELINES FOR THE SAFE USE AND MAINTENANCE OF THE APPLIANCE. -
Page 7: Installation
The appliance is supplied without water in the boiler. This is to prevent serious damage if the appliance is exposed to low temperatures. For the same reason, if the appliance is to remain in disuse for any long period of time, remove the water from the boiler before disconnecting it. Failure to respect the above may adversely affect the safety of the appliance and its useful life. -
Page 8: Starting Up The Appliance
STARTING UP THE APPLIANCE FOLLOW THE INSTRUCTIONS BELOW REFERRING TO THE KEY TO CONTROLS AT THE END OF THIS MANUAL. FILLING THE WATER TANK 1. Remove the drip tray (1). 2. Then remove the container (4) and fill it with cold drinking water. 3. -
Page 9: Preparing Coffee
PREPARING COFFEE 1. Remove the filter holder (11) from the delivery group (10) and insert the filter basket for one or two cups of coffee. 2. Fill with ground coffee (using the doser supplied), taking care not to leave any coffee powder on the top edge of the filter holder (11), and press it down using the special coffee tamper provided. -
Page 10: Appliance Operating Temperature Adjustment
APPLIANCE OPERATING TEMPERATURE ADJUSTMENT MINI VIVALDI 1. While the appliance is operating, press and hold down the button ON//OFF (27) for about 3 seconds. The power control light (22) and the control light for the set temperature will flash. For example, if the set temperature is 105°C, the control light (18) will flash. -
Page 11: Programming The Doses
NOTE. Access to this programming function is only possible when the delivery group temperature set is programmed to the minimum value (91°C) or the maximum value (97°C). • Switch off the appliance by pressing the button ON/OFF (27), the green control light (22) will go from lit to flashing (machine on Stand-by). -
Page 12: Hot Water Delivery For Infusions (Possible Only With The Boiler On, Control Light 13 On)
HOT WATER DELIVERY FOR INFUSIONS (Possible only with the boiler on, control light 13 on) 1. Place a pitcher under the hot water spout (28). 2. Press the hot water delivery button (23). 3. Hot water delivery will start. 4. Once the required dose has been delivered, stop the flow by pressing the button (23) again. STEAM DELIVERY (Possible only with the boiler on, control light 13 on) 1. -
Page 13: Counters (Optional)
COUNTER (Optional) This additional module is meant to manage the appliance according to a preset amount of coffee doses through the visualization of the corresponding partial and total numbers of cups of coffee delivered and the possibility to block the machine. When the appliance is plugged into the mains power and therefore, even when in Stand-by mode, the counter is powered and the initial screen shown here below is seen on the display: Dis01927... -
Page 14: Programming
The letter N will be flashing; pressing the button , to confirm the setting will return to the previous display page; moving with the buttons , will cause the letter Y to flash; pressing the button will reset the partial count for the delivery and return to the previous page, which will therefore be: .P.00000 .T.05963 NOTE. - Page 15 From the SERVICE menu, confirm the letter N, and the display will show: N^ COFFEES 00000 with the first zero on the left flashing. The number to be set refers to the quantity of deliveries to be entered into the machine and which will be added to the ones left over form the previous setting operation (leftover credit).
-
Page 16: Clock/Timer Module (Optional)
When the appliance is plugged into the mains power and therefore, even when the machine is in stand- by mode, the clock module (TIMER) is powered and the display will show the «La Spaziale» logo for 3 seconds, followed by the software version. After this it will show the current time and date. -
Page 17: Language Setting
LANGUAGE SETTING Confirming the “Select Language” with the button will access the language selections, where there is a choice of: Italian – English – French – German – Spanish. Pressing the button scrolls through the different languages. Stop on the language required, which will start to flash and confirm the selection with the button CLOCK SETTING Confirming the “Select Clock”... -
Page 18: On/Off Timer Setting
Pressing the buttons will select the correct hour. Press the button o confirm and the minutes (18) will start to flash. Pressing the buttons will select the minutes. Press the button to confirm and at this point, the display will show: Summer time NO / YES YES will start to flash;... - Page 19 After setting the first day, confirming the OFF time for the third time period of the day by pressing the button , the display will show: Tuesday Copy The day (Tuesday) will start to flash. If the same time settings as the previous day are required, hold down the button for 3 seconds to copy all the settings.
-
Page 20: Chap. 6 Alarm Management
ALARM MANAGER NO WATER IN THE TANK The lack of water in the tank (4) is signalled by the red control light (21) on the control panel (9), which will switch on. Fill the tank with at least 1 litre of cold drinking water (the tank can hold up to 3 litres of water). -
Page 21: Group Heating Element Piloting Device (Triak) Failure
GROUP HEATING ELEMENT PILOTING DEVICE (TRIAK) FAILURE This is a blocking alarm and it is signalled by the control lights 20-21, flashing. This alarm occurs when the temperature exceeds 140°C (triak in constant operation). If this alarm occurs, disconnect the appliance from the mains power and call an authorised technical assistance centre. -
Page 22: Routine Appliance Maintenance To Be Performed By The Customer
ROUTINE APPLIANCE MAINTENANCE TO BE PERFORMED BY THE CUSTOMER To grant efficient equipment and correct operation, it is necessary to follow the manufacturer’s instructions, carrying out cleaning and routine maintenance. WARNING Cleaning and routine maintenance operations must be carried out by the user according to the manufacturer’s instructions, listed here below. -
Page 23: Diagrams
DIAGRAMS WIRING DIAGRAM INSTRUCTION MANUAL LSC 014 -UK- REV. 01... -
Page 24: Power Diagram
POWER DIAGRAM SER1 EV. AL EV. H PUMP EV. GR PHASE DISPLAY NEUTRAL NEUTRAL TRIAK DIAGRAM F1 in F1 out F2 in F2 out LED CIRCUIT SER 2 INSTRUCTION MANUAL LSC 014 -UK- REV. 01... -
Page 25: Key To Wiring Diagrams
KEY TO WIRING DIAGRAMS EV GR Delivery group solenoid valve EV H Hot water delivery solenoid valve EV AL Automatic boiler refill solenoid valve Connection of triak feeding the boiler heating element on main board Connection of triak feeding the group heating element on main board Connection of main board to the triak feeding the boiler heating element Connection of main board to the triak feeding the group heating element SER1... -
Page 26: Parts
PARTS 14 15 16 17 18 19 20 21 14 15 16 17 18 19 20 21 91 92 93 94 95 96 97 INSTRUCTION MANUAL LSC 014 -UK- REV. 01... -
Page 27: Key To Parts
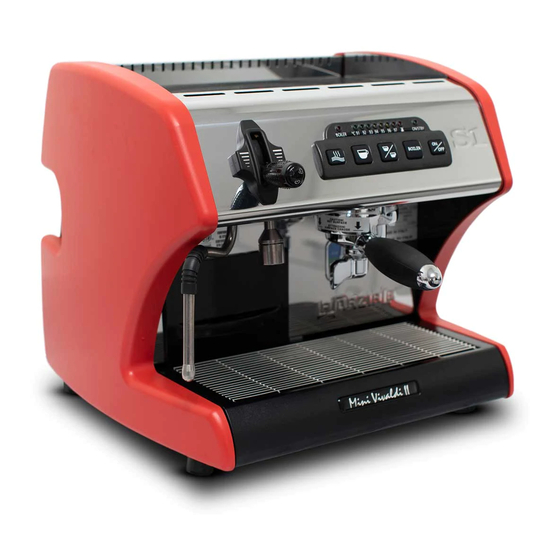
KEY TO PARTS Drip tray Steam wand Foot Water tank Side panel Steam delivery lever Top cup grid Cup guard Control panel Delivery group Filter holder Drip tray grid Boiler status control light Control light indicating water temperature for coffee 85 °C (91 °C on the MINI VIVALDI II version) Control light indicating water temperature for coffee 90 °C (92 °C on the MINI VIVALDI II version) Control light indicating water temperature for coffee 95 °C (93 °C on the MINI VIVALDI II version) Control light indicating water temperature for coffee 100°C (94°C on the MINI VIVALDI II version) - Page 29 03/2009 Graphics and Printing: “ X TYPE ENGINEERING S.r.l.” for “LA SPAZIALE S.p.A.“...
- Page 30 La Spaziale S.p.A. Via E. Duse, 8 40033 Casalecchio di Reno Bologna - (Italy) Tel. +39 051 611.10.11 Fax +39 051 611.10.40 E-mail: info@laspaziale.com Web Site: www.laspaziale.com...
Need help?
Do you have a question about the S1 Mini Vivaldi and is the answer not in the manual?
Questions and answers