La Spaziale S1 Vivaldi Owner's Manual
Double boiler espresso machine
Hide thumbs
Also See for S1 Vivaldi:
- Manual for use and maintenance (16 pages) ,
- Instruction manual (12 pages) ,
- User manual (22 pages)

Subscribe to Our Youtube Channel
Related Manuals for La Spaziale S1 Vivaldi


Summary of Contents for La Spaziale S1 Vivaldi
- Page 1 La Spaziale S1 Vivaldi Double Boiler Espresso Machine Owner’s Manual Last Updated on 03/31/2014...
-
Page 2: Table Of Contents
S1 Owner’s Manual Table of Contents Feature Overview ..................... 1 Reference Photos ....................1 Basic Machine Operation ..................3 15A or 20 Amp Operation ................. 3 Initial Installation Before Connecting Power ............3 Turning On and Heating the Machine ............... 4 Espresso Group Water Temperature Regulation ........... -
Page 3: Feature Overview
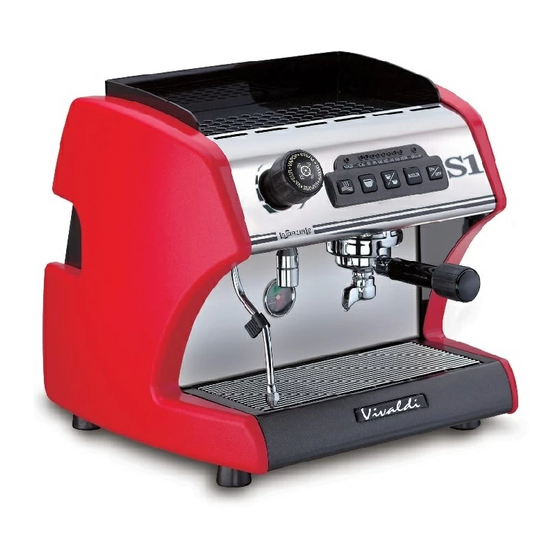
S1 Owner’s Manual 1 Feature Overview Dual Boiler Steam Boiler 2.5 liter Steam Boiler Element 1250 Watts Group Boiler .45 liter Group Boiler Element 800 Watts Direct Plumbed Rotary Pump Volumetric Dosing Adjustable Through Touch Pad ... - Page 4 S1 Owner’s Manual Label Function Label Function Label Function Label Function Drip Tray Warming Tray 90C Lamp On/Standby Lamp Steam Arm Control Panel 95C Lamp Hot Water Button Rubber Feet Group 100C Lamp One Cup Button Boiler Pressure Portafilter Handle 105C Lamp Two Cup Button Side Panels...
-
Page 5: Basic Machine Operation
S1 Owner’s Manual 3 Basic Machine Operation 3.1 15A or 20 Amp Operation The LaSpaziale S1 is available in 15A and 20A versions. In actuality, they are both identical machines. There is an internal switch that selects the operating mode and they have different power cords installed. -
Page 6: Turning On And Heating The Machine
S1 Owner’s Manual Contact your S1 vendor for advice if the solution isn’t obvious. Also, your S1 vendor may request that you check that your water hardness is below a certain level to ensure long life and trouble free operation. Hardness test strips may be included for this purpose. -
Page 7: Espresso Group Water Temperature Regulation
S1 Owner’s Manual WARNING!! To activate and deactivate the boiler mode press the "BOILER" (26) button. Every time you turn on the machine, the boiler is in service. When the boiler is turned off, it is impossible to use hot water for infusions or steam delivery. -
Page 8: Espresso Brewing
S1 Owner’s Manual previously been programmed.) 3. To increase the temperature, press the BOILER (13) button. The first press lights the yellow lamp over 110 (19) which indicates +1°C. A 2 press also lights the red lamp over 120 (20) which indicates +2°C. A 3 press also lights the red lamp over ECON (21) which indicates +3°C. -
Page 9: Volumetric Dose Programming
S1 Owner’s Manual 3.6 Volumetric Dose Programming The programmable volumetric dosing feature allows programming of the single shot (24) and double shot (25) buttons to dispense whatever quantities of espresso the user desires. Their use for single shot and double shot quantities is merely a suggestion. Many users only pull double shots and program the double shot button for 1.5-2.0oz for that purpose. -
Page 10: Economy / Boiler Operational Modes
1. Turning the Steam boiler on and off 2. Entry and exit of Economy mode There are three possible operational modes of the two boilers in the La Spaziale S1 20A model: 1. Both boilers are completely independent, turning on and off according to the needs of each. - Page 11 S1 Owner’s Manual Turning the Steam/Hot Water Boiler On and Off 1. The S1 must be in ON mode, not Standby for all operations below. 2. Momentarily press the Boiler button 3. The Boiler lamp turns off. Neither steam nor hot water is available. Note: if you turn the S1 Off then On again, or if power is removed and restored to the S1, the Boiler returns to the On state.
-
Page 12: Alarm Handling
S1 Owner’s Manual 4 Alarm Handling The S1 uses computerized sensors to robustly handle S1 device malfunctions. There are two types of alarms the S1 can generate: – these are the most serious. The S1 will not function when one of Blocking Alarms these alarms occurs –... -
Page 13: Boiler Automatic Refill System Failure
S1 Owner’s Manual 4.6 Boiler Automatic Refill System Failure (only with the boiler turned on) This is a blocking alarm which is signaled by blinking of the Boiler (13) light. If the pump runs for more than 1 minute attempting to refill the boiler without the controller circuit receiving a boiler full signal, this alarm is triggered. -
Page 14: Connection Diagrams
S1 Owner’s Manual 5 Connection Diagrams 5.1 Electrical Connection Diagram Page 12... -
Page 15: Control Board Connection Diagram
S1 Owner’s Manual 5.2 Control Board Connection Diagram Early versions of the S1 used a jumper on the above board (JP3) to switch between 15A and 20A mode. J3 Jumpered = 15A, No Jumper = 20A. Newer S1 have the above board enclosed in a plastic case with a switch on the case used to change modes. -
Page 16: Wiring Diagram Definitions
S1 Owner’s Manual 5.5 Wiring Diagram Definitions EV GR Coffee brewing group electrovalve EV H Hot water delivery electrovalve EV AL Automatic refill system electrovalve Connection on control board of the triac that feeds the boiler heating element Connection on control board of the triac that feeds the group heating element Connection of the control board on the triac that feeds the boiler heating element Connection of the control board on the triac that feeds the group heating... -
Page 17: S1 Water Flow Diagram
S1 Owner’s Manual 6 S1 Water Flow Diagram The information below is provided strictly as a reference for S1 owners who are curious about the function of their S1 Dual Boiler design. Page 15... -
Page 18: Adjustments And Maintenance
S1 Owner’s Manual 7 Adjustments and Maintenance 7.1 External S1 Surface Cleaning Use a damp sponge and wipe dry with a soft cloth. Alternately, window cleaner wiped off with a dry soft cloth works well. 7.2 Routine Group Cleaning The extra pair of shower screens was not included with your S1 so you'd have an extra set. -
Page 19: Group Pressure Test And Adjustment
S1 Owner’s Manual 7.3 Group Pressure Test and Adjustment This adjustment and the one covered in the next section require a portafilter pressure gauge such as the one pictured below which comes mounted on a dedicated portafilter. Your S1 dealer should be able to sell you this one or you can get generic gauges which screw onto your own portafilter spout. - Page 20 S1 Owner’s Manual 1. Adjust the group pressure to 12.5 bar per the following instructions: a) Loosen lock nut "A" using the 14mm wrench b) Tighten nut "B" 1-2 turns using the 10mm wrench c) Turn on pump until pressure on the PF gauge stabilizes d) Repeat steps b &...
-
Page 21: Other Laspaziale S1 Resources
S1 Owner’s Manual to 12 bar all dripping should stop - though it may take a minute or two for residual moisture to drip out. 5. Once you are convinced that the expansion valve is properly calibrated, readjust the rotary pump pressure by unscrewing "B" to reach your preferred pressure - normally in the range of 8.2 to 9.0 bar. -
Page 22: Quick Setting Guide
S1 Owner’s Manual 9 Quick Setting Guide Page 20...
Need help?
Do you have a question about the S1 Vivaldi and is the answer not in the manual?
Questions and answers