
Related Manuals for La Spaziale S1 Rossini


Summary of Contents for La Spaziale S1 Rossini
- Page 1 Rossini Rossini Rossini M A N U A L F O R U S E A N D M A I N T E N A N C E LS C 006 R E V . 01...
-
Page 3: Table Of Contents
INDEX Chap. 1 LEGEND OF THE SYMBOLS USED IN THE MANUAL ........... page 4 PLATES ..........................4 MACHINE OUTFIT ......................4 WARNINGS FOR THE INSTALLER ................5 INSTALLATION ........................ 6 Chap. 2 STARTING OF THE MACHINE ................. page 7 FILLING UP THE WATER TANK ..................7 SWITCHING ON AND HEATING UP OF THE MACHINE .......... -
Page 4: Legend Of The Symbols Used In The Manual
These instructions refer to advised procedures and precautions recommended to grant an easy maintenance or to clear up important operations. PLATES La Spaziale S.p.A. - MADE IN ITALY - ( UCIMAC ) via E. Duse, 8 40033 Casalecchio di Reno BOLOGNA N.F. -
Page 5: Warnings For The Installer
READ CAREFULLY THE FOLLOWING INSTRUCTIONS AS THEY PROVIDE IMPORTANT WARNINGS FOR THE SAFE USE AND MAINTENANCE OF THE MACHINE. This equipement is to be used only for the purpose it was intended for and needs to be installed in a place suitable to its use. -
Page 6: Installation
INSTALLATION • The machine should not be enclosed. • After having unpacked the machine please check its integrity, in case of doubt do not use it and consult the manufacturer. Packaging materials must be removed in order to prevent children from being hurt. Place the machine on a stable bearing surface, by lifting it from its base. -
Page 7: Starting Of The Machine
STARTING THE MACHINE FOLLOW THE INSTRUCTIONS HERE BELOW BY LOOKING AT THE LIST OF COMPONENTS AT THE END OF THIS MANUAL. FILLING UP OF THE TANK 1. Remove the drip-tray (1). 2. Then remove the tank (4) and fill it with drinkable and cold water. 3. -
Page 8: Coffee Brewing Automatic Version
COFFEE BREWING IN THE AUTOMATIC VERSION 1 Unfasten the filterholder (11) from the brewing group (10) and insert the filter for one or two cups. 2 Fill with ground coffee the filterholder (11), using the coffee doser provided, with the one cup filter, making sure not to leave coffee powder on the upper edge of the filterholder, and press it with the suitable coffee tamper provided. -
Page 9: Regulation Of The Operating Temperature Of The Machine
REGULATION OF THE OPERATING TEMPERATURE OF THE MACHINE 1 When the machine is on, press the ON//OFF (27) button and keep it pressed for 3 seconds: the control light (22) and the one concerning the set temperature start flashing. For example, if the set temperature is 105°C the control light (18) starts flashing. -
Page 10: Hot Water Delivery For Infusions
HOT WATER DELIVERY FOR INFUSIONS 1. Place the pitcher below the hot water output (28). 2. Press the hot water delivery push-button (23). 3. The hot water delivery starts (at this stage the pump is working). 4. Once the desired quantity is reached, stop the delivery by pressing the same button (23). After taking hot water, the pump remains on for another 15 seconds (water refill cycle inside the boiler). -
Page 11: Alarms Description
ALARMS DESCRIPTION LACK OF WATER INSIDE THE TANK The lack of water inside the tank (4) is shown by the turning on, on the control panel (9), of the red light (13); fill in the tank with at least 1 litre of drinkable and cold water (the tank contains maximum 3 litres). DAMAGED WATER DOSING SYSTEM FOR COFFEE (only in the automatic version) This alarm indicates that there is an anomaly on the water dosing system to brew coffee. -
Page 12: Chap. 5 Ordinary Maintenance On The Machine
REGULAR MAINTENANCE OF THE EQUIPMENT BY THE USER In order to maintain the efficiency and its proper operation, it is necessary to follow the manufacturer’s instructions carrying out a regular cleaning and maintenance program. WARNING!! The cleaning and maintenance operations must be carried out by the user according to the manufacturer’s instructions as specified below. -
Page 13: Diagrams
DIAGRAMS ELECTRIC DIAGRAM MANUAL FOR USE AND MAINTENANCE LSC 006 REV. 01... -
Page 14: Electric Diagram Automatic Version
ELECTRIC DIAGRAM AUTOMATIC VERSION MANUAL FOR USE AND MAINTENANCE LSC 006 REV. 01... -
Page 15: Control Board Diagram
CONTROL BOARD DIAGRAM SER1 IN HALL 12 V EV H PUMP EV GR PHASE NEUTRUM NEUTRUM TRIAK DIAGRAM F2 in F2 out LED CIRCUIT DIAGRAM SER 2 MANUAL FOR USE AND MAINTENANCE LSC 006 REV. 01... -
Page 16: Diagram List
DIAGRAM LIST EV GR Coffee brewing group electrovalve EV H Hot water delivery electrovalve Selector for control board version (SEMIAUTOMATIC/AUTOMATIC) Connection on control board of the triak feeding the group heating element Connection of the control board on the triak feeding the group heating element SER 1 Connection control panel on control board SER 2... -
Page 17: Components
COMPONENTS 14 15 16 17 18 19 20 21 SEMIAUTOMATIC VERSION 14 15 16 17 18 19 20 21 AUTOMATIC VERSION MANUAL FOR USE AND MAINTENANCE LSC 006 REV. 01... -
Page 18: List Of Components
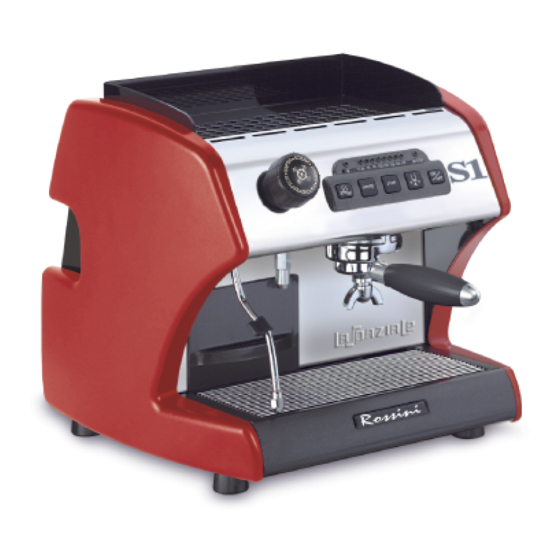
LIST OF COMPONENTS Drip tray Steam wand Foot Water tank Side Knob for steam delivery Upper grid Cup guard Control panel Brewing group Filterholder Drip tray grid Control light for lack of water Control light indicating water temperature for coffee 85°c Control light indicating water temperature for coffee 90°c Control light indicating water temperature for coffee 95°c Control light indicating water temperature for coffee 100°c... - Page 19 01/04 Realized by STUDIO '80 Bologna - Italy...
- Page 20 La Spaziale S.p.A. Via E. Duse, 8 40033 Casalecchio di Reno Bologna - (Italy) Tel. +39 051 611.10.11 Fax +39 051 611.10.40 E-mail: info@laspaziale.com Web Site: www.laspaziale.com...
Need help?
Do you have a question about the S1 Rossini and is the answer not in the manual?
Questions and answers