
Subscribe to Our Youtube Channel
Related Manuals for La Spaziale Seletron S40


Summary of Contents for La Spaziale Seletron S40
- Page 1 espresso coffee machines MANUAL FOR USE AND MAINTENANCE eletron LSC 040 - Rev. 00 - Ed. 12/2009...
- Page 2 Pressurised Equipment Directive – PED Disposal of the equipment by the users within the European Community ( WEEE) in MANUFACTURER: La Spaziale Spa compliance with the article 13 of the legis- ADDRESS: Via E. Duse, 8 - Casalecchio di Reno (BO) ITALIA lative decree issued on 25 July 2005, nr151 ”Implementation of the directives 2002/95/...
- Page 3 It makes your work run smoothly. You have thus more time to think, to express your own creativity, to better fulfil the art of the barman. In planning the new S40, La Spaziale top of the range, the technicians set themselves these goals. They observed gestures, pauses and work spaces to come up with the ergonomic aspects. Then, they dressed the elements of functionality with a high-class aesthetic, as elegance and practicality may blend in an excellent de- sign. Inside the machine, they placed a technological heart, whose components interact with extreme precision, guided by avant-garde electronics. An ample display with LCD graphics guarantees total interaction between the barman and the engineer responsible of maintenance, who in every single moment has full control of the machine. There is rapid and easy access to the technological heart of the S40. Accu- rately programmed control cycles allow to reduce maintenance time and ensure that the machine is kept in a state of maximum efficiency. A personalised card gives access to the management programmes, making the S40 unique and secure in every aspect. The updates of the software controlling the machine are extraordinarily simple. Energy consumption is limited, as after 20 minutes of inactivity the machine goes into “stand-by”. But this in only the start of a journey. The opportunities offered by digital technologies are constantly growing and the S40 is ready to seize them all. La Spaziale S.p.A. LSC 040 - Rev. 00 - Ed. 12/2009...
-
Page 4: Table Of Contents
espresso coffee machines INDEX 5.8 FUNCTION OF THE THERMOSTAT-REGULATED 1. GENERAL DESCRIPTION OF THE MACHINE ......... 5 CUP WARMER SURFACE ............35 1.1 DESCRIPTION OF THE MAIN COMPONENTS OF THE MACHINE ............... 6 6. CLIENT PARAMETER PROGRAM ACCESS ........36 1.1.1 Coffee dispensing touchpad ........... 6 6.1 TIMER ..................38 1.1.2 Control panel ..............7 6.1.1 Daily programming ............40 1.1.3 Display principale ............8 6.1.2 Weekly programming ............ 41 1.2 ORIENTATION OF THE MACHINE .......... - Page 5 espresso coffee machines 10. MANAGEMENT OF THE ALARMS ..........78 10.1 ALARM MESSAGES VISUALISED ON THE MAIN DISPLAy ............. 78 10.2 ALARM MESSAGES VISUALISED ON THE FRONT DISPLAy ............78 10.2.1 Alarms relative to the auto-level system ...... 79 10.3 MESSAGES VISUALISED ON THE COFFEE DISPENSING GROUPS’ DISPLAyS ..............87 11. TECHNICAL DATA ................89 LSC 040 - Rev. 00 - Ed. 12/2009...
- Page 6 espresso coffee machines LSC 040 - Rev. 00 - Ed. 12/2009...
-
Page 7: General Description Of The Machine
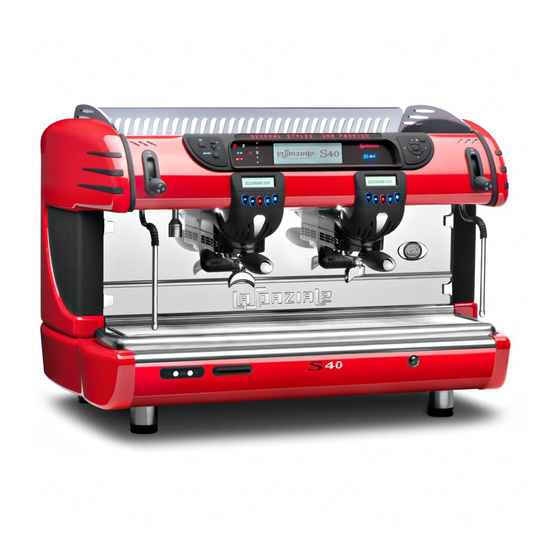
1. GENERAL DESCRIPTION OF THE MACHINE The S40 coffee machine is designed and manufactured by LA SPAZIALE S.p.A. to increase the profitability of the buffet bar service by reducing operating costs to the minimum. Fig. 1 LEGEND 8. Water collection basin + grill 16. One-cup filter holder 1. Selector touchpad 9. Adjustable foot 17. Left steam wand 2. Main display 10. M.A.T. dispensing system touchpad 18. Water supply wand for infusions 3. Navigation touchpad (optional) 19. Coffee dispensing group 2 touchpad 4. Coffee dispensing group 1 touchpad 11. Main on/off switch 20. Coffee dispensing group display 5. Right steam tap 12. Two-cup filter holder... -
Page 8: Description Of The Main Components Of The Machine
espresso coffee machines 1.1 DESCRIPTION OF THE MAIN COMPONENTS OF THE MACHINE 1.1.1 Coffee dispensing touchpad Fig. 2 LEGEND 1. Display 7. 1 short coffee key 2. 2 long coffees’ key 3. 2 short coffees’ key 4. Work surface illumination LED 5. Continuous delivery key 6. 1 long coffee key LSC 040 - Rev. 00 - Ed. 12/2009... -
Page 9: Control Panel
espresso coffee machines 1.1.2 Control panel Fig. 3 LEGEND 1. Cup warmer heating plate on/off key 2. Cup warmer heating plate temperature increase key 3. Logo 4. OK key 5. Scroll up arrow key 6. Stand-by/on key 7. Scroll right arrow key 8. Scroll down arrow key 9. Scroll left arrow key 10. Main display 11. On/off manual boost key 12. Cup warmer heating plate temperature decrease key LSC 040 - Rev. 00 - Ed. 12/2009... -
Page 10: Display Principale
espresso coffee machines 1.1.3 Display principale 120° C Fig. 4 LEGEND SYMBOLS 1. Boiler pressure Stand-by 2. Boiler temperature EGS function “ON” 3. Compensation temperature Automatic level “ON” 4. Water supply or motor pump pressure Temperature increase signal 5. Series and model of the machine Compensation function “ON” 6. M.A.T. temperature setting programme Cup warmer resistances system (optional) “ON” 7. Hour and date Temperature decrease signal Level indicator 8. Message area Economy function activated 9. Hot water dispensing times setting programme for infusions... -
Page 11: Orientation Of The Machine
espresso coffee machines 1.2 ORIENTATION OF THE MACHINE To ensure that each reference to the various parts of the machine (front, rear, etc.) that appear in this manual is clear and unmistakable, the orientation of the machine is as represented in this figure. Any exceptions to this rule will be specified. UPPER PART RIGHT SIDE REAR PART FRONT PART LEFT SIDE LOWER PART Fig. 5 LSC 040 - Rev. 00 - Ed. 12/2009... -
Page 12: General Advice For The Installer
espresso coffee machines 2. GENERAL ADVICE FOR THE INSTALLER Read carefully the instructions and warnings contained in this manual and in the “INSTRUCTION MANUAL FOR THE INSTALLER”, since they provide important indications concerning the installation of the appliance. Attention! The electric system, water system and drainage system MUST BE put in place by the customer in a suitable position to allow correct installation. The installation engineer cannot change the existing system put in place by the customer. See chapter 2.2: “Arrangements for installation provided by the customer”. Attention! The appliance must be installed where use and maintenance are restricted to trained staff. 2.1 GENERAL WARNINGS Attention! CAREFULLY READ THE FOLLOWING WARNINGS, WHICH OFFER IMPORTANT GUIDELINES FOR THE SAFE USE AND MAINTENANCE OF THE APPLIANCE. The appliance must only be used for its intended purpose and it must be installed in a suitable place for its use. Any other use is there- fore considered as improper and unreasonable. The manufacturer cannot be held liable for any damage caused by improper, incorrect or unreasonable use. Installation must be carried out by qualified personnel according to current laws and to the manufacturer’s instructions. Incorrect installation may cause damage to people, animals or property for which the manufacturer cannot be held liable. LSC 040 - Rev. 00 - Ed. 12/2009... - Page 13 espresso coffee machines Danger! The electrical safety of the appliance is fully achieved only after it has been correctly connected to an earthing system as required by the laws in force. It is necessary to have the earthing connection checked by professionally qualified personnel. The manufacturer cannot be held liable for any damage caused by the lack or inefficiency of the system’s earthing connection. The appliance has not been designed for outdoor use. It must only be operated in a place where the ambient temperature is between +5°C and +40°C. Attention! The use of any electrical appliance also requires observance of the following important regulations. • Do not touch the appliance with wet or damp hands or feet. • Do not use the appliance barefooted. • Do not pull the power supply cord to unplug the appliance from the mains power. • Do not allow children or unqualified persons to use the appliance. • Access to the appliance’s service area must be restricted to those persons with the relevant practical experience and familiarity with the appliance itself, especially in terms of safety and hygiene. • Before carrying out any routine maintenance or cleaning operation, disconnect the appliance from the mains power and shut off the water supply tap. • In the event of damage and/or malfunction of the appliance, switch it off completely without trying to make any direct repairs. Contact the nearest Service Centre authorised by the manufacturer. • In order to guarantee the proper efficiency and operation of the appliance, it is fundamentally important to follow the manufacturer’s instructions, and to follow a regular maintenance schedule. • The appliance has IPX2 protection against water and therefore, it cannot be installed in areas where it may be subject to jets of water. • The appliance has class I protection against electric shocks. • The noise emitted by the appliance during normal operation is less than 70 dB. LSC 040 - Rev. 00 - Ed. 12/2009...
-
Page 14: Installation Requirements For The User
espresso coffee machines Attention! Failure to comply with the above regulations could jeopardise the correct operation and safety of the appliance as well as its useful lifetime. Warning! The appliance is supplied without a plug. It is supposed to be directly connected to the electric mains and therefore, it is necessary to fit a single-pole switch with contact opening of 3 mm or more beforehand, according to the regulations in force . 2.2 INSTALLATION REQUIREMENTS FOR THE USER The machine has to be placed on a stable flat surface that can Legend: guarantee a safe position. Check this important requirement, since the manufacturer cannot be considered liable for any dam- 1 Single pole switch age caused by the instability of the appliance. While preparing with an opening of at least 3 mm between the systems, take into account that a hole is needed in the bear-... - Page 15 espresso coffee machines • Between the water mains and the water inlet pipe of the appliance, there must be a tap to stop the water flow if necessary (2 - Pict.6). • The water mains pressure must be within the range of 1 and 5 bar. • If this requirement is not met, please consult the manufacturer. • The appliance is supplied without a plug. It is supposed to be directly connected to the electric mains and therefore, it is necessary to fit a single-pole switch with contact opening of 3 mm or more beforehand, according to the regulations in force (1 - Pict.6). • The drainpipe of the appliance must be directly connected to a suitable open drain siphon, previously installed by the customer (3 - Pict.6). Do not fit the drain pipe into basins or buckets placed under the counter as this will increase the possibility of forming dirt deposits and as a result, the spread of bacteria. Attention! The appliance is supplied without water in the boiler. This is to prevent serious damage if the appliance is exposed to low temperatures. The appliance must only be supplied with cold drinking water. LSC 040 - Rev. 00 - Ed. 12/2009...
-
Page 16: Warning/Technical Data Labels And Nameplates Applied To The Machine
2.3 WARNING/TECHNICAL DATA LABELS AND NAMEPLATES APPLIED TO THE MACHINE. In the figure below are shown the warning/technical data labels and nameplates positioned on the machine. Warning! Dedicate the time necessary to familiarise yourself with these labels. Ensure that they are readable and keep them clean or replace those that have deteriorated or illegible (both the text and the graphics). Use a soft cloth, soap and water to clean the labels. Do not use solvents, petrol, etc. If a label is positioned on a component part that has to be replaced, ensure that the new component has the same label ap- plied or a new one. La Spaziale S.p.A. - MADE IN ITALY - via E. Duse, 8 ( UCIMAC ) 40033 Casalecchio di Reno BOLOGNA N.F. 2009 Espresso machines 255600 SERIES: S40 - MOD. -
Page 17: Removing The Packaging
espresso coffee machines 3 REMOVING THE PACKAGING After unpacking the machine, please check its integrity; in case of doubt, do not use it and consult themanufacturer. Packaging materials must not be left within children’s reach since they are potentiallydangerous. Attention! The appliance weight is more than 30 kg and therefore, it cannot be moved by a single person alone. Take note! Dispose of the packaging as per the norms in force of the country in which the machine is utilised. LSC 040 - Rev. 00 - Ed. 12/2009... -
Page 18: Standard Equipment Of The Machine
espresso coffee machines 3.2 STANDARD EQUIPMENT OF THE MACHINE FILTER HOLDER 1 CUP FILTERS GROUPS UNIT 1 CUP SPOUT 2 CUP FILTERS GROUPS UNIT 2 CUP SPOUT 1 SET OF SHOWER HEADS GROUPS UNIT GROUPS UNIT CONNECTION 1 BOX SPANNER FOR WATER SUPPLY HOSES SHOWER HEAD REMOVAL QUANTITY... -
Page 19: Optional Accessories
espresso coffee machines MANUAL COFFEE TAMPER CUSTOMER CARD MOTOR POMP (When the pump is not incorporated in the machine) 3.3 OPTIONAL ACCESSORIES (Supplied only at the request of the customer) WATER SOFTENER PRESSURE REDUCER FILTER DETERGENT LSC 040 - Rev. 00 - Ed. 12/2009... -
Page 20: Commissioning The Machine
espresso coffee machines 4. COMMISSIONING THE MACHINE a) Open the water supply valve as envisaged in the preparations for installation (See Fig. 6 on page 12 - Ref. 2). b) Check for any water leaks from the hosing/connections. c) Switch on the main breaker as envisaged in the preparations for installation (See Fig. 6 on page 12 - Ref. 1). LSC 040 - Rev. 00 - Ed. 12/2009... -
Page 21: Switching On The Machine
espresso coffee machines espresso coffee machines 5 SWITCHING ON THE MACHINE 1. Move the switch positioned on the lower panel of the machine to the “I” position. Fig. 8 2. The machine goes into STAND-BY mode and the warning lights (represented in the figure on the right) on the control panel come on (the symbol flashes). Fig. 9 3. Keep the stand-by key pressed for three seconds; a general check is carried out during which all symbols on the control panel light up without flashing for two 120° C seconds and the main display is subsequently visualised as shown in the figure. Take note! 120°... -
Page 22: Filling Up With Water
espresso coffee machines 5.1 FILLING UP WITH WATER 120° C Three seconds after switching on, the machine automatically fills the boiler with water (Fig. 11). 120° C Fig. 11 When the boiler filling phase is finished, the relative filling warning light switches off and then a check/adjustment of the motor pump must be carried out. 5.1.1 Water level indicator of the boiler 120° C The level indicator positioned on the right of the main display indicates the level of water in the boiler. 120° C - EMPTY INDICATOR When the level of water in the boiler has not reached the minimum level to ensure the functioning of the machine, the level indicator symbol is shown as in the figure on the right. Fig. 12 LSC 040 - Rev. 00 - Ed. 12/2009... - Page 23 espresso coffee machines - LEVEL “1” REACHED 120° C The symbol is visualised when the level of water in the boiler has reached the minimum level to ensure the functioning of the machine, but not at the level pre- established by the manufacturer. 120°...
-
Page 24: Appliance Heating And Preparation Stage
espresso coffee machines 5.2 APPLIANCE HEATING AND PREPARATION STAGE 1. Attach the filter holders to the delivery groups. Fig. 16 2. Open the steam delivery valves by moving the dial upwards and leave them open: then move the steam wands over the grille. Fig. 17 3. Wait for steam to come out of the relevant wands (approx, 15-20 minutes) then close the steam valves by returning the dial to the initial position. Fig. 18 LSC 040 - Rev. 00 - Ed. 12/2009... - Page 25 espresso coffee machines 4. Wait for the appliance to reach the running temperature. The groups display will show the screen opposite. SELECT DOSE STOR 24.5 s PREV 10.8 s Fig. 19 Each time that the temperature inside the boiler drops to below the SET LEVEL, the 120° C main display will show the screen opposite. BOILER HEATING 118° C BOILER HEATING Fig. 20 Take note! The running temperature is the temperature of the boiler during normal operation.
-
Page 26: Coffee Preparation
espresso coffee machines 5.3 COFFEE PREPARATION 1. Remove a filter holder from the delivery group. Fig. 21 2. Fill with ground coffee, taking care not to leave any coffee powder residues on the top edge of the filter holder, then press it using the special coffee press supplied. Fig. 22 3. Re-insert the filter holder firmly but not excessively. Fig. 23 LSC 040 - Rev. 00 - Ed. 12/2009... - Page 27 espresso coffee machines 4. Place one or two cups under the filter holder (according to whether you wish to pour 1 or 2 cups of coffee). Fig. 24 5. Press one of the delivery buttons (A - B - D - E) with programmed doses (during installation) or alternatively, use the button (C) for free flow delivery. Fig. 25 Take note! To stop a delivery commenced using one of the programmed dose buttons, press the (C) key on the same touchpad. LSC 040 - Rev. 00 - Ed. 12/2009...
- Page 28 espresso coffee machines While delivering the coffee, the group display shows the screen opposite. Represents the icon for the selected coffee dose with alongside, a bar to show the delivery progress. STOR 24.5 s PREV 10.8 s The seconds stored during the dose programming stage for the selected dose (MEM) are shown under the bar, while alongside are the seconds indicating the actual progress of delivery (DEL). Fig. 26 Once delivery has finished, the group display will show the screen opposite. SELECT DOSE The bottom of the display shows the seconds stored during the dose programming STOR 24.5 s PREV 10.8 s stage for the last dose selected (MEM) and alongside, the duration, in seconds, of the last dose delivered (PREV).
-
Page 29: Steam Delivery
espresso coffee machines 5.4 STEAM DELIVERY 1. Insert the steam wand into a jug containing the beverage to be heated. Fig. 29 2. Move the dial of the corresponding steam wand upwards. Adjust the steam flow as required. Fig. 30 3. When the beverage is sufficiently hot, shut off the steam by moving the dial to its original position, remove the jug away from the steam wand and wipe off any residues immediately using a damp sponge. Fig. 31 LSC 040 - Rev. 00 - Ed. 12/2009... -
Page 30: Delivering Water To Prepare Infusions
espresso coffee machines 5.5 DELIVERING WATER TO PREPARE INFUSIONS 1. Place a jug under the hot water delivery wand. Fig. 32 2. The hot water delivery wand is enabled from the touchpad on the left of the bottom front panel on the appliance. The touchpad has 2 keys; the first serves to deliver 100% hot water, while the sec- ond serves to deliver hot water mixed to a set temperature that can be adjusted during the installation stages of the appliance. WATER Fig. 33 Attention! Do not use the touchpad to deliver water before first placing the jug under the hot water wand. Danger of scalds and burns. LSC 040 - Rev. 00 - Ed. 12/2009... -
Page 31: Semiautomatic Mode
espresso coffee machines 5.5.1 Semiautomatic mode With the semiautomatic delivery mode enabled (programmed by the engineer); the touchpad keys will operate semi automatically (ON/OFF) and not timed. 5.5.2 Automatic mode With the automatic delivery mode enabled (programmed by the engineer), the touch- pad keys will operate automatically and delivery from the wand will take place for the time set during the appliance installation stage. LSC 040 - Rev. 00 - Ed. 12/2009... -
Page 32: Automatic Milk Emulsion With Temperature Adjustment - M.a.t. (Optional)
espresso coffee machines 5.6 AUTOMATIC MILK EMULSION WITH TEMPERATURE ADJUSTMENT - M.A.T. (OPTIONAL) The appliance can be equipped with a system that allows you to emulsify milk at a set temperature and completely automatically. 1. Insert the steam wand, complete with probe, into the jug of milk. Fig. 34 2. The M.A.T. wand is started up from the touchpad on the right-hand side of the bottom front panel of the appliance. The touchpad has 2 keys corresponding to 2 different SET temperatures pro- grammed previously by the engineer. - Page 33 espresso coffee machines 4. At the end of the emulsion process, remove the jug and wipe any residues from the steam wand and temperature probe away immediately, using a damp sponge. Fig. 37 Attention! Do not press the M.A.T. system delivery button before inserting the steam wand with temperature probe into the jug; danger of burns and scalds. LSC 040 - Rev. 00 - Ed. 12/2009...
-
Page 34: Boost Function
espresso coffee machines 5.7 BOOST FUNCTION This function has the purpose of optimising the management of the boiler resistances of the machine.. The “Boost” function permits taking advantage of the whole power available of the machine so as to have a greater thermal reset speed. The menu also offers the possibility of activating the “Manual” and “Automatic” func- tions. - MANUAL BOOST The “Boost” function can be activated manually. 120° C Pressing the “BOOST” key on the control panel, the “Boost ON” warning light indi- cates that the function is active. Pressing the “BOOST” key again, the boost indicator light will switch off, indicating that the function is not enabled. 120° C Fig. 38 LSC 040 - Rev. 00 - Ed. 12/2009... - Page 35 espresso coffee machines - AUTOMATIC BOOST The “Boost” function can be activated also in automatic mode. In automatic mode the function is active only when there is a drop in temperature in the boiler more than 5°C in respect of the set temperature. The active function is visualised by the relative flashing warning light on the control panel Fig. 39 LSC 040 - Rev. 00 - Ed. 12/2009...
-
Page 36: Economy Function
espresso coffee machines 5.7.1 Economy FUNCTION After 20 minutes with the machine at a standstill, the “Economy” function is automati- cally activated. In this state, the total power of the appliance is reduced for the purpose of maintaining the running temperature. When another delivery is requested, the “Economy” function is deactivated immediately. The active “Economy” function is highlighted by the switching on of the relative warn- ing light on the control panel. Fig. 40 LSC 040 - Rev. 00 - Ed. 12/2009... -
Page 37: Function Of The Thermostat-Regulated Cup Warmer Surface
espresso coffee machines 5.8 FUNCTION OF THE THERMOSTAT-REGULATED CUP WARMER SURFACE 120° C BOOST BOOST The machine is equipped with a thermostat-regulated cup warmer surface that keeps the coffee cups at a determined uniform temperature. To activate the heating of the cup warmer surface, press the relative key on the control panel and check the switching on of the relative symbol BOILER 1 BAR The symbol flashes whilst the surface is heating up and remains fixed when the set temperature has been reached. The temperature of the heating of the cup warmer sur- SET H2O face can be increased or decreased using the increase and decrease keys positioned at the side of the heating key of the cup warmer surface. Fig. 41 The relative variation in temperature is visualised by the switching on/off of the ( ) symbols on the basis of the desired temperature step level. 120° C BOILER HEATING Take note! To modify the base temperature of the cup warmer surface (Refer to “IN- BOILER 1 BAR STRUCTION MANUAL FOR THE INSTALLER”). -
Page 38: Client Parameter Program Access
espresso coffee machines 6. CLIENT PARAMETER PROGRAM ACCESS The “Customer Card“ supplied with each appliance makes it possible to change some of its functions. Insert the “Customer Card“ into the special reader in the front panel (bottom left). Fig. 44 Access to the programming phase is confirmed by an acoustic signal and the main display visualises the “Main menu” viewing panel on the display. It is now possible to remove the “Customer Card” from the reader. Take note! Sixty seconds after pressing the last key, the machine automatically exits from the programming phase. The data set previously is memorised. LSC 040 - Rev. 00 - Ed. 12/2009... - Page 39 espresso coffee machines The “Main Menu” contains 2 screens concerning the parameters to be programmed. To pass from one viewing panel to another, use the navigation touchpad to position TIMER INFO BEEP CALENDAR COUNTER LANGUAGE the cursor on the “” symbol and press the “OK” key. TIMER INFO BEEP CALENDAR COUNTER LANGUAGE Fig. 45 The display visualises the viewing panel on the right. CLEANING GRINDING CONTROL LOGO SCREENSAVER CLEANING GRINDING CONTROL LOGO SCREENSAVER Fig. 46 LSC 040 - Rev. 00 - Ed. 12/2009...
-
Page 40: Timer
espresso coffee machines 6.1 TIMER This programme permits the programming of the switching on time and switching off time of the machine. Position the cursor on the “Timer” menu and press “OK”; the display will show the screen opposite. The function is enabled by default. Fig. 47 To enable the “Timer” function, position the cursor to “ON” and press the “OK” key to confirm. Fig. 48 Enabling the “Timer” function, the relative warning light on the control panel comes on. Fig. 49 LSC 040 - Rev. 00 - Ed. 12/2009... - Page 41 espresso coffee machines The main display visualises the viewing panel on the right. TUES WEDN THUR TUES WEDN THUR Fig. 50 Programming the “Timer” function to switch the machine on/off can be on a daily or weekly basis. LSC 040 - Rev. 00 - Ed. 12/2009...
-
Page 42: Daily Programming
espresso coffee machines 6.1.1 Daily programming Using the navigation touchpad, position the cursor on the chosen day of the week for 00:00 00:00 TUES WEDN THUR switching the machine on and press the “OK” key to highlight it. 00:00 00:00 TUES WEDN THUR Fig. 51 Subsequently, position the cursor on the time to switch on the machine and set the time using the navigation touchpad (HH:MM). 06:00 00:00 TUES WEDN THUR 00:00 06:00 TUES WEDN THUR Fig. 52 Using the navigation touchpad, set the time for switching off the machine. 06:00 22:00 TUES WEDN THUR When the settings have been carried out, press the “OK” key to confirm. -
Page 43: Weekly Programming
espresso coffee machines 6.1.2 Weekly programming Using the navigation touchpad, position the cursor on the chosen day of the week for 00:00 00:00 TUES WEDN THUR switching the machine on and press the “OK” key to highlight it. 00:00 00:00 TUES WEDN THUR Fig. 54 Subsequently, position the cursor on the time to switch on the machine and set the time using the navigation touchpad (HH:MM). 06:00 00:00 TUES WEDN THUR When the settings have been carried out, press the “OK” key to confirm. 06:00 00:00 TUES WEDN THUR Fig. 55 Using the navigation touchpad, set the day for switching off the machine. The example on the right shows the machine has been set to come on at 06.00 on 06:00 TUES 22:00 WEDN THUR Monday and 22.00 on Saturday; Sunday the machine is switched off. -
Page 44: Timer Active
espresso coffee machines 6.1.3 Timer active If the “Timer” function is activated, the main display alternates the visualisation of the 120° C date and current hour with the day and hour that the machine switches off. 120° C Fig. 57 When the machine is switched off by the timer, the main display shows the informa- tion on the right. TIMER ATTIVO PROSSIMA ACCENSIONE VENERDI ORE 08:00 ACTIVE TIMER NEXT SWITCHING ON FRIDAY TIME 08:00 Fig. 58 If it is necessary to switch the machine on before the pre-established time set by the “Timer” function, consecutively press the ON key on the control panel for three 120°... -
Page 45: Leds
espresso coffee machines 6.2 LEDs From the “Main Menu” page, use the navigation touchpad to select the “LED” menu TIMER INFO BEEP CALENDAR COUNTER and press “OK” to open it. LANGUAGE The display visualises the possibility of activating/deactivating the illumination of the work surface TIMER INFO BEEP CALENDAR COUNTER LANGUAGE Fig. 60 This function is not enabled by default. AUTO AUTO Fig. 61 To enable this function, position the cursor on “ON” and press the “OK” key to confirm. The work surface is now illuminated by the LEDs positioned to the side of each coffee AUTO dispensing group. AUTO Fig. 62 LSC 040 - Rev. 00 - Ed. 12/2009... - Page 46 espresso coffee machines Activating the “Auto” function, the two LEDs positioned at the side of each dispens- ing coffee group are switched on only during the coffee dispensing phase. AUTO AUTO Fig. 63 LSC 040 - Rev. 00 - Ed. 12/2009...
-
Page 47: Calendar
espresso coffee machines 6.3 CALENDAR From the “Main Menu” screen, use the navigation touchpad to select the “Calendar” TIMER INFO BEEP CALENDAR COUNTER LANGUAGE menu and press “OK” to open it. TIMER INFO BEEP CALENDAR COUNTER LANGUAGE Fig. 64 - DATE Using the navigation touchpad, enter the “Date” menu and the display visualises the DATE TIME DAY LIGHT viewing panel on the right. Pressing the right/left arrows of the navigation touchpad, select the parameter to modify. Press the “OK” key to highlight it and modify the parameter using the up/ down keys of the navigation touchpad. - Page 48 espresso coffee machines - HOURS From the “Calendar” menu place the cursor on the inscription “Hour” and press the “OK” key to gain access. 12:54 The display visualises the actual time. Using the left/right arrow keys of the navigation touchpad, select the parameter to modify and press the “OK” key to highlight it. Use the up/down arrow keys of the navigation touchpad to modify the parameter. 12:54 Having modified the parameters, position the cursor on the “Calendar” menu using the navigation touchpad and press the “OK” key to return to the “Calendar” menu or posi- Fig. 67 tion the cursor on the “Main menu” and press the “OK” key to return to the main menu. - SUMMER TIME From the “Calendar” menu place the cursor on the inscription “Summer time” and press the “OK” key to gain access. Using the navigation touchpad, position the cursor on the desired parameter and press the “OK” key to select it. Fig.
-
Page 49: Language
espresso coffee machines 6.4 LANGUAGE From the “Main Menu” screen, use the navigation touchpad to select the “Language” TIMER INFO BEEP CALENDAR COUNTER LANGUAGE menu and press “OK” to open it. TIMER INFO BEEP CALENDAR COUNTER LANGUAGE Fig. 70 Pressing the right/left arrow keys of the navigation touchpad select the parameter to modify, press the “OK” key to highlight it and the up/down arrow keys of the naviga- ITALIANO tion touchpad to modify the parameter. ITALIANO Fig. 71 LSC 040 - Rev. 00 - Ed. 12/2009... -
Page 50: Info
espresso coffee machines 6.5 INFO From the “Main Menu” screen, use the navigation touchpad to select the “Info” menu TIMER INFO BEEP and press “OK” to open it. CALENDAR COUNTER LANGUAGE TIMER INFO BEEP CALENDAR COUNTER LANGUAGE Fig. 72 The “Info” menu contains a viewing panel displaying all the main information of the machine. SERIAL NUMBER SOFTWARE RELEASE WEB SITE: WWW.LASPAZIALE.COM MAIN MENU SERIAL NUMBER SOFTWARE RELEASE WEB SITE: WWW.LASPAZIALE.COM MAIN MENU Fig. -
Page 51: Serial Number
espresso coffee machines 6.5.1 Serial number Using the navigation touchpad enter the “Info” menu, select the “Serial number” SERIAL NUMBER SOFTWARE RELEASE WEB SITE: WWW.LASPAZIALE.COM menu and press the “OK” key to gain access. MAIN MENU SERIAL NUMBER SOFTWARE RELEASE WEB SITE: WWW.LASPAZIALE.COM MAIN MENU Fig. 74 The main display visualises the machine’s serial number. 400004 400004 Fig. -
Page 52: Software Release
espresso coffee machines 6.5.2 Software release Using the navigation touchpad enter the “Info” menu, select the “Software release” SERIAL NUMBER SOFTWARE RELEASE menu and press the “OK” key to gain access. WEB SITE: WWW.LASPAZIALE.COM MAIN MENU SERIAL NUMBER SOFTWARE RELEASE WEB SITE: WWW.LASPAZIALE.COM MAIN MENU Fig. 76 The main display visualises a viewing panel in which all versions of the various firmware in the machine are present. -
Page 53: Beep
espresso coffee machines 6.6 BEEP From the “Main Menu” screen, use the navigation touchpad to select the “Beep” TIMER INFO BEEP CALENDAR COUNTER menu and press “OK” to open it. LANGUAGE The display visualises the possibility of activating/deactivating the audible warning associated to pressing certain keys and the appearance of alarm messages. TIMER INFO BEEP CALENDAR COUNTER LANGUAGE Fig. -
Page 54: Counter
espresso coffee machines 6.7 COUNTER This function has the purpose of counting the number of deliveries supplied during TIMER INFO BEEP CALENDAR COUNTER the life cycle of the machine. LANGUAGE Using the navigation touchpad enter the “Main menu”, select the “Counter” menu and press the “OK” key to gain access. TIMER INFO BEEP CALENDAR COUNTER LANGUAGE Fig. 81 The menu visualises an initial viewing panel in which the partials and totals of the deliveries of coffee, water for infusions and cappucini are indicated. COFFEE WATER FOR CAPPUCCINO INFUSIONS... - Page 55 espresso coffee machines Position the cursor on a pre-chosen coffee dispensing group. Press the “OK” key and the total and partial deliveries subdivided by doses are visualised RESETTABLE TOTAL TOTAL RESETTABLE TOTAL TOTAL Fig. 84 Positioning the cursor on “Coffee” and then on “Counter”, the first viewing panel “Counter” returns. COFFEE WATER FOR CAPPUCCINO INFUSIONS RESETTABLE TOTAL TOTAL Positioning the cursor on “Water for infusions” and pressing the “OK” key, the cal- culation of the deliveries of water for infusions is visualised. COFFEE WATER FOR CAPPUCCINO INFUSIONS RESETTABLE TOTAL...
- Page 56 espresso coffee machines Positioning the cursor on “Counter” and pressing the “OK” key, the first viewing panel “Counter” returns. COFFEE WATER FOR CAPPUCCINO Positioning the cursor on “Cappuccino” and pressing the “OK” key, the calculation INFUSIONS RESETTABLE TOTAL TOTAL of the deliveries supplied by the M.A.T. system are visualised COFFEE WATER FOR CAPPUCCINO INFUSIONS RESETTABLE TOTAL TOTAL Fig. 87 Pressing the “OK” key, the total and partial deliveries of cappuccino relative to the first and second selection are visualised. RESETTABLE TOTAL TOTAL 1°...
-
Page 57: Reset Counter
espresso coffee machines 6.7.1 Reset counter In the main “Counter” viewing panel, position the cursor on “Reset” and press the COFFEE WATER FOR CAPPUCCINO INFUSIONS RESETTABLE TOTAL TOTAL “OK” key to zero all partial calculations memorised by the machine. COFFEE WATER FOR CAPPUCCINO INFUSIONS RESETTABLE TOTAL TOTAL Fig. 89 When a request for a confirmation appears, press the “OK” key again to proceed. ATTENTION: PUSHING OK ALL THE RESETTABLE COUNTERS WILL BE RESET ATTENTION: PUSHING OK ALL THE RESETTABLE COUNTERS WILL BE RESET Fig. -
Page 58: Grinding Control
espresso coffee machines 6.8 GRINDING CONTROL This function advises the operator if extraction times are not correct by referring to the CLEANING GRINDING CONTROL LOGO SCREENSAVER previously memorised data. From the “Main Menu” screen, use the navigation touchpad to select the “Grinding Control” menu and press “OK” to open it. CLEANING GRINDING CONTROL The display visualises the possibility of activating/deactivating the control of the LOGO SCREENSAVER amount of coffee grinding. Fig. 92 This function is disenabled by default. Fig. 93 To activate the function, position the cursor on “ON” and press the “OK” key to con- firm. Fig. - Page 59 espresso coffee machines Once the function is activated, select the tolerance (expressed in seconds) to be con- sidered with regards to previously memorised parameters and press the “OK” key. E.g. Memorised extraction time - 25 sec. Selection tolerance - 5 sec. Coarse grinding advice with extractions < 20 sec. Fine grinding advice with extractions > 30 sec. 10s 15s Any coarse or fine grinding advices are visualised on the coffee dispensing group Fig. 95 display when dispensing has terminated. LSC 040 - Rev. 00 - Ed. 12/2009...
-
Page 60: Logo
espresso coffee machines 6.9 LOGO This function is used to switch the logo over the display on or off. CLEANING GRINDING CONTROL LOGO SCREENSAVER From the “Main Menu” screen, use the navigation touchpad to select the “Logo” menu and press “OK” to open it. CLEANING GRINDING CONTROL LOGO SCREENSAVER Fig. 96 This function is active by default. Fig. 97 To deactivate the function, position the cursor on “OFF” and press the “OK” key to confirm. Fig. 98 LSC 040 - Rev. 00 - Ed. 12/2009... -
Page 61: Cleaning
espresso coffee machines 6.10 CLEANING From the “Main Menu” screen, use the navigation touchpad to select the “Cleaning” CLEANING GRINDING CONTROL LOGO SCREENSAVER menu and press “OK” to open it. CLEANING GRINDING CONTROL LOGO SCREENSAVER Fig. 99 The display visualises the possibility of activating the washing/cleaning of the coffee dispensing groups or the washing of the boiler. GROUPS WASHING BOILER WASHING GROUPS WASHING BOILER WASHING Fig. 100 - WASHING/CLEANING THE COFFEE DISPENSING GROUPS In the “Washing” menu, the cursor is positioned on “Group washing”. Press the GROUPS WASHING BOILER WASHING “OK” key to gain access... - Page 62 espresso coffee machines The main display visualises the viewing panel on the right. ACTIVATE THE WASHING CYCLE FOR THE DEDICATED GROUPS ACTIVATE THE WASHING CYCLE FOR THE DEDICATED GROUPS Fig. 102 The displays of the coffee dispensing groups visualise the viewing panel on the right. PUSH START CLEANING Fig. 103 Press the “Continuous delivery” key to activate the washing cycle. PUSH START CLEANING Fig. 104 LSC 040 - Rev. 00 - Ed. 12/2009...
- Page 63 espresso coffee machines The delivery group cleaning cycle consists of 5 seconds of water delivery from the groups with a 5-second pause, which allows the brush (provided) to be used as well PUSH STOP CLEANING as the blind filter supplied by the Technical Assistance Service. The displays of the coffee dispensing groups visualise the viewing panel on the right. Fig. 105 Press the “Continuous delivery” key to conclude the washing cycle of the coffee PUSH STOP CLEANING dispensing groups Take note! The deliveries made during the washing cycle are not taken into account in the counter menu. Fig. 106 - WASHING/CLEANING THE BOILER In the “Washing” menu, position the cursor on “Wash boiler” and press the “OK” key GROUPS WASHING BOILER WASHING to gain access...
- Page 64 espresso coffee machines Subsequently, a viewing panel confirming the operation appears. Press the “OK” key to activate the boiler washing cycle. PUSH THE OK BUTTON TO ACTIVATE THE BOILER WASHING CYCLE PUSH THE OK BUTTON TO ACTIVATE THE BOILER WASHING CYCLE Fig. 108 The main display indicates that the washing cycle of the boiler is in progress. PUSH THE OK BUTTON TO ACTIVATE THE BOILER WASHING CYCLE The machine completely empties the boiler and resets it. To stop the washing cycle in advance, press the “OK” key again. PUSH THE OK BUTTON TO ACTIVATE THE BOILER WASHING CYCLE Fig.
-
Page 65: Egs
espresso coffee machines 6.11 EGS This function maintains the coffee pod moist that is used inside the filter holder in CLEANING GRINDING CONTROL LOGO SCREENSAVER case it is not used for more than 30 minutes. From the “Main Menu” screen, use the navigation touchpad to select the “Egs” menu and press “OK” to open it. CLEANING GRINDING CONTROL The display visualises the possibility of activating/deactivating this function. LOGO SCREENSAVER Fig. 111 This function is not active by default. Fig. 112 To activate the function, position the cursor on “ON” and press the “OK” key to confirm Fig. - Page 66 espresso coffee machines With the EGS function active, a small quantity of water is poured into the filter holder every thirty minutes of inactivity of the coffee dispensing group so as to avoid exces- sive drying of the coffee grouts contained in it. 120° C BOILER HEATING The active function is visualised on the left, upper part of the main display of the machine. 120° C BOILER HEATING Fig. 114 The imminent activation of the cycle is signalled to the operator 30 seconds before by ATTENTION EGS CYCLE ACTIVE an acoustic signal and 15 seconds before by a further acoustic signal. Attention! Whilst the EGS cycle is functioning, do not remove the filter holders to avoid being burned by boiling water.
-
Page 67: Screensaver
espresso coffee machines 6.12 SCREENSAVER This function permits the composition of a message that will be visualised on the main CLEANING GRINDING CONTROL LOGO SCREENSAVER display when the machine remains inactive for more than two minutes. From the “Main Menu” screen, use the navigation touchpad to select the “Egs” menu and press “OK” to open it. CLEANING GRINDING CONTROL LOGO SCREENSAVER Fig. 116 This function is not active by default. Position the cursor on “ON” and press the “OK” key to enable the “screensaver” function. Fig. 117 Using the navigation touchpad, choose the letter or number to be composed and press the “OK” key. - Page 68 espresso coffee machines The characters chosen are visualised in the “text preview line”. To cancel the last character, select the symbol and press the “OK” key. Fig. 119 To modify the text use the navigation touchpad to select the symbols, press the “OK” key and the cursor of the “text preview line” moves. It is now possible to cancel a character of the text or add another. Fig. 120 Selecting the “ESC” symbol, the display visualises the previous menu. Selecting the “OK” key, the text is visualised on the main display (in a scrolling mode) when the machine remains inactive for more than two minutes. If no message is composed, the screensaver function remains inactive after pressing the “OK” key. In the case of deliveries, messages or alarms, the visualisation of the text is inter- rupted. Fig. 121 LSC 040 - Rev. 00 - Ed. 12/2009...
-
Page 69: Software Updating
espresso coffee machines 7. SOFTWARE UPDATING The machine’s software can be updated by utilising an SD card (not supplied as standard). To update the software, copy the file with the “.bin” extension onto a memory card and proceed as described. Attention! Do not rename the “.bin” file because it will no longer be recognised by the machine. For further information, visit the www.laspaziale.com website. With the main switch in the “0” position (machine switched off), insert the SD card with the contacts facing down into the appropriate reader under the machine. Fig. 122 Once the card has been inserted, switch on the machine using the main switch. Warning! Do not switch off the machine during all the following operations. Fig. 123 LSC 040 - Rev. 00 - Ed. 12/2009... - Page 70 espresso coffee machines The main display visualises all files that are present on the SD card that correspond to the file name structure “S40_XXYY.bin”, where XX and YY correspond to the software revision. S40_0200.bin 2 - S40_0102.bin 3 - S40_0300.bin Using the navigation touchpad, select the software to update the machine and press the “OK” key to confirm S40_0200.bin 2 - S40_0102.bin 3 - S40_0300.bin Fig. 124 The software is copied from the SD card to the CPU of the machine Fig. 125 Subsequently the software is transmitted from the power CPU to all the EEPROMs in the machine. Fig. 126 LSC 040 - Rev. 00 - Ed. 12/2009...
- Page 71 espresso coffee machines The following viewing panel appears when the copying of the software has finished. Fig. 127 Switch off the machine. Fig. 128 Remove the SD card from the reader Fig. 129 LSC 040 - Rev. 00 - Ed. 12/2009...
-
Page 72: Routine Appliance Maintenance To Be Performed By The User
espresso coffee machines 8. ROUTINE APPLIANCE MAINTENANCE TO BE PERFORMED BY THE USER Take note! To grant the efficiency of the appliance and to maintain correct operation, it is necessary to follow the manufacturer’s instructions as to cleaning and regular maintenance. Attention! Cleaning and routine maintenance operations must be carried out by the user according to the manufacturer’s instructions given here below. Before carrying out any cleaning operations, disconnect the appliance from the mains power. Cleaning and routine maintenance operations must be carried out when the machine is cold and using protective gloves to prevent abrasions. 8.1 DAILY AT THE END OF THE JOB 1. Replacing the water in the boiler (See paragraph 6.10 “CLEANING”, page 59). 2. Then clean the filter holders and the filters with the brush provided, making sure no dirt is left inside the filter holders and that all filter holes are clean. - Page 73 espresso coffee machines 3. Clean the delivery groups (See paragraph 6.10 “CLEANING” on page 59). Also clean the shower heads under the groups between one delivery and the next using the brush. Fig. 131 4. Clean the basin and the cup grille using standard detergent, if necessary. Fig. 132 LSC 040 - Rev. 00 - Ed. 12/2009...
-
Page 74: Every Two Weeks
espresso coffee machines 8.2 EVERY TWO WEEKS 1. After turning off the machine, remove the shower heads using the wrench provid- ed; brush them carefully, making sure that all the holes are clean. Then reassemble the parts following the sequence shown in the figure. a. Fastening screw b. Small shower head c. Large shower head d. Diffuser Fig. 133 e. Delivery group Attention! Every day, at the end of work and after daily cleaning, turn off the appliance us- ing the electric switch; then close the water supply tap and the gas tap (if fitted). Warning! Do not use water jets to clean the machine. 3. WATER SOFTENER If the installation of a water softener has been recommended by the installation engineer because of hard water and problems of scale deposits, it is necessary to follow the instructions of the water softener’s manufacturer (periodic regeneration). -
Page 75: List Of Programmable Functions (Technical Assistance Service Only)
espresso coffee machines 9. LIST OF PROGRAMMABLE FUNCTIONS (TECHNICAL ASSISTANCE SERVICE ONLY) Take note! For access and programming procedures for appliance functions, see the Installation Instruction Manual. SETTINGS MENÙ The “Settings” menu has two screens for the parameters to be programmed. Water mains menu The appliance is equipped with a pressure sensor to check the pressure from the water mains on a constant basis. Cup warmer set menu This function is used to change the reference temperature for the heat settings of the cup rack. Free flow This function is used to disable the free flow key of the coffee delivery groups in order to carry out a correct calculation of the number of coffees delivered. Pin menu This function serves to use a password to access appliance programming stages (Technical Assistance Service). Motor pump pressure sensor menu ... - Page 76 espresso coffee machines Installation date menu It is possible to enter the installation date and to store it to the appliance memory for future reference. Factory settings menu The display can be used to restore all of the factory settings for the appliance. PROGRAM MENU The “Program” menu contains a screen relevant to some appliance parameters that need setting. Boiler temperature This function is used to set the working temperature for the boiler. M.A.T. system temperature (optional) The appliance can be equipped with a system for automatic milk emulsifying at a controlled, adjustable temperature. The display shows the possibility to set the heating temperature of the milk according to the two available selections. Auto calibration This function serves to calibrate the temperature probe of the boiler based on the appliance pressure sensor. Take note! Only use this function in case of replacing the temperature probe and/or the main CPU. LSC 040 - Rev. 00 - Ed. 12/2009...
-
Page 77: Lsc 040 - Rev. 00 - Ed. 12/2009
espresso coffee machines Coffee doses menu The display shows the possibility to program the coffee doses for the appliance groups. Hot water doses menu The display shows the possibility to program the hot water doses automatically or semi automatically. Selecting semiautomatic delivery, the relevant button operates semi automatically (ON/OFF) and not timed. Selecting automatic delivery for hot water doses sets the automatic wand delivery times. Boiler sensor menu The display shows the possibility to calibrate the appliance pressure sensor. SERVICE MENU The “Service” menu contains a screen for the parameters to be set on the appliance. Alarms menu This shows the list of alarms that have intervened on the machine, including the date, time and the description of the alarm itself. Tech. service menu This shows the list of technical services performed on the machine, including the date and the description of the interven- tions. Access menu This shows the list of ID accesses made using the Service card. LSC 040 - Rev. 00 - Ed. 12/2009... - Page 78 espresso coffee machines INSTRUMENTS MENU The “Instruments” menu has two screens for the parameters to be programmed. Compensation menu This function is used to automatically compensate the boiler temperature on the appliance based on the variations in the ambient temperature in the area in which it is installed. Boost menu The display shows the possibility to enable the “BOOST” function manually or automatically. Itc menu This system makes it possible to set a different water temperature for coffee infusion on each delivery group. The display shows the possibility to enable the system for each group and each selection. Technical assistance menu This function makes it possible to program scheduled servicing intervals. Accessing “Service” accesses the possibility to enter the number of delivery cycles to be made before the service inter- vention (routine technical servicing). Accessing “Filter” offers the possibility to monitor the water consumption envisaged before replacing any cartridge filter. LSC 040 - Rev. 00 - Ed. 12/2009...
- Page 79 espresso coffee machines INFO MENÙ The “Info” menu contains a screen with all of the main information concerning the appliance. Testing date menu When this menu is opened, the main display shows the date on which the machine was tested. Installation date When this menu is opened, the main display shows the previously stored date on which the machine was installed. SOFTWARE UPGRADE It is possible to upgrade the appliance software using an SD card (not provided). LSC 040 - Rev. 00 - Ed. 12/2009...
-
Page 80: Management Of The Alarms
espresso coffee machines 10. MANAGEMENT OF THE ALARMS 10.1 ALARM MESSAGES VISUALISED ON THE MAIN DISPLAY EEPROM DEFAULT LOADED ON MAIN BOARD This message is visualised when the power CPU cannot find the parameters memorised when installing the machine and a backup is not available in the front CPU. In this situation, the default data is reset. DAY LIGHT SAVING TIME UPDATE This message signals the change from summer time to winter time and vice versa. This message automatically resets after 1 minute. BACK UP RESTORE ON FRONT BOARD IN PROGRESS ... -
Page 81: Alarms Relative To The Auto-Level System
espresso coffee machines 10.2.1 Alarms relative to the auto-level system The S40 SELETRON has a water refilling system that is managed by three electronic sensors*: The minimum level sensor checks the presence of a minimum quantity of water in the boiler that is sufficient to cover the elements of the electrical resistances. The * level sensor determines the level of water in the boiler preset by the manufacturer. The maximum level sensor checks that the level of water in the boiler is not higher than that allowed. When the water in the boiler does not reach the level of the minimum level sensor, the display visualises: When the water in the boiler reaches the level of the minimum level sensor, the level indicator visualises: When the water in the boiler reaches the level preset by the manufacturer, the level indicator visualises: When the water in the boiler reaches the level of the maximum level sensor, the level indicator visualises: * The electronic level sensor can be replaced by a mechanical/electrical float on request. BOILER REFILL FAILED, PUSH OK alternating with LOW WATER LEVEL IN THE BOILER This alarm blocks the machine and can be reset by pressing the “OK” key. This alarm intervenes when the refilling of the water in the boiler has exceeded the run time of the programmed time-out (6 minutes) and the water in the boiler has not reached the minimum level sensor. Press the “OK” key to activate a second refilling cycle. BOILER REFILL FAILED, PUSH OK ... - Page 82 espresso coffee machines DAMAGED WATER REFILL SYSTEM This alarm does not block the machine. This alarm intervenes after the BOILER REFILL FAILED, PUSH OK alarm intervenes a second refilling cycle is activated and the water in the boiler does not reach the temperature level set by the manufacturer. The alarm is visualised on the display for 5 minutes and is then substituted by the flashing symbol that signals the presence of a malfunction in the machine. In this machine status the hot water dispensing keys are disenabled but the machine continues to function until the LOW WATER LEVEL IN THE BOILER alarm intervenes. FAILED MINIMUM LEVEL SENSOR This alarm does not block the machine. This alarm intervenes when, after a minimum level sensor fault has been detected, the machine detects the correct level of water in the boiler set by the manufacturer but not the presence of the minimum level of water permitted. The alarm is visualised on the display for 5 minutes and is then substituted by the flashing symbol that signals the presence of a malfunction in the machine. DAMAGED WATER REFILL SYSTEM alternating with FAILED MINIMUM LEVEL SENSOR This alarm does not block the machine. This alarm intervenes when the machine is in a FAILED MINIMUM LEVEL SENSOR alarm status and the refilling of the water in the boiler has exceeded the run time of the programmed time-out (6 minutes).
- Page 83 espresso coffee machines CUT OFF BOILER TEMPERATURE PROBE This alarm does not block the machine. This alarm intervenes when the boiler temperature sensor is interrupted. The alarm is visualised on the display for 5 minutes and is then substituted by the flashing symbol that signals the presence of a malfunction in the machine. When the temperature sensor is faulty, the thermostat regulation of the machine is taken over by the pressure sensor that recovers the pressure value corresponding to the set temperature value previously memorised during the programming phase (or correspond- ing to the last compensated temperature value) and maintains the temperature constant. During this phase, the machine continues to function and it is not possible to modify the reference pressure value. SHORT CIRCUITED BOILER TEMPERATURE PROBE This alarm does not block the machine. This alarm intervenes when the boiler temperature sensor is short-circuiting. The alarm is visualised on the display for 5 minutes and is then substituted by the flashing symbol that signals the presence of a malfunction in the machine. When the temperature sensor is faulty, the thermostat regulation of the machine is taken over by the pressure sensor that recovers the pressure value corresponding to the set temperature value previously memorised during the programming phase (or correspond- ing to the last compensated temperature value) and maintains the temperature constant. During this phase, the machine continues to function and it is not possible to modify the reference pressure value. HIGH BOILER TEMPERATURE This alarm intervenes when the boiler temperature sensor detects a temperature greater than 130°C. When this alarm intervenes, the machine is disconnected from the electrical mains supply by a circuit breaker switch. The alarm resets when the temperature detected by the sensor re-enters within the normal parameters. BOILER TEMPERATURE NOT REACHED ...
- Page 84 espresso coffee machines CUT OFF GROUPS TEMPERATURE PROBE This alarm does not block the machine. This alarm intervenes when the coffee dispensing groups’ ambient temperature sensor is interrupted. The alarm is visualised on the display for 5 minutes and is then substituted by the flashing symbol that signals the presence of a malfunction in the machine. When this alarm intervenes the COMPENSATION function is disenabled (if it is active it becomes disenabled) and the GROUPS HIGH TEMPERATURE and the GROUPS VERY HIGH TEMPERATURE alarms are not managed SHORT CIRCUITED GROUPS TEMPERATURE PROBE This alarm does not block the machine. ThIS alarm intervenes when the coffee dispensing groups’ ambient temperature sensor is short-circuiting. The alarm is visualised on the display for 5 minutes and is then substituted by the flashing symbol that signals the presence of a malfunction in the machine. When this alarm intervenes the COMPENSATION function is disenabled (if it is active it becomes disenabled) and the GROUPS HIGH TEMPERATURE and the GROUPS VERY HIGH TEMPERATURE alarms are not managed. GROUPS HIGH TEMPERATURE This alarm intervenes when the temperature detected by the coffee dispensing groups’ ambient temperature sensor is greater than the tem- perature set in the menu. The alarm resets when the temperature re-enters within normal parameters. GROUPS VERY HIGH TEMPERATURE ...
- Page 85 espresso coffee machines If there is a fault in the boiler pressure sensor the auto-setting functions and the management of the thermostat are not available if there is a fault in the temperature sensor. Furthermore, the controls managed by the sensor are disenabled. ALARM FOR FAILED THERMO REGULATION This alarm blocks the machine. This alarm intervenes when the boiler temperature sensor and the boiler pressure sensor are simultaneously faulty. The main display visualises the alternating messages CUT OFF BOILER TEMPERATURE PROBE or SHORT CIRCUITED BOILER TEMPERATURE PROBE and FAILED BOILER PRESSURE SENSOR for 1 minute. The ALARM FOR FAILED THERMO REGULATION message follows. AIR IN THE BOILER, OPEN THE STEAM WANDS This alarm does not block the machine. This alarm intervenes when the boiler pressure sensor detects a pressure greater or equal to 0.5 bar and the temperature sensor detects a temperature less than 100°C. The alarm resets when the pressure value re-enters within normal parameters. FAILED WATER PRESSURE SENSOR This alarm does not block the machine. This alarm intervenes when the water pressure sensor is faulty. The alarm is visualised on the display for 5 minutes and is then substituted by the flashing symbol that signals the presence of a malfunction in the machine. If the water pressure sensor is faulty the controls and alarms associated to it are not available.
- Page 86 espresso coffee machines LOW WATER PRESSURE This alarm does not block the machine. This alarm intervenes when the water pressure sensor detects a pressure less than 1 bar for 3 consecutive seconds. The alarm is visualised on the display for 5 minutes and is then substituted by the flashing symbol that signals the presence of a malfunction in the machine. HIGH PUMP PRESSURE This alarm does not block the machine. This alarm intervenes when the pressure sensor detects a pressure greater than 11 bar after 5 seconds of delivery. The alarm automatically resets at the end of the delivery LOW PUMP PRESSURE This alarm does not block the machine. This alarm intervenes when the pressure sensor detects a pressure greater than 6 bar after 5 seconds of delivery. The alarm automatically resets at the end of the delivery. NO WATER FEEDING This alarm intervenes when the water pressure sensor detects a 0 bar pressure for 3 consecutive seconds. The alarm resets automatically when the pressure value re-enters within normal parameters. CUT OFF MAT TEMPERATURE PROBE This alarm does not block the machine. This alarm intervenes when the temperature sensor of the M.A.T. system is interrupted. The alarm is visualised on the display for 5 minutes and is then substituted by the flashing symbol that signals the presence of a malfunction in the machine. If the steam wand temperature sensor is faulty the system continues to function in semi-automatic mode when operating either one of the steam dispensing keys. This means the system functions by pressing one of the steam dispensing keys to activate the delivery of steam and press it again to stop the delivery...
- Page 87 espresso coffee machines The alarm is visualised on the display for 5 minutes and is then substituted by the flashing symbol that signals the presence of a malfunction in the machine. If the steam wand temperature sensor is faulty the system continues to function in semi-automatic mode when operating either one of the steam dispensing keys. This means the system functions by pressing one of the steam dispensing keys to activate the delivery of steam and press it again to stop the delivery. CUT OFF CUP WARMER TEMPERATURE PROBE This alarm does not block the machine. This alarm intervenes when the cup warmer temperature sensor is interrupted. This alarm is visualised on the display for 5 minutes and is then substituted by the flashing symbol that signals the presence of a malfunction in the machine. If the cup warmer temperature sensor is faulty the cup warmer resistances function in semi-automatic mode. This means the system functions by pressing one of the cup warmer keys to activate the resistances and press it again to deactivate it. When the cup warmer resistances are switched on in semi-automatic mode the increase/decrease warning lights flash. SHORT CIRCUITED CUP WARMER TEMPERATURE PROBE This alarm does not block the machine. This alarm intervenes when the cup warmer temperature sensor is short-circuiting. The alarm is visualised on the display for 5 minutes and is then substituted by the flashing symbol that signals the presence of a malfunction in the machine. If the cup warmer temperature sensor is faulty the cup warmer resistances function in semi-automatic mode. This means the system functions by pressing one of the cup warmer keys to activate the resistances and press it again to deactivate it. When the cup warmer resistances are switched on in semi-automatic mode the increase/decrease warning lights flash. NO RECOGNIZED TAG ...
- Page 88 espresso coffee machines The alarm is visualised on the display for 5 minutes and is then substituted by the flashing * symbol that signals the presence of a malfunction in the machine. If the reader is faulty it is no longer possible to gain access to the programming menus. FAILED BACK UP This alarm does not block the machine. This alarm intervenes when the parameters memorised in the CPU are not copied into the TAG when making a backup copy using the TAG SERVICE. FAILED RESTORE This alarm does not block the machine. This alarm intervenes when the parameters memorised in the TAG are not copied to the CPU when effectuating a RESTORE DATA using the TAG SERVICE. LOW POWER This alarm blocks the machine. This alarm intervenes when the machine detects a voltage of 9 volts or less on the secondary circuit of the transformer. The alarm resets automatically when the voltage re-enters within normal parameters. HIGH POWER This alarm blocks the machine. This alarm intervenes when the machine detects a voltage of 14 volts or more on the secondary circuit of the transformer. The alarm resets automatically when the voltage re-enters within normal parameters. FAILED CLOCK MODULE This alarm does not block the machine. This alarm intervenes when the clock module is faulty. NO COMMUNICATION WITH MAIN BOARD ...
-
Page 89: Groups' Displays
espresso coffee machines ERROR COMMUNICATION GROUP 1 The alarm intervenes when the power CPU cannot detect the presence of the 1st coffee dispensing groups’ CPU. ERROR COMMUNICATION GROUP 2 The alarm intervenes when the power CPU cannot detect the presence of the 2nd coffee dispensing groups’ CPU. ERROR COMMUNICATION GROUP 3 The alarm intervenes when the power CPU cannot detect the presence of the 3rd coffee dispensing groups’ CPU. ERROR COMMUNICATION GROUP 4 The alarm intervenes when the power CPU cannot detect the presence of the 4th coffee dispensing groups’ CPU. 10.3 MESSAGES VISUALISED ON THE COFFEE DISPENSING GROUPS’ DISPLAYS Take note! All messages visualised on the coffee dispensing group displays are accompanied by an acoustic alarm. VOLUMETRIC DOSING SYSTEM FAULTY ... - Page 90 espresso coffee machines TOO FINE GRINDING This alarm intervenes when the machine detects a number of impulses generated by the volumetric counter that can only be ex- plained by the presence of coffee that has been ground too fine. ERROR COMMUNICATION FRONT BOARD This alarm blocks the machine. The alarm intervenes when the power CPU cannot detect the front CPU. All displays visualise this alarm message. LACK OF COMMUNICATION WITH THE POWER CPU The alarm intervenes when the CPU of a determined coffee dispensing group cannot detect the presence of the power CPU. LACK OF COMMUNICATION WITH THE FRONT CPU The alarm intervenes when the CPU of a determined coffee dispensing group cannot detect the presence of the front CPU. DEFAULT DATA DOWNLOADED This message is visualised when the CPU of a determined coffee dispensing group cannot find the parameters memorised at the moment of installation. In this case the default data are reset. MACHINE BLOCKED ...
-
Page 91: Technical Data
espresso coffee machines 11. TECHNICAL DATA Dimensions 845 x 600 x 560 (2 groups) Length x Height x 1,078 x 600 x 560 (3 groups) Depth (mm) 1,311 x 600 x 560 (4 groups) Weight (Kgs) 85 (2 groups) 100 (3 groups) 115 (4 groups) Power supply rating 230/400 - 50/60 and absorption (V - Hz) 3200 (with Boost function active: 4600) 2 groups 4200 (with Boost function active: 6200) 3 groups 6200 (with Boost function active: 7200) 4 groups... - Page 92 espresso coffee machines LSC 040 - Rev. 00 - Ed. 12/2009...
- Page 94 La Spaziale S.p.A. Via E. Duse, 8 40033 Casalecchio di Reno Bologna - (Italy) ¥ +39 051 611.10.11 +39 051 611.10.40 info@laspaziale.com www.laspaziale.com...
Need help?
Do you have a question about the Seletron S40 and is the answer not in the manual?
Questions and answers