Advertisement
Quick Links
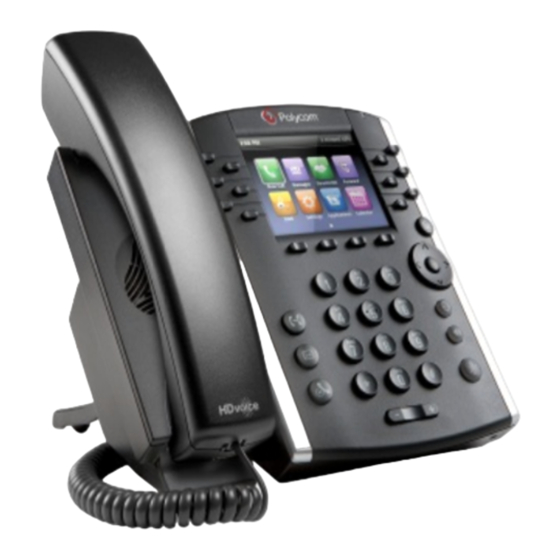
Getting to Know Your Polycom VoIP Phone
Polycom VVX 400/410
®
Getting to know your new phone is easy. This guide will help you get started.
You'll learn how to:
Use the feature buttons
Navigate your phone
Use and adjust the handset, speakerphone, and headset
Place calls and other basic phone tasks
And much more!
Business Support
Phone: 800.900.5474
E-mail: business.support@touchtone.net
®
BUSINESS
®
Advertisement

Summary of Contents for Polycom VVX 400
- Page 1 BUSINESS Getting to Know Your Polycom VoIP Phone ® Polycom VVX 400/410 ® ® Getting to know your new phone is easy. This guide will help you get started. You’ll learn how to: Use the feature buttons Navigate your phone...
- Page 2 Initial Setup for Polycom VVX 400/410 Page 2 of 11 ...
- Page 3 (not provided) to the PC port on the back of the phone body. Connect the other end of the Ethernet cable to the network port on your PC. 9. (Optional) To install the phone on a vertical surface, use the Polycom Wall Mount bracket. See the Polycom User Guide or the Polycom VVX phone documents on www.Polycom.com...
- Page 4 How to Adjust the Handset, Speakerphone, or Headset Volume 1. Activate the desired choice by picking up the handset, or pressing the Headset or Speaker button on the bottom right of pad. 2. Press and release the Volume (plus or minus) keys to adjust the volume as desired. A horizontal scale displays on the phone to indicate the volume level.
- Page 5 To reconnect with the first call simply press the blinking line key of the original call. How to Make a Second Call 1. During a conversation, press the hold key. 2. Press any available green line key. 3. Dial the number for your second call. Phone Features Transferring Calls Attended Transfer...
- Page 6 Conferencing a Cal on Hold with an Active Call If you have a call on hold and an active call, you can create a conference call between the active call, the call on hold, and you. 1. With an active call and one or more calls on hold, press the JOIN softkey. 2.
- Page 7 How to View Missed, Received and Placed Calls 1. Press the DIR softkey. 2. Use the black directional pad to scroll down and select RECENT CALLS, then press the SELECT softkey. 3. Press the softkey labeled TYPE and then select the desired call history option: All Calls Missed Calls, Received Calls, Placed Calls.
- Page 8 Voice Portal Menu Voicemail Controls Press the following keys to access voicemail controls. 1 Access Voicemail Box 1 Plays Messages (see Play Messages Options) 2 Record Busy Greeting 3 Record No Answer Greeting 5 Compose Message (see Compose Message Options) 7 Delete All Messages * Go to Comm Pilot Voice portal # Repeat Menu...
- Page 9 * Return to previous menu # Repeat menu Reply to Message 1 Change current reply 2 Listen to current reply 3 Send reply 6 Set or clear urgent indicator 7 Set or clear confidential indicator * Return to previous menu # Repeat menu Forward Message 1 Change current introduction...
- Page 10 To send your voicemail to an email address without storing a copy on your IP Phone: 1. Login into http://businessvoip.touchtone.net/. 2. Select "Messaging" from the Options, then select "Voice Management". 3. Towards the middle of the page, in the “When a message arrives...:” section, click on the radio button that says “Forward it to this e-mail address:”...
- Page 11 1. Login into http://businessvoip.touchtone.net/. 2. Click the Incoming Calls link on the left hand side. 3. Click the Sequential Ring link. 4. Click on the Add Button. 5. Enter a Description and click the OK button. 6. Click the Use sequential ring radio button. 7.


Need help?
Do you have a question about the VVX 400 and is the answer not in the manual?
Questions and answers