Table of Contents
Advertisement
Advertisement
Table of Contents

Related Manuals for Kärcher BR 45/40


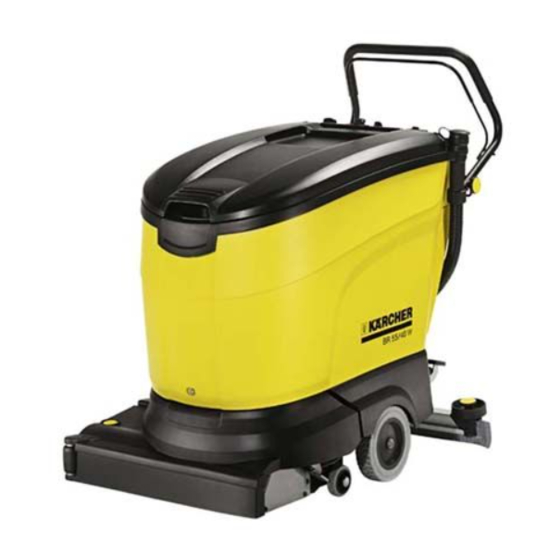
Summary of Contents for Kärcher BR 45/40
-
Page 1: Service Manual
BR/BD 45/40 BR/BD 55/40 Service Manual English 5.906-269.0 Rev. 00 (03/11) -
Page 2: Table Of Contents
Contents Contents........... . Preface . - Page 3 5.9.1 Version 1 ..........5.9.2 Version 2 .
- Page 4 Basic settings ..........67 8.1 Factory settings .
- Page 5 10.1.2 BR model ..........11 Troubleshooting .
-
Page 6: Preface
Preface 3.2 General notes on safety Danger Good service work requires extensive and practice- Risk of injury! oriented training as well as well-structured training Vor allen Arbeiten am Gerät Schlüsselschalter materials. – und Batterie-Hauptschalter ausschalten und Hence we offer regular basic and advanced training Schlüssel abziehen. -
Page 7: Water System
Cleaning head with quick brush change system. – decoding switch) 2 brush rollers, working width 550 mm (BR 55/40) – or 450 mm (BR 45/40 mm). 4.6.2 Bp model Brush drive system with toothed belt. – Indicator lamp - battery monitoring –... -
Page 8: Setup And Function - General
Setup and function - general 5.1 Front view (BD) 5.1.1 Version 1 1 Push handle 9 Vacuum bar 2 Switch bow, brush motor 10 Wheel (driven with W Bp Pack) 3 Dirt water discharge hose 11 transport roller 4 Lock for push handle adjustment 12 Cleaning head 5 Fresh water tank 13 Scraper roller of cleaning head... -
Page 9: Version 2
5.1.2 Version 2 1 Push handle 9 Floor group 2 Switch bow, brush motor 10 Wheel (driven with W Bp Pack) 3 Dirt water discharge hose 11 transport roller 4 Lock for push handle adjustment 12 Cleaning head 5 Lift handle of fresh water reservoir 13 Scraper roller of cleaning head 6 Fresh water tank 14 Locking screw for fresh water reservoir... -
Page 10: Front View (Br)
5.2 Front view (BR) 5.2.1 Version 1 1 Push handle 9 Vacuum bar 2 Switch bow, brush motor 10 Wheel (driven with W Bp Pack) 3 Dirt water discharge hose 11 transport roller 4 Lock for push handle adjustment 12 Cleaning head 5 Fresh water tank 13 Scraper roller of cleaning head 6 Foot actuation of transport roller... -
Page 11: Version 2
5.2.2 Version 2 1 Push handle 9 Floor group 2 Switch bow, brush motor 10 Wheel (driven with W Bp Pack) 3 Dirt water discharge hose 11 transport roller 4 Lock for push handle adjustment 12 Cleaning head 5 Lift handle of fresh water reservoir 13 Button for brush change 6 Fresh water tank 14 Locking screw for fresh water reservoir... -
Page 12: Rear View
5.3 Rear view 5.3.1 Version 1 1 Drive motor switch (W Bp Pack only) 8 Lever, raise/lower suction bar 2 Info button, rotary and button function (W Bp Pack 9 Rotary handle - water volume dosing valve only) 10 Suction hose 3 Key switch (W Bp Pack only) 11 Wing screws of suction bar support 4 Emergency stop button (W Bp Pack only) -
Page 13: Version 2
5.3.2 Version 2 1 Drive motor switch (W Bp Pack only) 7 Lever, raise/lower suction bar 2 Info button, rotary and button function (W Bp Pack 8 Water volume dosing valve only) 9 Wing screws of suction bar support 3 Program selection switch 10 Tilt roller 4 Detergent switch (W Bp Pack only, option on C Bp 11 Vacuum bar... -
Page 14: Detergent Compartment
5.4 Detergent compartment 5.4.1 Version 1 1 Detergent compartment (foldable and removable) 5 Cap for ventilation pipe (slotted) 2 Detergent tank (accessory) 6 Connection of detergent hose 3 Lid (with ventilation pipe and ball backflow valve) 7 Connection for ventilation of detergent tank 4 Ventilation pipe 8 Ball backflow valve English 5.906-269.0 Rev. -
Page 15: Version 2
5.4.2 Version 2 1 Detergent tank (accessory) 2 Detergent compartment 3 Dirt water discharge hose 1 Detergent hose 2 Vent opening 3 Closure of detergent reservoir 4 Filter sieve English 5.906-269.0 Rev. 00 (03/11) -
Page 16: Vacuum Bar
5.5 Vacuum bar 1 Winch, raise/lower suction bar 4 Vacuum lip 2 Wing nut, suction bar attachment 5 Tilt roller 3 Wing nut, setting of the tilting position of the suc- 6 Suction hose tion bar 7 Scraper roller Note The front suction lip is grooved by default, the rear one is smooth. -
Page 17: Suction Turbine
5.6 Suction turbine 1 Suction turbine 2 Connecting cable 3 Sound insulation hose 4 Support bow, sound insulating hose English 5.906-269.0 Rev. 00 (03/11) -
Page 18: Bd Cleaning Head
5.7 BD cleaning head 5.7.1 Overview 1 Pedal for changing brushes 2 Rotation wheel contact pressure 3 Scraper roller 4 Cleaning head English 5.906-269.0 Rev. 00 (03/11) -
Page 19: Brush Drive
5.7.2 Brush drive 1 Pinion of disc brush 2 Gear belt 3 Drive pinion, brush motor 4 Brush motor 5.7.3 Solenoid valve for water inlet 1 Supply hose for fresh water 2 Solenoid valve for water inlet 3 Connecting cable English 5.906-269.0 Rev. -
Page 20: Contact Pressure Adjustment
5.7.4 Contact pressure adjustment The rotation wheel can be used to set the contact pressure and for appliances without travel drive the propulsion speed. Contact pressure / reduce speed: Turn the rotation wheel to the left. Contact pressure / increase speed: ... -
Page 21: Br Cleaning Head
5.8 BR cleaning head 5.8.1 Overview 1 Waste container 5 Unlocking button for brush roller holder 2 Cleaning head 6 Scraper roller 3 Lockscrew, brush roller holder 7 Water distribution bar 4 Brushing rollers Note The waste is transported using the dustpan for mod- els BR 45-55/40 C and thrown over into the waste container for the W models. - Page 22 5.8.2 Brush drive 1 Cleaning head 5 Gear 2 Supply hose for fresh water 6 Toothed belt cover 3 Solenoid valve for water inlet 7 transport roller 4 Brush motor 1 Brush roller driver 1 Drive pinion, brush motor 2 Gear belt 3 Tension pulley 4 Drive pinion, brush rollers English 5.906-269.0 Rev.
-
Page 23: Solenoid Valve For Water Inlet
5.8.3 Solenoid valve for water inlet 1 Supply hose for fresh water 2 Solenoid valve for water inlet 3 Connecting cable English 5.906-269.0 Rev. 00 (03/11) -
Page 24: Transport Roller
5.9 Transport roller 5.9.1 Version 1 1 transport roller 2 Hookup for transport roller 3 Sheathed cable 4 Deflection pulley, winch When you operate the foot pedal, the transport roller is swivelled out via a winch and a deflection roller. The push handle must be pressed down slightly dur- ing this procedure to be able to swivel the transport roller out and in as needed. -
Page 25: Version 2
5.9.2 Version 2 1 Foot pedal 2 transport roller After lifting the appliance via the lift handle, the transport roller can be swivelled out or in with the foot pedal. The appliance can now be pushed freely. English 5.906-269.0 Rev. 00 (03/11) -
Page 26: Cover Dirt Water Reservoir
5.10 Cover dirt water reservoir 1 Fresh water tank lock 4 Seal 2 Lock of waste water reservoir cover (model 2 only) 5 Float 3 Suction channel opening English 5.906-269.0 Rev. 00 (03/11) -
Page 27: Wastewater Reservoir
5.11 Wastewater reservoir 5.11.1Version 1 1 Suction pipe wastewater 5 Lint sieve suction channel 2 Dirt water reservoir 6 Fresh water reservoir filler neck 3 Drain opening, wastewater 4 Baffle English 5.906-269.0 Rev. 00 (03/11) -
Page 28: Version
5.11.2Version 2 1 Suction pipe wastewater 2 Dirt water reservoir 3 Drain opening, wastewater 4 Lint sieve suction channel 5 Lock of waste water reservoir cover 6 Fresh water reservoir filler neck English 5.906-269.0 Rev. 00 (03/11) -
Page 29: Setup And Function Bp
Setup and function Bp 6.1 Battery (Bp Pack only) 1 Fuse on battery and terminal 4 Battery + terminal 2 Battery 5 Solenoid valve for water inlet 3 Battery - terminal English 5.906-269.0 Rev. 00 (03/11) -
Page 30: Control Terminal
6.2 Control terminal 6.2.1 Version 1 1 Drive motor switch (W Bp Pack only) 7 Detergent switch (W Bp Pack only, option on C Bp Pack) 2 Indicator lamp - battery monitoring 8 Key switch (W Bp Pack only) 3 Indicator lamp - fault 9 Info button, rotary and button function (W Bp Pack 4 Program selection switch only) -
Page 31: Version 2
6.2.2 Version 2 1 Drive motor switch (W Bp Pack only) 6 Detergent switch (W Bp Pack only, option on C Bp Pack) 2 Indicator lamp - battery monitoring 7 Key switch (W Bp Pack only) 3 Indicator lamp - fault 8 Info button, rotary and button function (W Bp Pack 4 Program selection switch only) -
Page 32: Indicator Lamp - Battery Monitoring
6.2.5 Indicator lamp - battery monitoring Discharge Operating mode, battery capacity in % Charging mode, charge status in % Glows green continuously Battery charged, 40% - 100%, 23.0 V ± 0.2 V 80% - 100%, charge protection active, discharge level 1 Glows yellow continuously Remaining capacity 20% - 40%, 22.3 V ±... -
Page 33: Overview Of Operator Console Inside
6.2.6 Overview of operator console inside 1 Control PCB, info button and display (W Bp Pack 5 Rotary handle - water volume dosing valve only) 6 Emergency-stop button (model 1 only) 2 Program selection switch 7 Indicator lamps "Battery monitoring and fault" 3 Key switch (W Bp Pack only) 8 Drive motor switch (W Bp Pack only) 4 Detergent switch (W Bp Pack only, option on C Bp... -
Page 34: Electronics System
6.3 Electronics system 6.3.1 Control board 1 Display (W Bp Pack only) 12 Connector plug (X15/A1) 2 Control PCB Display (W Bp Pack only) 13 Connection (X6/A1) 3 Info button, rotary and button function (W Bp Pack 14 Relay (K2) only) 15 Relay (K1) 4 Indicator lamps "Battery monitoring and fault"... - Page 35 14 13 1 Terminal strip (X10/A1) 10 Connection (X6/A1) 2 Terminal strip (X11/A1) 11 Relay (K2) 3 Terminal strip (X3/A1) 12 Relay (K1) 4 Terminal strip (X1/A1) 13 Connector plug (X12/A1) 5 Terminal strip (X2/A1) 14 Connector plug (X14/A1) 6 Terminal strip (X5/A1) 15 Connection (X7/A1) 7 Connector plug (X16/A1) 16 Relay (K3)
-
Page 36: Battery Charger (Bp Pack Only)
6.3.2 Battery charger (Bp Pack only) 1 Ventilator wheel, charger 6 Mains connection ground (X3) 2 Charger 7 Mains connection (L2-X2) 3 Terminal strip (X7) 8 Mains connection (L1-X2) 4 Connector plug (X4) 9 Fuse (F2) 5 Connector plug (X5) English 5.906-269.0 Rev. - Page 37 1 Terminal strip (X7) 5 Connector plug (X1) 2 Connector plug (X4) 6 Connector plug (X2) 3 Connector plug (X5) 7 Fuse (F2) 4 Connector plug (X3) English 5.906-269.0 Rev. 00 (03/11)
-
Page 38: Switch Bow, Brush Motor
6.4 Switch bow, brush motor 1 Switch bow, brush motor 2 Microswitch support 3 Micro switch 4 Connecting cable, microswitch 6.4.1 Microswitch installed 1 Microswitch support English 5.906-269.0 Rev. 00 (03/11) -
Page 39: Detergent Pump (W Bp Pack Only, Option On C Bp Pack)
6.5 Detergent pump (W Bp Pack only, option on C Bp Pack) 1 Detergent hose to the pump 3 Detergent hose to the cleaning head 2 Detergent pump 1 Detergent pump 1 Detergent hose 2 Pump rotor 2 Transport rolls 3 Pump input 4 Pump outlet 5 Connecting cable to the flowmeter... -
Page 40: Flowmeter
6.6 Flowmeter 1 Fresh water tank 2 Flowmeter 3 Flowmeter support 1 Flowmeter support 2 Fastening screws, cover 3 Flowmeter 4 Remove the lid of the flowmeter 5 Hall sensor English 5.906-269.0 Rev. 00 (03/11) -
Page 41: Travel Drive (W Bp Pack Only)
6.7 Travel drive (W Bp Pack only) 6.7.1 Version 1 1 Drive motor 2 Drive shaft 3 Gear English 5.906-269.0 Rev. 00 (03/11) -
Page 42: Version
6.7.2 Version 2 1 Drive motor 2 Differential gear 3 Drive wheel English 5.906-269.0 Rev. 00 (03/11) -
Page 43: Operator Functions (W Bp Pack)
6.8 Operator functions (W Bp Pack) 6.8.1 Startup - driving Switch the programme selector switch (S2) to position “drive" Switch on the drive switch (S4) Display Suction trailing switch-off same Switch off the key switch (S0) Suction turbine (M2) active and Self-test OK? Display <... - Page 44 Continued from previous page. Display Activate the operator func- Battery: E...F tions: Wet scrubbing – Suction – Polishing – Parameterization – Factory setting – LED displays – Drive motor (M1) ready Deadman switch (S3) actuated? The drive motor (M3) starts via the on ramp and moves forward con- tinuously at 4 km/h.
-
Page 45: Wet Scrubbing (With Vacuuming)
6.8.2 Wet scrubbing (with vacuuming) Initial use Display Battery: E...F Shutting down Switch the programme selector switch (S2) to position “wet scrubbing with vacuuming" Drive switch (S4) switched off Suction turbine (M2) active Cleanspeed active ("Cleanspeed Edit" set to "1" in setup menu) ... - Page 46 Continued from previous page. Drive switch (S4) switched on? The drive motor (M3) starts via the on ramp and moves forward con- tinuously at 4 km/h. Cleanspeed? Time delay Display 5 seconds CleanSpd.: ---- Switch off the drive switch (S4) The drive motor (M3) is continuously stopped on the brake ramp.
-
Page 47: Polishing (Without Vacuuming)
6.8.3 Polishing (without vacuuming) Initial use Display Battery: E...F Shutting down Switch the programme selector switch (S2) to position “wet scrubbing without vacuuming" Drive switch (S4) switched off Cleanspeed active ("Cleanspeed Edit" set to "1" in setup menu) ... - Page 48 Continued from previous page. Drive switch (S4) switched on? The drive motor (M3) starts via the on ramp and moves forward con- tinuously at 4 km/h. Cleanspeed? Time delay Display 5 seconds CleanSpd.: ---- Switch off the drive switch (S4) The drive motor (M3) is continuously stopped on the brake ramp.
-
Page 49: Vacuuming (Without Scrubbing)
6.8.4 Vacuuming (without scrubbing) Initial use Display Battery: E...F Shutting down Switch the programme selector switch (S2) to position “Suction" Drive switch (S4) switched off Suction turbine (M2) active Cleanspeed active ("Cleanspeed Edit" set to "1" in setup menu) ... - Page 50 Continued from previous page. Cleanspeed? Time delay Display 5 seconds CleanSpd.: ---- Switch off the drive switch (S4) The drive motor (M3) is continuously stopped on the brake ramp. The braking reaction cannot be influenced due mechanical free- wheeling English 5.906-269.0 Rev. 00 (03/11)
-
Page 51: Polishing (Without Vacuuming)
6.8.5 Polishing (without vacuuming) Initial use Display Battery: E...F Shutting down Switch the programme selector switch (S2) to position “Polish" Drive switch (S4) switched off Cleanspeed active ("Cleanspeed Edit" set to "1" in setup menu) Display Battery: E...F ... - Page 52 Continued from previous page. Cleanspeed? Time delay Display 5 seconds CleanSpd.: ---- Switch off the drive switch (S4) The drive motor (M3) is continuously stopped on the brake ramp. The braking reaction cannot be influenced due mechanical free- wheeling English 5.906-269.0 Rev. 00 (03/11)
-
Page 53: Polishing (With Vacuuming)
6.8.6 Polishing (with vacuuming) Initial use Display Battery: E...F Shutting down Switch the programme selector switch (S2) to position “Polishing with vacuuming" Drive switch (S4) switched off Suction turbine (M2) active Cleanspeed active ("Cleanspeed Edit" set to "1" in setup menu) ... - Page 54 Continued from previous page. Cleanspeed? Time delay Display 5 seconds CleanSpd.: ---- Switch off the drive switch (S4) The drive motor (M3) is continuously stopped on the brake ramp. The braking reaction cannot be influenced due mechanical free- wheeling English 5.906-269.0 Rev. 00 (03/11)
-
Page 55: Parameterization (W Bp Pack, Option On C Bp / C Bp Pack)
6.8.7 Parameterization (W Bp Pack, option on C Bp / C Bp Pack) Shutting down Initial use Display Battery: E...F Time delay 5 seconds Display Cleanspeed: II Suction: Power FACT: Power DOSE: 1.0% Information menu Factory setting Display apply? Display Std:2h 41min BR/D 45-55/40 Bp Prg-Vers:2.2... - Page 56 Continued from previous page. Factory reset was Time delay 5 seconds Time delay 5 seconds Display (blinking) FACT:Power Display (blinking) FACT:FINE Time delay 5 seconds Display FACT:FINE new setting saved Display FACT:FINE new setting saved English 5.906-269.0 Rev. 00 (03/11)
- Page 57 Programmes Parameter Remark Cleanspeed FACT for BR 45-55/40 only SUCTION DOSE Option (upgrade kit) Information menu Factory setting DOSE – FACT – SUCTION – Cleanspeed – are reset English 5.906-269.0 Rev. 00 (03/11)
-
Page 58: Operator Functions (C Bp / Bp Pack)
6.9 Operator functions (C Bp / Bp Pack) 6.9.1 Startup - operation off Programme selector switch (S2) in position Wet scrubbing with vacuuming Wet scrubbing without vacuuming Suction Polishing Polishing with vacuuming Trailing of suction turbines Suction turbine (M2) active and... -
Page 59: Wet Scrubbing (With Vacuuming)
6.9.2 Wet scrubbing (with vacuuming) Initial use LED "Battery" (green) Shutting down Switch the programme selector switch (S2) to position “wet scrubbing with vacuuming" Suction turbine (M2) active Speed reset suction turbine speed (M2) active, if set to "1" in the setup menu (option only) ... -
Page 60: Polishing (Without Vacuuming)
6.9.3 Polishing (without vacuuming) Initial use LED "Battery" (green) Shutting down Switch the programme selector switch (S2) to position “wet scrubbing without vacuuming" Detergents active, if set to "1" in the setup menu FACT active if set to "1" in the setup menu LED "Battery"... -
Page 61: Vacuuming (Without Scrubbing)
6.9.4 Vacuuming (without scrubbing) Initial use LED "Battery" (green) Shutting down Switch the programme selector switch (S2) to position “Suction" Suction turbine (M2) active Speed reset suction turbine speed (M2) active, if set to "1" in the setup menu (option only) LED "Battery"... -
Page 62: Polishing (Without Vacuuming)
6.9.5 Polishing (without vacuuming) Initial use LED "Battery" (green) Shutting down Switch the programme selector switch (S2) to position “Polish" FACT active if set to "1" in the setup menu LED "Battery" (green) Red LED "Fault" is glowing continuous- Brush motor (M1) ready ... -
Page 63: Polishing (With Vacuuming)
6.9.6 Polishing (with vacuuming) Initial use LED "Battery" (green) Shutting down Switch the programme selector switch (S2) to position “Polishing with vacuuming" Suction turbine (M2) active Speed reset suction turbine speed (M2) active, if set to "1" in the setup menu (option only) ... -
Page 64: Setup And Function Of Ep
Setup and function of Ep 7.1 Control terminal 7.1.1 Control elements 1 Rotary handle - water volume dosing valve 2 Program selection switch 7.1.2 Program selection switch 1 Appliance off 2 Wet scrubbing (with vacuuming) 3 Polishing (without vacuuming) 4 Vacuuming (without scrubbing) 5 Polishing (without vacuuming) 6 Polishing (with vacuuming) English 5.906-269.0 Rev. - Page 65 7.1.3 Overview of operator console inside 1 Power cord 2 Program selection switch 3 De-interference capacitor 4 Operating capacitor English 5.906-269.0 Rev. 00 (03/11)
-
Page 66: Floor Group
7.2 Floor group 1 Floor group 2 Brush motor cover 3 Cleaning head 4 Connection cable cleaning head 5 Supply hose for fresh water English 5.906-269.0 Rev. 00 (03/11) -
Page 67: Basic Settings
Basic settings 8.1 Factory settings PROCESS SWITCH MENU, factory setting BR/BD 45-55/40 C/W Bp (Pack) - Series 02/10 Transport No adjustment possibilities Adjustable (X = yes) drive planned. Scrubbing DOSE 1,0% 0,0:0,5:3,0% The DOSE can be switched off This mod- 1,0% suction via the menu item... -
Page 68: Setup Menu
8.2 Setup menu 8.2.1 Access to setup menu (W Bp Pack) Display Battery: E...F Switch the programme selector switch (S2) to po- sition “wet scrubbing without vacuuming" Press the info button three times within 2 seconds. Display Parameter setup Time delay 5 seconds Display (blinking) Press <i>... - Page 69 Continued from previous page. Display Display Deutsch Maschinentyp: R Englisch Entladespg: 21.0V Francais Standby: 30 min Italiano Saugnachlauf: 10s Espanal Geschw.: Portugues Beschl.rampe: 3 Nederlands Bürst.rampe: 9 Dansk CleanspdEdit: 1 Norsk SUCTred.Edit: 1 Svenska DOSE-Edit: 1 Suomi Strom Fahr: 15A Polski Strom B/W: 60A Cesky...
-
Page 70: Saving In Setup Menu (W Bp Pack)
8.2.2 Saving in setup menu (W Bp Pack) Access to setup menu Display Battery: E...F Display Maschinentyp: R Entladespg: 21.0V Standby: 30 min Saugnachlauf: 10s Geschw.: Beschl.rampe: 3 Bürst.rampe: 9 CleanspdEdit: 1 SUCTred.Edit: 1 DOSE-Edit: 1 Strom Fahr: 15A Strom B/W: 60A Strom Turb: 30A LCD Kontrast: 27 Most recently occurred... - Page 71 Continued from previous page. Parameter value fixed Adjustment value blinks Time delay 4 seconds The new parameter val- ue is adjusted while blinking Time delay 4 seconds Display Exit setup The new parameter value is displayed and saved Blinking ends English 5.906-269.0 Rev.
-
Page 72: Display Setup Manu (W Bp Pack)
8.2.3 Display setup manu (W Bp Pack) Display parameter setup (exclusively for models with display and info button), sequence and factory settings, 10/09 Parameter Factory min:step:max Remarks Service setting quence access Maschine BR 45/40BD 45/ Modell variant. With the BD, the FACT type: operator menu is hidden, displayed for Discharge... - Page 73 Parameter Factory min:step:max Remarks Service setting quence access Power B / W: 30 A:1 A:60 A Max. regular power of the brush. 60 A In case of overload, the power is limited to the set up value for 15 seconds until the shut-off with fault message occurs.
-
Page 74: Service Tasks
Service tasks 9.1 Replace the motor protection switch (Ep only) 1 Handle fastening screws. 2 Fastening screws, casing cover 3 Covering lid Unscrew fastening screws of the casing cover. Loosen the fastening screws of the handle. Remove the housing cover. 1 Appliance switch with motor protection switch ... -
Page 75: Remove Operating Panel
9.2 Remove operating panel 1 Operator console 2 Fastening screws Unscrew locking screws. Remove the control panel. English 5.906-269.0 Rev. 00 (03/11) -
Page 76: Remove Rear Appliance Cover
9.3 Remove rear appliance cover 1 Fastening screws 2 Appliance cover, rear Unscrew locking screws. Remove device cover from the rear English 5.906-269.0 Rev. 00 (03/11) -
Page 77: Electronics System
9.4 Electronics system 9.4.1 Connect service module 9.4.2 Check the key switch Note Remove operating panel. The service module can be connected starting with control version 2.0. The service programme of the service module must be at least version V 4.0. ... -
Page 78: Check The Drive Motor Switch
9.4.3 Check the drive motor switch 9.4.4 Check detergent switch Remove operating panel. Remove operating panel. 1 Drive motor switch 1 Key switch 2 Indicator lamps "Battery monitoring and fault" 2 Detergent switch 3 Control PCB display Pull the connector plug off the detergent switch. -
Page 79: Check The Programme Selector Switch
9.4.5 Check the programme selector switch Remove rear appliance cover. 1 Connector plug programme selector switch 2 Control board Pull the connector plug of the progamme selector switch from the control PCB. Connect the resistance measurement device to the connector plug of the programme selector switch. -
Page 80: Remove The Control Pcb And The Charger
9.4.6 Remove the control PCB and the charger Remove rear appliance cover. 1 Charger 2 Control board Remove all connector plugs from the control PCB and the charger. Remove the entire sheet metal plate from the ap- pliance. -
Page 81: Check The Detergent Dosing Pump
9.4.7 Check the detergent dosing pump If too little or no detergent is applied, the detergent Measure the AC voltage between the black wire dosing pump must be checked. (negative X10/4) and the gray wire (signal X10/ 12). The AC voltage depends on the battery voltage and changes with different detergent doses. -
Page 82: Check The Microswitch, Brush Motor
9.4.8 Check the microswitch, brush motor 9.4.9 Check supply voltage of brush motor Remove rear appliance cover. Remove rear appliance cover. Pull the connector plug of the terminal strip X10 Turn the programme selector switch to position 5 from the control PCB. -
Page 83: Check The Voltage Supply To The Solenoid Valve For Water Inlet
9.4.10Check the voltage supply to the solenoid 9.4.11Check supply voltage of the drive motor valve for water inlet Remove rear appliance cover. Remove rear appliance cover. Turn the programme selector switch to position 1 Turn the programme selector switch to position 3 "Drive". -
Page 84: Check Supply Voltage Of The Suction Turbine
9.4.12Check supply voltage of the suction turbine 9.4.13Check the charge voltage Remove rear appliance cover. Remove rear appliance cover. Turn the programme selector switch to position 4 Plug in the main plug. "Vacuuming". Measure the voltage on the control PCB between ... -
Page 85: Checking The Total Discharge Protection
9.4.14Checking the total discharge protection As an alternative, you can check the total discharge protection using the voltmeter or the voltage tester. Connect the voltmeter directly to the battery and operate the appliance until the green LED of the battery control lamp begins to blink. -
Page 86: Check The Maintenance-Free Batteries
9.4.15Check the maintenance-free batteries The battery must be fully charged prior to the inspec- If this procedure still does not indicate clearly that tion to obtain a reliable result. there is a faulty cell, the third measurement must be performed after the second load test. The following checks must then be made: Measuring the battery voltage under load until Measurement of the idle voltage... - Page 87 Battery measuring log - maintenance-free battery 1. Measurement - idle voltage Measure the idle voltage with charged battery without consumers. Battery block 2. Measurement - load test Measure the battery voltage several times while the turbine is turned on. Battery block 3.
-
Page 88: Notes Regarding The Battery
9.4.16Notes regarding the battery Replacing a battery due to old age With 12 volt battery blocks, the complete battery set must be replaced in case of damage. Taking out of operation If batteries are not to be used for a while, the following must be observed when storing them: Disconnect the negative battery connection on the –... -
Page 89: Test The Charger
9.4.17Test the charger Connect the charger to the batteries. Determine the current and voltage measuring val- ues after about 10 minutes and record them. Connect the voltage meter and clip-on ammeter to the batteries. The measuring result of the I constant phase in the Plug in mains connector and switch on charger. - Page 90 During the I constant phase, the charger is – charged with the nominal current (see typeplate on charger) and the charge voltage will increase slower or faster depending on the charge condi- tion. After that, the charger will switch to U con- stant phase.
-
Page 91: Vacuum Bar
9.5 Vacuum bar 9.5.1 Clean/replace the vacuum lips 9.5.2 Replacing the deflector roller A scraper roller must be replaced if it is damaged or worn out 1 Fastening screw 2 Scraper roller 3 Vacuum lip mounting 1 Fastening screw 4 Vacuum lip 2 Scraper roller 5 Vacuum bar 3 Vacuum lip mounting... -
Page 92: Adjust/Replace Support Roller Of The Suction Bar
9.5.3 Adjust/replace support roller of the suction 1 Fastening screw 2 Support roller Loosen the fastening screw of the support rollers, if necessary remove the fastening screw and re- place the support roller. Adjust the support rollers until the suction lips are parallel and rest flush on the floor. -
Page 93: Replacing The Suction Turbine
9.6 Replacing the suction turbine 1 Locking screw for fresh water reservoir 2 Fresh water tank Unscrew the locking screw for the fresh water res- ervoir. Tilt the fresh water reservoir rearward. 1 Fastening screw 2 Hose clip 3 Connecting cable 4 Sound insulation hose ... -
Page 94: Bd Cleaning Head
9.7 BD cleaning head 9.7.1 Replacing the disk brushes 1 Pedal for changing brushes 2 Rotation wheel contact pressure 3 Scraper roller 4 Cleaning head Empty the dirt water reservoir. Swivel out the transport roller. Loosen the disc brush from the actuator via the brush change pedal. - Page 95 1 Contact roller 2 Bow brush change 3 transport roller 4 Actuator, disc brush 5 Cleaning head Place the new disc brush underneath the cleaning head. Swivel the transport roller back in. Lower the appliance onto the disc brush until it locks into the actuator.
-
Page 96: Replacing The Toothed Belt
9.7.2 Replacing the toothed belt 1 Pinion of disc brush 2 Gear belt 3 Drive pinion, brush motor 4 Brush motor Pull the toothed belt off of the pinion of the disc brush. Remove the toothed belt from the drive pinion. ... -
Page 97: Replacing The Brush Rollers
9.8 BR cleaning head 9.8.1 Replacing the brush rollers 1 Waste container 4 Brushing rollers 2 Cleaning head 5 Unlocking button for brush roller holder 3 Lockscrew, brush roller holder 6 Scraper roller Empty the dirt water reservoir. Swivel out the transport roller. -
Page 98: Replacing The Water Distribution Bar
9.8.2 Replacing the water distribution bar 1 Cleaning head 2 Water distribution bar The water distribution strip is removed from the cleaning head and can be cleaned under running wa- ter. Installation in reverse order English 5.906-269.0 Rev. 00 (03/11) -
Page 99: Replacing The Toothed Belt
9.8.3 Replacing the toothed belt Remove the cover, model 1 1 Drive pinion, brush motor 1 Toothed belt cover 2 Gear belt 2 Fastening screws 3 Toothed belt tension pulley 4 Drive pinion, brush rollers Unscrew locking screws. Remove the cover from the toothed belt. -
Page 100: Removing The Wastewater Reservoir
9.9 Removing the wastewater reservoir Remove operating panel. 1 Seal of wastewater reservoir 2 Interior side of fresh water reservoir 3 Fastening screw seal Note The seals must be coated with silicone grease prior to assembling the reservoir. 1 Fastening screw, wastewater reservoir 2 Fresh water tank 1 Fresh water tank 2 Fastening screw, wastewater reservoir... -
Page 101: Travel Drive (W Bp Pack Only)
9.10 Travel drive (W Bp Pack only) 9.10.1Replacing the carbon brushes in the drive motor If the motor runs poorly or insufficiently, the carbon brushes could be worn. 1 Closing head 2 Carbon brush 3 Drive motor Unscrew the locking cover. ... -
Page 102: Maintenance And Care
10 Maintenance and care 10.1 Exchange times 10.1.1BD model Wear part Part number Exchange time in minutes Disc brush 4.905-003 Seal ring FW-SW 5.363-647 Scraper roller of suction bar 5.515-267 Roller D60 5.515-280 Rubber lip set 6.273-213 Gear belt 6.348-384 Rubber profile 6.366-043 Drain hose... -
Page 103: Br Model
10.1.2BR model Wear part Part number Exchange time in minutes Brush roller 4.762-392 Skid 5.056-010 Seal ring FW-SW 5.363-647 Scraper roller of suction bar 5.515-267 Roller D60 5.515-280 Rubber lip set 6.273-213 Gear belt 6.348-429 Rubber profile 6.366-043 Drain hose 6.391-070 Suction hose 6.391-474... -
Page 104: Troubleshooting
11 Troubleshooting 11.1 Faults without display Fault Remedial action Appliance cannot be started Check if the mains plug is connected (Ep only). – The appliance is in standby mode. – Set the programme selector switch to position "1" (drive / OFF) and then to the desired programme (Bp only). - Page 105 Fault Remedial action Brushes do not turn Check the electrical connection on the brush motor. – Check whether the brush rollers / disc brush is blocked / remove for- – eign matters / replace brush rollers / disc brushes. Check/replace the toothed belt. –...
-
Page 106: Faults With Display (W Bp Pack Only)
11.2 Faults with display (W Bp Pack only) Display Fault Measures Driv- Vacu- Scrub- Polish- source dis- uming bing play possi- possi- possi- possi- fault Brush motor Short circuit Call customer service. 1* fault=1 in the brush blinking motor Suction turbine Short circuit fault=1 in suction... - Page 107 Display Fault Measures Driv- Vacu- Scrub- Polish- source dis- uming bing play possi- possi- possi- possi- fault Pcb. Fault=4 PCB defec- Call customer service. Perma- tive nent light Pcb. Fault=4 PCB defec- Perma- tive nent light Pcb. Fault=4 PCB defec- Perma- tive nent...
- Page 108 Display Fault Measures Driv- Vacu- Scrub- Polish- source dis- uming bing play possi- possi- possi- possi- fault Suction turbine Overload Turn the programme fault=3 suction mo- selector switch to the blinking position "Drive". Then select the cleaning programme once more. If the fault re- curs, call customer service.
- Page 109 Display Fault Measures Driv- Vacu- Scrub- Polish- source dis- uming bing play possi- possi- possi- possi- fault Battery fault! Battery fault Disconnect the charg- er from the socket. It blinking can be cleaned again. Inform Customer Service at any rate. Emergency Emergency- Release emergency-...
-
Page 110: Technical Specifications
12 Technical specifications BR 45/40 BR 45/40 BD 45/40 BD 45/40 C Bp C Bp Pack C Bp C Bp Pack Power Nominal voltage Battery capacity (5h) Average power consumption Suction engine output Brush motor performance Suction turbine Cleaning power, air quantity... - Page 111 BR 45/40 BR 45/40 BD 45/40 BD 45/40 C Bp C Bp Pack C Bp C Bp Pack Values determined as per EN 60335-2-72 Total oscillation value m/s² < 2,5 Uncertainty K m/s² Sound pressure level L dB(A) Uncertainty K...
- Page 112 BR 55/40 BR 55/40 BD 55/40 BD 55/40 C Bp C Bp Pack C Bp C Bp Pack Power Nominal voltage Battery capacity (5h) Average power consumption Suction engine output Brush motor performance Suction turbine Cleaning power, air quantity Cleaning power, negative pressure 10,5 with closed suction opening >...
- Page 113 BR 55/40 BR 55/40 BD 55/40 BD 55/40 C Bp C Bp Pack C Bp C Bp Pack Values determined as per EN 60335-2-72 Total oscillation value m/s² < 2,5 Uncertainty K m/s² Sound pressure level L dB(A) Uncertainty K dB(A) Sound power level L + Uncertainty K...
- Page 114 BR 45/40 BR 55/40 BD 45/40 BD 55/40 W Bp W Bp W Bp W Bp Pack Pack Pack Pack Power Nominal voltage Battery capacity Ah (5h) Average power consumption Suction engine output Brush motor performance Drive motor output Suction turbine...
- Page 115 BR 45/40 BR 55/40 BD 45/40 BD 55/40 W Bp W Bp W Bp W Bp Pack Pack Pack Pack Permissible overall weight Transport weight 165 (Dose 170) Values determined as per EN 60335-2-72 Total oscillation value m/s² < 2,5 Uncertainty K m/s²...
- Page 116 BR 45/40 BR 55/40 BD 45/40 BD 55/40 C Ep C Ep C Ep C Ep Power Nominal voltage V/Hz 230 / 1~50 Average power consumption 1100 1200 Suction engine output Brush motor performance Suction turbine Cleaning power, air quantity...
- Page 117 BR 45/40 C Bp DOSE *EU 1.533-110.0 0.088-843.0 5.963-150.0 5.970-517.0 BD 45/40 C Bp DOSE *EU 1.533-111.0 0.088-843.0 5.963-150.0 5.970-517.0 BR 45/40 C Bp Pack DOSE *EU 1.533-112.0 0.088-844.0 5.963-150.0 5.970-517.0 BD 45/40 C Bp Pack DOSE *EU 1.533-113.0 0.088-844.0 5.963-150.0 5.970-517.0 BD 45/40 W Bp *EU 1.533-114.0...
-
Page 118: Special Tools
13 Special tools Voltage regulator 6.803-025.0 14 Tightening torques No data. English 5.906-269.0 Rev. 00 (03/11) -
Page 119: Circuit Diagrams
15 Circuit diagrams 15.1 Version 1 15.1.1BR/BD 55/40, 45/40 C Ep (circuit diagram 0.088-845) English 5.906-269.0 Rev. 00 (03/11) -
Page 120: Br/Bd 55/40, 45/40 C Bp (Circuit Diagram 0.088-843)
15.1.2BR/BD 55/40, 45/40 C Bp (circuit diagram 0.088-843) X11/6 X11/7 X11/4 X11/5 S2/PIN 0 X11/14 S2/PIN 1 X11/13 S2/PIN 2 X11/12 S2/W X11/11 X1/2 X11/1 X10/2 X1/1 X11/8 X1/4 X11/9 X1/3 X10/11 X11/2 X10/3 X10/12 X10/4 X10/8 X10/17 X11/3 X11/10 X10/9 X10/18 English 5.906-269.0 Rev. -
Page 121: Br/Bd 55/40, 45/40 C Bp Pack / W Bp Pack (Circuit Diagram 0.088- 844)
15.1.3BR/BD 55/40, 45/40 C Bp Pack / W Bp Pack (circuit diagram 0.088-844) X11/6 X11/7 X11/4 X11/5 S2/PIN 0 X11/14 S2/PIN 1 X11/13 S2/PIN 2 X11/12 S2/W X11/11 X1/2 X11/1 X10/2 X1/1 X11/8 X1/4 X11/9 X10/11 X1/3 X11/2 X10/3 X10/12 X10/4 X10/8 X10/17... -
Page 122: Br/Bd 55/40, 45/40 Wrb (Circuit Diagram 0.088-966 Italy)
15.1.4BR/BD 55/40, 45/40 WRB (circuit diagram 0.088-966 Italy) X11/6 X11/7 X11/4 X11/5 S2/PIN 0 X11/14 S2/PIN 1 X11/13 S2/PIN 2 X11/12 S2/W X11/11 X10/2 X11/1 X11/8 X10/11 X11/9 X11/2 X10/3 X10/12 X10/4 X10/8 X10/17 X11/3 X11/10 X10/9 X10/18 X10/6 X10/15 English 5.906-269.0 Rev. -
Page 123: Version 2
15.2 Version 2 15.2.1BR/BD 55/40, 45/40 C Ep (circuit diagram 0.088-845) English 5.906-269.0 Rev. 00 (03/11) -
Page 124: Br/Bd 55/40, 45/40 C Bp Low Cost (Circuit Diagram 0.088-892)
15.2.2BR/BD 55/40, 45/40 C Bp Low Cost (circuit diagram 0.088-892) S2/PIN 0 X5/3 S2/PIN 1 X5/4 X5/7 S2/PIN 2 X5/8 S2/W X1/2 X5/1 X4/5 X1/1 X5/5 X1/4 X5/6 X4/2 X1/3 X5/2 X4/3 X4/6 English 5.906-269.0 Rev. 00 (03/11) -
Page 125: Br/Bd 55/40, 45/40 C Bp (Circuit Diagram 0.088-843)
15.2.3BR/BD 55/40, 45/40 C Bp (circuit diagram 0.088-843) X11/6 X11/7 X11/4 X11/5 S2/PIN 0 X11/14 S2/PIN 1 X11/13 S2/PIN 2 X11/12 S2/W X11/11 X1/2 X10/2 X11/1 X1/1 X11/8 X1/4 X10/11 X11/9 X1/3 X11/2 X10/3 X10/12 X10/4 X10/8 X10/17 X11/3 X11/10 X10/9 X10/18 X10/6... -
Page 126: Br/Bd 55/40, 45/40 C Bp Pack / W Bp Pack (Circuit Diagram 0.088- 844)
15.2.4BR/BD 55/40, 45/40 C Bp Pack / W Bp Pack (circuit diagram 0.088-844) X11/6 X11/7 X11/4 X11/5 S2/PIN 0 X11/14 S2/PIN 1 X11/13 S2/PIN 2 X11/12 S2/W X11/11 X10/2 X1/2 X11/1 X1/1 X10/11 X11/8 X1/4 X11/9 X1/3 X11/2 X10/3 X10/12 X10/4 X10/8 X10/17... -
Page 127: Legend
15.3 Legend Control PCB, info button and display module (option) Control board Operation capacitor (30 µF) De-interference capacitor (0,22 µF) Main switch (100 A) Battery 24 V / 100 Ah Indicator lamps "Battery monitoring and fault" Brush motor Suction turbine Drive motor (option) Detergent pump (option) Appliance switch with motor protection switch...