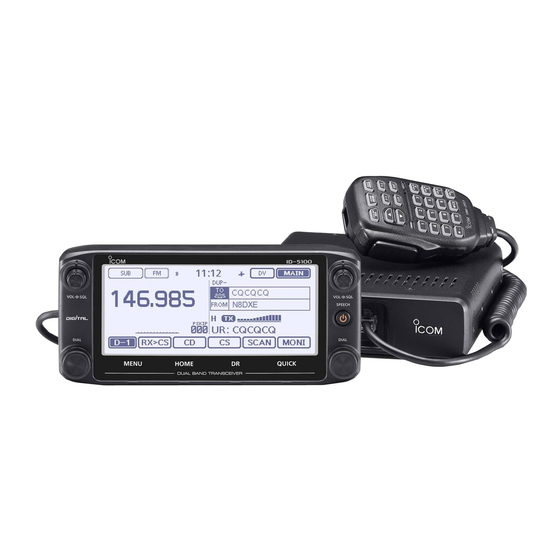
Icom ID-5100E Service Manual
Dual band
Hide thumbs
Also See for ID-5100E:
- Basic manual (108 pages) ,
- Full manual (352 pages) ,
- Operating manual (2 pages)
Table of Contents
Advertisement
Advertisement
Table of Contents

Related Manuals for Icom ID-5100E


Summary of Contents for Icom ID-5100E
- Page 1 DUAL BAND TRANSCEIVER S-15103XZ-C1 June 2014...
- Page 2 8. READ the instructions of the test equipment thoroughly before connecting it to the transceiver. Icom, Icom Inc. and the Icom logo are registered trademarks of Icom Incorporated (Japan) in Japan, the United States, the United Kingdom, Germany, France, Spain, Russia and/or other countries.
-
Page 3: Table Of Contents
TABLE OF CONTENTS SECTION SPECIFICATIONS SECTION INSIDE VIEWS SECTION DISASSEMBLY INSTRUCTION SECTION CIRCUIT DESCRIPITON RECEIVER CIRCUITS ..................4-1 TRANSMITTER CIRCUITS ................4-3 FREQUENCY SYNTHESIZER CIRCUITS ............4-5 VOLTAGE BLOCK DIAGRAM ................4-6 PORT ALLOCATIONS ..................4-6 SECTION ADJUSTMENT PROCEDURES PREPARATION ....................5-1 FREQUENCY ADJUSTMENT ................ -
Page 4: Specifications
SECTION 1. SPECIFICATIONS ■ General • Frequency coverage: 118–174 MHz* , 375–550 MHz* 144–146 MHz, 430–440 MHz 118–136.99166 MHz* , 144–146 MHz, 430–434 MHz, 435–438 MHz 144–146 MHz, 430–434 MHz, 435–438 MHz 144–146 MHz, 430–432 MHz 144–146 MHz, 430–432 MHz 118–174 MHz* , 375–550 MHz* 144–148 MHz, 430–450 MHz*... - Page 5 ■ Transmitter • Modulation system: FM/FM-N Variable reactance frequency modulation GMSK reactance frequency modulation • Maximum Deviation: ±5.0 kHz ±2.5 kHz FM-N 600 ø • Microphone impedance: –60 dBc • Spurious emission: • Output power: High 25 W, Mid 15 W, Low 5 W (TPE version) High 50 W, Mid 15 W, Low 5 W (Other versions) ■...
-
Page 6: Inside Views
SECTION 2. INSIDE VIEWS • CONTROL UNIT (TOP VIEW) 3.3 V REGULATOR (IC6) RESET IC (IC5) CPU CLOCK (X1) CONTROLLER CPU (IC2) • CONTROL UNIT (BOTTOM VIEW) 3.3 V REGULATOR (IC7) Q3 Q3 TOUCH SCREEN CONTROLLER (IC8) -
Page 7: Top View
• MAIN UNIT (TOP VIEW) RS232 LEVEL CONVERTER (IC318) AF SW (IC111) IC324 IC324 VOLTAGE DETECTOR (IC324) D/A CONVERTER ELECTRIC VOLUME IC (IC1) (IC110) AF SW (IC109) IC111 IC111 IC110 IC110 1ST MIXER IC108 IC108 (Band A) 5 V REGULATOR (IC319) IC124 IC124... - Page 8 • MAIN UNIT (BOTTOM VIEW) CURRENT DETECTOR (IC310) APC AMP (IC2) 8 V REGULATOR (IC313) 8 V REGULATOR (IC321) AF POWER AMP (IC106) AF POWER AMP (IC105) 6 V SWITCHING REGULATOR (IC309) 3.3 V REGULATOR (IC311) SRAM (IC304) MAIN CPU CLOCK (X300) MAIN CPU PLL IC (Band B)
- Page 9 SECTION 3. DISASSEMBLY INSTRUCTION M Removing the CONTROL UNIT from the controller. 1) Remove two dials and four knobs from the front 3) Take off the rear panel carefully in the direction of panel. the arrow, and then disconnect the fl at cable. BE CAREFUL when you disassemble the rear panel from the CONTROL UNIT.
- Page 10 M Removing the MAIN UNIT from the chassis. 4) Remove total of 14 screws from the MAIN UNIT. Before disassembling: REMOVE the SD card if inserted. Otherwise the MAIN 14 screws UNIT and chassis cannot be separated. 1) Remove eight screws from the top cover. Eight screws Bottom cover 5) Disconnect the cooling fan cable, and unsolder fi...
-
Page 11: Receive Circuits
SECTION 4. CIRCUIT DESCRIPTION UHF BAND (380–479 MHz) 4-1 RECEIVE CIRCUITS The RF signal from the antenna is passed through the LPF RF CIRCUITS (MAIN UNIT) (L90, L94, L96, C409 and C418) and HPF (L84, L88, C391, VHF BAND (108–174 MHz) C395 and C402) and ANT SW (D68, D73, D75 and D84), and The RF signal from the antenna is passed through two LPFs then applied to the RF AMP (Q23). - Page 12 1ST IF CIRCUITS (MAIN UNIT) 2ND IF CIRCUITS (MAIN UNIT) • Band A • Band A The RX signal from the RF circuit is applied to the 1st mixer The 1st IF signal from the 1st IF circuit is applied to the IF IC (IC125) and mixed with the 1st LO signal, resulting in the (IC121, pin 20), which contains the 2nd IF AMP, 2nd mixer, 38.85 MHz 1st IF signal.
- Page 13 DIGITAL DEMODULATION CIRCUIT (MAIN UNIT) 4-2 TRANSMIT CIRCUITS While operating in the DV mode, the demodulated signal (dig- TX AF CIRCUIT (MAIN UNIT) ital audio signal) is passed through the LPF (Band A: R1195, The AF signal from the microphone (MIC signal) is passed R1206, C1461 and C1475/Band B: R1194, R1205, C1460 through the MIC SW (IC100) and ATT (IC100), and then ap- and C1474) and amplifi...
- Page 14 MODULATION CIRCUITS (MAIN UNIT) TX AMP CIRCUITS (MAIN UNIT) The MIC signal from the TX AF circuits is applied to the VCO VHF BAND as the GMSK (For the DV mode) or Frequency Modulation The TX signal is passed through the LPF (L50, L51, C215, (For the FM mode) modulation signal.
-
Page 15: Frequency Synthesizer Circuits
4-3 FREQUENCY SYNTHESIZER CIRCUIT (MAIN UNIT) VCOs • Band A The ID-5100A/E has total of fi ve VCOs: three VCOs for Band A portion of VHF and UHF VCOs output signal is amplifi ed by A and another two for Band B. the buffer (Q213), and then fed back to the PLL IC (IC201). -
Page 16: Port Allocations
4-4 VOLTAGE DIAGRAM 4-5 PORT ALLOCATIONS • CONTROLLER CPU (CONTROL UNIT: IC2) W300 Ball NOISE Q32/Q34 Line Name Description FANHV FILTER UTX_C I SENS Touch panel controller touch sens- TWDTX ing data. IC310 Q27/Q28 CURRENT RESET Reset signal input. IDET VTX_C DETECT R_VOLV... - Page 17 • MAIN CPU (MAIN UNIT: IC300) Ball Ball Line Name Description Line Name Description ® Bluetooth unit power supply con- R_LV Lock voltage input. (Band B) trol. External power supply voltage. BT_SW ® H= The Bluetooth unit is acti- WX alert signal (1050 Hz). (Band L_WXALT vated.
- Page 18 • MAIN CPU (MAIN UNIT: IC300) (continued) • SUB CPU (MAIN UNIT: IC303) Ball Ball Line Name Description Line Name Description CI-V/CLONE UART data. Reference frequency control. CLOUT L_REFC (300–38400 bps) (Band A) DSP reset control. Reference frequency control. DSP_RESET R_REFC L=Reset.
-
Page 19: Preparation
SECTION 5. ADJUSTMENT PROCEDURE 5-1 PREPARATION M REQUIRED TEST EQUIPMENT EQUIPMENT GRADE AND RANGE EQUIPMENT GRADE AND RANGE Modifi ed 8-pin modular jack JIG cable (See the illustration shown below.) Output voltage: 13.8 V DC DC power supply Current capacity: More than 20 A Frequency range: 300–3000 Hz... -
Page 20: Frequency Adjustment
M ENTERING THE ADJUSTMENT MODE 1) Connect the JIG cable to the MICROPHONE CONNECTOR (see the illustration on page 5-1). 2) Turn Band A [SQL] maximum clockwise. 3) Set Band B [SQL] to the center position. 4) Touch and hold [QUICK], and turn ON the power. •... -
Page 21: Transmit Adjustments
5-3 TRANSMIT ADJUSTMENTS M TRANSMIT OUTPUT POWER ADJUSTMENTS 1) Select the adjustment item by rotating Band A [DIAL]. 2) Set or modify the adjustment value as specifi ed, by rotating Band B [DIAL]. 3) Touch [ENT] to store the value. ADJUSTMENT ADJUSTMENT ITEM OPERATION... -
Page 22: Deviation Adjustments
M DEVIATION ADJUSTMENTS 1) Select the adjustment item by rotating Band A [DIAL]. 2) Set or modify the adjustment value as specifi ed, by rotating Band B [DIAL]. 3) Touch [ENT] to store the value. ADJUSTMENT ADJUSTMENT ITEM OPERATION VALUE CONDITIONS 144 MHz Band (Band Low) - Page 23 M DEVIATION ADJUSTMENT (continued) 1) Select the adjustment item by rotating Band A [DIAL]. 2) Set or modify the adjustment value as specifi ed, by rotating Band B [DIAL]. 3) Touch [ENT] to store the value. ADJUSTMENT ADJUSTMENT ITEM OPERATION VALUE CONDITIONS 144 MHz Band...
-
Page 24: Receive Adjustments
5-4 RECEIVE ADJUSTMENTS M RECEIVE SENSITIVITY ADJUSTMENT 1) Select the adjustment item by rotating Band A [DIAL]. 2) Set or modify the adjustment value as specifi ed, by rotating Band B [DIAL]. 3) Touch [ENT] to store the value. ADJUSTMENT ITEM ADJUSTMENT CONDITIONS OPERATION VALUE... - Page 25 M S-METER ADJUSTMENT 1) Select the adjustment item by rotating Band A [DIAL]. 2) Confi gure the SSG setting as specifi ed. 3) Touch [ENT] to automatically adjust and store the value. ADJUSTMENT ADJUSTMENT ITEM OPERATION VALUE CONDITIONS S-METER • Connect a Standard Signal Generator to the antenna connector. 127.020 MHz Band A (AM) [S11]...
- Page 26 M SQUELCH ADJUSTMENT 1) Select the adjustment item by rotating Band A [DIAL]. 2) Touch [ENT] to automatically adjust and store the value. ADJUSTMENT ITEM OPERATION VALUE • Connect a Terminator (50 ) to the antenna connector, to block any RF signal. SQUELCH 127.020 MHz (AM) [SQ1]...
-
Page 27: Parts List
SECTION 6. PARTS LIST [CONTROL UNIT] [CONTROL UNIT] PARTS PARTS DESCRIPTION DESCRIPTION LOCATION LOCATION 1140016220 S.IC STM32F101VFT6 <TOMEN> 84.3/89.3 4030021580 S.CER GRM188B31E225KA12D 77.8/25.8 1180003480 S.REG NJU7772F33-TE1-#ZZZB 21.1/39.1 4030021580 S.CER GRM188B31E225KA12D 76.2/29.3 1110006490 S.IC LMV321IDCKR 95.4/32.0 4030021580 S.CER GRM188B31E225KA12D 80.4/21.4 1130017190 S.IC UC6528XBNQ4GRC <GOS>... -
Page 28: Main Unit
[MAIN UNIT] [MAIN UNIT] PARTS PARTS DESCRIPTION DESCRIPTION LOCATION LOCATION 1110003800 S.IC NJM2904V-TE1-#FMZB 50.8/18.0 Q108 1590004070 S.TRA LDTC144EET1G <SLVJ> 88.5/31.4 1150002423 IC RA60H1317M1A-222 Q110 1590004070 S.TRA LDTC144EET1G <SLVJ> 112.8/41.2 1150002400 IC RA60H4047M1-121 Q112 1590004590 S.TRA DMC506010R 105.4/35.6 IC100 1130015760 S.IC TC74VHC4066AFK(EK) 66.6/20.7 Q113... - Page 29 [MAIN UNIT] [MAIN UNIT] PARTS PARTS DESCRIPTION DESCRIPTION LOCATION LOCATION 1790001621 S.DIO 1SV308(TPL3F) 68.5/76.1 D319 1750001810 S.DIO L1SS400T1G <SLVJ> [EUR-01] T 97.5/99.6 1790001621 S.DIO 1SV308(TPL3F) 27.7/76.1 1750001810 S.DIO L1SS400T1G <SLVJ> [ITR-01] 1750001810 S.DIO L1SS400T1G <SLVJ> 85.0/71.1 D321 1750001810 S.DIO L1SS400T1G <SLVJ> [ITR-01] T 95.7/112.5 1750001810 S.DIO...
- Page 30 [MAIN UNIT] [MAIN UNIT] PARTS PARTS DESCRIPTION DESCRIPTION LOCATION LOCATION 6200010160 S.COI AS080440-22N 39.0/126.8 7030005090 S.RES ERJ2GEJ 104 X (100K) 69.6/122.0 6200010420 S.COI FHW1210HC 1R0JGT <JJE> 81.8/145.0 7030005530 S.RES ERJ2GEJ 100 X (10) 20.3/120.4 6200010060 S.COI AS080647-56N 62.4/150.4 7030005530 S.RES ERJ2GEJ 100 X (10) 68.4/122.4 6200010060 S.COI AS080647-56N...
- Page 31 [MAIN UNIT] [MAIN UNIT] PARTS PARTS DESCRIPTION DESCRIPTION LOCATION LOCATION R233 7030006070 S.RES ERJ12YJ101U (100) 82.2/140.2 R403 7030005240 S.RES ERJ2GEJ 473 X (47K) 117.4/86.2 R234 7520000290 S.POS PRF18BE471QB5RB 39.9/133.0 R404 7030007320 S.RES ERJ2GEJ 225 X (2.2M) 107.6/38.8 R236 7030005120 S.RES ERJ2GEJ 102 X (1K) 86.1/84.4 R405 7030005040 S.RES ERJ2GEJ 472 X (4.7K)
- Page 32 [MAIN UNIT] [MAIN UNIT] PARTS PARTS DESCRIPTION DESCRIPTION LOCATION LOCATION R533 7030005530 S.RES ERJ2GEJ 100 X (10) 8.4/64.7 R753 7030005120 S.RES ERJ2GEJ 102 X (1K) 62.6/50.0 R534 7030005530 S.RES ERJ2GEJ 100 X (10) 49.4/64.7 R754 7030005040 S.RES ERJ2GEJ 472 X (4.7K) 62.2/54.5 R539 7030005170 S.RES ERJ2GEJ 474 X (470K)
- Page 33 [MAIN UNIT] [MAIN UNIT] PARTS PARTS DESCRIPTION DESCRIPTION LOCATION LOCATION R910 7030005120 S.RES ERJ2GEJ 102 X (1K) 88.6/19.0 R1100 7410001140 S.ARR EXB28V104JX 112.7/31.4 R911 7030005120 S.RES ERJ2GEJ 102 X (1K) 88.6/20.6 R1101 7410001140 S.ARR EXB28V104JX 130.6/67.0 R915 7410001220 S.ARR EXB28V103JX 89.7/50.7 R1102 7030005090 S.RES ERJ2GEJ 104 X (100K)
- Page 34 [MAIN UNIT] [MAIN UNIT] PARTS PARTS DESCRIPTION DESCRIPTION LOCATION LOCATION 4030017530 S.CER C1005 CH 1H 0R5B-T 9.3/112.3 C180 4030017460 S.CER C1005 JB 1H 102K-T 63.3/141.0 4030017520 S.CER C1005 CH 1H 0R3B-T 57.7/116.6 C181 4030017460 S.CER C1005 JB 1H 102K-T 63.3/141.9 4030017530 S.CER C1005 CH 1H 0R5B-T 57.7/115.0 C182...
- Page 35 [MAIN UNIT] [MAIN UNIT] PARTS PARTS DESCRIPTION DESCRIPTION LOCATION LOCATION C376 4030017460 S.CER C1005 JB 1H 102K-T 44.3/126.7 C580 4030020000 S.CER C1005 JB 1A 105K-T 120.0/14.9 C377 4030017460 S.CER C1005 JB 1H 102K-T 90.5/87.2 C581 4030016930 S.CER C1005 JB 1A 104K-T 92.5/24.4 C378 4030021210 S.CER GRM31A5C2J150JW01D...
- Page 36 [MAIN UNIT] [MAIN UNIT] PARTS PARTS DESCRIPTION DESCRIPTION LOCATION LOCATION C728 4030016930 S.CER C1005 JB 1A 104K-T 13.3/56.3 C921 4030017730 S.CER C1005 JB 1H 471K-T 69.6/41.1 C729 4030016930 S.CER C1005 JB 1A 104K-T 54.3/56.3 C922 4030017460 S.CER C1005 JB 1H 102K-T 80.2/32.4 C730 4030017420 S.CER C1005 CH 1H 470J-T...
- Page 37 [MAIN UNIT] [MAIN UNIT] PARTS PARTS DESCRIPTION DESCRIPTION LOCATION LOCATION C1060 4030017520 S.CER C1005 CH 1H 0R3B-T 70.4/44.6 C1265 4030020000 S.CER C1005 JB 1A 105K-T 126.6/33.7 C1061 4030017460 S.CER C1005 JB 1H 102K-T 20.7/44.9 C1268 4030020000 S.CER C1005 JB 1A 105K-T 126.6/32.1 C1062 4030017460 S.CER C1005 JB 1H 102K-T...
- Page 38 [MAIN UNIT] [MAIN UNIT] PARTS PARTS DESCRIPTION DESCRIPTION LOCATION LOCATION C1437 4030017460 S.CER C1005 JB 1H 102K-T 113.6/52.9 EP319 6910018460 S.BEA MMZ1005Y102C-T 128.0/23.0 C1438 4030016930 S.CER C1005 JB 1A 104K-T 104.1/58.8 EP320 6910018460 S.BEA MMZ1005Y102C-T 125.2/21.4 C1439 4030020000 S.CER C1005 JB 1A 105K-T 108.1/50.7 EP321 6910018460 S.BEA...
- Page 39 SECTION SECTION 7 7 . MECHANICAL PARTS [CONTROL UNIT] [CHASSIS UNIT] ORDER ORDER DESCRIPTION QTY. DESCRIPTION QTY. W1** 8600036881 SP CABLE-1 (FX2493 P01LO)<PHL> 6510027710 S5B-ZR-SM4A-TF (LF) (SN) 6510028740 14FLH-SM1-TB (LF) (SN) 6510028880 04-6238-010-410-800+ 6510004881 MR-DSE-01-1 <GA> 6510030110 IMSA-9681S-38Y901 6450002260 6606A-B11G ROHS <KTC> 6510030080 IMSA-9632S-04Y800 2510001160 057P0802 5030003870 JIC-MSGF013343-01 <RYOYO>...
- Page 40 MP8(CHASSIS)x4 (8810009611) MP8(CHASSIS) (8810009611) MP8(CHASSIS) (8810009611) MP3(CHASSIS) (8110010550) MP2(CONTROL) W300(MAIN) (8210029710) (8900015130) W1(CHASSIS) (8600036881) SP1(CHASSIS) MP12(CONTROL) MP12(CHASSIS)x4 (2510001160) (8810009221) (8810010141) MP6(CONTROL) MP6(CHASSIS) MP5(CHASSIS) (8930089520) (8930078590) (8110009020) MP7(CHASSIS) MF1(CHASSIS) (8930089330) (2710000820) MP11(CONTROL)x4 EP13(CONTROL) (8810009221) (6910024430) MP11(CHASSIS)x2 DS1(CONTROL) MP16(CONTROL) (8810008661) (5030003870) (8930064320) J1(CHASSIS) MP11(CONTROL) MP4(CONTROL)
- Page 41 SECTION BOARD LAYOUTS • CONTROL UNIT (B-7917B) (TOP VIEW) [VOL] [VOL] B-7917B • • [SQL] [SQL] [PWR] [DIAL] [DIAL]...
- Page 42 • CONTROL UNIT (B-7917B) (BOTTOM VIEW) EP11...
- Page 43 • MAIN UNIT (B-8059B) (TOP VIEW) J102 [SP2] J101 [SP1] J304 [DATA] [COOLING FAN] [ANTENNA CONNECTOR]...
- Page 44 • MAIN UNIT (B-8059B) (BOTTOM VIEW) J103 IC105 IC106 W300 [DC POWER SOCKET]...
- Page 45 SECTION 9. BLOCK DIAGRAM W300 IC103 NOISE Q32/Q34 FANHV Audio Processor LSI IC307 IC104 UTX_C BTMIC DIGI/AN I SENS BUFF SELECT IC102 IC100 IC100 IC104 IC310 Q27/Q28 BTMIC DTCS MUTE IC205 CURRENT IC103 IC103 IDET VTX_C DETECT VCOMOD MUTE REFMOD J100 IC205 Q302/Q306...
- Page 46 D223/D224 D227/D229 Q235 Q226 Q229-Q231 Q232/Q227 D231/D233 ANTENNA RIPPLE BUFF 375-550MHz 118-550MHz R_UHF IC208 D52/D234/D235 D62/D67 D68/D73/D75 TX:400M-470MHz TX/RX DRIVE DRIVE 400-470MHz TX/RX RX:353.65M-516.35MHz LIMITER D225/D226 D230 Q236 Q221 IC207/Q222 Q233/Q228 D232 R_LV LOOP BUFF BUFF R_VHF D66/D69/ 118-174MHz R_VCOSHIFT RX:164.35M-220.35MHz D59/D63 D70/D77...
- Page 47 SECTION 10. VOLTAGE DIAGRAM • CONTROL UNIT MMZ1005Y102CT EP12 DTXD DRXD BOOT0 TWPIRQ TWDRX TWBUSY 1 BUSY 2 DIN TWDTX 3 CS TWCS TWDCLC 4 DCLK UC6528XBNQ4G RESET JTMS TEMP JTCK JTDI JTDO NJTRST TRACECLK TRACED0 TRACED1 TRACED2 TRACECLK 1 PE2 VDD_2 2 PE3 TRACED3...
- Page 48 • MAIN UNIT (1/10) FANHV FANHV R_UAGC R_UR5 DB2S31400 R:4.81V R:4.05V 2.2k PCON_V PCON_V PCON_U U-R (375-550) PCON_U R_UR5 R_UR5 L_UR5 L_UR5 R_VR5 2.5P 0.5P R_VR5 L_VR5 L_VR5 C111 C139 C147 C163 0.5P 1.5P 0.001 3SK293 0.5P C182 C189 R123 3SK293 C112 4.7U...
- Page 49 • MAIN UNIT (2/10) T:7.88V 2SA1362 7.98V FANHV 13.76V LDTC144EE R132 VTX_C JDP2S12CR C244 R168 C267 R179 R186 C360 C372 C226 R147 C233 V_LOOUT AS080647 AS080647 0.001 0.001 AS080647 AS080747 AS080447 AS100340 AS080440 AS100340 1SV308 0.001 0.001 C304 C338 MT3S20P 0.001 0.001 LRB706F...
- Page 50 • MAIN UNIT (3/10) 7.99V 3.75V R431 8.2k R382 R385 3.29V 100k 100k C637 C643 C593 0.0039 0.015 C566 0.78V DMC506010R Q112 3.29V C658 R457 R463 R465 CLONE IC107 13.67V 0.033 LMV321IDCK R608 LA4425A IC106 C634 [SP2] R307 MPZ1608S221A C572 R376 C590 C603...
- Page 51 • MAIN UNIT (4/10) 617DB MAIN UNIT (6/10) C813 R_AMC 4.79V C814 R_LO R_R5 LDTC144EE MAIN UNIT (1/10) R_AGC Q117 Q131 R_R5C L205 R525 R533 Q119 FI100 LDTC144EE R559 R573 R583 LDTA114YE LTWC450H D105 C695 C705 D109 150k Q123 Q133 R601 LDTA144EE DA2S10100L...
- Page 52 • MAIN UNIT (5/10) LDTC144EE Q208 R736 L_VVCOC L_UVCOC Q212 2SC4738 Q206 7.99V LDTC144EE DMA501010 Q209 R737 LDTC144EE X200 Q241 R700 L_REFC VCON IC201 C915 Q240 OSCIN LDTA114YE 0.001 R711 OSCOUT CR-833 FOUT C979 DATA R763 CLOCK L_UNLK D211 MB15A02PFV1 R704 L1SS400 L_R5...
- Page 53 • MAIN UNIT (6/10) LDTC144EE Q229 R821 R_VVCOC R_UVCOC Q231 2SC4738 Q226 4.97V LDTC144EE DMA501010 Q230 R822 R859 X201 IC206 C1029 560k OSCIN R782 0.001 OSCOUT R793 R_REFC VCON FOUT CR-875 C1031 2969 2775 DATA MP204 MP206 CLOCK R785 D221 MB15A02PFV1 R_R5 L1SS400...
- Page 54 • MAIN UNIT (7/10) CP300 R915 CP301 CP302 CP303 CP304 FZTX R916 CP305 FZRX CP306 R908 SCRES CP308 CP309 TEST0 CP310 TEST1 CP311 TEST2 CP312 D334 R923 CP317 LRB706F EMLE CP318 CP319 CP320 RESET CP321 CP322 CP323 CP324 TRST CP325 CP326 CP327 R902...
- Page 55 • MAIN UNIT (8/10) IC321 NJM2835DL1 8.02V D336 MICMUTE MICMUTE DTMUTE DTMUTE URX_RPT URX_RPT VRX_RPT VRX_RPT L_DASEL L_DASEL LRB706F FANHV Q306 R_DASEL *R1002 R_DASEL IC310 R1005 0.003 R_UNLK VOUT 2SB1132L R_UNLK L_UNLK 330k L_UNLK L_RMUTE LOAD R1031 L_RMUTE AF_SW AF_SW ZXCT1022 AF_RSW AF_RSW...
- Page 56 • MAIN UNIT (9/10) CP417 BER_DATA BER_CK CP418 3.31V CP425 CP426 DSP_RESET SPI_RX R1151 SPI_CLK CP427 SPI_TX DV_EMU1 DV_EMU0 DV_TCK R1154 DV_TDO IC401 DV_TDI DV_TRST SPI_RX SPI_RX D0(DQ1) NC(DQ3) DV_TMS WP(DQ2) DI(DQ0) J400 R1105 EN25Q40 4.7k SPI_CLK SPI_TX CP419 R1118 AUDIO IC SC-1445 CP400...
- Page 57 • MAIN UNIT (10/10) DSP_DEMP DSP_DEMP DSP_RESET DSP_RESET DSP_SO DSP_SO DSP_PD DSP_PD DSP_CK DSP_CK DSP_REMP R1196 R1207 R1211 R1194 R1205 C1484 DSP_REMP DSP_SI R_DDET R_DDET DSP_SI To MAIN UNIT (8/10) DSP_STB 330k DSP_STB IC406 DSP_REQ DSP_REQ SC_SDO SC_SDO SC_SDI SC_SDI SC_LR SC_LR SC_CLK...
- Page 58 Highway 17A Delta, B.C., V4K 5B8, Canada : http://www.icomspain.com Phone : +1 (604) 952-4266 Fax : +1 (604) 952-0090 E-mail : icom@icomspain.com : http://www.icomcanada.com E-mail : info@icomcanada.com Blacksole House, Altira Park, Herne Bay, Kent CT6 6GZ, UK Phone : +44 (0) 1227 741741...
- Page 59 S-15103XZ-C1 1-1-32, Kamiminami, Hirano-ku, Osaka 547-0003, Japan © 2014 Icom Inc.
Need help?
Do you have a question about the ID-5100E and is the answer not in the manual?
Questions and answers