Icom ID-51A Basic Instructions
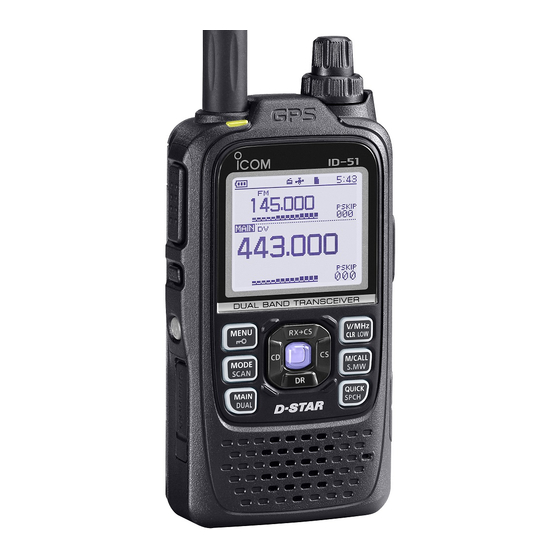
Vhf/uhf transceiver
Hide thumbs
Also See for ID-51A:
- Advanced manual (413 pages) ,
- Advanced instructions (369 pages) ,
- Basic instructions (104 pages)
Table of Contents
Advertisement
Quick Links
New2001
BASIC INSTRUCTIONS
This device complies with Part 15 of the FCC Rules. Operation is
subject to the following two conditions: (1) this device may not cause
harmful interference, and (2) this device must accept any interference
received, including interference that may cause undesired operation.
WARNING: MODIFICATION OF THIS DEVICE TO RECEIVE CEL-
LULAR RADIOTELEPHONE SERVICE SIGNALS IS PROHIBITED
UNDER FCC RULES AND FEDERAL LAW.
New2001
UNIQUE FEATURES OF D-STAR
Easy to QSO to the world
Easy call sign entry with
the Repeater list or TX/RX
History
Call Sign Capture key
makes call sign capture
easy.
1
VHF/UHF TRANSCEIVER
VHF/UHF TRANSCEIVER
You can easily begin using
D-STAR repeaters!
Worldwide
communication!!
This key makes call sign
capture easy!
New2001
Easy Desti-
nation (To)
setting!
Advertisement
Table of Contents

Related Manuals for Icom ID-51A


Summary of Contents for Icom ID-51A
- Page 1 New2001 BASIC INSTRUCTIONS VHF/UHF TRANSCEIVER VHF/UHF TRANSCEIVER This device complies with Part 15 of the FCC Rules. Operation is You can easily begin using subject to the following two conditions: (1) this device may not cause harmful interference, and (2) this device must accept any interference D-STAR repeaters! received, including interference that may cause undesired operation.
-
Page 2: Preparation
New2001 PREPARATION Before starting D-STAR, entering and registering your call sign (MY) are needed, as described below. IMPORTANT! STEP 1 STEP 2 Entering your call sign (MY) into the transceiver. Registering your call sign (MY) to a gateway repeater. You have completed the steps!! Push [MENU] STEP 1 Enter your call sign into the transceiver... -
Page 3: Register Your Call Sign To A Gateway Repeater
New2001 PREPARATION Convenient! New users If necessary, enter a note of up to 4 characters, such as the Now, you can begin using D-STAR! start here! model of the transceiver, name, area name, and so on, after your call sign. Push D-pad(#) until the cursor Access the repeater... -
Page 4: Table Of Contents
New2001 New2001 TABLE OF CONTENTS D-STAR Operation Other functions Saving settings Recording a QSO conversation Go to page 37 Go to page 39 Troubleshooting Checking your position using Go to page 35 Go to page 43 The destination call sign is al- ready programmed? YES Go to page 31 Go to section 9 of the CD Ad-... -
Page 5: Table Of Contents
Rapid charging is possible, and the charg- ing time period is approximately 3 hours choice, and hope you agree with Icom’s philosophy of “tech- with the supplied battery pack. (Half peri- nology first.” Many hours or research and development went ods of the ID-31A/E) into the design of your ID-51A or ID-51E. -
Page 6: Explicit Definitions
SAVE THIS INSTRUCTION MANUAL— This in- struction manual contains basic operating instructions for the ID-51A/ID-51E. New2001 New2001 ABOUT THE SUPPLIED CD D Starting the CD The following instructions and installers are included on the Insert the CD into the CD drive. -
Page 7: Precautions
R WARNING! NEVER operate the transceiver with an earphone, headphones or other audio accessories at high charged with Icom chargers. Using third-party or counterfeit volume levels. Hearing experts advise against continuous high volume operation. If you experience a ringing in your the battery to burst. -
Page 8: Battery Cautions
Battery damage may not be visible on the outside of the an abnormal odor, heats up, or is discolored or deformed. If any of these conditions occur, contact your Icom dealer or or any other damage, the cells inside the battery may rupture distributor. -
Page 9: Important Notes
D Spurious signals Depending on the combination of the operating band and ing the ID-51A or ID-51E inside a vehicle, you may not re- mode, the Dualwatch or Triple-watch operation may generate ceive GPS signals. We recommend you use it near a win- certain spurious signals, or noise may be heard. -
Page 10: Step3 Select The Destination Repeater ("To")
New2001 New2001 ACCESS THE REPEATER Push D-pad( !) to select the If the selected repeater name repeater group where your is displayed in “FROM” on access repeater is listed, and the DR mode screen, the ac- then push D-pad(Ent). cess repeater setting is com- pleted. -
Page 11: How To Use The Rx History
New2001 ACCESS THE REPEATER If the selected repeater name If you get a reply call, or “UR?” in step r is displayed in “TO” appears on the LCD within 3 on the DR mode screen, the seconds, your signal reached destination repeater setting is your access repeater and your completed. -
Page 12: Step2 Save The Destination Call Sign Into Your Call Sign Memory From The Rx History
New2001 New2001 HOW TO USE THE RX HISTORY Save the destination call sign into your STEP 2 call sign memory from the RX History While in the RX HISTORY Push D-pad( !) to select “To screen, push D-pad(!) to se- Your Memory,”... -
Page 13: Capturing A Call Sign
New2001 HOW TO USE THE RX HISTORY After entering the name, push Push D-pad( !) to select “YES,” D-pad(Ent). and then push D-pad(Ent). Completed The saved call sign is displayed on Push D-pad( !) to select the YOUR CALL SIGN screen as a “<<Add Write>>,”... -
Page 14: Step1 Set The Received Call Sign To The Destination
New2001 New2001 CAPTURING A CALL SIGN STEP 1 Set the received call sign to the destination STEP 2 Hold down [PTT] to transmit While holding down [PTT], Hold down for 1 second. level. the station call sign is announced if the RX>CS Speech function is set to ON in the MENU screen. -
Page 15: Step2 Set "To" (Destination)
New2001 New2001 MAKING A LOCAL AREA CALL STEP 2 Set “TO” (Destination) STEP 3 Hold down [PTT] to transmit Push D-pad( %) to select “TO,” at your normal voice level. and then push D-pad(Ent). D-pad (Ent) Transmitting < Communication example for a Local area call>... -
Page 16: Step2 Set "To" (Destination)
New2001 New2001 MAKING A GATEWAY CALL STEP 2 Set “TO” (Destination) STEP 3 Hold down [PTT] to transmit Push D-pad( %) to select “TO,” and then push D-pad(Ent). at your normal voice level. D-pad it is a repeater call sign. (Ent) Transmitting <... -
Page 17: Making A Simplex Call
New2001 CALLING A DESTINATION STATION STEP 2 Set “TO” (Destination) STEP 3 Hold down [PTT] to transmit Push D-pad( %) to select “TO,” While holding down [PTT], and then push D-pad(Ent). your normal voice level. D-pad (Ent) < Communication example Transmitting with a destination station>... -
Page 18: Step2 Hold Down [Ptt] To Transmit
New2001 New2001 MAKING A SIMPLEX CALL STEP 2 Hold down [PTT] to transmit Push D-pad( !) to select “25: While holding down [PTT], Simplex,” and then push D- pad(Ent). level. transmit output power level. Release [PTT] to receive. Transmitting Push D-pad( !) to select “433.450,”... -
Page 19: Saving Settings
New2001 TROUBLESHOOTING PROBLEM POSSIBLE CAUSE SOLUTION REF. Even holding down , the Sec. 17 of the on the CD. Advanced In- DR mode will not appear. CLONING SOFTWARE struction PDF transceiver. Advanced In- struction PDF Even holding down , the —... -
Page 20: Step2 View The Saved Contents
New2001 New2001 SAVING SETTINGS STEP 2 View the saved contents Station A Station B Hamacho area Push [M/CALL] to select the Memory mode. ” appears. Memory mode screen w Rotate [DIAL] to select the Stored channel M-CH 11 M-CH 006 M-CH 010 is selected stored channel. -
Page 21: Step2 Format The Microsd Card
New2001 New2001 RECORDING A QSO ONTO A microSD CARD STEP 2 Format the microSD card When using a preformatted brand new microSD card, format- The confirmation screen “For- ting is not necessary. However, we still recommend you format mat OK?” appears. it in the following way to get the card’s best performance. -
Page 22: Gps Operation
Go to step r New2001 New2001 New2001 GPS OPERATION The ID-51A/E has a built-in internal GPS receiver. You can See the PDF type Advanced Instruction for more details of the GPS operation. mode. Receiving GPS data from the internal STEP 1... -
Page 23: Step2 Displaying Your Position
New2001 New2001 GPS OPERATION STEP 2 Displaying your position <Contents of the GPS Position screen> Confirm the GPS icon is dis- played on the LCD. Latitude The top of the compass is North. Longitude Your course head- Grid Locator ing is Northwest. Altitude Your course head- Speed... -
Page 24: Step2 Turning On The Gps Logger Function
New2001 New2001 New2001 INTRODUCING NEW FUNCTIONS This section introduces new functions built into the ID-51A/E. Two band monitoring plus BC Radio NEW! When the transceiver receives 2 amateur bands on the MAIN band and SUB band, you can still listen to the Broadcast (BC) -
Page 25: Auto Position Reply Function
New2001 New2001 INTRODUCING NEW FUNCTIONS NEW! Auto Position Reply function NEW! Speech function When you receive a call addressed to your own call sign, but Hold down [SPCH] for 1 second to audibly announce the displayed frequency and operating mode, or call sign. ceiver, this function automatically replies with your own call sign and transmits your position. -
Page 26: Information
Ireland Italy United Kingdom from that to which the receiver is connected. Latvia for help. CAUTION: Changes or modifications to this device, not ex- pressly approved by Icom Inc., could void your authority to operate this device under FCC regulations. -
Page 27: Index
New2001 INDEX Access repeater Destination repeater (“TO”) setting ........1 Access repeater (“FROM”) setting .........17 DR mode Access the repeater ............17 Selection ................17 ....20 Auto Position Reply function ..........48 Explicit definitions ...............10 Entering your own call sign into the transceiver ....2 Battery Cautions .................14 FCC information ..............51... - Page 28 Two band monitoring plus BC Radio ........47 Troubleshooting ..............35 Unique features of D-STAR ..........1 Using a microSD card ............3 New2001 #02 Europe <Intended Country of Use> #03 U.K. <Intended Country of Use> #04 Italy <Intended Country of Use> A-7056H-1EX Printed in Japan 2012 Icom Inc. ©...
Need help?
Do you have a question about the ID-51A and is the answer not in the manual?
Questions and answers