Avaya 9600 Series User Manual
Ip office release 6.1
Hide thumbs
Also See for 9600 Series:
- Installing and administering (268 pages) ,
- Administrator's manual (186 pages) ,
- User manual (178 pages)

Related Manuals for Avaya 9600 Series


Summary of Contents for Avaya 9600 Series
-
Page 1: 9600 Series Phone User Guide
TelephoneMagic.com IP Office Release 6.1 9600 Series Phone User Guide Issue 02c - (28 October 2010) - Page 2 Avaya is not responsible for the contents or reliability of any linked Web sites consent of Avaya can be a criminal, as well as a civil, offense under the referenced within this site or documentation(s) provided by Avaya. Avaya is applicable law.
-
Page 3: Table Of Contents
..............40 14.2 Forwarding Calls ..............75 8.3 Viewing Conference Details ..............40 14.2.1 Forward Unconditional (Status Menu) ................77 8.4 Dropping/Muting Parties ..............41 9600 Series Phone User Guide Page 3 IP Office Release 6.1 Issue 02c (28 October 2010) - Page 4 ..............138 17.6.5 Ringer Volume ................104 22.4 Auto Hold ..............138 17.6.6 Internal Auto Answer ................105 22.5 Bridged Appearance Button ..............138 9600 Series Phone User Guide Page 4 IP Office Release 6.1 Issue 02c (28 October 2010)
- Page 5 ..............141 22.30 Small Community Network ..............141 22.31 System Administrator ..............141 22.32 System Phone User ..............141 22.33 Twinning ..............141 Index ................143 9600 Series Phone User Guide Page 5 IP Office Release 6.1 Issue 02c (28 October 2010)
-
Page 7: Introduction
Chapter 1. Introduction 9600 Series Phone User Guide Page 7 IP Office Release 6.1 Issue 02c (28 October 2010) -
Page 9: Important Safety Information
Introduction: 1. Introduction This guide is for 9600 Series telephones supported by IP Office Release 6.1 running on IP Office 500 and 500v2 systems. · 9600 Series Phones These are IP phones supported by IP Office and other Avaya telephone systems. The supported phones are the:... -
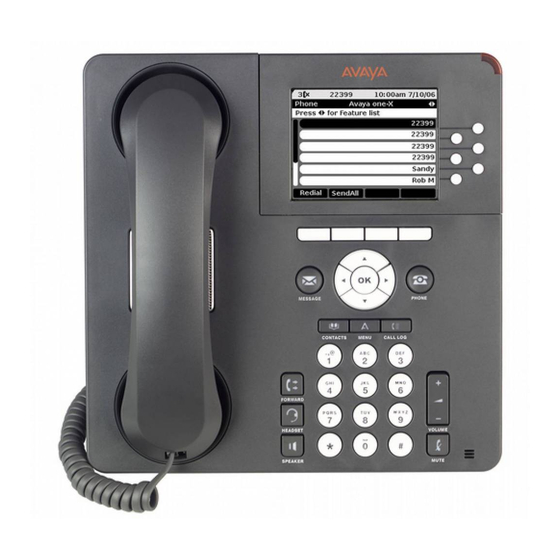
Page 10: 9620 Telephone
However also note there are features that the system maintainer can assign that are not available to you to assign. This guide just includes features that you can assign yourself if required. 9600 Series Phone User Guide Page 10 IP Office Release 6.1... -
Page 11: 9630 Telephone
However also note there are features that the system maintainer can assign that are not available to you to assign. This guide just includes features that you can assign yourself if required. 9600 Series Phone User Guide Page 11 IP Office Release 6.1... -
Page 12: 9640 Telephone
However also note there are features that the system maintainer can assign that are not available to you to assign. This guide just includes features that you can assign yourself if required. 9600 Series Phone User Guide Page 12 IP Office Release 6.1... -
Page 13: 9650 Telephone
However also note there are features that the system maintainer can assign that are not available to you to assign. This guide just includes features that you can assign yourself if required. 9600 Series Phone User Guide Page 13 IP Office Release 6.1... -
Page 14: Status Letters
· S = System Alarm If you are configured as a system administrator , an S in the phone's display indicates a system alarm (IP500 V2 only) 9600 Series Phone User Guide Page 14 IP Office Release 6.1 Issue 02c (28 October 2010) -
Page 15: Button Modules
9620 These phones do not support any additional button modules. 9600 Series Phone User Guide Page 15 IP Office Release 6.1 Issue 02c (28 October 2010) -
Page 16: Phone Keys
- Those key not configured as appearance keys can be used for other functions. · · The CONFERENCE, DROP, HOLD, REDIAL and TRANSFER keys found on other Avaya phones are presented as soft key functions when appropriate to the current call to which you are protected. -
Page 17: The Phone Stand
Other Stands If the phone needs to be used in a situation other than on a desk, for example wall mounted, a number of other stand designs are available from Avaya. Contact your system maintainer. 9600 Series Phone User Guide Page 17 IP Office Release 6.1... -
Page 19: Making Calls
Chapter 2. Making Calls 9600 Series Phone User Guide Page 19 IP Office Release 6.1 Issue 02c (28 October 2010) -
Page 20: En-Bloc Dialing
Call Settings. Press Select. 4. Use the up and down arrow keys to highlight En-Bloc Dial. 5. Use Change button to select On or Off. 9600 Series Phone User Guide Page 20 IP Office Release 6.1 Issue 02c (28 October 2010) -
Page 21: Call Soft Key Options
Put your current call on hold and present dial tone for you to dial the number to which you want to transfer the call. · ToVM Send an alerting call to your voicemail. 9600 Series Phone User Guide Page 21 IP Office Release 6.1 Issue 02c (28 October 2010) -
Page 22: Calling From The Contacts List
Use the up and down arrow keys to scroll through the records. 2. Press Call to call the number displayed in the call record. 9600 Series Phone User Guide Page 22 IP Office Release 6.1 Issue 02c (28 October 2010) -
Page 23: Redialling A Previous Number
3. Use the up and down menu keys to highlight Withhold Number. 4. Press Change to switch the option On or Off. 5. Press Save. 9600 Series Phone User Guide Page 23 IP Office Release 6.1 Issue 02c (28 October 2010) -
Page 24: Adjust The Call Volume
HEADSET key is lit. Pressing the key again will end the call. · If the call is connected on the phone's handset, replacing the handset will end the call. 9600 Series Phone User Guide Page 24 IP Office Release 6.1... -
Page 25: Answering Calls
Chapter 3. Answering Calls 9600 Series Phone User Guide Page 25 IP Office Release 6.1 Issue 02c (28 October 2010) -
Page 26: 3. Answering Calls
1. This guide assumes that auto hold is enabled (the default). The system administrator can disable auto hold for the system, in which case calls are automatically disconnected rather than held. 9600 Series Phone User Guide Page 26 IP Office Release 6.1... -
Page 27: Divert A Call To Voicemail
· To answer the page call, press the Answer soft key. The call is turned into a normal call. · To ignore the page call, press the Drop soft key. 9600 Series Phone User Guide Page 27 IP Office Release 6.1... -
Page 28: Call Pickup
Pickup a call ringing a user's extension number (N). · Pickup a Group Members Call: *53*N# Pickup a call ringing the members of a group (N). This does not necessarily have to be a group call. 9600 Series Phone User Guide Page 28 IP Office Release 6.1... -
Page 29: Redialling
Chapter 4. Redialling 9600 Series Phone User Guide Page 29 IP Office Release 6.1 Issue 02c (28 October 2010) -
Page 30: Redial (Last Dialed Mode)
None of the other redial functions will be accessible. 6. Press Change to change the mode. 7. When the required mode is displayed, press Save. 9600 Series Phone User Guide Page 30 IP Office Release 6.1 Issue 02c (28 October 2010) -
Page 31: Holding And Parking Calls
Chapter 5. Holding and Parking Calls 9600 Series Phone User Guide Page 31 IP Office Release 6.1 Issue 02c (28 October 2010) -
Page 32: 5. Holding And Parking Calls
... can be used with conference calls..can be used to start or add calls to a conference..the call is assigned a unique ID. 9600 Series Phone User Guide Page 32 IP Office Release 6.1 Issue 02c (28 October 2010) -
Page 33: Holding Calls
1. If you are the only internal user in the conference, depending on your telephone systems configuration, dropping yourself from the conference may end it. Consult your system administrator for details. 9600 Series Phone User Guide Page 33 IP Office Release 6.1... -
Page 34: Parking Calls
4. Use the up and down arrow keys to scroll through the parked calls. 5. To unpark a particular call, press the Connect soft key. 9600 Series Phone User Guide Page 34 IP Office Release 6.1 Issue 02c (28 October 2010) -
Page 35: Transferring Calls
Chapter 6. Transferring Calls 9600 Series Phone User Guide Page 35 IP Office Release 6.1 Issue 02c (28 October 2010) -
Page 36: Transfer To Voicemail
1. If you are the only internal user in the conference, depending on your telephone systems configuration, dropping yourself from the conference may end it. Consult your system administrator for details. 9600 Series Phone User Guide Page 36 IP Office Release 6.1... -
Page 37: Account Codes
Chapter 7. Account Codes 9600 Series Phone User Guide Page 37 IP Office Release 6.1 Issue 02c (28 October 2010) -
Page 38: Forced Account Code Entry
Access to the enter account code menu can be assigned to a feature button configured with the Account Code Entry action. The button can also be preset with a specific account code. 9600 Series Phone User Guide Page 38 IP Office Release 6.1 Issue 02c (28 October 2010) -
Page 39: Conference Calls
Chapter 8. Conference Calls 9600 Series Phone User Guide Page 39 IP Office Release 6.1 Issue 02c (28 October 2010) -
Page 40: Starting A Conference
· To drop a caller from the conference, highlight them and press Drop. · To mute a caller, highlight them and press Mute. Repeat this to unmute them. · To return to the call display, press the Back soft key. 9600 Series Phone User Guide Page 40 IP Office Release 6.1... -
Page 41: Dropping/Muting Parties
1. If you are the only internal user in the conference, depending on your telephone systems configuration, dropping yourself from the conference may end it. Consult your system administrator for details. 9600 Series Phone User Guide Page 41 IP Office Release 6.1... -
Page 43: Headset/Handsfree Operation
Chapter 9. Headset/Handsfree Operation 9600 Series Phone User Guide Page 43 IP Office Release 6.1 Issue 02c (28 October 2010) -
Page 44: Headset Operation
5. Press Change to change the setting between Headset and Speaker. 6. When completed, press the Save soft key. 7. Press the Back / Exit soft keys to exit the menus. 9600 Series Phone User Guide Page 44 IP Office Release 6.1... -
Page 45: Handsfree Speaker Operation
5. Press Change to change the setting between Headset and Speaker. 6. When completed, press the Save soft key. 7. Press the Back / Exit soft keys to exit the menus. 9600 Series Phone User Guide Page 45 IP Office Release 6.1... - Page 46 9600 Series Phone User Guide Page 46 IP Office Release 6.1 Issue 02c (28 October 2010)
-
Page 47: Contacts/Directory
Chapter 10. Contacts/Directory 9600 Series Phone User Guide Page 47 IP Office Release 6.1 Issue 02c (28 October 2010) -
Page 48: Managing External Contacts
· They are displayed on the phone while you are using it. If you hot desk to another 1400 Series, 1600 Series or 9600 Series phone, your personal contacts move with you. · You can have up to 100 personal directory entries which you can add, edit and delete these through the phone. -
Page 49: Viewing Contacts Details
Edit · Edit the name and number. Delete · Delete the name and number. · Add a new personal directory contact. 9600 Series Phone User Guide Page 49 IP Office Release 6.1 Issue 02c (28 October 2010) -
Page 50: Make A Call From The Directory
To view more details of the highlighted name press Details. To return to the directory press List. 3. When the required entry is highlighted, press Select. 4. You will be returned to the menu in which you selected the Dir soft key. 9600 Series Phone User Guide Page 50 IP Office Release 6.1... -
Page 51: Adding A New Contact
Pause soft key to enter a comma (,) for a 1 second pause in the number dialing. 5. When the name and number are set as required, press the Save soft key. To return without saving the name and number, press the Cancel soft key. 9600 Series Phone User Guide Page 51 IP Office Release 6.1... -
Page 52: Editing A Contact
Note 1. If you have been configured as a system phone user by the system administrator, then you can also add, edit and delete some external directory contacts. 9600 Series Phone User Guide Page 52 IP Office Release 6.1 Issue 02c (28 October 2010) -
Page 53: Call Log/History
Chapter 11. Call Log/History 9600 Series Phone User Guide Page 53 IP Office Release 6.1 Issue 02c (28 October 2010) -
Page 54: 11. Call Log/History
CALL LOG key. The call log you see is a call log stored on the telephone system. If you login at another 1400 Series, 1600 Series or 9600 Series phone, your call log moves with you. Your call log contains your 10 most recent answered calls, 10 most recent calls you made and 10 most recent missed calls. -
Page 55: Accessing The Call Log/History
Use the up and down arrow keys to scroll through the records. 2. Press Call to call the number displayed in the call record. 9600 Series Phone User Guide Page 55 IP Office Release 6.1 Issue 02c (28 October 2010) -
Page 56: Viewing Call Details
Add the name and number to your personal directory. You can edit the details before they are added. · Delete All Delete all the records. 9600 Series Phone User Guide Page 56 IP Office Release 6.1 Issue 02c (28 October 2010) -
Page 57: Deleting A Record
Pause soft key to enter a comma (,) for a 1 second pause in the number dialing. 5. When the name and number are set as required, press the Save soft key. To return without saving the name and number, press the Cancel soft key. 9600 Series Phone User Guide Page 57 IP Office Release 6.1... -
Page 59: Voicemail
Chapter 12. Voicemail 9600 Series Phone User Guide Page 59 IP Office Release 6.1 Issue 02c (28 October 2010) -
Page 60: Message Waiting Indication
They remain lit until you have played each of the new messages. The system administrator can also configure it so that you receive new message waiting indication for a hunt group or hunt groups. 9600 Series Phone User Guide Page 60 IP Office Release 6.1... -
Page 61: Checking Messages
(24 hours for embedded voicemail, 30 days for Voicemail Pro). For voicemail messages on a Voicemail Pro system, the system administrator can customize the delay and can also apply automatic deletion times to new and saved messages. 9600 Series Phone User Guide Page 61 IP Office Release 6.1... -
Page 62: Sending A Message
Intuity voicemail allows a number of greeting to be recorded and then used for different call types (internal, external, etc). These greetings are setup and recorded through the mailbox voice prompt interface or using the IP Office Phone Manager application. 9600 Series Phone User Guide Page 62 IP Office Release 6.1... -
Page 63: Email Mode
When set to visual voice mode, the key can be used to transfer your current call to the voicemail mailbox of another user or group. 9600 Series Phone User Guide Page 63 IP Office Release 6.1 Issue 02c (28 October 2010) -
Page 64: Send A Call To Voicemail
· Depending on how your system is configured, you may be required to enter your voicemail password and then press the Done soft key. 4. You will now see the visual voice menu. 9600 Series Phone User Guide Page 64 IP Office Release 6.1... -
Page 65: Logging In/Out
Chapter 13. Logging In/Out 9600 Series Phone User Guide Page 65 IP Office Release 6.1 Issue 02c (28 October 2010) -
Page 66: Default Short Codes
You can login at any phone that you want to use. All your calls are then directed to that phone and your user settings are applied to calls made and received. If it is a 1400 Series, 1600 Series or 9600 Series phone, your contacts and call log are displayed by the phone. -
Page 67: Logging In
4. When you have entered your security PIN, press Done. If the details are correct, you user details will be loaded into the phone. 9600 Series Phone User Guide Page 67 IP Office Release 6.1 Issue 02c (28 October 2010) -
Page 68: Logout
1. Press the Unlock soft key. 2. Enter your security PIN (login code). 3. Press the Done soft key. 9600 Series Phone User Guide Page 68 IP Office Release 6.1 Issue 02c (28 October 2010) -
Page 69: Auto Lock
4. Enter your current security PIN if you already have one and press Done. 5. Enter your new password. 6. Press Save. 7. The security PIN changed message will appear for a few moments. 9600 Series Phone User Guide Page 69 IP Office Release 6.1 Issue 02c (28 October 2010) -
Page 71: Redirecting Calls
Chapter 14. Redirecting Calls 9600 Series Phone User Guide Page 71 IP Office Release 6.1 Issue 02c (28 October 2010) -
Page 72: 14. Redirecting Calls
External Voicemail Follow Me Follow Me To Follow Me Here Forward Forward on Busy Forward on No Answer Forward Unconditional Do Not Disturb Twinning 9600 Series Phone User Guide Page 72 IP Office Release 6.1 Issue 02c (28 October 2010) -
Page 73: Follow Me
The system administrator is able to configure whether you can access the Forward and Follow Me menu and · status options. 9600 Series Phone User Guide Page 73 IP Office Release 6.1 Issue 02c (28 October 2010) -
Page 74: Follow Me To (Features Menu)
· Press the Save soft key to set the follow me here. The system administrator is able to configure whether you can access the Forward and Follow Me menu and · status options. 9600 Series Phone User Guide Page 74 IP Office Release 6.1 Issue 02c (28 October 2010) -
Page 75: Forwarding Calls
(default 15 seconds). This is not always possible for calls that have been forwarded to an external number. 9600 Series Phone User Guide Page 75 IP Office Release 6.1... - Page 76 · Switch Forward on No Answer Off: *06 The system administrator is able to configure whether you can access the Forward and Follow Me menu and · status options. 9600 Series Phone User Guide Page 76 IP Office Release 6.1 Issue 02c (28 October 2010)
-
Page 77: Issue 02C (28 October
The system administrator is able to configure whether you can access the Forward and Follow Me menu and · status options. 9600 Series Phone User Guide Page 77 IP Office Release 6.1 Issue 02c (28 October 2010) -
Page 78: Forward On No Answer (Status Menu)
· Press Save to save any changes. The system administrator is able to configure whether you can access the Forward and Follow Me menu and · status options. 9600 Series Phone User Guide Page 78 IP Office Release 6.1 Issue 02c (28 October 2010) -
Page 79: Do Not Disturb
· Cancel All Forwarding: *00 Switch off any forwarding. Includes forward unconditional, forward on busy, forward on no answer, follow me and do not disturb. 9600 Series Phone User Guide Page 79 IP Office Release 6.1 Issue 02c (28 October 2010) -
Page 80: Dnd On/Off (Features Menu)
5. To add a number highlight Add Another. Dial the number and press Add. 6. To remove an existing number highlight it and press Remove. 7. Press Done when completed. 9600 Series Phone User Guide Page 80 IP Office Release 6.1... -
Page 81: Twinning
Your settings are applied to both phones. Similarly message waiting indication and voicemail access from either phone will be to your mailbox. If both your twinned phones are 1400 Series, 1600 Series or 9600 Series phones, the call logs and directory contacts on each will be yours. -
Page 82: Forward On Busy/No Answer (Features Menu)
· Press Save to save any changes. The system administrator is able to configure whether you can access the Forward and Follow Me menu and · status options. 9600 Series Phone User Guide Page 82 IP Office Release 6.1 Issue 02c (28 October 2010) -
Page 83: Groups
Chapter 15. Groups 9600 Series Phone User Guide Page 83 IP Office Release 6.1 Issue 02c (28 October 2010) -
Page 84: 15. Groups
Set a hunt group into night service status by entering its extension number (N). · Night Service Status Off: *21*N# Take a hunt group out of night service status by entering its extension number (N). 9600 Series Phone User Guide Page 84 IP Office Release 6.1... -
Page 85: Group Membership
The system administrator is able to configure if you can access the Membership, State and Fallback options of · a group. If you are not configured for any groups then the Group menu is not shown. 9600 Series Phone User Guide Page 85 IP Office Release 6.1... -
Page 86: Group Service Status And Fallback
The system administrator is able to configure if you can access the Membership, State and Fallback options of · a group. If you are not configured for any groups then the Group menu is not shown. 9600 Series Phone User Guide Page 86 IP Office Release 6.1... -
Page 87: Changing The Group Service Status (Features Menu)
The system administrator is able to configure if you can access the Membership, State and Fallback options of · a group. If you are not configured for any groups then the Group menu is not shown. 9600 Series Phone User Guide Page 87 IP Office Release 6.1... -
Page 88: Changing The Group Fallback
The system administrator is able to configure if you can access the Membership, State and Fallback options of · a group. If you are not configured for any groups then the Group menu is not shown. 9600 Series Phone User Guide Page 88 IP Office Release 6.1... -
Page 89: Button Features
Chapter 16. Button Features 9600 Series Phone User Guide Page 89 IP Office Release 6.1 Issue 02c (28 October 2010) -
Page 90: 16. Button Features
On all the phones, the programmable button features appear below the call appearance button. The screen can be scrolled to display further buttons. For the 9650 phones, some of the programmable buttons remain permanently visible even if the display is scroll. 9600 Series Phone User Guide Page 90 IP Office Release 6.1... -
Page 91: Editing Your Programmable Buttons
Note that the label is only shown while editing the label and after you exit the administration menu. 6. When completed press Back. 9600 Series Phone User Guide Page 91 IP Office Release 6.1... -
Page 92: Abbreviated Dial
The button's red lamp is lit when forwarding is enabled. The button can be pressed again to switch forward unconditional off. 9600 Series Phone User Guide Page 92 IP Office Release 6.1... -
Page 93: Call Park
This action can be used to drop you current call without having to highlight it on the display. 16.13 Flash Hook A button configured for this action will send a hook flash signal to a currently connected analog line. 9600 Series Phone User Guide Page 93 IP Office Release 6.1... -
Page 94: Group Blf
When do not disturb is on, the button's red lamp is lit or a red warning icon is displayed. Pressing the button again turns do not disturb off. 9600 Series Phone User Guide Page 94 IP Office Release 6.1... -
Page 95: Supress Digits
Start silent monitoring of the user's call. In addition to calling the user, the button can be used in processes such as transferring calls or starting a conference rather than dialing the user's extension number. 9600 Series Phone User Guide Page 95 IP Office Release 6.1... -
Page 97: Phone Settings
Chapter 17. Phone Settings 9600 Series Phone User Guide Page 97 IP Office Release 6.1 Issue 02c (28 October 2010) -
Page 98: 17. Phone Settings
Ring Sound · · Headset Volume Ringer Volume · · Speaker Volume Internal Auto Answer · · Automatic Gain Control · Default Audio Path · 9600 Series Phone User Guide Page 98 IP Office Release 6.1 Issue 02c (28 October 2010) -
Page 99: Mobile Twinning
None of the other redial functions will be accessible. 6. Press Change to change the mode. 7. When the required mode is displayed, press Save. 9600 Series Phone User Guide Page 99 IP Office Release 6.1 Issue 02c (28 October 2010) -
Page 100: En-Bloc Dialing
Do not use the inactivity timer. · 1 / 5 / 30 / 60 Lock the phone after the indicated number of minutes. 6. Press the Save soft key. 9600 Series Phone User Guide Page 100 IP Office Release 6.1 Issue 02c (28 October 2010) -
Page 101: Ringer Controls
The system administrator can also adjust the when ringing is used for each specific appearance button. The ringing can be immediate, delayed for a set time or off. 9600 Series Phone User Guide Page 101 IP Office Release 6.1... -
Page 102: Disabling The Ringer
5. Press the Change soft key to change the setting. · Ring - Use normal ringing. · Abbreviated - Use a single non-repeated ring (abbreviated ring). · Off - No ring. 9600 Series Phone User Guide Page 102 IP Office Release 6.1 Issue 02c (28 October 2010) -
Page 103: Ring Sound
· To make the currently displayed ring pattern the selected ring pattern for the phone press the Save soft key. · To leave the menu without making any changes press the Cancel soft key. 5. Press Back / Exit to exit the menus. 9600 Series Phone User Guide Page 103 IP Office Release 6.1... -
Page 104: Ringer Volume
2. Use the + plus and – minus keys to adjust the volume. 3. The display will return to normal after a few seconds. 9600 Series Phone User Guide Page 104 IP Office Release 6.1 Issue 02c (28 October 2010) -
Page 105: Internal Auto Answer
This function can be assigned to a feature button configured with the Internal Auto Answer action. The button lamp will indicate when internal auto answer is on. 9600 Series Phone User Guide Page 105 IP Office Release 6.1 Issue 02c (28 October 2010) -
Page 106: Display Controls
5. Press Change to change the setting between On or Off. 6. When completed, press the Save soft key. 7. Press Back / Exit to exit the menus. 9600 Series Phone User Guide Page 106 IP Office Release 6.1 Issue 02c (28 October 2010) - Page 107 Phone Settings: Display Controls 9600 Series Phone User Guide Page 107 IP Office Release 6.1 Issue 02c (28 October 2010)
-
Page 108: Last Call Duration Display
Show Last Call Duration. 4. Press Change to change the setting between On or Off. 5. Press the Save soft key. 9600 Series Phone User Guide Page 108 IP Office Release 6.1 Issue 02c (28 October 2010) -
Page 109: Display Language
Do not use the inactivity timer. · 30 / 60 Apply the inactivity timer after the selected number of seconds. 6. Press the Save soft key. 9600 Series Phone User Guide Page 109 IP Office Release 6.1 Issue 02c (28 October 2010) -
Page 110: Volume And Sound
2. Use the + plus and – minus keys to adjust the volume. 3. The display will return to normal after a few seconds. 9600 Series Phone User Guide Page 110 IP Office Release 6.1 Issue 02c (28 October 2010) -
Page 111: Handset Volume
5. Press Change to change the setting between Headset and Speaker. 6. When completed, press the Save soft key. 7. Press the Back / Exit soft keys to exit the menus. 9600 Series Phone User Guide Page 111 IP Office Release 6.1... -
Page 112: Backup/Restore
Manual Restore. Press Restore. This option is only available if your system administrator has configured backup/restore operation. · 9600 Series Phone User Guide Page 112 IP Office Release 6.1 Issue 02c (28 October 2010) -
Page 113: Viewing Information
· Miscellaneous Details of the phone and the firmware that it current has loaded. 4. To return to the parent menu, press the Back soft key. 9600 Series Phone User Guide Page 113 IP Office Release 6.1 Issue 02c (28 October 2010) -
Page 115: Status Menu
Chapter 18. Status Menu 9600 Series Phone User Guide Page 115 IP Office Release 6.1 Issue 02c (28 October 2010) -
Page 116: Do Not Disturb
· To change the destination of the setting, press the Details soft key. The system administrator is able to configure whether you can access the Forward and Follow Me menu and · status options. 9600 Series Phone User Guide Page 116 IP Office Release 6.1 Issue 02c (28 October 2010) -
Page 117: Follow Me Here
· Press Save to save any changes. The system administrator is able to configure whether you can access the Forward and Follow Me menu and · status options. 9600 Series Phone User Guide Page 117 IP Office Release 6.1 Issue 02c (28 October 2010) -
Page 118: Forward On No Answer
Fwd To Here. The system administrator is able to configure whether you can access the Forward and Follow Me menu and · status options. 9600 Series Phone User Guide Page 118 IP Office Release 6.1 Issue 02c (28 October 2010) -
Page 119: Group Membership
2. If necessary use the up and down arrow keys to highlight Mobile Twinning. · To clear the setting, press the Off soft key. 9600 Series Phone User Guide Page 119 IP Office Release 6.1 Issue 02c (28 October 2010) -
Page 120: Parked Calls
There is an error in the date or time being used by the system. Selecting Admin will take you to the system administration menu where you can change the date time 9600 Series Phone User Guide Page 120 IP Office Release 6.1 Issue 02c (28 October 2010) -
Page 121: Short Codes
Chapter 19. Short Codes 9600 Series Phone User Guide Page 121 IP Office Release 6.1 Issue 02c (28 October 2010) -
Page 122: 19. Short Codes
· Cancel All Forwarding: *00 Switch off any forwarding. Includes forward unconditional, forward on busy, forward on no answer, follow me and do not disturb. 9600 Series Phone User Guide Page 122 IP Office Release 6.1 Issue 02c (28 October 2010) -
Page 123: Hunt Group
Have voicemail ring your phone when you have any new messages. It will call when you use the phone. · Voicemail Ringback Off: *49 Switch off ringback. 9600 Series Phone User Guide Page 123 IP Office Release 6.1 Issue 02c (28 October 2010) - Page 124 9600 Series Phone User Guide Page 124 IP Office Release 6.1 Issue 02c (28 October 2010)
-
Page 125: System Administration
Chapter 20. System Administration 9600 Series Phone User Guide Page 125 IP Office Release 6.1 Issue 02c (28 October 2010) -
Page 126: Checking The System Information
8. When a complete valid date has been entered, the display will confirm that by showing the full date and the Set soft key option. 9. To set the date as the new date to be used by the telephone system press Set. 9600 Series Phone User Guide Page 126 IP Office Release 6.1... -
Page 127: Checking The Time Server Status
6. The time server information is listed. It includes the address of the time server, the current local time and the UTC time. If the phone system is configured for daylight savings then the current amount of daylight savings being applied to the local time is also shown. 9600 Series Phone User Guide Page 127 IP Office Release 6.1... -
Page 128: Setting The Time
8. When a valid offset has been entered, the Set soft key is displayed. 9. To apply the offset to the current telephone system time press the Set soft key. 9600 Series Phone User Guide Page 128 IP Office Release 6.1... -
Page 129: System Shutdown
Only proceed is you are sure. If you are not sure press Back. 8. If you press the Confirm soft key, the telephone system will switch itself to a shutdown state. This will disconnect all current calls and services. 9600 Series Phone User Guide Page 129 IP Office Release 6.1... -
Page 130: Memory Card Management
This option is available when an Active card is present. It allows the card to be made inactive. · Start Up This option is available when an Inactive care is present. It allows the card to be made active again. 9600 Series Phone User Guide Page 130 IP Office Release 6.1... -
Page 131: System Alarms
There is an error in the date or time being used by the system. Selecting Admin will take you to the system administration menu where you can change the date time 9600 Series Phone User Guide Page 131 IP Office Release 6.1 Issue 02c (28 October 2010) -
Page 133: 21. Menus
Chapter 21. Menus 9600 Series Phone User Guide Page 133 IP Office Release 6.1 Issue 02c (28 October 2010) -
Page 134: Features Menu
· The Mobile Twinning options are only shown if you have been configured to use mobile twinning. · The System Admimistration option is only shown if you have been configured as a 'System Phone' user. 9600 Series Phone User Guide Page 134 IP Office Release 6.1... -
Page 135: Status Menu
Menus: Features Menu 21.2 Status Menu This menu is accessed by pressing the Status soft key when displayed. 9600 Series Phone User Guide Page 135 IP Office Release 6.1 Issue 02c (28 October 2010) -
Page 136: A Menu
· VPN Settings... Do not use this menu unless advised by your system maintainer. They will tell you the settings to use if your phone is connected via a VPN connection. 9600 Series Phone User Guide Page 136 IP Office Release 6.1... -
Page 137: Glossary
Chapter 22. Glossary 9600 Series Phone User Guide Page 137 IP Office Release 6.1 Issue 02c (28 October 2010) -
Page 138: Abbreviated Ring
· You can still use the phone to make outgoing calls. When you go off-hook you will hear broken dial tone. · N = No Calls (Do Not Disturb) An N is shown after your extension name on the phone's idle display when you have do not disturb enabled. 9600 Series Phone User Guide Page 138 IP Office Release 6.1... -
Page 139: Do Not Disturb Exceptions
(default 15 seconds). This is not always possible for calls that have been forwarded to an external number. 9600 Series Phone User Guide Page 139 IP Office Release 6.1... -
Page 140: Group
You can use a login code to login at any phone on the telephone system and then use that phone as your own. While logged in at a 1400 Series, 1600 Series or 9600 Series phone, you can use the phone's menus to set and change your login code. -
Page 141: Park Call
Twinning is a process whereby your calls ring on two phones. Twinning is only available if configured by the system administrator. There are two methods of twinning supported, internal twinning mobile twinning 9600 Series Phone User Guide Page 141 IP Office Release 6.1 Issue 02c (28 October 2010) -
Page 143: Index
74, 117 Caller details 40, 41 Edit 74, 117 Drop caller 40, 41 End automatically 33, 36, 41 Status Hold 33, 41 Follow Me To 9600 Series Phone User Guide Page 143 IP Office Release 6.1 Issue 02c (28 October 2010) - Page 144 101, 103 Login 67 Ring Time 56 Ringback 101, 103 Ringer Make call Volume 104, 110 from Call Log 22, 55 from Contacts 22, 50 9600 Series Phone User Guide Page 144 IP Office Release 6.1 Issue 02c (28 October 2010)
- Page 145 Voicemail Failure 120, 131 Voicemail Full 120, 131 Volume Handset Headset 44, 111 Ringer 104, 110 Speaker 45, 111 Waiting Call 109 Withhold Number 23, 99 9600 Series Phone User Guide Page 145 IP Office Release 6.1 Issue 02c (28 October 2010)
- Page 147 9600 Series Phone User Guide Page 147 IP Office Release 6.1 Issue 02c (28 October 2010)
- Page 148 Performance figures and data quoted in this document are typical, and must be specifically confirmed in writing by Avaya before they become applicable to any particular order or contract. The company reserves the right to make alterations or amendments to the detailed specifications at its discretion. The publication of information in this document does not imply freedom from patent or other protective rights of Avaya or others.