Boss BR-80 Owner's Manual
Digital recorder
Hide thumbs
Also See for BR-80:
- Data list (18 pages) ,
- Workshop manual (17 pages) ,
- Training manual (11 pages)
Table of Contents
Advertisement
Quick Links
Advertisement
Chapters
Table of Contents

Related Manuals for Boss BR-80


Summary of Contents for Boss BR-80
- Page 2 © 2011 BOSS CORPORATION All rights reserved. No part of this publication may be reproduced in any form without the written permission of BOSS CORPORATION. BOSS, COSM and eBand are either registered trademark of BOSS Corporation in the United States and/or other countries.
-
Page 4: Using The Unit Safely
AC adaptor from the AC • Damp (e.g., baths, washrooms, on wet floors); outlet, disconnect the USB cable from the BR-80, or are and request servicing by your retailer, the nearest • Exposed to steam or smoke; or are Roland Service Center, or an authorized Roland distributor, as listed on the “Information”... - Page 5 USING THE UNIT SAFELY Never climb on top of, nor place heavy objects on Do not force the unit’s power-supply cord to share the unit. an outlet with an unreasonable number of other devices. Be especially careful when using extension cords—the total power used by all devices you have connected to the extension cord’s outlet must Never handle the AC adaptor body, or its output...
-
Page 6: Important Notes
IMPORTANT NOTES Power Supply • When moved from one location to another where the temperature and/or humidity is very different, water droplets (condensation) may form inside the unit. • Do not connect this unit to same electrical outlet that Damage or malfunction may result if you attempt to is being used by an electrical appliance that is con- use the unit in this condition. - Page 7 IMPORTANT NOTES Additional Precautions Using SD cards • Please be aware that the contents of memory can be • Carefully insert the SD card or the SDHC card all the irretrievably lost as a result of a malfunction, or the way in—until it is firmly in place.
- Page 8 IMPORTANT NOTES Copyright • MMP (Moore Microprocessor Portfolio) refers to a patent portfolio concerned with microprocessor architecture, which was developed by Technology • Recording, duplication, distribution, sale, lease, Properties Limited (TPL). Roland has licensed this performance, or broadcast of copyrighted technology from the TPL Group.
- Page 9 IMPORTANT NOTES • Company names and product names appearing in this document are registered trademarks or trademarks of their respective owners. • The product names mentioned in this document are registered trademarks or trademarks of their respec- tive owners. In this manual, these names are used because it is the most practical way of describing the sounds that are simulated using COSM technology.
-
Page 10: Table Of Contents
Connecting the External Equipment to the BR-80 ........ - Page 11 Contents Other Functions . . . . . . . . . . . . . . . . . . . . . . . . . . . . . . . . . . . . . . . . . . . . . . . . . . . . . . . . . . . . . . . . . . . . . . . . . . 49 Adjusting the Recording Level .
- Page 12 Contents Using Rhythm . . . . . . . . . . . . . . . . . . . . . . . . . . . . . . . . . . . . . . . . . . . . . . . . . . . . . . . . . . . . . . . . . . . . . . . . . . . . 69 Creating a Rhythm Progression (EDIT) .
- Page 13 Recording Audio from the BR-80 on Your Computer ....... . .
- Page 14 Contents Detailed Effect Settings . . . . . . . . . . . . . . . . . . . . . . . . . . . . . . . . . . . . . . . . . . . . . . . . . . . . . . . . . . . . . . . . . . 110 Editing the Insert Effect Settings (EDIT) .
-
Page 15: Quick Start
Quick Start... -
Page 16: What You Can Do With The Br-80
Numerous rhythm patterns are built in, so you can enjoy playing in a variety of musical styles. Play along with a completed song Since the BR-80 lets you change the playback speed without changing the pitch, you can practice at your own tempo. - Page 17 • You can back up the BR-80’s recorded data to your computer, and recover the backup when desired. • You can apply effects to the BR-80’s input sound and record the result on your computer, or play back sounds from your computer through speakers connected to the BR-80.
-
Page 18: Recording Ideas For Songs (Live Rec Mode)
The BR-80 can operate for plenty of time on batteries, so you can record even in locations where there’s no AC outlet, such as in a park or on a street. It’s a great way to collect natural sounds or city noises for use in a song. -
Page 19: Connecting Headphones
Connecting Headphones The BR-80 does not contain speakers. In order to hear the sound, you’ll need to connect an audio device such as monitor speakers or a stereo system, or headphones. When recording, you should use headphones in order to avoid acoustic feedback. - Page 20 ] (REC) button . The BR-80 will enter recording-standby mode. While actually performing, use the [REC LEVEL] dial located on the right side of the BR-80 to adjust the recording level . While you perform, make adjustments so that the INPUT level meter is moving in the range of 12–P (-12–0 dB).
- Page 21 Tips for Recording Microphone position For an acoustic guitar, place the BR-80 so that it’s about 30 cm (1 foot) from the body of the guitar, and that the sound hole of the guitar is between the left and right microphones.
-
Page 22: Turning Your Idea Into A Song (Mtr Mode)
(MTR Mode) What is MTR Mode? In MTR mode, the BR-80 functions as a multi-track recorder that lets you create a finished song. You’ll be able to play multiple tracks simultaneously, and use V-tracks to record multiple takes of a guitar solo and then choose the best one. -
Page 23: Create A New Song
Step 2 Create a New Song Create a New Song Press the [MENU] button . Use the cursor buttons to move the cursor to “SONG,” and press the [ENTER] button . Use the cursor buttons to move the cursor to “NEW,” and press the [ENTER] button . Use the dial to select the desired genre of song template, and then press the [ENTER] button . - Page 24 . The recording track will switch each time you press the track button. Press the [ ] (REC) button . The BR-80 will enter recording-standby mode. Press the [ ] (PLAY) button to start recording . Press the [ ] (STOP) button to stop recording .
-
Page 25: Setting The Tempo
Tips for Recording Setting the tempo Here’s how to adjust the tempo of the rhythm that sounds during recording and playback. Press the [RHYTHM] button . Use the cursor buttons to move the cursor to “TEMPO,” and use the dial to set the tempo . You can set the tempo in the range of 25.0–250.0. - Page 26 Turning Your Idea Into a Song (MTR Mode) Step 4 Mastering Mastering is the process of adding the final polish to your song by using a special effect called the “Mastering toolkit, ” which boosts the perceived loudness and power of the overall song, and improves the tonal balance to make it more listenable.
- Page 27 Tips for Mastering Adjusting the master level To get a powerful sounding recording, raise the volume until it is as high as you can get it without causing the sound to distort. Select mastering mode . Press the [ ] (PLAY) button to play back the song . In the MASTERING screen, move the cursor to “LEVEL”...
-
Page 28: Practicing Along With Your Completed Song (Eband Mode)
] button a number of times until the “eBand” indicator is lit . While actually performing, adjust the recording level by gradually raising the [REC LEVEL] dial located on the BR-80’s right side . Gradually raise the [VOLUME] dial to adjust the output volume . - Page 29 Use the cursor buttons to move the cursor to “ALL SONGS,” and press the [ENTER] button . Use the dial to select a song, and press the [ENTER] button . The BR-80 can narrow down the song display so that you can find the desired song more quickly (p. 94). Select an effect Press the [COSM] button .
- Page 30 Practicing Along With Your Completed Song (eBand Mode) Step 3 Practicing at a Different Speed You can use the phrase trainer function to slow down the song’s playback speed in order to practice a rapid phrase, or use the center cancel function while playing along with the song. Change the speed Press the [TR3/4] (SPEED) button .
- Page 31 Tips for the Phrase Trainer SPEED ([TR3/4] button) * The SPEED and PITCH function apply only to the song that you’re playing back. SPEED Since you can slow down the speed without changing the pitch, rapid phrases will be easier to figure out.
-
Page 32: Connecting The Br-80 To Your Computer
For details, refer to ”Saving Data on Your Computer” (p. 107). Using the BR-80 as an Audio Interface • Before you use the BR-80 as an audio interface, you must install the USB driver in your computer. The USB driver is on the included SD card. -
Page 33: Getting Ready
Getting Ready... -
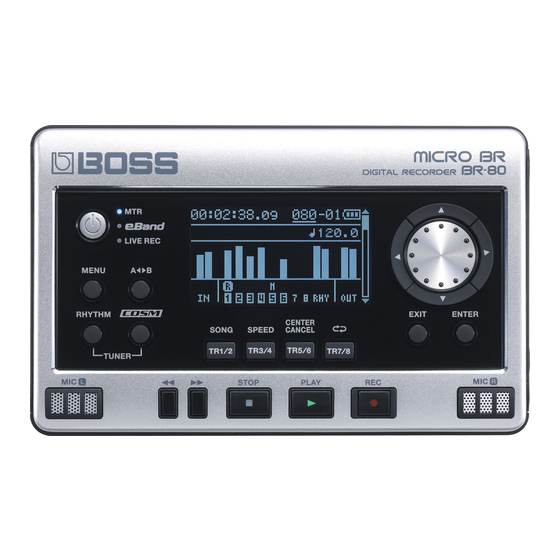
Page 34: Panel Descriptions
(p. 118). [MENU] button [COSM] button This button accesses various functions, such as settings for the entire BR-80. This button accesses a screen in which you can turn the insert effect on/off and edit its [A B] button settings. -
Page 35: Cursor Buttons
Panel Descriptions Display ] button This shows various types of information The song will continue rewinding while depending on the settings you’re making, you hold down this button. By holding such as volume levels, and menu screens. down the [ ] (STOP) button and pressing If you find the display screen difficult to the [... -
Page 36: Side Panel (Left)
* Use a monaural dynamic microphone. do the following things. The BR-80 does not support condenser • Use the BR-80 as an audio interface microphones. • Transfer audio data to and from the computer LINE IN jack (Stereo mini type) •... -
Page 37: Bottom Panel
Memory card slot The BR-80 can operate on two commercially Open this cover and insert an SD card. available AA alkaline batteries or The BR-80 is shipped from the factory with rechargeable nickel-metal hydride the included SD card inserted. batteries. -
Page 38: Getting Ready To Use The Br-80
• Expected battery life under continuous use: If you want to remove the batteries, turn Alkaline dry cell batteries: Approx. 6 hours off power to the BR-80 first; then take These figures will vary depending on the out the batteries. -
Page 39: Inserting An Sd Card
Getting Ready to Use the BR-80 Inserting an SD Card Here’s how to open the card cover. • This unit supports SD/SDHC cards. Removing the card cover • Never insert or remove an SD card while this unit’s power is on. Doing so may corrupt the unit’s data or the data on the SD card. -
Page 40: Connecting The External Equipment To The Br-80
Speakers Computer If you connect the BR-80 to your computer via USB, it will operate on USB bus power. (You’ll need to install the driver.) If you use the USB connection simultaneously with an AC adaptor, the AC adaptor will take priority. -
Page 41: Turning The Power On/Off
However, this is normal and does not indicate a malfunction. • When using the BR-80 on USB bus power, take care that the USB cable is not disconnected during use. If the USB cable is disconnected, data might be lost. -
Page 42: Turning The Power Off
Other settings you were editing will be saved automatically when you turn the power off. • Auto Power Off is enabled when the BR-80 is operating on batteries or the AC adaptor. This function is deactivated when you’re connected to a computer via USB. -
Page 43: Recording Ideas For Songs (Live Rec Mode)
Audio signal flow in LIVE REC mode Recorder REC LEVEL VOLUME Built-in PHONES/ microphones LINE OUT • In LIVE REC mode, you can only record via the stereo microphones that are built into the BR-80. • Effects are not applied in LIVE REC mode. -
Page 44: Recording Flow In Live Rec Mode
Recording Flow in LIVE REC Mode LIVE REC mode lets you easily make stereo recordings using the BR-80’s built-in microphones. Prepare for Recording Switching to LIVE REC Mode (p. 45) Other Functions (p. 49) Recording/Playback Recording (p. 46) Playback (p. 47) Using the metronome while recording Recording with the Metronome (p. -
Page 45: Recording/Playback
Switching to LIVE REC Mode Press the [ ] button a number of times until the LIVE REC indicator is lit . The BR-80 will enter LIVE REC mode, and the main screen will appear. Power supply status File name... -
Page 46: Recording
Recording/Playback Recording Press the [ ] (STOP) button to stop Rewind recording . Record / Recording-standby The [ ] (REC) button will go out. Fast-forward The display will show the file that was recorded. MEMO A song name such as LIVE0001.WAV will be created automatically. -
Page 47: Playback
(point A) . the BR-80 can play back. If the display indicates “No Card, ” no SD card has been Press the [A B] button at the point inserted. -
Page 48: Specifying The Type Of Playback (Play Mode)
Recording/Playback Specifying the Type of Playback (PLAY MODE) Here you can specify how the songs will play back. You can choose the basic play mode in which the songs play consecutively starting from the first song, or play just the selected single song, or play songs in random order (shuffle play). -
Page 49: Other Functions
Level of the song. While the sound plays, use the [REC The BR-80 is designed to let you record LEVEL] dial to adjust the recording a wide range of sounds. By adjusting the level a little at a time . -
Page 50: Making Settings For A Song (Song Info)
Other Functions Press the [MENU] button . Making Settings for a Song (SONG INFO) Here’s how to view or edit information about the song. Press the [MENU] button . Use the cursor [ ] buttons to select “REC SETUP,” and press the Use the cursor [ ] buttons to [ENTER] button . -
Page 51: Naming A Song (Song Name)
Other Functions Press the [ENTER] button . Naming a Song (SONG NAME) A message will ask “Are you sure?” If you decide to cancel the procedure, press When you create a new song, it will the [EXIT] button. automatically be given a name such as “LIVE0001. -
Page 52: Erasing A Song (Song Erase)
Other Functions Erasing a Song (SONG ERASE) Here’s how to erase the currently selected song. Press the [MENU] button . Use the cursor [ ] buttons to move the cursor to “SONG,” and press the [ENTER] button . Use the cursor [ ] buttons to move the cursor to “ERASE,”... -
Page 53: Building Your Ideas Into A Song (Mtr Mode)
Building Your Ideas Into a Song (MTR Mode) Audio signal flow in MTR mode GUITAR/ SENS REC LEVEL MIC IN Effect Built-in Recorder microphones VOLUME PHONES/ LINE IN LINE OUT • The built-in microphones will turn off when you connect a cable to the GUITAR/MIC IN jack. -
Page 54: Recording Flow In Mtr Mode
Recording Flow in MTR Mode In MTR mode, the BR-80 operates as a digital recorder that can play back eight tracks simultaneously. From recording to mastering, all the functions you need to create a song are provided. Preparations for Recording Make Connections (p. -
Page 55: Recording/Playback
Recording/Playback Switching to MTR Mode Press the [ ] button a number of times until the MTR indicator is lit . The BR-80 will enter MTR mode; the level meter screen will appear. Punch-in/out status Cursor Current Repeat time Status... -
Page 56: Listen To The Demo Song
Recording/Playback Listen to the Demo Song The SD card included with the BR-80 contains demo songs. Here’s how to play back the demo songs. Press the [MENU] button . Use the cursor [ ] buttons to move the cursor to “DEMOSONG,”... -
Page 57: Recording
The BR-80 manages your recordings in units called “songs. ” If you want to create a new recording, you need to create a new song (SONG NEW). If you want to record additional material for a song that’s already saved in the BR-80, select that song (SONG SELECT). -
Page 58: Recording
Recording/Playback Press the [ENTER] button . Use the track buttons to select the recording track (p . 59) . The song will be selected, and you’ll return to the Level Meter screen. Press the [ ] (REC) button to enter * The display will indicate “Keep power recording-standby mode . -
Page 59: Selecting The Track(S) For Recording (Rec Track)
Recording/Playback Selecting the Track(s) for Recording (REC TRACK) Select the track(s) on which you’ll record. Press a track button to select the track(s) to use for recording . The recording track level is shown in the level meter screen in the location circled below. If you press the [TR1/2] button, repeated pressing of the button allows you to cycle through the available choices, which are: track 1 (mono) track 2 (mono) -
Page 60: Playback
Recording/Playback Playback Playing Back Repeatedly Rewind Fast-forward (AB Repeat) By using the “repeat” function you can repeatedly play back a specified region. Stop Play Section to repeat Time Hold down the [ ] (STOP) button and press the [ ] button to return (Repeat End) (Repeat Start) to the beginning of the song . -
Page 61: Re-Recording Only Over A Mistake (Auto Punch In/Out)
Recording/Playback Re-Recording Only Over a Mistake (AUTO PUNCH IN/OUT) Press the [MENU] button . When recording, there may be times when you made a mistake or were unable to play Use the cursor buttons to move the as you intended. In such cases, you can use punch-in/out to re-record only the region cursor to “A . -
Page 62: Recording
] buttons to move the cursor to “OUT,” and turn Select the track 1, and press the the dial to specify the punch-out ] (REC) button to put the BR-80 in location . recording-standby mode . MEMO Press the [ ] (PLAY) button . -
Page 63: Track Settings (The Mixer Screen)
Track Settings (the Mixer Screen) The mixer screen lets you make settings for Adjusting the Volume each track. In the mixer screen, use the cursor [ Balance (TRACK LEVEL) ] buttons to move through the various settings in the following order. Here you can adjust the volume of each Screen Page... -
Page 64: Adjusting The Stereo Position (Track Pan)
Track Settings (the Mixer Screen) Use the dial to turn solo or mute on/ Adjusting the Stereo off . Position (TRACK PAN) MEMO You can press the cursor [ ] button to switch to the TRACK PAN screen. Here you can adjust the left/right position of each track. -
Page 65: Making Detailed Eq Settings
Track Settings (the Mixer Screen) Adjusting the Reverb Making Detailed EQ Settings (REVERB SEND) Here you can adjust the depth of In the TRACK EQ screen, press the reverberation (reverb) for each track. [ENTER] button . A screen for detailed track EQ editing will appear. -
Page 66: Selecting V-Tracks (V-Track)
(V-TRACK) actual tracks are called “V-Tracks. ” 1 1 2 2 3 3 4 4 5 5 6 6 7 7 8 8 Each of the BR-80’s tracks contains eight V-Track1 “V-tracks, ” and you can choose one of these... -
Page 67: Using Effects
By calling up “effect patches, ” you can switch the effects used by the insert effect and the parameters of each effect. The BR-80 provides a variety of effect patches suitable for use with vocals and a A. Guitar Multi variety of instruments. These effect patches are organized by their type into seven “categories. -
Page 68: Selecting An Effect
Using Effects Selecting an Effect Here’s how to choose the effect that’s applied to the input from the GUITAR/MIC IN jack. Press the [COSM] button . The effect patch select screen will appear. The effect will turn on/off each time you press the [COSM] button. -
Page 69: Using Rhythm
On the BR-80, To create a song that has musical variation, these basic repeated units are called you can arrange several different patterns “patterns. -
Page 70: Inserting A Pattern
Using Rhythm Use the cursor [ ] buttons to Parameter Explanation move the cursor to a pattern you’ve This specifies the tempo at placed . which the current pattern will play. Use the cursor [ ] buttons to TEMPO Range: 25.0–250.0 select a parameter . -
Page 71: Deleting A Pattern
Using Rhythm Use the cursor [ ] buttons to Press the [ENTER] button . move the cursor to “INSERT,” and The data will be deleted. press the [ENTER] button . Select the Fill and delete the pattern. A one-measure break will be inserted. Intro Fill Verse... -
Page 72: Changing The Drum Sounds (Kit)
A drum kit suitable for 4 . HARD hard rock The BR-80 contains nine such sets, which are appropriate for different styles of music. 5 . JAZZ A drum kit suitable for jazz Each of these sets is called a “drum kit. ”... - Page 73 Using Rhythm Use the cursor [ ] buttons to 4,999 notes or less for all Number of note move the cursor to “SMF IMPORT,” patterns combined and press the [ENTER] button . MIDI channel Channel 10 only The corresponding note numbers are as shown in the chart below.
-
Page 74: Track Editing (Track Edit)
Track Editing (TRACK EDIT) Here’s how to copy or erase tracks, or Items Page import data from eBand mode or LIVE REC Cancelling an Operation mode. p. 78 (UNDO/REDO) MEMO The results of your track editing operations are saved to the song when Copying Track Data you return to the level meter screen. -
Page 75: Press The [Menu] Button
Track Editing (TRACK EDIT) Use the cursor buttons and the dial to Parameter Explanation select the copy-source (SOURCE) and START copy-destination (DEST) track and V-track . Time or Specify the start of the copy measure source. Time or Specify the end of the copy measure source. -
Page 76: Moving Track Data (Track Move)
Track Editing (TRACK EDIT) Press the [ENTER] button . Moving Track Data The time setting screen will appear. (TRACK MOVE) This operation moves the data of the specified track. If recorded data exists at the destination of the move, it will be overwritten by the data that was moved. -
Page 77: Exchanging Data (Track Exchange)
Track Editing (TRACK EDIT) Use the cursor [ ] buttons and Exchanging Data the dial to select the erase-source track/V-track . (TRACK EXCHANGE) This operation exchanges data between two tracks. Example: Exchanging the entire contents of tracks 1 Press the [ENTER] button . and 2 The time setting screen will appear. -
Page 78: Importing Audio Data (Track Import)
Track Editing (TRACK EDIT) Press the [ENTER] button . To import the data, press the [ENTER] button . The exchange will be carried out. A message will ask “Are you sure?” * The display will indicate “Keep power on!” while the data is being updated. If you decide to cancel the procedure, press Do not turn off the power while this the [EXIT] button. -
Page 79: Returning To The Previous State (Undo)
Track Editing (TRACK EDIT) Returning to the Previous Canceling the Undo State (UNDO) (REDO) If you want to cancel the most recent If you want to cancel the previously recording or editing operation, execute performed Undo operation, execute Redo. Undo. Press the [MENU] button . -
Page 80: Mastering
The Menu screen will appear. Although the BR-80 allows the simultaneous playback of eight tracks, when you run out of tracks, the BR-80 also lets you copy the recordings of multiple tracks together onto one track (V-Track). This is called “bounce” (also known as bounce recording or ping-pong recording). -
Page 81: Mastering (Mastering)
Mastering effect Press the [ ] (REC) button . The BR-80 will enter recording-standby mode. WAV file Press the [ ] (PLAY) button . The bounce operation will begin. - Page 82 ] buttons to move the cursor to “MASTERING,” and press the [ENTER] button . The BR-80 will enter mastering mode, and the MASTERING screen will appear. If you decide not to mastering, press the ] (STOP) button or the [EXIT] button.
-
Page 83: Editing The Mastering Effect Settings
Mastering Use the cursor [ ] buttons to Editing the Mastering move the cursor to each parameter, Effect Settings and use the dial to set the value of each effect parameter . If you want to save the current effect To create a new patch, choose the existing settings, proceed as described in “Saving patch that’s closest to what you have in... -
Page 84: Saving The Mastering Effect Settings
Mastering Use cursor [ ] buttons and Saving the Mastering the dial to select the desired write- destination mastering effect . Effect Settings Once you’ve selected the destination Here’s how to assign a name (patch name) at which to write the mastering to the effect you’ve created, and save it as a effect, press the [ENTER] button . -
Page 85: Managing Your Songs (Song)
Managing Your Songs (SONG) The BR-80 manages your recordings as Making Settings for a units called “songs. ” Song (SONG INFO) Press the [MENU] button . The Menu screen will appear. Here’s how to view or edit information about the song. -
Page 86: Naming A Song (Song Name)
Managing Your Songs (SONG) Naming a Song Protecting a Song (SONG NAME) (SONG PROTECT) When you create a new song, it will You can protect the song data from being automatically be given a name such as rewritten (Song Protect). “SONG0001. -
Page 87: Erasing A Song (Song Erase)
Managing Your Songs (SONG) Erasing a Song Copying a Song (SONG ERASE) (SONG COPY) Here’s how to erase a song. Here’s how to copy the currently selected song. NOTE To copy the song, press the [ENTER] Song data erased by the Song Erase button . -
Page 88: Saving Space On The Sd Card (Song Optimize)
Managing Your Songs (SONG) Saving Space on the SD Card (SONG OPTIMIZE) When you perform track editing or punch- in/out, the previous data will remain on the SD card without being erased. This will reduce the available recording time. By executing the “Song Optimize” operation you can erase unneeded data from the memory card and increase the amount of space that’s available. -
Page 89: Practicing Along With A Completed Song (Eband Mode)
Practicing Along With a Completed Song (eBand Mode) Audio signal flow in eBand mode GUITAR/ SENS REC LEVEL MIC IN Effect Built-in Recorder microphones VOLUME PHONES/ LINE IN LINE OUT • The built-in microphones will turn off when you connect a cable to the GUITAR/MIC IN jack. -
Page 90: Procedural Flow In Eband Mode
Procedural Flow in eBand Mode In eBand mode, you can record a guitar performance together with a backing song. This mode allows you to gain effective practice on your guitar---you can change the playback speed of a song or change the performance pitch, and you can make use of the Center Cancel function. -
Page 91: Playback/Recording
Press the [ ] button a number of times until the eBand indicator is lit . The BR-80 will enter eBand mode, and the main screen will appear. During recording: length of recording While stopped, during playback: remaining recording time... -
Page 92: Playback
Playback/Recording Playback Press the [ ] button . Rewind The song will play back. Play Fast-forward Press the [A B] button at the point where you want to start repeating (point A) . Press the [A B] button at the point where you want to stop repeating (point B) . -
Page 93: Recording
The 0001 portion will be the number following the highest-numbered song Press the [ ] (STOP)button . that exists. Recording will stop. • You can easily find songs you’ve recorded in the BR-80 by using the “USER” category in the SEARCH function. -
Page 94: Playback
MEMO BEST 30 already been ranked (1–30) • The BR-80 can handle up to a maximum (p. 100). of 4,000 songs. Songs are listed by album • You can register up to 2,000 headings,... -
Page 95: Changing The Song's Speed Or Pitch (Speed)
Playback Changing the pitch Changing the Song’s The PITCH parameter changes the key of the song. Speed or Pitch (SPEED) Parameter Explanation Here’s how to change the song’s playback Raises or lowers the pitch in speed (tempo) or pitch. semitone steps. SHIFT Range: -6–+7 Press the [TR3/4] (SPEED) button . -
Page 96: Canceling Sounds In The Center (Center Cancel)
Playback Canceling Sounds in the Specifying the Type of Center (CENTER CANCEL) Playback (PLAY MODE) Here’s how you can minimize sounds that Here you can specify how the songs are localized at the center. will play back. You can choose the basic play mode in which the songs play Press the [TR5/6] (CENTER CANCEL) consecutively starting from the first song,... -
Page 97: Using Effects
Using Effects eBand mode provides two effects Apply Reverb processors (insert effect and reverb). Here’s how to make settings for the Selecting an Effect reverberation (reverb) that’s applied to the input from the GUITAR/MIC IN jack. Here’s how to choose the effect that’s Press the [COSM] button . -
Page 98: Other Functions
The SONG INFO screen will appear. so that your song data will be easier to manage. * The BR-80 can’t edit the name of a song that was edited in eBand Song List Editor. Press the [MENU] button . -
Page 99: Erasing A Song (Song Erase)
Other Functions Use the cursor [ ] buttons to Erasing a Song move the cursor to the character that you want to edit . (SONG ERASE) Turn the dial to select the desired character . Here’s how to erase the currently selected song. -
Page 100: Registering Your 30 Favorite Songs (Best 30 Edit)
Other Functions Registering Your 30 Precise Adjustment of Favorite Songs the Repeat Segment (BEST 30 EDIT) (AB EDIT) Including your favorite songs, allows you to Here’s how to precisely adjust the start time always have the songs you want appear in and end time for AB Repeat. -
Page 101: Using The Metronome
(PATCH SYNC) Press the [RHYTHM] button . The METRONOME screen will appear. Here’s how to set the BR-80 so the effect patch stored in a song is loaded automatically when you switch songs. Press the [MENU] button . -
Page 103: Other Convenient Functions
Recorder MIC IN VOLUME Effect Built-in PHONES/ microphones LINE OUT LINE IN • In LIVE REC mode, you can only record via the stereo microphones that are built into the BR-80. • Effects are not applied in LIVE REC mode. -
Page 104: Connecting The Br-80 To A Computer
Press the [MENU] button . following operations. The Menu screen will appear. • Use the BR-80 as an audio interface (p. 109). Use the cursor [ ] buttons to • Transfer audio data between the BR-80 and your computer (p. -
Page 105: Data Structure On The Sd Card
Wave Converter can be found on the supplied SD card. ROLAND folder Mac.dmg The BR-80’s data is saved in the following This folder contains the USB driver, eBand folders. Song List Editor, and BR Series Wave Converter for Mac OS X. -
Page 106: Exchanging Data With Your Computer
Drag and drop the WAV files that you want to copy. Set the USB mode to STORAGE before you Stop the connection between the BR- connect the BR-80 to your computer (p. 104). 80 and your computer . After carrying out the following procedure Transferring WAV Files on your personal computer, wait until the IDLING screen has reappeared on the BR-80. -
Page 107: Using Br Series Wave Converter
Computer By using “BOSS BR Series Wave Converter” Set the USB mode to STORAGE before you you can convert BR-80 audio data to WAV/ connect the BR-80 to your computer (p. 104). AIFF files, or convert WAV/AIFF files from When your SD card has filled up, or if your computer to BR-80 audio data. - Page 108 “Removable disk (*:)” icon), and then execute “Eject. ” To recover Mac OS users Double-click the “BR-80 eBand” icon (or the Drag the “BR-80 eBand” icon to the “Eject” “removable disk (*:)” icon). icon. Delete the “ROLAND” folder in the BR-80. Turn the BR-80’s power off .
-
Page 109: Using The Br-80 As An Audio Interface
Here’s how audio data played back by your computer can be sent to the BR-80 via USB Recording Audio from the and recorded on the BR-80’s tracks. BR-80 on Your Computer Use a USB cable to connect the BR-80 to your computer . -
Page 110: Detailed Effect Settings
Detailed Effect Settings Use the cursor [ ] buttons to Editing the Insert Effect move the cursor to the effect whose parameters you want to edit, and Settings (EDIT) press the [ENTER] button . The parameter edit screen for that effect To create a new effect sound, choose an will appear. -
Page 111: Saving An Effect (Write/Name)
Sound Modeling) move the cursor to the character that you want to edit . Composite Object Sound Modeling– or “COSM” for short–is BOSS/Roland’s Turn the dial to select the desired innovative and powerful technology character . that’s used to digitally recreate the... -
Page 112: Algorithm List
For the insert effects, the available effects and the order in which they are connected (the algorithm) will differ for each category and patch. The BR-80 provides the following algorithms for various purposes. * The line or lines connecting the algorithm indicate whether the effect features mono (single line) or stereo (two lines). -
Page 113: For Microphone
Detailed Effect Settings 3. GUITAR TO BASS 5. STEREO MULTI Simulates the sound of a bass guitar. This effect is designed specifically for the built-in microphones. Obtain the sound of a bass guitar while playing an electric guitar. This algorithm connects six types of effect, all in full stereo. -
Page 114: Making Overall Settings
Making Overall Settings Use the cursor [ ] buttons to Adjusting the Input select a parameter, and use the dial to edit the value . Sensitivity (INPUT) Parameter Explanation Here’s how to adjust the input sensitivity Adjusts the contrast of the LCD of the GUITAR/MIC IN jack/Built-in CONTRAST screen. -
Page 115: Viewing Sd Card Usage (Sd Info)
SD card, you must format it on the BR-80. Use the cursor [ ] buttons to • Make sure that the BR-80’s power is move the cursor to “SD INFO,” and turned off before you insert or remove press the [ENTER] button . -
Page 116: Initializing The Unit (Factory Reset)
If you decide to cancel, choose “NO” and press the [ENTER] button . If you choose “YES” and press the [ENTER] button, the factory reset will be executed. NOTE After executing the Factory Reset, turn the BR-80’s power off, then on again. -
Page 117: Auto Power Off Settings
Making Overall Settings Auto Power Off Settings The BR-80 can turn off its power automatically. The power will turn off automatically when 30 minutes have passed since you last played or operated the unit. With the factory settings, this function is turned “ON”... -
Page 118: Tuning Your Instrument
Tuning Your Instrument To turn off the tuner, press the [EXIT] The BR-80 provides a Chromatic Tuner function that makes it easy to tune an button . instrument. The built-in tuner supports guitar or bass guitar. MEMO Here’s how to tune your guitar. - Page 119 You can adjust the tuner’s reference pitch in the range of 435–445 Hz. In the TUNER screen, you can use the dial to set the reference pitch. With the factory settings, this is set to 440 MEMO The reference pitch setting is saved within the BR-80.
-
Page 121: Appendix
Appendix... -
Page 122: Troubleshooting
– Phrases shorter than one second cannot be played back in MTR mode. Can’t play back a Could you be attempting to play back a file in a format that the BR-80 does not p. 128 WAV/MP3 file support? - Page 123 39 Check the reverb send level amounts for the loop effect. You don’t want to The BR-80 provides reverb as a loop effect. apply reverb in MTR p. 65 Reverb is applied by default. If you want to turn off the reverb effect, set each mode track’s send level amount to “0.
-
Page 124: Problems With The Sd Card
Could the SD card be write protected? p. 39 Could an SD card not supported by the BR-80 be inserted? Can’t format the SD Before using any SD card other than the one that was supplied with the unit, card –... -
Page 125: Error Message List
List Editor can be viewed but not – name! Song List Editor to edit the name. edited on the BR-80. You tried to erase a pattern from Make sure that there are at least two Cannot delete! a rhythm that contains only one p. - Page 126 What is an event? An “event” is the smallest unit used by the BR-80 to manage the data recorded on an SD card. Approximately 30,000 events are allocated for each newly created song.
- Page 127 Press the [ Stop recorder! – recorder is operating (i.e., during playback or recording. playback or recording). It may be that the BR-80 has malfunctioned. Writing to the BR-80’s memory System error! Please contact Roland customer service or – failed.
-
Page 128: Specifications
Specifications BOSS MICRO BR BR-80 : DIGITAL RECORDER Tracks: MTR Mode Simultaneously recording track: 2 V-Track: 64 (8 V-Tracks per each Track) Tracks: 2 (stereo) eBand Mode Tracks Simultaneously recording track: 2 (stereo) Tracks: 2 (stereo) Simultaneously recording track: 2 LIVE REC Mode * Either the playback or the recording. - Page 129 Specifications Nominal Output Level PHONES/LINE OUT jack: -14 dBu Output Impedance PHONES/LINE OUT jack: 22 ohms Display Graphic LCD 128 x 64 dots 24-bit/44.1 kHz USB-AUDIO (Hi-Speed USB) USB Functions USB Mass Storage Class (Hi-Speed USB) BUS Power operation GUITAR/MIC IN jack (1/4” phone type) LINE IN jack (Stereo miniature phone type) Connectors PHONES/LINE OUT jack (Stereo miniature phone type)
-
Page 130: Index
Index [ ] button ........34 Effect ] button . -
Page 131: Song Name
Index PLAY MODE SONG SELECT ........57 eBand Mode . - Page 132 MEMO...
- Page 134 For EU Countries For China...
-
Page 135: Declaration Of Conformity
WARNING This product contains chemicals known to cause cancer, birth defects and other reproductive harm, including lead. For the USA DECLARATION OF CONFORMITY Compliance Information Statement BR-80 Model Name : Digital Recorder Type of Equipment : Roland Corporation U.S. Responsible Party : 5100 S.Eastern Avenue, Los Angeles, CA 90040-2938...