Table of Contents
Advertisement
Installation, Operation, and Maintenance
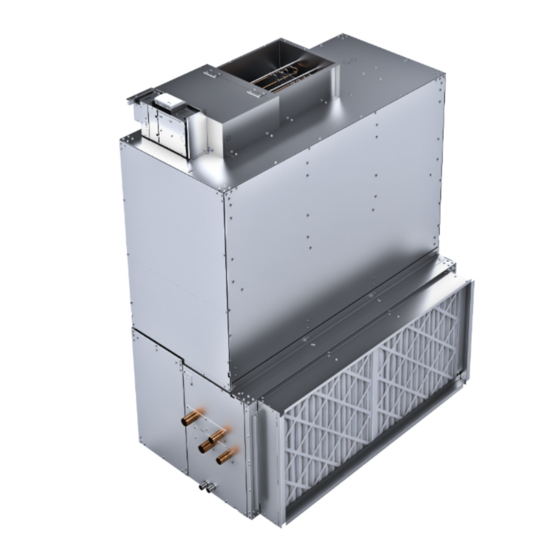
Blower Coil Air Handler
Single Zone Air Handler, 400 to 4000 CFM
Models BCHE, BCVE and later design sequence
Only qualified personnel should install and service the equipment. The installation, starting up, and servicing of heating, ventilating, and air-conditioning equipment
can be hazardous and requires specific knowledge and training. Improperly installed, adjusted or altered equipment by an unqualified person could result in death or
serious injury. When working on the equipment, observe all precautions in the literature and on the tags, stickers, and labels that are attached to the equipment.
June 2022
SAFETY WARNING
BCX-SVX002A-EN
Advertisement
Table of Contents
Troubleshooting

Related Manuals for Trane BCHE


Summary of Contents for Trane BCHE
- Page 1 Blower Coil Air Handler Single Zone Air Handler, 400 to 4000 CFM Models BCHE, BCVE and later design sequence SAFETY WARNING Only qualified personnel should install and service the equipment. The installation, starting up, and servicing of heating, ventilating, and air-conditioning equipment can be hazardous and requires specific knowledge and training.
- Page 2 (HCFCs). Not all refrigerants containing these compounds bump cap, fall protection, electrical PPE and arc have the same potential impact to the environment. Trane flash clothing). ALWAYS refer to appropriate advocates the responsible handling of all refrigerants-...
- Page 3 Follow EHS Policies! This document and the information in it are the property of Trane, and may not be used or reproduced in whole or in Failure to follow instructions below could result in part without written permission. Trane reserves the right to death or serious injury.
-
Page 4: Table Of Contents
Grommet Installation ....53 Drain Pan Trapping (Models BCHE/ General Information ......10 BCVE) . - Page 5 Wireless Zone Sensors ....73 Trane Electronically Commutated Motor Receivers ......73 (ECM).
- Page 6 Table of Contents Water Temperature Sampling Water Coils ......119 Function ......109 Refrigerant Coils .
- Page 7 Table of Contents Wiring Diagrams......144 Motor....... 139 Replacing ECM Components .
-
Page 8: Model Number Description
Digit 1, 2, 3, 4 — Unit Model B = 4-row hydronic Digit 23 — Electric Heat Options C = 6-row hydronic BCHE = Horizontal blower coil D = 4-row hydronic with auto change over 0 = None BCVE = Vertical blower coil... - Page 9 Model Number Description Digit 28 — Coil #1 Control Valve Cv Digit 35 — Factory Mounted Control Options 0 = None 0 = None A = 2-way 2.3 Cv 3/4-in. valve A = Condensate overflow B = 2-way 3.3 Cv 3/4-in. valve B = Condensate Overflow and Low Limit C = 2-way 4.6 Cv 3/4-in.
-
Page 10: General Information
400–4000 cfm. Units are available in inch filters. An optional angle filter box (two inch only), horizontal (model BCHE) and vertical (model BCVE) mixing box, bottom filter access box, or combination angle configurations. Horizontal units are typically ceiling filter mixing box is available. - Page 11 General Information Figure 2. Vertical blower coil BCVE size 24-60 Direct-drive up to Control box options 2.5 inches total static include UC400-B controller eliminates the difficulties for single zone VAV; CSTI with belts 1/2 - 1 HP ECM motor (standard) Auxillary heating coil with 1- or 2-row hydronic...
- Page 12 General Information Figure 3. Vertical blower coil BCVE size 72-120 BCX-SVX002A-EN...
-
Page 13: Pre-Installation
Request an immediate joint Inspection inspection of the damage by the carrier and consignee. ☐ Notify your Trane sales representative of the damage Upon delivery, thoroughly inspect all components for any and arrange for repair. Do not attempt to repair the unit shipping damage that may have occurred, and confirm that without consulting the Trane representative. -
Page 14: Site Preparation
Support all • BCHE and BCVE units have either right or left hand piping and ductwork independently of the unit to piping. Reference piping locations by facing the front of prevent excess noise and vibration. -
Page 15: Dimensions And Weights
Dimensions and Weights Service Clearances Figure 4. Recommended service clearance BCX-SVX002A-EN... - Page 16 Dimensions and Weights Figure 5. Recommended service clearance for blower coil with electric heat Table 1. Service requirements (inches) Unit Size Dimension A Filter Section Dimension B Coil Section BCX-SVX002A-EN...
- Page 17 Dimensions and Weights Figure 6. Recommended service clearance for BCVE 72 to 120 with electric heat (top view) BCX-SVX002A-EN...
- Page 18 Dimensions and Weights Figure 7. Recommended service clearances for BCVE 72 to 120 (side view) BCX-SVX002A-EN...
- Page 19 Dimensions and Weights Figure 8. Service clearance for BCVE size 24 to 60 Electric heat 2 ft. controls Airflow Control box Fan motor 4 ft. Piping package Filter Airflow Drain pan Airflow BCX-SVX002A-EN...
-
Page 20: Horizontal Blower Coil
Dimensions and Weights Horizontal Blower Coil Figure 9. BCHE horizontal blower coil BCX-SVX002A-EN... - Page 21 Dimensions and Weights Table 2. BCHE horizontal blower coil dimensions (inches) and weights (lb) G (RH) G (LH) Unit Size 17.00 24.00 30.10 15.00 18.00 10.70 7.15 2.30 1.00 10.65 12.65 17.00 28.00 30.10 15.00 22.00 10.70 7.15 2.30 1.00 10.65...
-
Page 22: Vertical Blower Coil
Dimensions and Weights Vertical Blower Coil Figure 10. Size 24-60 BCVE vertical blower coil BCX-SVX002A-EN... - Page 23 Dimensions and Weights Figure 11. Size 72-120 BCVE vertical blower coil BCX-SVX002A-EN...
- Page 24 Dimensions and Weights Table 3. BCVE 24 to 60 vertical blower coil dimensions (inch) and weights (lb) Unit Size 45.9 10.7 19.45 2.65 7.15 16.05 20.9 49.9 10.9 22.95 2.65 14.4 8.13 25.2 56.6 13.9 24.45 2.65 11.5 15.4 26.7 58.6 13.9 27.45...
-
Page 25: Options
Dimensions and Weights Options Angle Filter and Mixing Box Figure 12. Combination angle filter and mixing box dimension Figure 13. Mixing box dimension Figure 14. Angle filter box dimension BCX-SVX002A-EN... -
Page 26: Bottom/Top Access Filter Box
Dimensions and Weights Table 5. Angle filter and mixing box dimensions (inches) and weights (lb) Unit Size 17.00 24.00 23.60 8.33 14.00 5.00 11.57 15.00 6.25 17.00 28.00 23.60 8.33 14.00 7.00 11.57 15.00 6.25 17.00 30.00 23.60 8.33 20.00 5.00 11.57 15.00... -
Page 27: Return And Discharge Attenuators
Out swing hinged door on bottom of unit. Single Wall (SW), Double Wall (DW). Dimensions are the same for SW and DW units. Return and Discharge Attenuators Figure 16. BCHE 12 to 120 and BCVE 72 to 120 attenuator BCX-SVX002A-EN... - Page 28 Dimensions and Weights Table 7. BCHE 12 to 120 and BCVE 72 to 120 return attenuator dimensions (inch) and weights (lb) Weight Unit Size 25.86 27.75 28.7 42.05 53.99 72.83 64.87 83.9 Table 8. BCHE 12 to 120 and BCVE 72 to 120 discharge attenuator dimensions (inch) and weights (lb)
- Page 29 Dimensions and Weights Figure 17. BCVE 24 to 60 attenuator Front View Back View Top/Bottom View Side View Table 9. BCVE 24 to 60 return attenuator dimensions (inch) and weights (lb) Unit Weight Size 19.4 29.8 30.16 22.9 29.8 4.95 4.95 32.18 24.4...
-
Page 30: Electric Heat
Dimensions and Weights Electric Heat Figure 18. BCHE/BCVE blower coils with electric heat section BCX-SVX002A-EN... - Page 31 Dimensions and Weights Table 11. BCHE/BCVE blower coils with electric heat section dimensions (inches) and weights (lb) Unit Size 28.00 37.10 32.00 37.10 33.00 37.10 44.00 40.10 46.00 42.80 58.00 42.75 60.75 48.20 47.65 73.65 58.00 47.65 73.65 Figure 19. BCVE 24 to 60 blower coil with electric heat section...
- Page 32 Dimensions and Weights Figure 20. Electric heat section for BCHE/BCVE BCX-SVX002A-EN...
- Page 33 Dimensions and Weights Table 13. Electric heat section for size BCHE 12 to 120 and BCVE 72 to 120 dimensions (inches) and weights (lb) Unit Size Weight Weight 17.88 14.10 8.13 6.80 10.50 8.75 1.90 1.98 1.98 13.6 23.4 19.88 14.10...
- Page 34 Dimensions and Weights Figure 21. Electric heat section for BCVE size 24 to 36 Control panel door 0.875 Power connection 1.00 1.00 Hinges 7.63 0.875 Power connection on opposite side 1.00 1.00 0.875 Power connection BCX-SVX002A-EN...
- Page 35 Dimensions and Weights Figure 22. Electric heat section for BCVE size 48 to 60 Control panel door Hinges 1.00 1.00 0.875 Power connection on opposite side 7.63 .875 POWER CONNECTION 1.00 1.00 0.875 KO 0.875 Power connection on opposite side BCX-SVX002A-EN...
-
Page 36: Coil Connections
Electric heater is factory mounted on unit discharge face and wired to unit control box. Electric heat may need field-supplied externally-wrapped insulation if the unit is installed in an unconditioned space or if sweating is an issue. Coil Connections Table 15. BCHE hydronic coil connection sizes, OD (inches) Unit Size 1-Row... -
Page 37: Sample Piping Schematics
Dimensions and Weights Table 17. BCHE DX coil connection sizes, OD (inches) (continued) 3-Row 4-Row 6-Row Unit Size Liquid Liquid Liquid Suction Suction Suction 1-1/8 1-1/8 1-1/8 1-1/8 1-1/8 1-3/8 1-3/8 1-1/8 1-3/8 1-1/8 1-3/8 1-1/8 1-3/8 1-1/8 1-3/8 1-1/8... - Page 38 Dimensions and Weights Figure 24. 2 way valve 7.4 and 10.0 CV Figure 25. 3 way valve 1.0 and 2.7 CV BCX-SVX002A-EN...
- Page 39 Dimensions and Weights Figure 26. 3 way valve 4.6 CV Figure 27. 3 way valve 7.4 and 10.0 CV BCX-SVX002A-EN...
-
Page 40: Valve And Actuator Operation
Dimensions and Weights Figure 28. 2-way PIQCV valve STRAINER COIL MAIN SUPPLY SUPPLY SHUT OFF VALVE COIL MAIN RETURN RETURN SHUT OFF VALVE PIC VALVE AND ACTUATOR NOTES: 1. ALL COPPER PIPES, REDUCERS, ADAPTERS, TEES, AND ELBOWS ARE TO BE FIELD SUPPLIED. 2. - Page 41 Dimensions and Weights Figure 29. Cv adjustments Table 20. Actuator clip settings 2-way Valve Body No Clip 1/2 in. Z2050QS-F Cv 1/2 in. Z2050QS-J Cv 3/4 in. Z2075QS-K Cv Stroke Time (seconds) This Cv shows the standard Cv offering for 2-way valves Table 21.
-
Page 42: Installation Mechanical
Verify that no power is present with a voltmeter. Installation Procedure Horizontal Unit (Model BCHE) Installation Follow the procedures below to install the blower coil unit. BCX-SVX002A-EN... - Page 43 Installation Mechanical Install horizontal units suspended from the ceiling with 3/8- section) in. threaded rods that are field-provided. There are lugs on • Nuts (16) each corner of the unit (8 total) for installation of the • Optional vibration isolator hangers or turnbuckles (4 per threaded rods.
-
Page 44: Vertical Unit (Model Bcve)
Installation Mechanical Figure 32. Add nut and flat washers to threaded rod • #10 screws to fasten vertical fan section to coil section. • Eight #10 screws to fasten leg to unit, 32 per unit. • Four 1/4"-20 screws per leg, 16 per unit. 1. -
Page 45: Accessory Installation - Mix Box
Installation Mechanical Accessory Installation — Figure 34. Mounting leg installation for vertical units and accessories Mix Box, Angle Filter, Bottom Access Filter, and Attenuators Materials Provided: • Mounting legs (2) for vertical units • Accessory module and damper actuator cross over harness (Mix Box) Material Needed: •... - Page 46 Installation Mechanical Figure 36. Mix box install FASTEN BOLTING STRIP TO MAIN UNIT WITH SCREW SELF-DRILLING, #10-16 X 1/2 HEX WASHER GASKET; 0.190T X 1.000W Bolting Strip 2. Verify that the factory supplied gasket is installed 3. Plug damper crossover harness into plug plate on coil around the perimeter of the accessory where it panel.
- Page 47 Installation Mechanical Figure 37. Size 24 to 60 BCVE unit with return and discharge attenuator BOLTING STRIP GASKET; 0.19T x 1.000W FASTEN CONTROL BOX SIDE FASTEN FRONT ATTENUATOR ATTENUATOR PANEL FLANGE PANEL FLANGE TO UNIT WITH TO UNIT WITH SELF DRILLING SELF DRILLING SCREW, SCREW, #10-16 x 1/2 #10-16 x 1/2...
- Page 48 Installation Mechanical Figure 38. Size 12 to 120 BCVE unit with return and discharge attenuator FASTEN BOLTING STRIP TO MAIN UNIT WITH #10-16 X 1/2 GASKET; 0.19T x 1.000W BOLTING STRIP FASTEN CONTROL BOX SIDE ATTENUATOR PANEL FLANGE TO UNIT WITH SELF DRILLING SCREW, #10-16 x 1/2 DETAIL A 4.
- Page 49 Mix Box Damper Linkage If a fire hazard exists, Trane recommends using Flexweave 1000, type FW30 or equivalent canvas. Use three inches 1. Verify bearing bracket on back damper is biased to the for the return duct and three inches for the discharge duct.
- Page 50 Installation Mechanical Figure 40. Mix box or mix box w/angle filter linkage orientation (size 12 to 90) BCX-SVX002A-EN...
- Page 51 Installation Mechanical Figure 41. Mix box or mix box w/angle filter linkage orientation (size 120) BCX-SVX002A-EN...
-
Page 52: Condensate Drain Connections
Size the main drain lines and trap them the same size as the drain connection, which is 3/4-inch schedule 40 PVC, 1.050 inch O.D. on BCHE/BCVE blower coils. The size 24- 60 BCVE blower coils have a rubber internal trap that has a 1.050 inch I.D. -
Page 53: Piping And Connections
Piping and Connections NOTICE • After completing the piping connections, seal around pipe from inner panel to outer panel. Connection Leaks! Grommet Installation Failure to follow instructions below could result in damage to the coil header and cause connection Grommets for piping headers ship loose in an accessory leaks. -
Page 54: Drain Pan Trapping
Condensate drain connections are provided on only one Note: Size 24-60 BCVE units are internally trapped. side of the coil section. Pitch the connection lines horizontal or downward toward an open drain. Trane WARNING recommends installing a plug to facilitate cleaning of the No Step Surface! trap. -
Page 55: Water Coil Piping
Piping and Connections Water Coil Piping Unit Size # Rows 4,6,8 Water coils are self-venting only if the water velocity exceeds the minimum required velocity. 2,4,6,8 The following combinations of unit size and number of rows 2,4,6,8 have a coil with a minimum self-venting velocity of 1 feet per second (fps). -
Page 56: Liquid Lines
Piping and Connections Figure 48. Example of placement for split-system components Access port Manual Discharge ball valve Filter line Manual Access angle valves port Manual Compressors ball valve Liquid line Check/relief valve Condensing unit King valve access port Expansion Coil section valves Solenoid Moisture-... -
Page 57: Suction Lines
MCHE. Failure to protect the valve from high temperatures could result in damage to internal components. Note: Trane condensing units with MCHE no longer employ Disassemble the thermal expansion valve before pump-down, but isolation solenoids are required. -
Page 58: Expansion Valves
Installing the suction line requires field installation of these WARNING components: a filter, access port, and a Frostat™ control R-410A Refrigerant under Higher when the refrigerant coil is used with Trane condensing Pressure than R-22! units. Position them as close to the compressor as possible. -
Page 59: Field-Installed Evaporator Piping
Piping and Connections NOTICE • For the best performance and operation, the original mineral oil should be removed from the components of Compressor Damage! the system that are not being replaced. Any component POE oil is hygroscopic – it absorbs water directly of the system that is suspected of trapping oil (piping, from the air. - Page 60 Piping and Connections Figure 51. Typical single-circuit condensing unit: evaporator coil with two distributors Evaporator Coil with suction line Intertwined Circuiting liquid line Sight glass Solenoid Filter drier valve Thermal expansion valve (TXV) Distributor 1. Pitch the liquid line slightly—1 inch/10 feet —so the 6.
-
Page 61: Installation - Controls
Installation - Controls Control Options box contains a relay board which includes a line voltage to 24-volt transformer, quiet contactors (for electric heat Available control options are: units), and an optional disconnect switch. All end devices • Customer-supplied terminal interface (CSTI) are wired to a low-voltage terminal block and are run- tested, so the only a power connection and thermostat •... -
Page 62: Cooling
– A 10K NTC thermistor (similar to Trane part number SW3 enables or disables the changeover function for 2– X13790374010) is wired properly to the motor... -
Page 63: Heating
The temperature is not in the dead-band between the – A 10K NTC thermistor (similar to Trane part number A A i i 2 2 b b parameter and the A A i i 2 2 M M parameter (in this case, X13790374010) is wired properly to the motor previous state will be retained). -
Page 64: Thermostat
Installation - Controls Thermostat The thermostat is a wall-mounted, field-installed option. It can provide three-speed control. Figure 54. Terminal block 1. 24 Vac 2. N 10 9 8 7 6 5 4 3 2 1 3. Fan High 4. Fan Med Terminal Block 5. -
Page 65: Tracer ® Uc400-B Controller
Installation - Controls Communication Wire Specifications 3. Set thermostat away from working area. 4. Align thermostat base with junction box mounting holes All wiring must comply with the National Electrical Code and feed the control wires through hole. (NEC™) and local electrical codes. 5. - Page 66 Installation - Controls Figure 57. Setting rotary address dials Comm In Comm Out Zone Sensor Comm - Serv Tool Connection Address Comm + 1 2 3 J14 - JST 24VDC Auxiliary 24 Vdc Output 14 13 12 11 10 9 8 7 6 5 4 3 2 1 Phoenix 14 Pin AMP...
-
Page 67: Power Supply
1 2 3 4 1 2 3 4 24VDC 24VDC 24VDC BACnet BACnet BACnet 1 2 3 4 1 2 3 4 1 2 3 4 Trane BACnet Terminator Tracer SC UC400-B UC400-B UC400-B Zone Sensor Zone Sensor Zone Sensor Power Supply Read all of the warnings, cautions, and notices below before proceeding with this section. - Page 68 Installation - Controls WARNING to the controller (12VA) and outputs (maximum 12VA per binary output). Hazardous Voltage! • CE-compliant installations: The transformer must be Failure to disconnect power before servicing could CE marked and SELV compliant per IEC standards. result in death or serious injury. Disconnect all electric power, including remote Wiring Requirements disconnects before servicing.
-
Page 69: Air-Fi ® Wireless Communications
BAS-SVX55*-EN - Wireless Comm Network Design Best Practices Guide Quantity of WCIs per Network Each Trane wireless network can have a total of 31 WCIs (30 member WCIs plus one coordinator WCI). Each network requires one WCI to function as network coordinator. -
Page 70: Specifications
Wireless Zone Sensors evaluation. Placement of WCI is critical to proper The WCI also communicates with Trane wireless zone system operation. In most general office space sensors, eliminating the need for analog receivers. -
Page 71: Zone Sensor Options
Installation - Controls Zone Sensor Options and operate on 24 Vac. Options with setpoint knobs are available in Fahrenheit or Celsius. A variety of wall-mounted zone sensors are available for design flexibility. Zone sensors have an internal thermistor Figure 61. Wall-mounted zone sensor with Figure 62. -
Page 72: Location Considerations For Wireless
Installation - Controls Location Considerations for Wireless Figure 66. Wall-mounted wired and wireless zone sensor dimensions Zone Sensors TYP R.07 in. Placement of the sensor is critical to proper operation (the (R1.9) 0.31 in. receiver is factory mounted). For most installations, barriers limit proper radio signal strength more than distance. -
Page 73: Wireless Zone Sensors
Installation - Controls Wireless Zone Sensors Figure 67. Mounting zone sensor base plate 1. Note the position of the setpoint adjustment knob and gently pry the adjustment knob from the cover using the blade of a small screwdriver. 2. Insert the screwdriver blade behind the cover at the top of the module and carefully pry the cover away from the base. -
Page 74: Observing Receiver For Readiness
Installation - Controls • It is not possible to associate more than one sensor to a Figure 71. Set the rotary address switches on the receiver receiver, nor is it possible to associate more than one receiver to a sensor. •... -
Page 75: Associating Sensor To Receiver
Installation - Controls Figure 72. Receiver conducts 20 second channel Figure 74. Power sensor by removing insulation strip scan Sec. After the channel scan is finished, LED3 begins blinking (one-blink pattern) to show that the receiver is ready to be associated with a sensor. -
Page 76: Sensor Operations
Installation - Controls Sensor Operations Figure 75. Wireless Zone Sensor (WZS) with LED lights to test for battery strength Temporary Occupancy (Timed Override) Temporary occupancy (timed override) is available on model WDS. Temporary occupancy is selected for after- business-hours adjustment of temperature setting, fan settings, or heat/cool settings, when the system has changed to unoccupied mode. -
Page 77: Transmission Variables
Installation - Controls Then the receiver and sensor begin operation at the • The maximum time between sensor temperature appropriate channel and power level (see “Observing transmissions is 15 minutes. Receiver for Readiness,” p. 74). • The minimum time between sensor temperature Address set from 001 to 999 (and not changed since transmissions is 30 seconds. -
Page 78: Agency Compliance
Agency Compliance Figure 78. Wrench is shown in configuration mode The European Union (EU) Declaration of Conformity is ® available from your local Trane office. Wireless Display Sensor (WDS) Configuration Procedure Note: Sensors shipped with the fan coil are pre-configured for three speeds. -
Page 79: Displaying Setpoint Or
Installation - Controls Table 24. Configuration options for wireless display sensors Setting Configuration Options Temperature • Choose Fahrenheit or Celsius • Choose the degree resolution (whole degrees, half degrees, or tenths of degrees). Setpoint System No system options enabled Note: Not all fan options are available for all systems. -
Page 80: Wds Operating Mode
Installation - Controls WDS Operating Mode 1. Verify that the sensor is in operating mode and at the home screen. This section describes how to operate the wireless display 2. Choose a setting to lock or unlock: sensor (WDS). The following figure shows an example of a WDS that has been configured and is in operating mode. -
Page 81: Settings
Replace batteries. Flashing symbol indicates that approximately 14 days of operation remain. Press the Test button to display the battery status symbols. Use only UL-listed non-rechargeable 1.5 V lithium AA batteries (Trane p/n X13770035010 or equivalent). BCX-SVX002A-EN... -
Page 82: Installation - Electrical
Installation — Electrical Note: Any modifications, additions or changes to the Note: All field wiring should conform to NEC and all control box could void the factory warranty and UL applicable state and local code requirements. The certification. Such modification, additions or control panel box is always on the end opposite the changes will become the responsibly of the piping connections. -
Page 83: Mca And Mop Calculations
Installation — Electrical Table 25. Maximum wiring distances for low voltage Heater amps = (heater kW x 1000) / heater voltage controls (ft) Notes: Range • Use 120V heater voltage for 115V units. Device Wire Size • Use 240V heater voltage for 230V units. Fan speed control 14–22 AWG •... - Page 84 Units with electric heat must not be run below the minimum cfm listed. Refer to the General Data section for more information. Electric heat is balanced staging: 1 stage = 100 percent, 2 stages = 50 percent/50 percent. Table 28. Airflow min/max for BCHE/BCVE blower coils Unit Size...
- Page 85 Installation — Electrical Table 29. Motor electrical data Voltage Voltage range Weight (lbs) Rated HP 115/60/1 104-127 14.0 7.46 115/60/1 104-127 19.0 13.30 208/60/1 187-229 14.0 4.26 208/60/1 187-229 19.0 7.73 230/60/1 207-253 14.0 4.26 230/60/1 207-253 19.0 7.73 277/60/1 249-305 14.0 3.76...
-
Page 86: Ecm Overview And Setup
The motor and control board are combined as a system, The VelociTach motor control board controls and reports and cannot work without each other. the performance of up to two Trane brushless DC (BLDC) motors. The motor control board also: •... -
Page 87: Status Display
Follow proper Trane or others, refer to the appropriate lockout/tagout procedures to ensure the power can manufacturer’s literature for allowable waiting periods not be inadvertently energized. -
Page 88: Safety Requirements
• Review and understand all information provided Setup in Submittals and Design Specifications. Note: Normally, Trane ECMs are configured for soft ramps and transitions between speeds. However, to aid in CAUTION commissioning of the unit, for approximately 10– Burn Hazard! -
Page 89: User Interface
ECM Overview and Setup To check status, configuration, or to change settings on the The motor control board features a nested menu integrated motor control board with the power on the unit, remove the user interface (UI) that supports: two screws at the top of the low voltage access lid and •... - Page 90 ECM Overview and Setup The user interface has three input buttons (see Figure 89, Each button has several different actuation levels 90), from left to right: depending on length of press, and what the UI is currently displaying. • Menu/Set •...
-
Page 91: Configuration Examples
ECM Overview and Setup Configuration Examples Start with the motor control board scrolling status display and proceed as follows: Example 1- View the value parameters without saving. Verify the low speed value for motor 1 is set to 800 rpm. Figure 90. -
Page 92: Adjustments
In addition, the CSTI adapter board offers configurability or other energy storing components provided by that can be used in special cases to adjust the following Trane or others, refer to the appropriate operation of the unit: manufacturer’s literature for allowable waiting periods for discharge of capacitors. - Page 93 ECM Overview and Setup WARNING The motor control board and adapter boards offer standard, normalizing 0–10V Variable speed fan inputs for Safety Alert! use with field supplied controllers or thermostats. These Failure to follow instructions below could result in inputs can be used as the only input to the system, used in death or serious injury.
- Page 94 For variable frequency drives or other energy storing components provided by Trane or others, refer to the appropriate manufacturer’s literature for allowable waiting periods for discharge of capacitors. Verify with a CAT III or IV voltmeter rated per NFPA 70E that all capacitors have discharged.
-
Page 95: Configurations
Configurations configured to cause hydronic heat and electric heat to be mutually exclusive: Every Trane unit with ECM motors will have modules ® specifically configured at the factory for the operation of –... -
Page 96: Motor Control Board Settings
ECM Overview and Setup Motor Control Board Settings may be on the back-side of the low voltage access lid, depending on the unit configuration. WARNING The serial number of each unit and the custom Safety Alert! configuration settings specific to that unit will be printed on the label for convenient matching of labels/settings to Failure to follow instructions below could result in specific units. - Page 97 ECM Overview and Setup Table 33. Configuration settings of the motor control board (for reference only) Description User Interface Typical User Interface Description on Unit Label Name Value Mtr 1 High Spd Sets the high-speed rpm for Motor 1. Do not exceed 2300 rpm. H H i i 1 1 1 1 0 0 8 8 0 0 Sets the medium-speed rpm for...
- Page 98 ECM Overview and Setup Table 33. Configuration settings of the motor control board (for reference only) (continued) Description User Interface Typical User Interface Description on Unit Label Name Value Sets the minimum maximum output Mt1 Low PWM This envelope protection value should not be percentage that the controller will M M 1 1 L L o o 1 1 4 4 .5 5...
- Page 99 ECM Overview and Setup Table 33. Configuration settings of the motor control board (for reference only) (continued) Description User Interface Typical User Interface Description on Unit Label Name Value Sets the acceleration factor for the Is used to force faster ramps when electric heat is EH Ramp Accel E E h h r r p p electric heat inputs.
-
Page 100: Verification
ECM Overview and Setup Table 33. Configuration settings of the motor control board (for reference only) (continued) Description User Interface Typical User Interface Description on Unit Label Name Value Do NOT change this setting. This setting locks out the following parameters from being changed, for safe operation of the unit. -
Page 101: Start-Up
Trane assumes no responsibility for Trane or others, refer to the appropriate equipment failures which result from untreated or manufacturer’s literature for allowable waiting periods improperly treated water, or saline or brackish water. -
Page 102: Unit Startup
Start-Up Unit Startup • “1” Heat only • “2” Cool only Thermostat • “4” 2-pipe seasonal changeover The high voltage thermostat can be used for two pipe or 2 – Temperature Scale four pipe systems. It can control heat only, cool only or heat This thermostat can function in Fahrenheit and Celsius. - Page 103 Start-Up Button Functions Changes setting between d1ºF and d6ºF (0.5ºC and 3.0ºC) Default: d1ºF Figure 99. Thermostat button 11 – Dead Band Dead band is the minimum number of degrees allowed between heat set point and cool set point in auto changeover operation.
-
Page 104: Tracer® Uc400-B Controller
Start-Up Tracer® UC400-B Controller Heat and Cool Mode In this mode, the thermostat can automatically turn on heat Tracer® UC400-B controller delivers single zone VAV or cool as needed. AUTO appears on display with heat set control in a stand-alone operation or as part of a building point and cool set point. - Page 105 165.2 1531 210.2 Space Temperature Measurement • Heating setpoint high limit Trane zone sensors use a 10kΩ thermistor to measure the • Heating setpoint low limit space temperature. Typically, zone sensors are wall- • Cooling setpoint high limit mounted in the room and include a space temperature •...
-
Page 106: Uc400-B Stand-Alone Operation
Note: Select and enable zone sensor temperature settings controllers and a building automation system. to prevent freeze damage to unit. Communication also is possible via Rover, Trane’s service tool. Peer-to-peer communication across controllers is possible even when a building automation system is not UC400-B Operation present. -
Page 107: Random Start
The state of the local (hard wired) occupancy binary controller is operating in the unoccupied mode and when input BI1. either the timed override ON button on the Trane zone • A timed override request from a Trane zone sensor. -
Page 108: Zone Temperature Control
CANCEL button is pressed on the Trane zone sensor or the occupied bypass Discharge Air Tempering time expires. If the controller is in cooling mode, cascade zone control... -
Page 109: Function
Start-Up Water Temperature Sampling Function • The controller receives a communicated OFF signal • The fan speed switch is set to OFF The entering water temperature sampling function is used with 2-pipe and 4-pipe changeover units and requires a • Specific diagnostics are generated valid entering water temperature value. -
Page 110: Exhaust Control
Start-Up temperature (unless the fan has been manually controlled. the desired positions based on heating or cooling Refer to “Manual Fan Speed Control,” p. 109. If multiple requirements. stages of electric heat exist the controller will use a single Three-Wire Modulating Valve Calibration minimum air flow for each stage. -
Page 111: Economizing (Free Cooling)
Start-Up Table 36. Modulating outdoor air damper position setpoint determination Occupancy BAS-communicated Setpoint Fan speed Active Minimum Setpoint Unoccupied Any value Any value 0 percent (closed) Occupied Occupied bypass Any value Valid BAS-communicated Occupied standby Occupied Occupied bypass Occupied low fan minimum Invalid Occupied standby Occupied... -
Page 112: Dehumidification Operation
Start-Up Dehumidification Operation Condensate Overflow ® For more information, refer to Tracer UC400-B The controller supports space dehumidification when: Programmable Controller for Blower Coil, Fan Coil, and • Mechanical (DX or hydronic) cooling is available Unit Ventilator Installation, Operation, and Programming •... -
Page 113: Freeze Avoidance
Start-Up accumulating fan run time again. The diagnostics can be • The outdoor/return air damper is closed cleared and the filter timer reset by temporarily overriding • DX cooling is OFF the Filter Timer Reset Request on the Binary Status •... -
Page 114: Routine Maintenance
Routine Maintenance WARNING WARNING Hazardous Service Procedures! Rotating Components! Failure to follow all precautions in this manual and on Failure to disconnect power before servicing could the tags, stickers, and labels could result in death or result in rotating components cutting and slashing serious injury. -
Page 115: Fans
HVAC use. 5. Immediately rinse the affected surfaces thoroughly with fresh water and a fresh sponge to prevent potential corrosion of metal surfaces. Table 40. BCHE/BCVE fan, filter, and mixing box general data Unit Size Nominal CFM 1200... - Page 116 Routine Maintenance Table 40. BCHE/BCVE fan, filter, and mixing box general data (continued) Unit Size Nominal CFM 1200 1600 1800 2000 2400 3000 4000 (1) 18 x 20 (1) 18 x 24 (1) 20 x 24 (Qty) Size (1) 12 x 24...
- Page 117 Routine Maintenance Table 41. BCHE coil general data (continued) Unit Size Nominal cfm 1200 1800 2400 3000 4000 Length - in. Velocity - ft/min. 1-row coil Minimum gpm Maximum gpm 18.6 18.6 29.3 29.3 Dry coil weight - lb 13.0 17.0...
- Page 118 Routine Maintenance Table 41. BCHE coil general data (continued) DX coil height and width dimensions are same as comparable hydronic coils. Four- and six-row DX coil dry weight dimensions are same as comparable 4-row and 6-row hydronic coils. A 3-row DX coil dry weight is 25% less than a comparable 4-row hydronic coil. Internal volumes are approximately 6% less than comparable hydronic coils.
-
Page 119: Coils
Routine Maintenance Table 42. BVCE coil general data (continued) Unit Size Nominal cfm 1200 1600 2000 2400 3000 4000 Wet coil weight - lb 114.8 135.7 168.3 Internal volume - in 649.8 811.3 999.5 Coil width = Length in the direction of a coil header, typically vertical. Coil width = Length in the direction of a coil header, typically vertical. -
Page 120: Refrigerant Coils
WARNING draining water from the coil before the heating season. Hazardous Pressures! Trane recommends flushing the coil with glycol if coils will be exposed to temperatures below 35 degrees Failure to follow instructions below could result in a violent explosion, which could result in death or NOTICE serious injury. -
Page 121: Cleaning Non-Porous Surfaces
Routine Maintenance effectively combats microbial growth and curbs moisture- To clean a porous insulating surface matte face (fiberglass related deterioration of air-handling components. insulation): 1. Disconnect all electrical power to the unit. Cleaning Non-Porous Surfaces 2. Wearing the appropriate personal protective WARNING equipment, use a vacuum device with a HEPA filter (99.97 percent efficient at 0.3 micron particles) to... - Page 122 Routine Maintenance 5. Thoroughly clean any contaminated area(s) with a mild 7. Allow the unit to dry completely before putting it back bleach and water solution or an EPA-approved sanitizer into service. specifically designed for HVAC use. 8. Be careful any contaminated material does not contact 6.
-
Page 123: Diagnostics And Troubleshooting
Diagnostics and Troubleshooting This section is intended to be used as a diagnostic aid only. WARNING For detailed repair procedures, contact your local Trane Hazardous Service Procedures! service representative. Failure to follow all precautions in this manual and on the tags, stickers, and labels could result in death or serious injury. -
Page 124: Wireless Zone Sensors (Wzs)
Diagnostics and Troubleshooting Table 43. Troubleshooting recommendations (continued) Symptom Probable Cause Recommended Action Low refrigerant coil capacity Incorrect airflow Check fan operating condition. Expansion valve is not operating properly or is sized Check sensing bulb temperature. incorrectly Verify valve operation. Verify proper valve size. -
Page 125: Receiver Diagnostics
Diagnostics and Troubleshooting Figure 102. Receiver for all fan coil models showing The sensor for a wireless display sensor (WDS) has test LED locations symbols and error codes that appear on the display, and a test button. See the following figure. Figure 104. -
Page 126: Sensor Diagnostics
Diagnostics and Troubleshooting Table 44. Diagnostics on the receiver LED state Indicates... LED1: Off Disassociated LED2: Off Receiver is not associated, waiting for a sensor. LED3: 1-blink pattern repeated Receiver lost communication with sensor. continuously Receiver has no devices on its wireless personal area network. Association with a device has been manually removed. -
Page 127: Testing Battery Status
Diagnostics and Troubleshooting Table 46. Observing signal strength on the wireless zone sensor User action LED state Symbol displayed on WDS Indicates... None LED1: Off No Test symbols appear Normal state LED2: Off No Test button press. LED3: Off Press Test button on LED1: Off Associated;... -
Page 128: 24 V Power Status Indicator
For more information on interpreting the LEDs and the already installed. Replacement batteries are available at display symbols that indicate signal strength, see “Testing Trane Service Parts Centers or other local suppliers. Signal Strength,” p. 126. Battery Life Replacing Sensor Batteries Battery life is five years under normal conditions. -
Page 129: Manual Association
Diagnostics and Troubleshooting Notes: 4. After verifying that the receiver and sensor are powered up, press the Test button on the sensor to establish that • If lithium batteries are temporarily unavailable, the signal strength (“Testing Signal Strength,” p. 126) alkaline batteries can be used. -
Page 130: Servicing And Testing Tools
Diagnostics and Troubleshooting Servicing and Testing Tools 1. Verify that the receiver is powered. 2. Set the receiver address to 000 to force the zone No special tools or software are necessary to service and temperature output and zone temperature setpoint test the wireless sensor system. -
Page 131: Measuring Output Resistance
Diagnostics and Troubleshooting Measuring Output Resistance wire. Compare resistance measurements to those given in Table 52, p. 131. To measure the resistance of receiver outputs for zone Note: The output circuits are not electrically powered; temperature and setpoints for all models, and heating consequently, resistance can be measured setpoint and fan/system for the WDS: without risk of damage to the volt-ohm meter. -
Page 132: Tracer® Uc400-B Controller
Diagnostics and Troubleshooting Tracer® UC400-B Controller There are 15 LEDs on the front of the Tracer® UC400-B controller. The following table provides a description of LED LED Activity activity. LED activity, an indication or troubleshooting tip for each, and any related notes. Activities Indication and Troubleshooting Tips Notes... -
Page 133: Overriding Outputs
Diagnostics are categorized according to the type of product literature for the building automation system. clearing method each uses and the type of information each provides. Trane Service Tools The diagnostic types are: Tracer® TU can be used to reset diagnostics present in a Tracer UC400-B controller. - Page 134 Diagnostics and Troubleshooting Table 54. Diagnostics generated by UC400-B controller Diagnostic Probable Cause Consequences Diagnostic Type Filter change Fan run hours exceed the Informational • Fan Unaffected required time set to indicate filter • Valves Unaffected change. • Electric heat Unaffected Condensate overflow The drain pan is full of Manual...
-
Page 135: Fans With Uc400-B Controller
Diagnostics and Troubleshooting Table 54. Diagnostics generated by UC400-B controller (continued) Diagnostic Probable Cause Consequences Diagnostic Type Generic AIP failure Invalid or missing value Informational • Fan Unaffected for generic analog input. • Valves Unaffected • Outdoor air damper Unaffected •... -
Page 136: Valves With Uc400-B Controller
Diagnostics and Troubleshooting Valves with UC400-B Controller Table 56. Valves remain closed Probable Cause Explanation Unit wiring The wiring between the controller outputs and the valve(s) must be present and correct for normal valve operation. Refer to applicable wiring diagram. Failed end device The valves must be checked to ensure proper operation. -
Page 137: Controller
Diagnostics and Troubleshooting Table 58. DX or electric heat does not energize (continued) Probable Cause Explanation No power to the If the controller does not have power, heat outputs do not operate. For the controller to operate controller normally, apply an input voltage of 24 Vac. If the Marquee/Power LED is OFF continuously, the controller does not have sufficient power or has failed. -
Page 138: Ecm Motors
For variable frequency drives or other energy storing components provided by The VelociTach motor control board oversees and monitors Trane or others, refer to the appropriate all motor operations and changes to speed resulting from: manufacturer’s literature for allowable waiting periods •... -
Page 139: Motor
Diagnostics and Troubleshooting drive a priority display mode that will present the error plugging connections to the adapter boards, engine code instantly to the screen. The error must be cleared boards or motors. Failure do so will register diagnostics by solving by powering down, removing the cause of or cause unsafe operation and reduction in the contact the problem and restarting the engine board. -
Page 140: Replacing Ecm Components
For variable frequency drives or other energy storing components provided by Subsequent changes to parameters made during Trane or others, refer to the appropriate commissioning will not be reflected in the printed manufacturer’s literature for allowable waiting periods parameters. -
Page 141: Circuit Module Replacement
If it is not practical to stay clear of these areas schematic. during adjustment, please contact Trane Global Parts ☐ Ensure that all wires are plugged in securely. for configuration kit that allows easy powering of the ☐... -
Page 142: Application Notes
Diagnostics and Troubleshooting Figure 106. CSTI wiring Figure 108. Ensure CSTI adapter board switches are set correctly Adapter board Attach green wire to quick-connect terminal Green wire Attach green wire to white plug 6. After replacing modules, commission the unit by performing at a minimum, “Fan Speed Response Verification,”... - Page 143 Diagnostics and Troubleshooting these overload conditions. If the motors cannot achieve Generally, verification of the engine and adapter boards’ rpm close to the target for a specific period of time, the unit wiring and configuration should be checked if there are will disable electric heat and fan-status indicators.
-
Page 144: Wiring Diagrams
Wiring Diagrams Table 63. Wiring diagram matrix Number Description Power 502629290001 Schematics, Power Schematic, CSTI/Thermostat 502629350001 Schematics, Power Schematic, UC400B Or UC400B W/WCI/SYMBIO 400-B Or SYMBIO 400-B W/WCI Controls 502629300001 Schematics, Control Schematic, CSTI, Standard Coil 502629320001 Schematics, Control Schematic, CSTI, DX Coil W/ 1 Stage EH Or W/ Heat Valve 502629330001 Schematics, Control Schematic, CSTI, DX Coil W/ 2 Stage EH 502629340001... -
Page 145: Layout And Control Box Diagrams
Layout and Control Box Diagrams BCX-SVX002A-EN... - Page 146 Layout and Control Box Diagrams Figure 110. Right-hand control box with motor, condensate overflow, low-limit switch, and discharge air temperature BCX-SVX002A-EN...
- Page 147 Layout and Control Box Diagrams Figure 111. Size 24 to 60 BCVE unit with condensate overflow, low-limit switch, and discharge air temp BCX-SVX002A-EN...
- Page 148 Layout and Control Box Diagrams Figure 112. Control box for Tracer® UC400-B controller Universal control panel (UCP) 1TB1 DX terminal block UCP lid 1U3 Wireless receiver with bracket Low voltage 1U1 (UC400-B) barrier green 1U4 (ECM engine control board) blue Transformer Disconnect switch...
- Page 149 Notes BCX-SVX002A-EN...
- Page 150 Notes BCX-SVX002A-EN...
- Page 151 Notes BCX-SVX002A-EN...
- Page 152 For more information, please visit trane. com or tranetechnologies.com. Trane has a policy of continuous product and product data improvements and reserves the right to change design and specifications without notice. We are committed to using environmentally conscious print practices.