Table of Contents
Advertisement
Quick Links
Advertisement
Table of Contents

Related Manuals for KBL megaSun 7900 Alpha


Summary of Contents for KBL megaSun 7900 Alpha
- Page 1 OPERATING INSTRUCTIONS...
- Page 3 Technical equipment and versions of the devices are in accordance with the legal prescriptions of the respective country of destination. Export to the USA and Canada of the KBL products, listed in this guide, or operation of the systems in these countries, are not permitted. KBL does not accept any manufacturers liability in case this direction is not adhered to.
-
Page 4: Table Of Contents
Contents General information ..........5 Service menu - options ........26 About these instructions ........5 Set decorative lighting ........39 Safety signs ............5 Signal words ............5 Maintenance and cleaning ......... 40 Transport by forklift truck ........6 Instructions on cleaning and care ..... -
Page 5: General Information
General information About these instructions This symbol indicates the danger of This operating manual is intended for use by burns from hot lamps and housing parts. • operating staff, If the tanning device was operated • users, before being switched off and opened, •... -
Page 6: Transport By Forklift Truck
To accomplish the update download the “USB- Old equipment disposal Connect” software offered by KBL. For detailed This tanning device consists of information press the help-button in the main menu. components that cannot be thrown into the... -
Page 7: Safety Notes
Safety notes This chapter provides a summary of general infor- • Persons, who have a predisposition toward sun- mation on safety and proper handling of the device. burn. More specific safety advice is given in other chapters of the operating manual. Lie down on the bench in a straight position and with physical contact to the bench. -
Page 8: Duties Of The Operator
22.105. Should the external timer fail, an internal instructions. timer will switch off the tanning device automatically Only use spare parts approved by KBL, otherwise after 33 minutes. operating authorization and terms of guarantee Tanning times will become invalid. -
Page 9: Description Of The Tanning Device
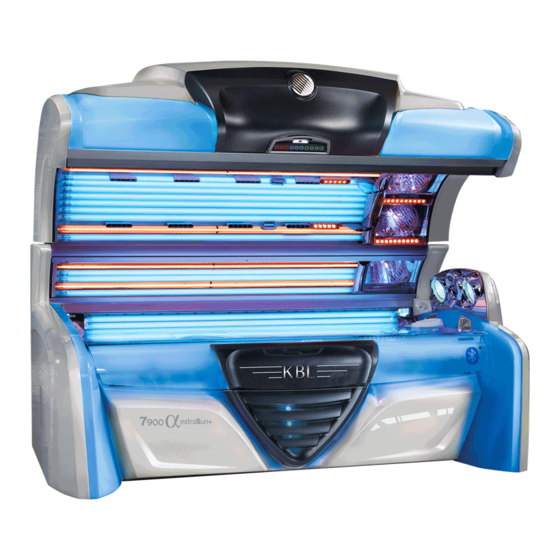
• The base part including 24 tubes and the electronic Canopy pane unit. Depending on the model also with shoul- Air nozzles der tanner and further, optionally available compo- Canopy nents. ② ③ ① megaSun 7900 alpha ④ ⑭ ⑤ ⑬ ⑥ ⑫ ⑦ ⑪ ⑩ ⑧... -
Page 10: Connections - Audio
EXTERNAL 100 V AUDIO SIGNAL (OPTIONAL FEATURE) If you decide for a connection to a 100 V audio system, you will need a transformer (KBL no.: 9100 0170 00) for the transmission of the audio signal. This connection must be made by trained service staff. -
Page 11: Bluetooth Connection
The MP3 tracks standby and during tanning mode. to be played must not exceed a sampling rate of 320 Kbit/s. KBL AG attaches great importance to hardware compatibility. Due to the large number of manufacturers of storage media, however, we cannot α... - Page 12 KBL AG attaches great importance to hardware com- megaSun 01 patibility. Due to the large number of manufacturers, KBL can not guarantee a 100 % compatibility. In rare megaSun 01 cases, it may happen that a bluetooth connection can not be established.
-
Page 13: Start-Up
Start-up Before switching on for the first time: TANNING MODE • Fix the supplied warning sign or one with the The tubes and the tanning lamps are switched following wording permanently to the wall close to on and a tanning session is in progress. While the the tanning device: tanning device is in tanning mode, the settings for the ongoing tanning session can be changed via the... -
Page 14: Tanning Instructions
Tanning instructions As a rule, an averagely tanning skin has achieved logical effects depend on the type and amount of a uniform tan after three to five tanning sessions. radiation as well as on the individual sensitivity of These sessions should take place every second day. the skin. -
Page 15: Tanning Times
Tanning times Please refer to the following tables for learning the individually applicable tanning times that depend on the skin type. If the tanning session sequence is interrupted for 4 weeks or more, you will have to start with the first ses- sion again. -
Page 16: Tanning Mode
Tanning mode There is a preSelection control panel in the middle WARNING of the front part of the canopy. Depending on the configuration of the tanning device, up to seven Excessive dose of UV radiation control buttons are available for you to make your Excessively prolonged tanning ses- choice. - Page 17 p r e S e l e c t i o n m e n u MP3 ext. MEDIT. CARIBIC MP3 int. STUDIO VOICE AIRCON AROMA AQUA BASIC Preselecting the tanning level Preselecting the audio Preselecting other features source Optimum tanning conditions This group provides you with further suited to meet the requirements You can preselect one out...
-
Page 18: Starting The Tanning Session
Starting the tanning session NOTES: 20 seconds after your last input, the interior control The tanning session automatically starts after the panel changes over to the indication of the tanning studio timer controlled delay time has expired. time. During the preset delay time the tanning session can be started anytime manually using the START button. -
Page 19: Basic Functions
During the tanning session, you need quick access to basic functions such as volume control, body fan and facial tanners. You should also be in a position to change your preselected settings. Basic functions The interior control panel caters for both requirements. You have •... -
Page 20: Variable Section Of The Interior Control Panel
Variable section of the interior control panel During the tanning session, you continue to have access to the settings you have made via the “preSelection” function. If you wish to make any changes to your choice, you can do so in the variable section of the interior control panel. - Page 21 AUDIO FUNCTIONS MODEL: ACTIVATING AUDIO FUNCTIONS There is a maximum of four audio sources available at the user’s disposal. If you change over to another source, you must ACTIVATE activate it first. The activation is effected by pressing the or the button (with the exception of USB audio).
-
Page 22: Standby Mode / Service Mode
Standby mode / service mode While the tanning device is in standby mode, you can Switching the decorative switch the decorative lighting of the tanning device lighting on and off on and off and trigger an aquaCool spraying test (1 spraying cycle). -
Page 23: Led Boosters In Standby Mode
LED boosters in standby mode SERVICE MENU - BASIC OPERATION The service menu is divided into the main menu and In standby mode, the LED boosters work as deco- subordinate groups of functions. rative lighting with minimum power. For testing and If you choose a menu item, e.g. - Page 24 STORE & EXIT CHANGE SETTINGS • Save your settings by pressing the button 3 • Depending on the respective function, you can (STORE). If you fail to do so, the system will not change values, select options and switch take over the changes you made. -> See also functions on or off.
-
Page 25: Service Menu - Overview
Service menu - Overview KBL-7 VERSION: 04.42 ENVIRONMENT AROMA ① Language ㊹ Aroma ② Contrast ㊺ Aroma status reset ③ TIME AND DATE ㊻ Cycle time ④ TIMER DECORATIVE LIGHTING ㊼ Aroma cabin automatic ⑤ Maximum tanning time ㊽ Aroma cycles per hour ㊾... -
Page 26: Service Codes
Service codes Service menu - options SERVICE-CODE LEVEL 1 In order to avoid operating errors, read Access to the service menu start window is pro- through the basics at the beginning of tected by CODE 1. When delivered, this CODE is the “Service Menu”... - Page 27 ③ The menu item „Timer decorative lighting“ offers you ENVIRONMENT 03/05 two switching cycles (A and B) for each day of the TIME AND DATE week. > press ENTER Entry of date and time. Invoke the submenu by NOTE - SWITCHING CYCLES pressing START (ENTER).
- Page 28 ⑤ ④ ENVIRONMENT 05/05 ENVIRONMENT 04/05 Maximum tanning time TIMER DEKOLIGHT > > press ENTER > 5min .. . 45min Entering switching times for the decorative lighting. Sets the maximum tanning time for all timers. In the easyCare operating mode, the setting has been The submenu is invoked by fixed to 30 minutes.
- Page 29 ⑬ ⑨ PRESELECTION 04/06 HOUR METERS 04/04 Aircon (Aircondition) Number of sunbaths > > 0000 Reset: press `-` for 2s > on > off 2 sec. = reset Fixes the “preSelection” setting of the air- conditioning system. Indicates the number of tanning sessions (sunbaths) and includes a reset function.
- Page 30 ㉒ ⑱ AUDIO 07/22 AUDIO 03/22 Studio channel selection megaVoice language > bcd > > English > > puls code > German > off > ... Allows for the change-over between pulse-code Fixes the language setting of the megaVoice system. and BCD-code mode with the Studio music signal The following languages are fully supported: pending and deactivates the external-channel...
- Page 31 ㉖ ㉛ AUDIO 11/22 AUDIO 16/22 Default volume tanning Treble MP3 - USB > > > 0 .. . 9 > -14 .. . +14 dB Sets the volume for the tanning mode. Sets the treble for MP3 - USB operation. Factory setting: 6 Factory setting: +14 dB ㉗...
- Page 32 ㊱ ㊶ AUDIO 21/22 AQUA 04/06 High-bass Studio Line-in aquaCool start testcycle > > Start: press `+` for 2s > -14 .. . +14 dB Sets the high-bass for studio music operation. Starts the aquaCool test (1 cycle). Factory setting: +08 dB ㊲...
- Page 33 ㊺ The menu item „TIMER AROMA“ offers you AROMA 02/07 a switching cycle for each day of the week. Aromastatus reset > Reset: press `-` for 2s NOTE - SWITCHING CYCLES Using the setting „monday-sunday“, the switching 2 sec. = reset cycle will be the same for each day of the week.
- Page 34 ㊿ ㊾ AROMA 07/07 AROMA 06/07 Aroma start testcycle TIMER AROMA > Start: press `+` for 2s > press ENTER Entering switching times for the Aroma Timer. Starts the Aroma test (1 cycle). The submenu is invoked by pressing START (ENTER). SUBMENU AIR CONDITIONING 01/02...
- Page 35 The easyCare menu item is only available with CPI EASYCARE\SETTINGS 03/07 Energy and smart technology tanning devices that easyCare tanning time are connected to an easyCare system. > > 8min .. . 20min EASYCARE 01/03 SETTINGS Allows for preselecting the tanning time. The >...
- Page 36 SERVICE 02/11 EASYCARE\SETTINGS 07/07 SERVICE-CODE Melanin min runtime > press ENTER > > 1.. .20 Submenu call with START/ENTER. These settings must only be made by trained service personnel! Factory setting: EU=10 / USA=6 SUBMENU SERVICE CODE Service Code Level 1 EASYCARE 02/03 Service Code Level 2...
- Page 37 SERVICE 03/11 SERVICE 05/11 BLUETOOTH FIRMWARE-VERSIONS > press ENTER > press enter Submenu call with START/ENTER. Displays the cur- Submenu BLUETOOTH. rent firmware version of the system components. Invoked by pressing START (ENTER). Do not operate the system with different firmware versions! •...
- Page 38 SERVICE 11/11 SERVICE 01/02 Reboot Service mode without tanning > Reboot: press `-` for 2s > Start: press `ENTER` for 2s Troubleshooting mode. Performs a restart of the electronics. The service mode is switched on for 30 minutes. The mains voltage is connected. Error notifications Attention are ignored, but tanning cannot be started.
-
Page 39: Set Decorative Lighting
Set decorative lighting COLORMOTION CONTROLLER For remote control of the color mode, you may use Decorative lighting our colorMotion controller. Available only for tanning On / Off devices with LED technology. Program selection switch colorWheel Brightness or frequency increase / decrease To control the color mode of the tanning device colorMotion controller - control elements use the stylish colorMotion controller with its... -
Page 40: Maintenance And Cleaning
• If possible, use the special cleaning and disinfect- • Depending on the level of knowledge required to ant agent “megaClean plus” supplied by KBL for carry out maintenance work, it may only be done by cleaning the acrylic parts and handles and dilute it “trained persons”... -
Page 41: Maintenance Intervals
Maintenance intervals Tools and aids Component/ Hexagon socket screwdriver (SW 4 / 60 Cleaning/care Replacement wearing part mm) Art. No.: 3410055251 If a corresponding Condensate message is When required tank 2x Standard Phillips screwdriver (PH2) displayed. Depending on local conditions after Phillips screwdriver (PH2) 90°... -
Page 42: Unlocking The Bench
③ ④ Side pane ④ Open the 3 locking spigots by using the hex- ⑤ agon socket screwdriver supplied by KBL. Hold the bench pane in the middle of the ③ Observe the order! front edge and lift it. ⇒... - Page 43 REMOVING THE CANOPY PANE ↵ It is not usually necessary to remove the canopy pane for maintenance and cleaning operations. Should ⑧ ⑧ ⑨ you prefer to work with the canopy pane removed, though, please proceed as follows: ⓐ ⓑ ⑥...
-
Page 44: Filter Panes
Filter panes REMOVING THE FILTER PANES ↵ ⑬ DANGER Excessive UV radiation Operating the tanning device with defective filter panes can result in serious injury to skin and eyes. • Never operate the tanning device if the filter pane is not present or defective. -
Page 45: Tubes
TESTING THE PROTECTIVE PANE-SWITCHES Tubes ↵ DANGER Excessive UV radiation Operating the tanning device with defective filter • When installing the tubes, make sure that the panes can result in serious injury to skin and eyes. tube inscription is visible. If it is installed in •... -
Page 46: P2 Tubes
TUBE REPLACEMENT CANOPY / SIDE PART Facial tanners ↵ ⇒ Tilt the canopy and / or side pane down. ⇒ Remove the tubes. REPLACING THE HIGH-PRESSURE LAMP P2 Tubes Dirt accumulation and bad seating can lead to damage during the operation. If your tanning device is equipped with P2 •... -
Page 47: Shoulder Tanner
ASSEMBLY NOTE The contacts of the high-pressure lamp have differ- ent diameters -> Install in the correct orientation! ⑲ Shoulder tanner The “x-tra Tan” shoulder tanner ⑱ can optionally be installed in the place of the Undo the retaining screw (M6x12) of the right-hand shoulder part. -
Page 48: Interior Unit Lighting
Filter cartridges ㉑ ↵ The cooling air for canopy and bench is filtered. Your tanning device is equipped with filter cartridges and continuous-service filter inserts. Therefore, purchase and replacement of conventional filter pads are not required. Clean the filter inserts after approx. -
Page 49: Canopy Drive
FILTER CARTRIDGES IN THE CANOPY PART REPLACING THE SPRING-LOADED WIRE ROPES (PREPARATION) ㉕ ㉖ ⇒ Open the bench part. Disconnect the cable connections of the ㉖ audio system (only on right-hand side). Pay attention to the correct connections ⇒ Fold down the canopy pane. according to the colours ㉖... - Page 50 ⇒ Tilt down the side pane. Loosen the hexagon socket head screw ㉜ ㉚ (SW10) by approx. two turns. ㉝ Remove the hinge cap. SERVICING THE CANOPY DRIVE Remove the screw (M6x12) of the shoulder ㉚ tanner or the shoulder part. ㉛...
- Page 51 REMOVE SPRINGS AND ROPES Lifting arm Lifting arm ㊲ ㊳ Determine the position of the cantilever beam ㊲ ㊳, measure and write it down. The position of the cantilever beams must be the same on both sides! ㉟ ㊴ 2x13 ㊵...
-
Page 52: Ventilation And Air-Conditioning
Grease the rope in the area of the return pulley evenly on both sides. ㉟ with copper crease or adhesive lubricant HHS-2000 (KBL 1200024000). Ventilation and air-conditioning ↵ SPRINGS - INSPECTION Do a visual inspection. -
Page 53: Recording To An Sd Card
SERVICING THE VENTILATION SYSTEM Unscrew the closing lid of the condensate ㊻ ⇒ Check all hose connections. canister. Remove any kinks in the air hoses. Replace ㊼ ⇒ Empty the condensate canister. defective hoses immediately. When closing, make sure that the condensate hose is inserted a max. -
Page 54: Aroma- Und Aquacool
• If aquaCool is not used for one week, clean the system before the next application. Use REPLACE THE AQUACOOL FILTER the KBL cleaning set 5100003061 for this Replace the aquaCool filter as specified purpose. in the chapter on Maintenance Intervals . -
Page 55: Aquacool Nozzles
REPLACING THE AROMA TIN When the Aroma tin is empty, a corresponding message is displayed. ㊿ ⇒ Open the bench part. ㊿ Unlock the retaining bracket. Replace the tin. Reset the Aroma counter in the service menu ⇒ to 0 (Reset). Then the message on the interior control panel will disappear. -
Page 56: System Messages
System messages ERROR MESSAGES After the error has been eliminated, all error messages must be acknowledged by pressing START on the interior control panel. Status message Description Remedy Check the air-intake/air-discharge system. Let the tan- Excess temperature bimetal Bimetal switch triggers. ning device cool down. - Page 57 ERROR MESSAGES After the error has been eliminated, all error messages must be acknowledged by pressing START on the interior control panel. Status message Description Remedy Frequency detection: power Frequency detection failed. No mains supply connection faulty Check mainboard connector X6/E6. voltage.
-
Page 58: Technical Data
Technical data Ambient conditions In dry rooms (booths) with sufficient airing and ventilation • Maximum relative air humidity: ≤ 70 % Installation site • Maximum room temperature: ≤ 30 °C • Minimum height of the room: 2400 mm Weights and measures Dimensions 1713 x 2380 x 1430 (when closed) (Height x width x depth) - Page 59 UNIT DATA - UV type 3 and 0.3 W/m in compliance with EN 60335-2-27 megaSun 7900 alpha - Electronic Power Super Item no Equivalency code range Canopy: 18x ultimate 1806 R 100W 3230076000 100-R-(20-27) / (2,6-3,6) 2x ultimate 1863 O 80W...
- Page 60 UNIT DATA - UV type 3 and 0.3 W/m in compliance with EN 60335-2-27 megaSun 7900 alpha - CPI Energy Super Item no Equivalency code range Canopy: 20x ultimate 1806 R 100W 3230076000 100-R-(20-27) / (2,6-3,6) Tubes Side: 6x ultimate 1806 R 100W...
- Page 61 3020019176 Nominal With air conditioning: 11960W - 14060W power Without air conditioning: 10700W - 12800W megaSun 7900 alpha deluxe - intelliSun - Hybrid Item no Equivalency code range Canopy: 14x ultimate 1808 R 160W 3230076030 160-R-(27-36) / (2-2,8) 6x hurricane 1809 R160W...
- Page 62 EQUIVALENCE KEY FOR UV FLUORESCENT LAMPS Marking of UV fluorescent lamps according to IEC 61228 Use of replacement tubes. Sample coding of a lamp The tanning tables referring to this tan- 160-R-32 / 3,2 ning device are only valid as long as the system is operated with the original tube set! Ratio of the NMSC-effective...
-
Page 63: Identification Markings On The Tanning Device
Identification markings on the tanning device Filter pane On each tanning device you find a label specifying the tube equipment and the type plate. The filter pane has its name printed on the side. Tube names EXAMPLE Lysrör överdel: 14 x 3230076030 ultimate 1808 R 160W [160-R-36/2,4] XY-intervall: 160-R-(27-36)/(2-2,8) Lysrör överdel: 6 x 3230076128 hurricane 1809 R 160 W [160-N-30/3,2]... - Page 64 Ringstraße 24-26 56307 Dernbach / Germany fon: +49 (0) 26 89.94 26-0 fax: +49 (0) 26 89.94 26-66 mail: megaSun@kbl.de www.megaSun.de...