Icom ID-51A Advanced Manual
Vhf/uhf transceiver
Hide thumbs
Also See for ID-51A:
- Advanced instructions (369 pages) ,
- Basic instructions (104 pages) ,
- Brochure & specs (5 pages)
Table of Contents
Advertisement
Quick Links
ADVANCED MANUAL
VHF/UHF TRANSCEIVER
ID-51A
ID-51E
Instructions for advanced operations and additional
details are described in this manual.
See the Basic manual to begin D-STAR, especially for
new users.
To update the repeater list,
click here!
INTRODUCTION
1
ACCESSORY ATTACHMENT
2
USING A MICROSD CARD
3
PANEL DESCRIPTION
4
BATTERY CHARGING
5
BASIC OPERATION
6
BC RADIO OPERATION
7
D-STAR INTRODUCTION
8
D-STAR OPERATION <BASIC>
9
D-STAR OPERATION <ADVANCED>
10 GPS OPERATION
11 VOICE MEMORY FUNCTION
12 MEMORY OPERATION
13 SCAN OPERATION
14 PRIORITY WATCH
15 REPEATER AND DUPLEX OPERATIONS
16 MENU SCREEN
17 OTHER FUNCTIONS
18 OPTIONS
19 SPECIFICATIONS
TROUBLESHOOTING
INDEX
INDEX FOR MENU ITEMS
Advertisement
Chapters
Table of Contents

Related Manuals for Icom ID-51A


Summary of Contents for Icom ID-51A
- Page 1 ADVANCED MANUAL INTRODUCTION ACCESSORY ATTACHMENT USING A MICROSD CARD PANEL DESCRIPTION BATTERY CHARGING VHF/UHF TRANSCEIVER BASIC OPERATION ID-51A BC RADIO OPERATION ID-51E D-STAR INTRODUCTION D-STAR OPERATION <BASIC> D-STAR OPERATION <ADVANCED> 10 GPS OPERATION 11 VOICE MEMORY FUNCTION 12 MEMORY OPERATION...
- Page 2 D-pad(Ent) to reset to the default value. Push [QUICK] Icom, Icom Inc. and the Icom logo are registered trademarks of Icom Incorporated (Japan) in Japan, the United States, the To reset to the default value. NOTE: United Kingdom, Germany, France, Spain, Russia, Australia, New Zealand, and/or other countries.
-
Page 3: Functions And Features
Previous view INTRODUCTION ® ® ® Functions and features of Adobe Acrobat Reader The following functions and features can be used with Adobe ® Acrobat ® Reader ® • Keyword search Click “Find” (Ctrl+F) or “Advanced • Find screen Search” (Shift+Ctrl+F) in the Edit menu to open the search screen. -
Page 4: Table Of Contents
Previous view Section ACCESSORY ATTACHMENT ■ Antenna ................1-2 ■ Battery pack ............... 1-2 ■ Belt clip ................1-3 ■ Hand strap ................1-3... -
Page 5: Section 1 Accessory Attachment
Previous view ACCESSORY ATTACHMENT ■ Antenna Antenna Insert the antenna connector into the antenna base and tighten the antenna. NEVER carry the transceiver by holding only the an- tenna. TIP: Third-party antennas may increase transceiver performance. An optional AD-92SMA antenna con is available to connect an antenna nector adapter that has a BNC connector. -
Page 6: Belt Clip
Previous view ACCESSORY ATTACHMENT ■ Belt clip To attach the belt clip: q Remove the battery pack from the transceiver, if it is To attach To detach attached. (p. 1-2) w Slide the belt clip in the direction of the arrow until the belt clip locks in place, and makes a ‘click’... - Page 7 Previous view Section USING A microSD CARD ■ About the microSD card ............. 2-2 ■ Saving data onto the microSD card ........2-2 ■ Inserting the microSD card ..........2-3 D Formatting the microSD card ......... 2-4 ■ Removing the microSD card ..........2-5 ■...
-
Page 8: About The Microsd Card
PC. TIP: Occasionally saving the data is recommended. • Icom is not responsible for any damage caused by Insert the card into the transceiver’s slot, and then data corruption of a microSD card. -
Page 9: Inserting The Microsd Card
Previous view USING A microSD CARD ■ Inserting the microSD card q Turn OFF the transceiver. NEVER forcibly or in- w Lift OFF the [micro SD] slot cover on the side panel. versely insert the card. e With the terminals facing the front, insert the card It will damage the card into the slot until it locks in place, and makes a ‘click’... -
Page 10: D Formatting The Microsd Card
Previous view USING A microSD CARD ■ Inserting the microSD card (Continued) D Formatting the microSD card q Turn ON the transceiver. w Push [MENU] Appears e Push D-pad( ) to select the root item (“SD Card”), when the and then push D-pad(Ent). -
Page 11: Removing The Microsd Card
Previous view USING A microSD CARD ■ Removing the microSD card q Turn OFF the power. w Lift OFF the [micro SD] slot cover on the side panel. e Push in the microSD card until a click sounds, and then carefully pull it out. •... -
Page 12: Saving Data Onto A Microsd Card
Previous view USING A microSD CARD ■ Saving data onto a microSD card Memory channels, item settings in the menu screen, and Repeater List can be saved on the microSD card. Saving data on the microSD card allows you to eas- ily restore the transceiver to its previous configuration, even if an All reset is performed. - Page 13 Previous view USING A microSD CARD ■ Saving data onto a microSD card (Continued) Overwriting a file (Example: Overwriting the “Set20161001_01”) q Push [MENU] w Push D-pad( ) to select the root item (“SD Card”), and then push D-pad(Ent). D-pad (Ent) e Push D-pad(...
-
Page 14: Saving With A Different File Name
Previous view USING A microSD CARD ■ Saving with a different file name q Push [MENU] w Push D-pad( ) to select the root item (“SD Card”), and then push D-pad(Ent). D-pad (Ent) e Push D-pad( ) to select “Save Setting,” and then ... - Page 15 Previous view USING A microSD CARD ■ Saving with a different file name (Continued) u Push D-pad() to move the cursor to the second digit. i Repeat steps y and u to enter a name of up to 15 characters, including spaces. (Example: My Data) o After entering the name, push D-pad(Ent).
-
Page 16: Loading The Saved Data Files That Are On The Microsd Card
List, click here! This function is convenient when copying the saved data, such as memory channels, or Repeater List, to another ID-51A/E and then operating with the same data. Saving the current data is recommended before load- ing other data in the transceiver. - Page 17 Previous view USING A microSD CARD ■ Loading the saved settings file that are on the microSD card (Continued) y Push D-pad(Ent) to select the file, and then the “Keep 'SKIP' settings in Repeater List?” appears. D-pad (Ent) u Push D-pad() to select “YES” or “NO.” •...
-
Page 18: Backing Up The Data Stored On The Microsd Card Onto A Pc
The folders contained in the microSD card are as fol- !0 Setting lows: q ID-51 folder !1 Voice !2 yyyymmdd The folders created in the ID-51A/E are in this ID-51 folder. !2 yyyymmdd w Csv folder !2 yyyymmdd !3 VoiceRec Contains the GPS Memory, Repeater List and Your (UR) call sign memory folders. -
Page 19: D Making A Backup File On Your Pc
Previous view USING A microSD CARD ■ Backing up the data stored on the microSD card onto a PC (Continued) D Making a backup file on your PC Windows 7 is used for these instructions. q Insert the microSD card into the microSD card drive on your PC. -
Page 20: Importing Or Exporting A Csv Format File
Previous view USING A microSD CARD ■ Importing or Exporting a CSV format file Please read this section before importing or exporting a Comma Separated Values (CSV) format file to or from the microSD card. You can import or export the following data: •... -
Page 21: D Exporting
Previous view USING A microSD CARD ■ Importing or Exporting a CSV format file (Continued) D Exporting You can export Your Call Sign Memory, Repeater List and GPS Memory. Example: Exporting the Your Call sign memory. q Push [MENU] to enter the Menu screen. w Push D-pad() to select the root item (“SD Card”), and then push D-pad(Ent) to go to the next level. - Page 22 Previous view Section PANEL DESCRIPTION ■ Front, top and side panels ..........3-2 ■ Function display ..............3-5...
-
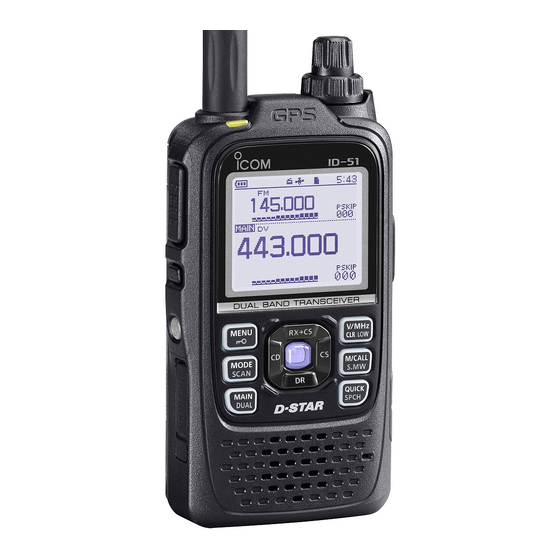
Page 23: Panel Description
Previous view PANEL DESCRIPTION ■ Front, top and side panels Function display (p. 3-5) Speaker Internal microphone q ANTENNA CONNECTOR (p. 1-2) u MENU • LOCK KEY [MENU Connect the antenna here. ➥ Push to enter or exit the Menu screen. •... - Page 24 Memory selection mode, push again to en- ➥ While in the DR screen, or with the Menu ter the Call channel mode. (p. 8-3) For ID-51A only screen or Quick Menu screen open, push to move the value or option selector bar In the Call channel mode, push once to down.
- Page 25 Previous view PANEL DESCRIPTION Front, top and side panels (Continued) ■ Function display (p. 3-5) Speaker Internal microphone CS (CALL SIGN SELECT)/D-PAD (RIGHT) KEY EXTERNAL MICROPHONE/SPEAKER JACK [CS]/D-pad() [MIC/SP] ➥ Hold down for 1 second to enter the oper- Connect a cloning cable, optional speaker micro- ating call sign select mode.
-
Page 26: Function Display
Previous view PANEL DESCRIPTION ■ Function display r y u io !0 BC Radio setting pop-up window (Tuning mode) Dual band display Single band display q BATTERY ICON t DUPLEX ICON (p. 15-5) ➥ Shows the capacity of the attached battery pack “DUP+”... - Page 27 Previous view PANEL DESCRIPTION ■ Function display (Continued) BC Radio setting pop-up window (Tuning mode) Dual band display Single band display !1 TONE ICONS While operating in the FM or FM-N mode: • D-TSQL (“D” blinks): When you transmit, the selected DTCS (pp.
- Page 28 ➥ Shows the selected band (A or B) is the Main band. ➥ “ TM” appears while in the Terminal mode. ➥ “ AP” appears while in the Access Point mode. TIP: See “About the DV Gateway function” that can be downloaded from the Icom website, for details.
-
Page 29: Battery Charging
Previous view Section BATTERY CHARGING ■ Battery information ............. 4-2 D Battery life ..............4-2 D Battery icon ..............4-2 ■ Charging through the [DC IN] jack ........4-3 D Battery icon ..............4-3 D Charging note ..............4-3 ■ Optional battery case ............4-4 D Battery life .............. -
Page 30: Battery Information
Previous view BATTERY CHARGING ■ Battery information D Battery life The approximate battery life (operating time) as shown The approximate battery life: to the right is calculated under the following assump- Battery pack FM mode DV mode tions: BP-271 4.5 hours 4.5 hours •... -
Page 31: Charging Through The [Dc In] Jack
Previous view BATTERY CHARGING ■ Charging through the [DC IN] jack Prior to using the transceiver for the first time, the bat- tery pack must be fully charged for optimum life and operation. BE SURE to turn OFF the power while charging with the supplied battery charger. -
Page 32: Optional Battery Case
Previous view BATTERY CHARGING ■ Optional battery case D Battery life When using the BP-273 , install three AA battery case (LR6) size alkaline batteries, as described below. The approximate battery life (operating time) as shown below is calculated under the following assumptions; q Remove the battery case if it is attached. -
Page 33: Charging With The Optional Desktop Charger
Previous view BATTERY CHARGING ■ Charging with the optional desktop charger The optional BC-202 rapidly charges of the BP-271 • Charging time: BP-271 approximately 2.0 hours and BP-272 Li-ion battery packs. BP-272 approximately 3.5 hours D Charging note Transceiver (with battery pack) •... -
Page 34: External Dc Power Operation
12 tion is automatically turned OFF. V DC power source. • ID-51A/E’s charging circuit may generate certain Use an external DC-DC converter to connect the transceiv- spurious signals; the S-meter appears, or noise may er through an optional CP-12L, CP-19R or OPC-254L to a V DC power source. - Page 35 Previous view Section BASIC OPERATION ■ Power ON ................5-2 ■ Adjusting the audio level ............. 5-2 ■ Dualwatch operation ............5-3 D MAIN band selection ............5-3 D Single watch operation ........... 5-3 D Audio mute during Dualwatch operation ......5-4 D Setting the volume for Dualwatch ........
-
Page 36: Adjusting The Audio Level
Previous view BASIC OPERATION ■ Turning ON power ➥ Hold down [ ] for 1 second to turn ON power. • Hold down [ ] for 1 second to turn OFF power. • After the opening message and power source voltage are displayed, the operating frequency or repeater name appears. -
Page 37: Dualwatch Operation
Previous view BASIC OPERATION ■ Dualwatch operation Frequency range on the A/B bands: The ID-51A/E has two independent operating bands, A band and B band. 108.000 MHz to 174.000 MHz The transceiver can simultaneously monitor two fre- 380.000 MHz to 479.000 MHz quencies, on A band and B band. -
Page 38: D Audio Mute During Dualwatch Operation
❍ SUB band mute status Dualwatch operation simultaneously monitors two fre- quencies. MAIN band SUB band The ID-51A/E has two independent receiver circuits, A DV mode DV mode band and B band. FM-N mode Depending on the operating band or mode, as shown DV mode to the right, the SUB band audio signal is muted. -
Page 39: D Setting The Volume For Dualwatch
Previous view BASIC OPERATION ■ Dualwatch operation (Continued) D Setting the volume for Dualwatch The volume setting for Dualwatch can be simultane- ously set for both bands or separately for each band, in the MENU screen. q Push [MENU] to enter the Menu screen. w Push D-pad() to select the root item (Sounds), and then push D-pad(Ent) to go to the next level. -
Page 40: Selecting The Operating Band
Previous view BASIC OPERATION ■ Selecting the operating band The transceiver can receive the AIR, 144 MHz or 430 MHz bands. You can transmit on only the 144 MHz and 430 MHz bands. q Push [V/MHz] to select the VFO mode, if neces- sary. -
Page 41: Selecting A Tuning Step
Previous view BASIC OPERATION ■ Selecting the tuning step The following tuning steps are selectable. (kHz) 6.25 8.33* 10.0 12.5 15.0 20.0 25.0 30.0 50.0 100.0 125.0 200.0 *Appears only when the AIR band is selected. When 10 kHz tuning steps is selected, the frequency changes in the 10 kHz steps. -
Page 42: Setting A Frequency
Previous view BASIC OPERATION ■ Setting a frequency Blinks q When the VFO mode is selected, push [V/MHz] to select the 1 MHz or 10 MHz Quick Tuning function step, or turn it OFF. • When the 1 MHz step is selected, the frequency changes in 1 MHz steps. -
Page 43: Selecting The Operating Mode
Previous view BASIC OPERATION ■ Selecting the operating mode AM mode is selected Operating modes are determined by the modulation of the transceiver signals. The transceiver’s operating modes are AM, FM, FM-N and DV. ➥ Push [MODE] one or more times to select the operating mode. -
Page 44: Selecting The Mode
Previous view BASIC OPERATION ■ Selecting the Mode D VFO mode The VFO mode is used to set the operating frequen- VFO mode cies. Push to select q Push [V/MHz] to select the VFO mode. DR function Memory mode • In the VFO mode, push [V/MHz] then rotate [DIAL] to Hold down Call channel mode... -
Page 45: Transmitting
Previous view BASIC OPERATION ■ Transmitting CAUTION: Transmitting without an antenna will dam- R WARNING! NEVER transmit for long periods of time. age the transceiver. During prolonged transmissions at high power or mid power, the transceiver radiates heat to protect itself NOTE: To prevent interfering, hold down [SQL] to lis- from overheating. -
Page 46: Key Lock Function
Previous view BASIC OPERATION ■ Key Lock function Activate to prevent accidental frequency changes and unnecessary function access. ➥ Hold down [LOCK] for 1 second to turn the Key Lock function ON or OFF. • When the Key Lock function is ON and the locked key or dial is pushed or rotated, “LOCK ON”... -
Page 47: Band Scope Function
Previous view BASIC OPERATION ■ Band Scope function The Band Scope function allows you to visually check a spec- About the sweep steps: The specified tuning step (in VFO ified frequency range around the center frequency. mode) or programmed tuning step (in memory mode) is used during a sweep. -
Page 48: Weather Channel Operation (Usa Version Transceivers Only)
Previous view BASIC OPERATION ■ Weather channel operation (USA version transceivers only) You can listen to NOAA (National Oceanographic and Atmospheric Administration) weather broadcasts on one of 10 weather channels. D Weather channel selection q Push [M/CALL] one or more times to select the Weather channel mode weather channel mode. -
Page 49: Bc Radio Operation
Previous view Section BC RADIO OPERATION ■ Basic operation ..............6-2 D Description ..............6-2 D Turning ON the BC Radio ..........6-2 D Listening to the BC Radio while monitoring two ham bands ............... 6-3 D Selecting the BC radio mode .......... 6-3 D Selecting the bank in the Memory bank mode .... -
Page 50: Basic Operation
Previous view BC RADIO OPERATION ■ Basic operation D Description You can listen to AM or FM radio broadcast (BC). Frequency range for the BC Radio When the transceiver is set to amateur frequencies on the MAIN band and SUB band, you can still listen to the 76.0 MHz* to 108.0 MHz AM or FM radio on the pop up window. -
Page 51: D Listening To The Bc Radio While Monitoring Two Ham Bands
Previous view BC RADIO OPERATION ■ Basic operation (Continued) D Listening to the BC Radio while monitoring two ham bands When the transceiver is set to amateur frequencies on the MAIN band and SUB band, you can still listen to Appears the BC Radio. -
Page 52: D Selecting The Bank In The Memory Bank Mode
Previous view BC RADIO OPERATION ■ Basic operation (Continued) D Selecting the bank in the Memory bank mode Up to 50 BC Radio memory channels can be assigned Memory bank mode to each bank for easy memory management. (Bank A) If you change the bank, other area channels can be selected. -
Page 53: D Selecting The Am/Fm Radio Mode
Previous view BC RADIO OPERATION ■ Basic operation (Continued) D Selecting the AM/FM radio mode FM mode ➥ Push [MODE] to select the AM or FM radio mode. AM mode D Searching for a BC Radio signal While in the Tuning mode, hold down to start searching the broadcast signal. -
Page 54: D Using The Attenuator Function
Previous view BC RADIO OPERATION ■ Basic operation (Continued) D Using the Attenuator function The attenuator reduces signal levels to prevent audio distortion. This is useful when the transceiver receives a very strong AM or FM BC Radio signal, or it is in very strong electromagnetic fields, such as from a broadcasting station near your location. -
Page 55: D Setting The Squelch Level
Previous view BC RADIO OPERATION ■ Basic operation (Continued) D Setting the squelch level The squelch level can be set for only the BC radio. q While holding down [SQL], rotate [DIAL] one click to display the squelch level. (Default: AUTO) w While holding down [SQL], rotate [DIAL] to select the squelch level. -
Page 56: D Setting A Tuning Step (Am Only)
Previous view BC RADIO OPERATION ■ Basic operation (Continued) D Setting a tuning step (AM Only) If you select the BC Radio frequency by rotating [DIAL] in the Tuning mode, the frequency changes in the se- lected tuning step. q Push [MODE] to select the AM mode. -
Page 57: Adding Or Editing A Bc Radio Memory
Previous view BC RADIO OPERATION ■ Adding or editing a BC Radio memory D Using the BC Radio Memory BC Radio Memory A total of 26 banks are selectable for BC Radio Mem- ory. You can assign up to 50 BC Radio memory chan- A: Area 1 FM-A Station nels to each bank, for easy memory management. - Page 58 Previous view BC RADIO OPERATION ■ Adding or editing BC Radio memory (Continued) 2. Entering a BC Radio Memory name u Push D-pad() to select “NAME,” and then push D- pad(Ent). D-pad (Ent) i Rotate [DIAL] to select the first character. •...
- Page 59 Previous view BC RADIO OPERATION ■ Adding or editing BC Radio memory (Continued) 3. Entering a frequency !2 Push D-pad() to select “FREQUENCY,” and then push D-pad(Ent). • A cursor appears and blinks. D-pad (Ent) !3 Rotate [DIAL] to enter the frequency. •...
-
Page 60: D Deleting A Bc Radio Memory
Previous view BC RADIO OPERATION ■ Adding or editing BC Radio memory (Continued) D Deleting a BC Radio memory All the contents of a BC Radio memory can be delet- Please note that deleted memory cannot be restored. q Push [MENU] w Push D-pad() to select the root item (BC Radio), and then push D-pad(Ent). -
Page 61: D Editing A Bc Radio Memory
Previous view BC RADIO OPERATION ■ Adding or editing BC Radio memory (Continued) D Editing a BC radio memory This function edits BC radio memory data. This is useful when already-entered data is incorrect, has changed or new data should be added to the list. q Push [MENU] w Push D-pad( ) to select the root item (“BC Radio”),... -
Page 62: D Rearranging The Display Order Of The Bc Radio Memory
Previous view BC RADIO OPERATION ■ Adding or editing BC Radio memory (Continued) D Rearranging the display order of the BC Radio memory You can move the BC Radio memories to rearrange their display order in the selected BC Radio memory bank. -
Page 63: Skip Setting For The Bc Radio Memory
Previous view BC RADIO OPERATION ■ Skip setting for the BC radio memory You can set the undesired frequency as skip targets. q Push [MENU] w Push D-pad( ) to select the root item (“BC Radio”), and then push D-pad(Ent). D-pad (Ent) e Push D-pad(... -
Page 64: Using The Bc Radio Mode
Previous view BC RADIO OPERATION ■ Using the BC Radio Mode The transceiver has an exclusive BC Radio mode where only the BC Radio functions. q Push [QUICK] w Push D-pad() to select “<<BC Radio Mode>>,” then push D-pad(Ent). D-pad (Ent) •... -
Page 65: Bc Radio Settings
Previous view BC RADIO OPERATION ■ BC Radio settings D FM Antenna Select the desired antenna for FM radio. q Push [MENU] w Push D-pad() to select the root item (“BC Radio”), and then push D-pad(Ent) to go to the next screen. D-pad (Ent) (MENU >... -
Page 66: D Auto Mute
Previous view BC RADIO OPERATION ■ BC Radio setting (Continued) D Auto Mute Enable this setting when you listen to the BC Radio in the background. q Push [MENU] w Push D-pad() to select the root item (“BC Radio”), and then push D-pad(Ent) to go to the next screen. D-pad (Ent) (MENU >... -
Page 67: D Volume Select
Previous view BC RADIO OPERATION ■ BC Radio setting (Continued) D Volume Select Select to adjust the audio output level of all bands to- gether, all separately, or just the BC Radio separately. q Push [MENU] w Push D-pad( ) to select the root item (“Sounds”), ... -
Page 68: D Bc Radio Level
Previous view BC RADIO OPERATION ■ BC Radio setting (Continued) D BC Radio Level Set the initial audio output level difference between the BC Radio and the A and B bands when “All” is set in “Volume Select.” (p. 16-88) q Push [MENU] w Push D-pad( ) to select the root item (“Sounds”),... -
Page 69: D-Star Introduction
Previous view Section D-STAR INTRODUCTION ■ D-STAR Introduction ............7-2 ■ About the DR (D-STAR Repeater) function ......7-2 ■ Ways to Communicate using the DR function ....7-3 To begin the digital mode communication except in the DR function For a Local area call or Gateway call: To begin the digital mode communication in other than the DR function, you can use the VFO mode, Memory... - Page 70 Previous view D-STAR INTRODUCTION Before starting D-STAR, the following steps are needed. Entering your call sign (MY) into the transceiver. STEP 1 Registering your call sign (MY) to a gateway repeater. STEP 2 IMPORTANT! Entering your D-STAR equipment into your registration form. STEP 3 You have completed the steps!! See the Basic manual for details.
- Page 71 Previous view D-STAR INTRODUCTION ■ Ways to Communicate using the DR function With the DR function, the transceiver has three ways to communicate, as shown below. • Local area call : To call through your local area (ac- cess) repeater. •...
-
Page 72: D-Star Operation
Previous view Section D-STAR OPERATION <BASIC> ■ Setting “FROM” (Access repeater) ........8-2 D Using the preloaded Repeater List ......... 8-3 D Using the DR scan ............8-4 D Using the Repeater Search function ......8-5 D Using the TX History ............8-7 ■... -
Page 73: Setting "From" (Access Repeater)
Previous view D-STAR OPERATION <BASIC> ■ Setting “FROM” (Access repeater) Your access repeater must be set in “FROM” when you transmit using the DR function. You have four ways to set the access repeater. “Hirano” repeater Click the title shown below to jump to the specified is set in “FROM.”... -
Page 74: D Using The Preloaded Repeater List
Previous view D-STAR OPERATION <BASIC> ■ Setting “FROM” (Access repeater) (Continued) D Using the preloaded Repeater List For easy operation, a Repeater List is preloaded into your transceiver. Example: Select the “Hirano” repeater in Japan from the list. q Hold down for 1 second. -
Page 75: D Using The Dr Scan
Previous view D-STAR OPERATION <BASIC> ■ Setting “FROM” (Access repeater) (Continued) D Using the DR scan The DR scan is useful to find a repeater. Example: Select the “Hirano repeater using the To quickly find a repeater using the DR function, the DR DR scan. -
Page 76: D Using The Repeater Search Function
Previous view D-STAR OPERATION <BASIC> ■ Setting “FROM” (Access repeater) (Continued) D Using the Repeater Search function The transceiver searches for the nearest repeater by using your own and repeater’s position data entered in the Repeater List. Example: Select the “Hirano” repeater that is the top search result. - Page 77 Previous view D-STAR OPERATION <BASIC> ■ Setting “FROM” (Access repeater) D Using the Repeater Search function (Continued) 2. Selecting the access repeater from the Near Re- peater List q Hold down for 1 second. • The DR screen appears. w Push D-pad( ) to select “FROM,”...
-
Page 78: D Using The Tx History
Previous view D-STAR OPERATION <BASIC> ■ Setting “FROM” (Access repeater) (Continued) D Using the TX History The TX History stores up to 10 “FROM” (Access re- peater) repeaters used when you transmit using the DR function. NOTE: Only repeaters you transmitted to using the DR function are stored in the TX History. -
Page 79: Setting "To" (Destination)
Previous view D-STAR OPERATION <BASIC> ■ Setting “TO” (Destination) The destination repeater or station must be set in “TO” TIP: While in the DV mode, hold down Call Sign Cap- when you make a call in the DV mode. ture key ( ) for 1 second to display the RX History You have seven ways to set the destination. -
Page 80: D Using "Local Cq" (Local Area Call)
Previous view D-STAR OPERATION <BASIC> ■ Setting “TO” (Destination) (Continued) D Using “Local CQ” (Local Area call) “CQCQCQ” is set in “TO” to call a station through your Example: Making a Local area call by accessing the local area (access) repeater. “Hirano”... -
Page 81: D Using "Gateway Cq" (Gateway Call)
Previous view D-STAR OPERATION <BASIC> ■ Setting “TO” (Destination) (Continued) D Using “Gateway CQ” (Gateway call) The destination repeater is set in “TO” to call a station Example: Making a gateway CQ call to (Japan; Hama- through your local area (access) repeater, gateway cho) from the “Hirano”... -
Page 82: D Using "Your Call Sign
Previous view D-STAR OPERATION <BASIC> ■ Setting “TO” (Destination) (Continued) D Using “Your Call Sign” The “Your Call Sign” memory stores the “UR” (destina- tion) call signs. When you select an individual station call sign for the “TO” (Destination) setting as “Your Call Sign,” a gate- way call can be made. -
Page 83: D Using Rx History
Previous view D-STAR OPERATION <BASIC> ■ Setting “TO” (Destination) (Continued) D Using RX History When a call is received in the DV mode, the call data is stored in RX History. Up to 50 callers and the last called station’s call signs can be stored. -
Page 84: D Using Tx History
Previous view D-STAR OPERATION <BASIC> ■ Setting “TO” (Destination) (Continued) D Using TX History When a call is transmitted in the DV mode, the name and/or call sign of up to 20 “TO” (Destination) stations that you called are stored in TX History. NOTE: If you never transmit a call in the DV mode, you cannot select “TO”... -
Page 85: D Directly Inputting (Ur)
Previous view D-STAR OPERATION <BASIC> ■ Setting “TO” (Destination) (Continued) D Directly inputting (UR) The destination station call sign can be directly input. Example: Directly input the call sign “JM1ZLK.” q Hold down for 1 second. • The DR screen appears. w Push D-pad( ) to select “TO,”... -
Page 86: D Directly Inputting (Rpt)
Previous view D-STAR OPERATION <BASIC> ■ Setting “TO” (Destination) (Continued) D Directly inputting (RPT) Example: Directly input the call sign “JP3YDH” The destination repeater call sign can be directly input. q Hold down for 1 second. • The DR screen appears. w Push D-pad( ) to select “TO,”... -
Page 87: Reflector Operation
Previous view D-STAR OPERATION <BASIC> ■ Reflector operation D What is the reflector? A reflector is a special server connected to the internet and running a version of Dplus software. If the Dplus software is installed on your access repeater, it pro- vides various functions including gateway and reflector linking capabilities (It is known as the D-STAR reflector system). -
Page 88: D Linking To A Reflector
Previous view D-STAR OPERATION <BASIC> ■ Reflector operation (Continued) D Linking to a reflector If your repeater is not currently linked to a reflector, or you want to change to another reflector, you can do so following the steps below. Before linking to another re- flector, be sure to unlink the current reflector. -
Page 89: D Using A Reflector
Previous view D-STAR OPERATION <BASIC> ■ Reflector operation D Linking to a reflector (Continued) Using the TX History The TX History stores the up to 5 reflectors that your access repeaters linked to before. Example: Select the “REF002AL” in the TX History. q Hold down for 1 second. -
Page 90: D Unlinking A Reflector
Previous view D-STAR OPERATION <BASIC> ■ Reflector operation (Continued) D Unlinking a reflector Before linking to another reflector, be sure to unlink the current reflector. q Hold down for 1 second. • The DR screen appears. w Push D-pad() to select “TO,” and then push D- pad(Ent). -
Page 91: D Requesting Repeater Information
Previous view D-STAR OPERATION <BASIC> ■ Reflector operation (Continued) D Requesting repeater information When you send the repeater information command, an ID message is sent back. q Hold down for 1 second. • The DR screen appears. w Push D-pad() to select “TO,” and then push D- pad(Ent). -
Page 92: Updating The Repeater List
“Cloning software(Rev. MM) and manuals” in peater List using a microSD card. the Icom website screen. The latest setting file can be downloaded from the Icom • The displayed contents may differ. website. 1. Downloading the latest setting file (ICF file) q Access the following URL to download the latest data. - Page 93 Previous view D-STAR OPERATION <BASIC> ■ Updating the Repeater List (Continued) 3. Copying the latest ICF file to the microSD card r Double-click the “51P2_USA_160913” folder cre- ated on the same place where the downloaded file is saved. Click t Copy the ICF file (Example: “51P2_USA_160913. icf”) in the folder to the “Setting”...
- Page 94 Previous view D-STAR OPERATION <BASIC> ■ Updating the Repeater List (Continued) 5. Updating the Repeater List u Push [MENU] i Push D-pad( ) to select the root item (“SD Card”), and then push D-pad(Ent). D-pad (Ent) o Push D-pad( ) to select “Load Setting,”...
- Page 95 Previous view D-STAR OPERATION <BASIC> ■ Updating the Repeater List (Continued) !2 Push D-pad(Ent) to select the file, and then the “Keep 'SKIP' settings in Repeater List?” appears. D-pad (Ent) !3 Push D-pad() to select “YES” or “NO.” • When “YES” is selected, the skip settings of the Repeater List are retained.
-
Page 96: D-Star Operation
Previous view Section D-STAR OPERATION <ADVANCED> ■ Message operation ............. 9-2 D Entering a TX message ..........9-2 D Transmitting a message ..........9-3 D Deleting a TX message ..........9-4 ■ Viewing received call signs ..........9-5 D Viewing the RX History screen ........9-5 ■... -
Page 97: Message Operation
Previous view D-STAR OPERATION <ADVANCED> ■ Message operation Example: To enter “JAPAN >TOM” into message mem- ory number 1. The transceiver has a total of 5 message memories to store short messages to transmit in the DV mode. TX messages of up to 20 characters can be entered in each of the 5 message memories. -
Page 98: D Transmitting A Message
Previous view D-STAR OPERATION <ADVANCED> ■ Message operation (Continued) D Transmitting a message You can transmit a pre-entered text message by push- ing [PTT]. First, select a TX message, which also turns ON the message transmission function. q Push [MENU] w Push D-pad( ) to select the root item (“My Station”), ... -
Page 99: D Deleting A Tx Message
Previous view D-STAR OPERATION <ADVANCED> ■ Message operation (Continued) D Deleting a TX message Example: To delete the TX message “JAPAN >TOM” from TX messages can be deleted, as described below. message memory number 1. q Push [MENU] w Push D-pad( ) to select the root item (“My Station”), ... -
Page 100: Viewing Received Call Signs
Previous view D-STAR OPERATION <ADVANCED> ■ Viewing received call signs When a DV call is received, the calling station and the repeater’s call signs are stored in RX History. Up to 50 calls can be stored. When you receive the 51st call, the oldest history call will be deleted. - Page 101 Previous view D-STAR OPERATION <ADVANCED> ■ Viewing received call signs (Continued) When the received call includes TIP: You can delete the RX HISTORY data. GPS position data. ➥ Push [QUICK] on the RX HISTORY or the contents screen, then push D-pad( ) to select ...
-
Page 102: Using The Bk Function
Previous view D-STAR OPERATION <ADVANCED> ■ Using the BK function The BK (Break-in) function allows you to break into a conversation where the two other stations are commu- nicating with call sign squelch enabled. (Default: OFF) NOTE: The BK function is automatically turned OFF when the transceiver is turned OFF. -
Page 103: Using The Emr Communication Function
Previous view D-STAR OPERATION <ADVANCED> ■ Using the EMR communication function The EMR (Enhanced Monitor Request) communication function can be used in only the DV mode. Using the EMR function, no call sign setting is necessary. All transceivers that receive an EMR signal automati- cally open their squelch to receive the signal. -
Page 104: D Adjusting The Emr Af Level
Previous view D-STAR OPERATION <ADVANCED> ■ Using the EMR communication function (Continued) D Adjusting the EMR AF level The audio output level when an EMR signal is received is adjustable between 0 and 39. When an EMR signal is received, the audio will be heard at the preset level, or the [VOL] control level, whichever is higher. -
Page 105: Automatic Dv Detection
Previous view D-STAR OPERATION <ADVANCED> ■ Automatic DV detection If you receive an FM signal in the DV mode, the “DV” and “FM” icons alternately blink to indicate the received signal is FM. When the DV Auto Detect function is turned ON, the transceiver automatically selects the FM mode to tem- porarily monitor the signal. -
Page 106: Automatic Reply Function
Previous view D-STAR OPERATION <ADVANCED> ■ Automatic Reply function When a call addressed to your own call sign is received, the Automatic Reply function automatically replies with your call sign. (Default: OFF) Depending on the setting, a recorded message or your position may be transmitted with the call sign. -
Page 107: D Recording An Auto Reply Voice Announcement
Previous view D-STAR OPERATION <ADVANCED> ■ Automatic Reply function (Continued) D Recording an Auto Reply voice announcement The Auto Reply voice announcement can be recorded and saved on the microSD card to reply to the call with your voice. NOTE: Be sure to insert a microSD card to the [micro SD] slot of the transceiver before starting to record a voice signal. -
Page 108: D Auto Position Reply Function
After receiving the Auto Position Reply call, the desti- q A call addressed to nation screen shows your position. your own call sign. Destination Icom transceivers prior to the ID-51A/E do not show the (ID-51A/E) position after receiving a call. (ID-31A/E, IC-9100, ID- Your 880H/E880, IC-80AD/E80D, IC-92AD/E92D, IC-2820H/... -
Page 109: Data Communication
Configure the serial data communication software as Depending on the PC environment, the COM port follows. number used by the ID-51A/E may be higher than 5. • Port: The COM port number which is used by In such case, use a program that can set to higher the ID-51A/E.*... -
Page 110: D Dv Fast Data Mode
The DV Fast Data can be used with the following prod- ucts. (As of October 2016) • ID-51A/ID-51E Plus2 • ID-51A/ID-51E Plus • ID-51A/ID-51E Icom 50th Anniversary Limited Edition • ID-5100A/ID-5100E* * Only for the transceivers whose firmware revision is later than CPU M 1.10/S 1.00/C 1.10/DSP 1.10. -
Page 111: Speech Function
Previous view D-STAR OPERATION <ADVANCED> ■ Speech function The speech function announces the called station call sign, or the individual or station call sign that is selected from the RX History by holding down and rotating [DIAL]. It is convenient when you cannot watch the LCD, or you missed the call’s audio. -
Page 112: D To Announce The Rx>Cs Call Sign
Previous view D-STAR OPERATION <ADVANCED> ■ Speech function (Continued) D To announce the RX>CS call sign The station call sign that is selected from the RX His- tory by holding down and rotating [DIAL], will be announced. q Push [MENU] w Push D-pad( ) to select the root item (“SPEECH”), ... -
Page 113: D Selecting The Speech Language
Previous view D-STAR OPERATION <ADVANCED> ■ Speech function (Continued) D Selecting the Speech Language The speech language can be set to English or Japa- nese. This setting is used for all Speech functions. q Push [MENU] w Push D-pad( ) to select the root item (“SPEECH”), ... -
Page 114: D Speech Speed Selection
Previous view D-STAR OPERATION <ADVANCED> ■ Speech function (Continued) D Speech speed selection The speech speed can be set to slow or fast. This setting is used for all Speech functions. q Push [MENU] w Push D-pad( ) to select the root item (“SPEECH”), ... -
Page 115: Digital Squelch Functions
Previous view D-STAR OPERATION <ADVANCED> ■ Digital squelch functions The digital squelch opens only when receiving a signal addressed to your own call sign, or a signal that in- cludes a matching digital code. You can silently wait for calls from others. D The digital call sign squelch setting q Hold down for 1 second. -
Page 116: D Setting The Digital Code Squelch
Previous view D-STAR OPERATION <ADVANCED> ■ Digital squelch functions (Continued) D Setting the digital code squelch q Hold down for 1 second. • The DR screen is displayed. • To use the digital call sign squelch function in another mode, push [V/MHz] or [M/CALL] to select the VFO, Memory, or CALL channel mode. -
Page 117: Viewing The Call Signs
Previous view D-STAR OPERATION <ADVANCED> ■ Viewing the call signs q Push [MODE] one or more times to select the While operating D-STAR in the Memory mode. DV mode. w Hold down for 1 second to display the CALL SIGN screen. -
Page 118: Repeater List
CS-51PLUS2 cloning software er List, as shown below: • DV repeater About the Repeater List: • DV simplex The Repeater List can be downloaded from the Icom • FM repeater website. • FM simplex http://www.icom.co.jp/world/support/download/firm/ index.html D Repeater List contents Example: “Hirano”... -
Page 119: Entering Information Into Repeater List
Previous view D-STAR OPERATION <ADVANCED> ■ Entering information into Repeater List This section describes how to manually enter new re- peater information into the Repeater List. The required setting items differ, depending on your communication usage. Be sure to confirm the required items, as shown below. -
Page 120: D New Repeater Entry
Previous view D-STAR OPERATION <ADVANCED> ■ Entering information into Repeater List (Continued) D New repeater entry 1. Selecting the repeater group q Push [MENU] w Push D-pad( ) to select the root item (“DV Memo- ry”), and then push D-pad(Ent). D-pad (Ent) e Push D-pad(... - Page 121 Previous view D-STAR OPERATION <ADVANCED> ■ Entering information into Repeater List D New repeater entry (Continued) 3. Entering the repeater name !0 Push D-pad( ) to select “NAME,” and then push D- pad(Ent) to enter the repeater name edit mode. D-pad (Ent) !1 Rotate [DIAL] to select a desired character.
- Page 122 Previous view D-STAR OPERATION <ADVANCED> ■ Entering information into Repeater List D New repeater entry (Continued) 4. Entering the repeater sub name !5 Push D-pad( ) to select “SUB NAME,” and then push D-pad(Ent) to enter the repeater sub name edit mode.
- Page 123 Previous view D-STAR OPERATION <ADVANCED> ■ Entering information into Repeater List D New repeater entry (Continued) 5. Entering the repeater call sign When used for simplex communication, go to [8. Setting the access repeater]. @0 Push D-pad( ) to select “CALL SIGN,” and then ...
- Page 124 Previous view D-STAR OPERATION <ADVANCED> ■ Entering information into Repeater List D New repeater entry (Continued) 6. Entering the gateway repeater call sign The 8th digit in the call sign, entered in [5. Entering the repeater call sign] is automatically set to “G” as the gateway port.
- Page 125 Previous view D-STAR OPERATION <ADVANCED> ■ Entering information into Repeater List D New repeater entry (Continued) 8. Setting the access repeater You can use the entered repeaters as access repeat- ers when using the DR function. For simplex operation, or when the entered repeater is not used as an access repeater, select “NO.”...
- Page 126 Previous view D-STAR OPERATION <ADVANCED> ■ Entering information into Repeater List D New repeater entry (Continued) 10. Setting the duplex direction • “DUP–” is automatically set when the access re- peater frequency is entered in [9. Entering the access repeater frequency]. •...
- Page 127 Previous view D-STAR OPERATION <ADVANCED> ■ Entering information into Repeater List D New repeater entry (Continued) When ‘2. Selecting the communication type’ is set to “DV Repeater” or “DV Simplex,” skip this page and go to the next page. The FM repeater or FM simplex mode These items appear only when ‘2.
- Page 128 Previous view D-STAR OPERATION <ADVANCED> ■ Entering information into Repeater List D New repeater entry (Continued) 12. Setting the Position data accuracy level When the Repeater Search function is not used, or the distance between your position and a repeater is not displayed, select “OFF.”...
- Page 129 Previous view D-STAR OPERATION <ADVANCED> ■ Entering information into Repeater List D New repeater entry (Continued) 15. Entering the UTC Offset UTC (Universal Time Coordinated) offset is the time difference between UTC and repeater local time. This item enables you to check the destination repeater’s time when you make a gateway call.
-
Page 130: Editing A Repeater List
Previous view D-STAR OPERATION <ADVANCED> ■ Editing a Repeater List This function edits a repeater’s data. This is useful when already-entered data is incorrect, has changed or some data should be added to the list. q Push [MENU] w Push D-pad( ) to select the root item (“DV Memo- ... -
Page 131: Deleting A Repeater List
Previous view D-STAR OPERATION <ADVANCED> ■ Deleting a Repeater List The repeater contents can be deleted from the Repeat- er List. q Push [MENU] w Push D-pad( ) to select the root item (“DV Memo- ry”), and then push D-pad(Ent). D-pad (Ent) e Push D-pad(... -
Page 132: Rearranging The Repeater Display Order
Previous view D-STAR OPERATION <ADVANCED> ■ Rearranging the repeater display order You can move the repeaters to rearrange their display order in the selected repeater group. Repeater cannot be moved out of their assigned re- peater group. q Push [MENU] w Push D-pad( ) to select the root item (“DV Memo- ... -
Page 133: Adding Repeater Information Using Rx History
Previous view D-STAR OPERATION <ADVANCED> ■ Adding Repeater information using RX History This section describes how to add a new repeater infor- mation to the Repeater List using RX History. q Push [MENU] w Push D-pad( ) to select the root item (“RX History”), ... -
Page 134: Skip Settings For The Dr Scan
Previous view D-STAR OPERATION <ADVANCED> ■ Skip settings for the DR scan You can set unnecessary repeaters as scan skip tar- gets. The selected repeaters are skipped during scan- ning for faster selection and scanning. You can set the skip setting to all repeaters in the se- lected repeater group, or individual repeaters. -
Page 135: D Group Skip Setting
Previous view D-STAR OPERATION <ADVANCED> ■ Skip settings for the DR scan (Continued) D Group skip setting q Push [MENU] w Push D-pad( ) to select the root item (“DV Memo- ry”), and then push D-pad(Ent). e Push D-pad( ) to select “Repeater List,”... -
Page 136: Entering The Repeater Group Name
Previous view D-STAR OPERATION <ADVANCED> ■ Entering the repeater group name q Push [MENU] w Push D-pad( ) to select the root item (“DV Memo- ry”), and then push D-pad(Ent). D-pad (Ent) e Push D-pad( ) to select “Repeater List,” and then ... -
Page 137: Repeater Detail Screen
Previous view D-STAR OPERATION <ADVANCED> ■ Repeater detail screen Example: Shows the “Hirano” repeater detail screen Depending on the contents, such as position data, UTC offset, and so on, the distance between your position and the repeater or repeater time can be displayed on the REPEATER DETAIL screen. -
Page 138: Entering The Your (Destination) Call Sign
Previous view D-STAR OPERATION <ADVANCED> ■ Entering the Your (destination) call sign A Your (destination) call sign can be manually entered. Example: Enter “TOM/JM1ZLK” to the Your Call Sign The Your (destination) call sign is set to “TO,” you can memory. - Page 139 Previous view D-STAR OPERATION <ADVANCED> ■ Entering the Your (destination) call sign (Continued) !1 Push D-pad( ) to select “CALL SIGN,” and then push D-pad(Ent). !2 Rotate [DIAL] to select the first character. (For example: J) • A to Z, 0 to 9, / and a space can be selected. •...
-
Page 140: Deleting Your (Destination) Call Sign
Previous view D-STAR OPERATION <ADVANCED> ■ Deleting Your (destination) call sign You can delete Your (destination) call signs from the Your Call Sign memory. q Push [MENU] w Push D-pad( ) to select the root item (“DV Memo- ry”), and then push D-pad(Ent). D-pad (Ent) e Push D-pad(... -
Page 141: Rearranging The Display Order Of Your (Destination) Call Sign
• The selected call sign is inserted to above the destina- tion. • When “<<Move End>>” is selected, the selected call sign is moved to the bottom of the YOUR CALL SIGN screen. Blinks Blinks Select the destination “ICOM AMC” is moved to the bottom. 9-46... -
Page 142: About The Repeater List Default Values
■ About the Repeater List default values You can check the Repeater List default values using the supplied CS-51PLUS2 cloning software The ICF (Icom Cloning Format) file, including the de- fault Repeater List, can also be downloaded from the Icom website. http://www.icom.co.jp/world/support/download/firm/ index.html... -
Page 143: Is Your Setting Correct
Previous view D-STAR OPERATION <ADVANCED> ■ Is your setting correct? If you make a Local Area call with the Gateway call set- ting, the destination repeater, selected in “TO,” will be busy while you transmit. So the station that uses that repeater as their Access repeater cannot access it, as shown below. -
Page 144: Gps Operation
Previous view Section GPS OPERATION ■ GPS operation ..............10-2 D Receiving GPS data ............. 10-2 ■ Checking GPS Position ............ 10-3 D Displaying Position Data ..........10-3 D Caller’s TX format ............10-5 D Displayed items ............10-6 D TX format: D-PRS Position (Mobile) ......10-7 D TX format: D-PRS Position (Base) ....... -
Page 145: D Receiving Gps Data
Any changes by the Department may affect the accuracy and function of the GPS system. • When the GPS receiver is activated, please do not cover the ID-51A or ID-51E with anything that will block the satellite signals. -
Page 146: Checking Gps Position
Previous view GPS OPERATION ■ Checking GPS Position You can check your current position. The GPS position screen is cancelled when [PTT] is pushed. After releasing, the screen automatically appears. During transmission, the GPS position screen can be se- lected by pushing [QUICK] D Displaying Position Data q Push [QUICK] to open the Quick Menu screen. - Page 147 Previous view GPS OPERATION ■ Checking GPS Position D Displaying Position Data (Continued) MEM Position e (Continued) • MEM Position: The position of the GPS memory location in Latitude, Longitude and The direction Grid Locator are displayed. Also, the from you to Distance and Direction from you to the memory location.
-
Page 148: D Caller's Tx Format
D-PRS is a function which simultaneously For users who have a D-STAR transceiver model sends position data received from the inter- prior to the ID-51A/E: nal or external GPS receiver, using the slow The GPS TX mode, “GPS (DV-G)” and “GPS-A (DV- speed data packet space, along with voice. -
Page 149: D Displayed Items
Previous view GPS OPERATION ■ Checking GPS Position (Continued) D Displayed items Depending on the caller’s transmit mode or transmit format, the displayed items differ. D-PRS Position Object Item Compass ✓ ✓ ✓ ✓ ✓ ✓ ✓ ✓ ✓ ✓ Latitude ✓... -
Page 150: D Tx Format: D-Prs Position (Mobile)
Previous view GPS OPERATION ■ Checking GPS Position (Continued) D TX format: D-PRS Position (Mobile) D TX format: D-PRS Position (Base) The following items are displayed when the caller’s TX The following items are displayed when the caller’s TX format is D-PRS Position (Mobile). format is D-PRS Position (Base). -
Page 151: D Tx Format: D-Prs Object
Previous view GPS OPERATION ■ Checking GPS Position (Continued) D TX format: D-PRS Object D TX format: D-PRS Item The following items are displayed when the caller’s TX The following items are displayed when the caller’s TX format is D-PRS Object. format is D-PRS Item. -
Page 152: D Tx Format: D-Prs Weather
Previous view GPS OPERATION ■ Checking GPS Position (Continued) D TX format: D-PRS Weather D TX mode: NMEA The following items are displayed when the caller’s TX The following items are displayed when the caller’s TX format is D-PRS Weather. mode is NMEA. -
Page 153: D Changing The Gps Memory/Alarm Channel
Previous view GPS OPERATION ■ Checking GPS Position (Continued) D Changing the GPS memory/alarm channel MEM screen ALM screen While displaying the GPS position screen, GPS memo- ry or GPS alarm location can be changed. q While the MEM or ALM screen is displayed, push [QUICK] w Push D-pad() to select “GPS Memory Select”... -
Page 154: D Saving Your Own Or Received Position Data
Previous view GPS OPERATION ■ Checking GPS Position (Continued) D Saving your own or received position data With this function, you can save the position informa- tion of your station wherever you are, and also the posi- tion information of the station you received it from. The GPS Memory is capable of storing 200 memories in total, assignable to one of 27 groups, A to Z and “(No Group).”... -
Page 155: Checking Gps Information (Sky View Screen)
Previous view GPS OPERATION ■ Checking GPS Information (Sky view screen) This screen is used to display received GPS satellite in- formation when the GPS indicator does not stop blink- ing for a long time. The GPS Information screen displays the quantity, sig- nal power and position of the GPS satellites. -
Page 156: Gps Memory Operation
(No Group) Also, an alarm can be set to GPS Memory to sound, depending on the distance from your station. ICOM Head Office A: Icom Office The GPS Memory is capable of storing a total of 200 B: Station Tokyo memories in an “ALL”... - Page 157 Previous view GPS OPERATION ■ GPS memory operation (Continued) 2. Entering the GPS Memory name u Push D-pad() to select “NAME,” and then push D- pad(Ent). D-pad (Ent) i Rotate [DIAL] to select the first character. • Selectable input characters are upper case letters, lower case letters, numbers or symbols.
- Page 158 Previous view GPS OPERATION ■ GPS memory operation (Continued) 3. Entering the GPS Memory date !2 Push D-pad() to select “DATE,” and then push D- pad(Ent). • The date edit screen is displayed. D-pad (Ent) !3 Rotate [DIAL] to edit the date. •...
- Page 159 Previous view GPS OPERATION ■ GPS memory operation (Continued) 6. Entering the GPS longitude @7 Push D-pad() to select “LONGITUDE,” and then push D-pad(Ent). • The longitude edit screen is displayed. D-pad (Ent) @8 Rotate [DIAL] to edit the longitude. •...
- Page 160 Previous view GPS OPERATION ■ GPS memory operation (Continued) 9. Writing the GPS memory $1 Push D-pad() to select “<<Add Write>>,” and then push D-pad(Ent). • If a previously added GPS memory is edited, select “<<Overwrite>>.” • “Add write?” appears. $2 Push D-pad() to select “YES,”...
-
Page 161: D Entering The Gps Group Name
Previous view GPS OPERATION ■ GPS memory operation (Continued) D Entering the GPS group name You can enter a name for each GPS group. q Push [MENU] w Push D-pad() to select the root item (“GPS”), and then push D-pad(Ent). D-pad (Ent) GPS MEMORY... -
Page 162: D Deleting Gps Data
Previous view GPS OPERATION ■ GPS memory operation (Continued) Example: Deleting all memories in “(No Group).” D Deleting GPS data All the contents of a GPS memory group can be de- leted. Please note that deleted GPS memories cannot be re- stored. -
Page 163: D Rearranging The Display Order Of The Gps Memory
Previous view GPS OPERATION ■ GPS memory operation (Continued) D Rearranging the display order of the GPS memory You can move GPS memories to rearrange their dis- play order in the selected GPS memory group. A GPS memory cannot be moved out of their assigned memory group. -
Page 164: D Setting The Gps Alarm
Previous view GPS OPERATION ■ GPS memory operation (Continued) D Setting the GPS alarm A GPS alarm can sound when a target position comes into the alarm area. This function can be set to the caller station, all GPS Memory channels, a specified Memory group or a specified Memory channel. - Page 165 Previous view GPS OPERATION ■ GPS memory operation D Setting the GPS alarm (Continued) q Push [MENU] w Push D-pad() to select the root item (“GPS”), and Example: Alarm Area (RX/Memory) then push D-pad(Ent). Alarm Setting is set to RX. D-pad (Ent) e Push D-pad() to select “GPS Alarm,”...
-
Page 166: Transmitting Gps Data (D-Prs And Nmea)
(NMEA0183) received from the inter- nal or an external GPS receiver. For users who have a D-STAR transceiver model prior to the ID-51A/E: The GPS TX mode, “GPS (DV-G)” and “GPS-A (DV- A),” are now called “NMEA” and “D-PRS.” • GPS (DV-G) NMEA •... -
Page 167: Transmitting D-Prs (Dv-A) Data
Previous view GPS OPERATION ■ Transmitting D-PRS (DV-A) data When D-PRS is selected in the GPS TX mode, you can NOTE: transmit D-PRS data. • If “GPS select” is set to “Manual,” the position data When operating in the D-PRS mode, the following entered in “Manual Position”... -
Page 168: D Setting D-Prs (Dv-A)
Previous view GPS OPERATION ■ Transmitting D-PRS (DV-A) data (Continued) D Setting D-PRS (DV-A) Set to transmit in the D-PRS (DV-A) mode. 1. Setting the GPS TX Mode to D-PRS (DV-A) q Push [MENU] w Push D-pad() to select the root item (“GPS”), and then push D-pad(Ent). - Page 169 Previous view GPS OPERATION ■ Transmitting D-PRS (DV-A) data D Setting D-PRS (DV-A) (Continued) 4. Setting the SSID To assist in identifying a station’s type, the displayed APRS ® (Automatic Packet Reporting System) based SSID is added after the D-PRS data call sign. The way to add SSID’s differs, depending on whether you enter a space in your call signs or not.
- Page 170 Previous view GPS OPERATION ■ Transmitting D-PRS (DV-A) data D Setting D-PRS (DV-A) (Continued) 5. Entering a comment Enter a comment, and transmit it with the D-PRS posi- tion data. The number of characters you can enter differs, de- pending on the data extension and altitude settings. (See the list.) Characters Data Extension...
- Page 171 Previous view GPS OPERATION ■ Transmitting D-PRS (DV-A) data D Setting D-PRS (DV-A) (Continued) 6. Setting the Time Stamp Set the time stamp function to transmit the received time data in UTC (Universal Time Coordinated) time. !8 Push D-pad() to select “Time Stamp,” and then push D-pad(Ent).
-
Page 172: D Displaying Your Position Using A Mapping Program
Previous view GPS OPERATION ■ Transmitting D-PRS (DV-A) data (Continued) D Displaying your position using a mapping program If you transmit to an I-GATE station, and then enter the call sign information on the internet map website, the selected symbol is displayed. You can check the location at a map site. - Page 173 Previous view GPS OPERATION ■ Transmitting D-PRS (DV-A) data D Displaying your position using a mapping program (Continued) For your reference D-PRS data content D-PRS data content are shown below. DPosition (Mobile) JA3YUA-A>API51,DSTAR*:/002338h3437.38N/13534.29E>090/002/A=000012ID-51 OP.SATOH (e.g.) DPosition (Base) JA3YUA-A>API51,DSTAR*:/002338h3437.38N/13534.29E-PHG5132ID-51 OP.SATOH (e.g.) DObject JA3YUA-A>API51,DSTAR*:;HAM FESTA*012345z3437.38N\13534.29Eh2014.2.28 am10-pm4 (e.g.)
-
Page 174: Transmitting Nmea (Dv-G) Data
Previous view GPS OPERATION ■ Transmitting NMEA (DV-G) data In the DV mode, you can transmit GPS data in the NMEA (DV-G) TX mode. D Setting the GPS data sentence Set the GPS sentence to transmit in the NMEA (DV-G) TX mode. -
Page 175: D Entering A Gps Message
Previous view GPS OPERATION ■ Transmitting NMEA data (Continued) Example: Adding “OSAKA suzuki” D Entering a GPS message Enter a GPS message of up to 20 characters to be transmitted with the NMEA (DV-G) data. q Push [MENU] w Push D-pad() to select the root item (“GPS”), and then push D-pad(Ent) to go to the next screen. -
Page 176: Gps Auto Transmission
Previous view GPS OPERATION ■ GPS Auto transmission In the DV mode, this function automatically transmits the transceiver’s current GPS position and the D-PRS (DV-A) data at a selected interval, and should only be used in the simplex mode. NOTE: •... -
Page 177: Gps Logger Function
• When the microSD card is full, this function will auto- 1. Insert a microSD card. matically be paused. ( microSD cards are not available from Icom. Pur- chase a card to meet your needs.) 2. Confirm that the GPS receiver is receiving your The transceiver has an exclusive GPS logger mode position and time. -
Page 178: D Setting The Gps Record Interval
Previous view GPS OPERATION ■ GPS Logger function (Continued) D Setting the GPS record interval For example, if you are moving slowly and if the time interval is set to “1sec,” a lot of position data is stored at almost the same place. Select the GPS Logger function record interval to suit your travel speed. -
Page 179: D Viewing The Route On A Pc Map
Previous view GPS OPERATION ■ GPS Logger function (Continued) D Viewing the route on a PC Map If you want to display your route, copy the log file to your PC. q Turn OFF the transceiver, if it’s ON. w Lift OFF the [micro SD] slot cover on the side panel. e Push the microSD card in to release, then carefully pull it out, to remove the card. - Page 180 ■ GPS Logger function (Continued) For your information— About the recorded NMEA sentences for GPS logging Regarding the GPS logging data of the ID-51A/E, each sentence corresponds to the NMEA standard and is recorded in the following format. D GGA sentence (e.g.) $GPGGA,161229.487,3723.2475,N,12158.3416,W,1,07,1.0,9.0,M,25.5,M,3,0000*18<CR><LF>...
-
Page 181: D Using <
<<GPS Logger Only>> outline 1. Insert the microSD card. (p. 2-3) ( microSD cards are not available from Icom. Pur- chase a card to meet your needs) 2. Confirm that the GPS receiver is receiving your position and time.> Mode -
Page 182: Voice Memory Function
Previous view Section VOICE MEMORY FUNCTION ■ Recording a QSO audio ........... 11-2 D To start recording ............11-2 D To stop recording ............11-3 ■ Playing back the recorded audio ........11-4 ■ Operations while playing back .......... 11-5 D Fast-forward while playing .......... -
Page 183: Recording A Qso Audio
Previous view VOICE MEMORY FUNCTION ■ Recording a QSO audio You can record the audio of a QSO (communication) on the MAIN band onto the microSD card. In addition to both the received and transmitted audio, the date, repeater, frequency and the destination call sign are also recorded. -
Page 184: D To Stop Recording
Previous view VOICE MEMORY FUNCTION ■ Recording a QSO audio (Continued) D To stop recording q Push [QUICK] to open the Quick Menu screen. w Push D-pad() to select “<<REC Stop>>.” e Push D-pad(Ent) to stop voice recording. • The transceiver displays “Recording stopped,” and auto- matically exits the Quick Menu screen. -
Page 185: Playing Back The Recorded Audio
Previous view VOICE MEMORY FUNCTION ■ Playing back the recorded audio q Push [MENU] to enter the Menu screen. w Push D-pad() to select the root item (Voice Memo), and then push D-pad(Ent) to go to the next level. D-pad (Ent) ( MENU >... -
Page 186: Operations While Playing Back
Previous view VOICE MEMORY FUNCTION ■ Operations while playing back You can fast-forward or rewind while playing back. Push to move to the previous file. D Fast-forward while playing • Push: Fast-forward. Push D-pad() to fast-forward. (Default: 10 seconds) • Push while the playback is pausing: If you want to change the fast-forward time, see “Chang- Pause at the beginning of the ing the skip time.”... -
Page 187: Voice Player Screen's Description
Previous view VOICE MEMORY FUNCTION ■ VOICE PLAYER screen’s description The displayed items are follows. q File name The playback file name is displayed. w Recording information The recorded frequency, mode and audio category are displayed. • When the receive audio is playing back, the audio cat- egory is displayed as “RX.”... -
Page 188: Changing The Skip Time
Previous view VOICE MEMORY FUNCTION ■ Changing the skip time You can change the fast forward and rewind skip time. q Push [MENU] to enter the Menu screen. w Push D-pad() to select the root item (Voice Memo), and then push D-pad(Ent) to go to the next level. D-pad (Ent) ( MENU >... -
Page 189: Deleting The Recorded Contents (Audio)
Previous view VOICE MEMORY FUNCTION ■ Deleting the recorded contents (audio) q Push [MENU] to enter the Menu screen. w Push D-pad() to select the root item (Voice Memo), and then push D-pad(Ent) to go to the next level. D-pad (Ent) ( MENU >... -
Page 190: Deleting The Folder
Previous view VOICE MEMORY FUNCTION ■ Deleting the folder NOTE: All the files in the folder are also deleted. q Push [MENU] to enter the Menu screen. w Push D-pad() to select the root item (Voice Memo), and then push D-pad(Ent) to go to the next level. D-pad (Ent) ( MENU >... -
Page 191: Changing The Recording Mode
Previous view VOICE MEMORY FUNCTION ■ Changing the recording mode The recording audio can be selected in the “REC Mode” item on the Menu screen. TIP: The default setting is “TX&RX” (Both transmit and receive signals are recorded). q Push [MENU] to enter the Menu screen. -
Page 192: Continue To Record Even If No Signals Are Received
Previous view VOICE MEMORY FUNCTION ■ Continue to record even if no signals are received In the default settings, the transceiver records audio only while receiving signals (the squelch opens). If you want to continue recording even if no signal is received, do the following steps. -
Page 193: Record The Transmit And Receive Audio Into The Same File
Previous view VOICE MEMORY FUNCTION ■ Record the transmit and receive audio into the same file The transceiver can record the transmit and receive au- dio into the same file. q Push [MENU] to enter the Menu screen. w Push D-pad() to select the root item (Voice Memo), and then push D-pad(Ent) to go to the next level. -
Page 194: Start To Record When The [Ptt] Switch Is Pushed
Previous view VOICE MEMORY FUNCTION ■ Start to record when the [PTT] switch is pushed The transceiver starts to record the transmitted audio at the same time the [PTT] switch is pushed. After transmitting, the transceiver receives signal in a given amount of time, it also records the received au- dio. -
Page 195: Viewing The File Information
Previous view VOICE MEMORY FUNCTION ■ Viewing the file information The transceiver can display the recorded file’s frequen- cy, mode, date, and so on. q Push [MENU] to enter the Menu screen. w Push D-pad() to select the root item (Voice Memo), and then push D-pad(Ent) to go to the next level. -
Page 196: Viewing The Folder Information
Previous view VOICE MEMORY FUNCTION ■ Viewing the folder information The transceiver can display the folder’s name, number of the files in the folder, total capacity of the files and date. q Push [MENU] to enter the Menu screen. w Push D-pad() to select the root item (Voice Memo), and then push D-pad(Ent) to go to the next level. -
Page 197: Voice Recorder Function
Previous view VOICE MEMORY FUNCTION ■ Voice Recorder function The microphone audio, including audio from an exter- nal microphone, can be recorded for your convenience. • Depending on the microSD card capacity, you may continu- ously record up to a maximum of about 37 hours. If the file size exceeds 2 GB, a new file is automatically created in the same folder, and the recorded voice audio is saved there. -
Page 198: D Playing Back The Recorded Audio
Previous view VOICE MEMORY FUNCTION ■ Voice Recorder function (Continued) D Playing back the recorded audio q Push [MENU] to enter the Menu screen. w Push D-pad() to select the root item (Voice Memo), and then push D-pad(Ent) to go to the next level. D-pad (Ent) ( MENU >... -
Page 199: D Erasing The Recorded Audio Contents
Previous view VOICE MEMORY FUNCTION ■ Voice Recorder function (Continued) D Erasing the recorded audio contents q Push [MENU] to enter the Menu screen. w Push D-pad() to select the root item (Voice Memo), and then push D-pad(Ent) to go to the next level. D-pad (Ent) ( MENU >... -
Page 200: D Mic Gain Setting
Previous view VOICE MEMORY FUNCTION ■ Voice Recorder function (Continued) D MIC Gain setting q Push [MENU] to enter the Menu screen. w Push D-pad() to select the root item (Voice Memo), and then push D-pad(Ent) to go to the next level. D-pad (Ent) ( MENU >... -
Page 201: D Changing The Skip Time
Previous view VOICE MEMORY FUNCTION ■ Voice Recorder function (Continued) D Changing the skip time You can change the skip time of fast forward and re- wind. q Push [MENU] to enter the Menu screen. w Push D-pad() to select the root item (Voice Memo), and then push D-pad(Ent) to go to the next level. -
Page 202: D Viewing The File Information
Previous view VOICE MEMORY FUNCTION ■ Voice Recorder function (Continued) D Viewing the file information The transceiver can display the recorded file’s frequen- cy, mode, date and so on. q Push [MENU] to enter the Menu screen. w Push D-pad() to select the root item (Voice Memo), and then push D-pad(Ent) to go to the next level. -
Page 203: Viewing The Microsd Card's Free Space And Recordable Time
Previous view VOICE MEMORY FUNCTION ■ Viewing the microSD card’s free space and recordable time q Push [MENU] to enter the Menu screen. w Push D-pad() to select the root item (SD Card), and then push D-pad(Ent). e Push D-pad() to select “SD Card Info,” and then push D-pad(Ent). -
Page 204: Playing Back The Voice Memory Data On A Pc
Previous view VOICE MEMORY FUNCTION ■ Playing back the voice memory data on a PC You can playback the voice memory data on a PC. However, the recorded information (frequency, date, and so on) are not displayed. • Microsoft ® Windows ®... -
Page 205: Memory Operation
Previous view Section MEMORY OPERATION ■ General description ............12-2 D Memory channel contents ..........12-2 ■ Selecting a Memory channel ..........12-3 ■ Selecting a call channel ............ 12-3 ■ Entering a Memory channel ..........12-4 ■ Copying memory and Call channel contents ....12-5 D Memory or Call channelVFO........ -
Page 206: General Description
Therefore, we recommend that memory data be backed up or be saved to a microSD card or to a PC. • The microSD card is not available from Icom. Purchase a microSD card to meet your needs. • The CS-51PLUS2 cloning software that is included on the supplied CD can also be used to backup the memory data. -
Page 207: Selecting A Memory Channel
Previous view MEMORY OPERATION ■ Selecting a Memory channel The Memory mode is used for operation on memory channels, which store programmed frequencies, call signs and other data. q Push [M/CALL] several times to select the Memory mode. • “ ”... -
Page 208: Entering A Memory Channel
Previous view MEMORY OPERATION ■ Entering a Memory channel Example: Programming 146.030 MHz/FM mode into q Push [V/MHz] to select the VFO mode. memory channel 11 (a blank channel). w Set a desired frequency and operating mode: ➥ Rotate [DIAL] to set a desired frequency. Set 146.030MHz in (Example: 146.030) the VFO mode. -
Page 209: Copying Memory And Call Channel Contents
Previous view MEMORY OPERATION ■ Copying memory and Call channel contents This function copies a memory channel’s contents to the VFO, another memory or Call channels. This is use- ful when searching for signals around a memory chan- nel frequency, and for recalling the frequency offset, subaudible tone frequency and so on. -
Page 210: D Memory Or Call ChannelAnother Memory Or Call Channel
Previous view MEMORY OPERATION ■ Copying memory and Call channel contents (Continued) D Memory or Call channelAnother memory or Call channel q Select the Memory or Call channel to be copied. Select the memory chan- ➥ Push [M/CALL] one or more times to select nel to be copied. -
Page 211: Setting A Memory Bank
Previous view MEMORY OPERATION ■ Setting a Memory bank The ID-51A/E has a total of 26 banks (A to Z). NOTE: The memory banks are only used to hold Regular memory channels 0 to 499 are assigned to any memory channels. Thus if the original memory chan- desired bank for easy memory management. -
Page 212: D Directly Entering Into A Memory Bank
Previous view MEMORY OPERATION ■ Setting a Memory bank (Continued) Directly entering into a memory bank You can also program the memory contents directly into a memory bank channel. This way is a short cut to programming the memory channel, and then assigning it to a bank. -
Page 213: Selecting A Memory Bank
Previous view MEMORY OPERATION ■ Selecting a Memory bank q Push [M/CALL] one or more times to select the Example: Selecting the bank group “A.” Memory mode. w Push [QUICK] to open the Quick Menu screen. Push [M/CALL] e Push D-pad() to select “Bank Select,” and then or more times to select push D-pad(Ent). -
Page 214: Entering A Memory/Bank/Scan Name
Previous view MEMORY OPERATION ■ Entering a memory/bank/scan name Each memory channel can be programmed with an al- phanumeric channel name for easy recognition. Names can be a maximum of 16 characters. NOTE: Only one name can be programmed for each bank. - Page 215 Previous view MEMORY OPERATION ■ Entering a memory/bank/scan name Continued from the previous page D Entering a memory name, bank name or scan name Rotate [DIAL] to select “I”. (Continued) Push D-pad() to move the cursor to the second y Rotate [DIAL] to select a desired character. digit.
-
Page 216: Selecting A Memory Name Display
Previous view MEMORY OPERATION ■ Selecting a memory name display While in the memory mode, the programmed memory Push [QUICK] name can be displayed. q Push [M/CALL] one or more times to select the Memory mode. w Push [QUICK] to open the Quick Menu screen. e Push D-pad() to select “Display Type,”... -
Page 217: Clearing A Memory Contents
Previous view MEMORY OPERATION ■ Clearing a Memory contents Contents of entered memories can be cleared (erased), if desired. Example: Clearing the memory channel 007. q Hold down [S.MW] for 1 second to enter the Se- lect Memory write mode. In the Select Memory •... -
Page 218: Scan Operation
Previous view Section SCAN OPERATION ■ Scan ................. 13-2 D About the scan function ..........13-2 D VFO scan ..............13-2 D Memory scan ..............13-2 D Memory bank scan ............13-2 D Scanning direction ............13-3 D Squelch setting for a scan ..........13-3 D Tuning step for a VFO scan .......... -
Page 219: D About The Scan Function
Previous view SCAN OPERATION ■ Scan Scanning is a versatile function that can automatically D VFO scan search for signals and makes it easier to locate stations • ALL (Full scan) p. 13-5 to contact or listen to, or to skip unwanted channels or Repeatedly scans the entire band. -
Page 220: D Squelch Setting For A Scan
Previous view SCAN OPERATION ■ Scan (Continued) D Scanning direction • If desired, rotate [DIAL] to switch the scanning direc- tion during a scan. D Squelch setting for a scan The squelch level can be changed to suit your operat- ing needs. -
Page 221: D When A Signal Is Received
Previous view SCAN OPERATION ■ Scan (Continued) D When a signal is received When a signal is received, the scan pauses for approxi- mately 10 seconds (default), then resumes. The scan resumes approximately 2 seconds (default) Blinks after the signal is disappears. To manually resume the scan, rotate [DIAL]. -
Page 222: Vfo Scan
Previous view SCAN OPERATION ■ VFO scan Hold down [SCAN] There are 6 scan types: Full scan, Band scan, Program for 1 second. scan, Program link scan, Duplex scan and Tone scan. NOTE: The frequencies that are set as skip channels “PSKIP”... -
Page 223: D Vfo Mode Scan
Previous view SCAN OPERATION D VFO mode scan (continued) When a scan name is assigned. • When the scan name is assigned When a scan name is assigned, the scan type can be set by selecting the scan name from the scan type list. (Step r on page 13-5.) NOTE: The scan name is not displayed during a scan. -
Page 224: Setting And Clearing The Skip Frequencies
Previous view SCAN OPERATION ■ Setting and clearing the skip frequencies D Setting the skip frequencies The frequencies set as skip channels “PSKIP” are skipped (not scanned). Example: Full scan in the FM mode. q Start the VFO scan (p. 13-5). •... -
Page 225: D Clearing The Skip Setting
Previous view SCAN OPERATION ■ Setting and clearing the skip frequencies (Continued) D Clearing the skip setting Push [M/CALL] q Push [M/CALL] one or more times to select the then rotate [DIAL] to Memory mode. select the memory w Rotate [DIAL] to select the memory channel you channel to clear its skip want to clear as the skip channel. -
Page 226: Memory Scan
Previous view SCAN OPERATION ■ Memory scan Repeatedly scans all programmed Memory channels. There two types of scan in the memory mode; Memory Push [M/CALL] scan and memory bank scan. • Channels set as “PSKIP” or “SKIP” are skipped during a scan. -
Page 227: D Memory Bank Scan
Previous view SCAN OPERATION ■ Memory scan (Continued) D Memory bank scan A memory bank scan searches through the memory channels in the selected bank. • Two or more memory channels, which are not set as skip chan- nels, must be programmed to start a memory bank scan. •... - Page 228 Previous view SCAN OPERATION ■ Memory scan D Memory bank scan (continued) When a bank name is programmed • When the bank name is programmed. When a bank name is programmed, the scan type can be set by selecting the bank name from the scan type list.
-
Page 229: Setting The Skip Channel
Previous view SCAN OPERATION ■ Setting the skip channel The channels set as “SKIP” or “PSKIP” skip channels are skipped (not scanned). Example: Set “SKIP” to Memory channel “009.” TIP: See page 13-8 for details of clearing the skip set- Rotate [DIAL] to select ting. -
Page 230: Setting The Temporary Skip Function
Previous view SCAN OPERATION ■ Setting the temporary skip function This function temporarily skips unwanted frequencies Example: Full scan in the FM mode. during a scan, for the set period. This function enables you to temporarily skip the un- wanted frequencies without the skip frequency setting. Blinks q Start the scan. -
Page 231: Priority Watch
Previous view Section PRIORITY WATCH ■ Priority watch ..............14-2 D VFO frequency and a priority channel ......14-2 D VFO frequency and a Memory/Bank scan ....14-2 D VFO scan and a priority channel ........14-2 D VFO scan and a Memory/Bank scan ......14-2 D A frequency in “FROM”... -
Page 232: D Vfo Frequency And A Priority Channel
Previous view PRIORITY WATCH ■ Priority watch While operating on a VFO frequency, using the DR function or while scanning, Priority watch checks for signals on a selected frequency every 5 seconds. D VFO frequency and a priority channel D VFO scan and a priority channel (p. -
Page 233: D A Frequency In "From" On The Dr Screen And A Priority Channel
Previous view PRIORITY WATCH ■ Priority watch (Continued) D A frequency in “FROM” on the DR screen D DR scan and a priority channel and a priority channel (p. 14-16) Checks a priority channel every 5 seconds, during a DR (p. -
Page 234: Vfo Frequency And A Priority Channel
Previous view PRIORITY WATCH ■ VFO frequency and a priority channel Checks the selected priority channel every 5 seconds, while receiving on a VFO frequency. Example: Checks Memory channel “490” every 5 sec- onds, while receiving on 145.800 MHz. 1. Set the VFO frequency Rotate [DIAL] to set the q Push [V/MHz] to select the VFO mode. - Page 235 Previous view PRIORITY WATCH ■ VFO frequency and a priority channel (Continued) 4. During a Priority watch Example: Checks M-CH “490” while receiving on Checks the selected priority channel every 5 seconds, 145.800 MHz. while receiving on a VFO frequency. Appears Appears Checks the Memory chan-...
-
Page 236: Vfo Frequency And A Memory/Bank Scan
Previous view PRIORITY WATCH ■ VFO frequency and a Memory/Bank scan Example: Sequentially checks the Memory channels every Sequentially checks the Memory or Bank channels ev- 5 seconds, while receiving on 145.800 MHz. ery 5 seconds, while receiving on a VFO frequency. Rotate [DIAL] to set the 1. - Page 237 Previous view PRIORITY WATCH ■ VFO frequency and a Memory/Bank scan (Continued) 4. During the Priority watch Example: Sequentially checks the Memory channels while Sequentially checks the Memory or Bank channels ev- receiving on 145.800 MHz. ery 5 seconds, while receiving on a VFO frequency. Appears Appears The Memory chan-...
-
Page 238: Vfo Scan And A Priority Channel
Previous view PRIORITY WATCH ■ VFO scan and a priority channel Checks the selected priority channel every 5 seconds, during a VFO mode scan. Example: Checks memory channel “490” every 5 sec- onds, during a VFO scan. 1. Set the priority channel Push [M/CALL] •... - Page 239 Previous view PRIORITY WATCH ■ VFO scan and a priority channel (Continued) 4. During the Priority watch Example: Checks M-CH “490” while VFO scanning Checks the selected priority channel every 5 seconds, Appears Appears while VFO scanning Checks the Memory chan- Blinks nel every 5 seconds.
-
Page 240: Vfo Scan And Memory/Bank Scan
Previous view PRIORITY WATCH ■ VFO scan and Memory/Bank scan Sequentially checks the Memory or Bank channels ev- ery 5 seconds during a VFO scan. Example: Sequentially checks the memory channels ev- 1. Start the Memory or Bank scan ery 5 seconds during a VFO scan. •... - Page 241 Previous view PRIORITY WATCH ■ VFO scan and Memory/Bank scan (Continued) Hold down [SCAN] 3. Start the VFO scan for 1 second. q Hold down [SCAN] for 1 second. w Push D-pad() to select the scan type, and then push D-pad(Ent) to start the VFO scan (p. 13-5). NOTE: Push [CLR] to cancel the all scans at the same time.
- Page 242 Previous view PRIORITY WATCH ■ VFO scan and Memory/Bank scan (Continued) 5. When a signal is received. Example: For a Memory scan • When “ON” is selected. When a signal is received on the priority channel, the channel is automatically selected. Blinks The “PRIO”...
-
Page 243: A Frequency In "From" On The Dr Screen And A Priority Channel
Previous view PRIORITY WATCH ■ A frequency in “FROM” on the DR screen and a priority channel Example: Checks “145.800 MHz” every 5 seconds, while Checks the selected priority channel every 5 seconds, receiving on the repeater using the DR func- while receiving a repeater or simplex frequency in tion. - Page 244 Previous view PRIORITY WATCH ■ A frequency in “FROM” on the DR screen and a priority channel (Continued) 4. During the Priority watch Example: Checks the VFO frequency every 5 seconds Checks the selected priority channel every 5 seconds, while receiving on a repeater or a simplex fre- while receiving a repeater on the DR screen.
- Page 245 Previous view PRIORITY WATCH ■ A frequency in “FROM” on the DR screen and a priority channel (Continued) 5. When a signal is received. Example: For a Memory channel • When “ON” is selected. When a signal is received on the priority channel, the channel is automatically selected.
-
Page 246: Dr Scan And A Priority Channel
Previous view PRIORITY WATCH ■ DR scan and a priority channel Example: Checks “145.800 MHz” every 5 seconds, dur- Checks the selected priority channel every 5 seconds, ing the DR scan. during a DR scan. Rotate [DIAL] to set the 1. - Page 247 Previous view PRIORITY WATCH ■ DR scan and a priority channel (Continued) 4. During the Priority watch Example: Checks the VFO frequency during the DR scan. Checks the selected priority channel every 5 seconds, Appears Appears during a DR scan. Checks the VFO frequen- cy every 5 seconds.
- Page 248 Previous view PRIORITY WATCH ■ DR scan and a priority channel (Continued) 5. When a signal is received. Example: For a Memory channel • When “ON” is selected. When a signal is received on the priority channel, the Blinks channel is automatically selected. The “PRIO” icon blinks.
-
Page 249: Repeater And Duplex Operations
Previous view Section REPEATER AND DUPLEX OPERATIONS ■ FM Repeater operation............. 15-2 D Checking the repeater input signal ....... 15-3 ■ Duplex operation .............. 15-4 D Setting the frequency offset .......... 15-4 D Setting the duplex direction .......... 15-5 D Duplex operation ............15-5 ■... -
Page 250: Fm Repeater Operation
Previous view REPEATER AND DUPLEX OPERATIONS ■ FM Repeater operation Repeater A repeater receives transmitted signals and retransmits 144.900 MHz 144.900 MHz them on a different frequency. The transmit frequency is shifted from the receive frequency by a preset fre- 145.500 MHz 145.500 MHz quency offset. -
Page 251: D Checking The Repeater Input Signal
Previous view REPEATER AND DUPLEX OPERATIONS ■ FM Repeater operation (Continued) D Checking the repeater input signal You can check whether the other station’s transmit sig- nal can be received directly or not, by listening on the repeater input frequency. While monitoring ➥... -
Page 252: Duplex Operation
Previous view REPEATER AND DUPLEX OPERATIONS ■ Duplex operation The Duplex operation shifts the transmit frequency up or down from the receive frequency by an offset amount. D Setting the frequency offset q Push [V/MHz] to select the VFO mode. w Push [MENU] e Push D-pad() to select the root item (“DUP/ TONE...”), and then push D-pad(Ent). -
Page 253: D Setting The Duplex Direction
Previous view REPEATER AND DUPLEX OPERATIONS ■ Duplex operation (Continued) D Setting the duplex direction q Push [V/MHz] to select the VFO mode. w Rotate [DIAL] to set the operating frequency. e Push [QUICK] r Push D-pad() to select “DUP,” and then push D- pad(Ent). -
Page 254: Auto Repeater Function
Previous view REPEATER AND DUPLEX OPERATIONS ■ Auto repeater function When the operating frequency falls within the repeater D Frequency range and offset direction output frequency range, the Auto Repeater function • USA version can automatically sets the repeater settings (duplex FREQUENCY RANGE SHIFT DIRECTION ON/OFF, duplex direction, tone encoder ON/OFF). -
Page 255: 1750 Hz Tone
Previous view REPEATER AND DUPLEX OPERATIONS ■ 1750 Hz tone To access most European repeaters, the transceiver must transmit a 1750 Hz tone. For such European re- peaters, do the following procedures. • This tone can also be used as a ‘Call signal.’ Push [MENU] For only the ID-51E: Push [PTT] briefly, then hold down [PTT] to transmit a... - Page 256 Previous view Section MENU SCREEN ■ Menu item selection............16-2 D Entering the Menu screen ..........16-3 ■ Menu items and Default settings ........16-4 ■ DUP/TONE items ............16-16 ■ Scan items ..............16-18 ■ Voice Memo items ............16-22 ■...
-
Page 257: Menu Item Selection
Previous view MENU SCREEN ■ Menu item selection The MENU system is used to enter infrequently changed values or function settings. In addition to this page, see pages 16-4 through 16-15 for details of each item. NOTE: The Menu system is constructed in a tree structure. -
Page 258: D Entering The Menu Screen
Previous view MENU SCREEN ■ Menu item selection (Continued) D Entering the Menu screen Example: Set the Auto Power OFF function to “30 min.” q Push [MENU] w Push D-pad() to select the root item (“Time Set”), and then push D-pad(Ent). •... -
Page 259: Menu Items And Default Settings
Previous view MENU SCREEN ■ Menu items and Default settings NOTE: The default settings shown below are for the USA version. The default settings may differ, depending on your transceiver version. In this item, set the repeater duplex offset and the channel tone or code options. DUP/TONE... - Page 260 Previous view MENU SCREEN ■ Menu items and Default settings (Continued) NOTE: The default settings shown below are for the USA version. The default settings may differ, depending on your transceiver version. Voice Memo In this item, set the TX/RX voice recording options. DESCRIPTIONS RANGE OR VALUE (Default is shown in bold) Starts recording the received signal audio.
- Page 261 Previous view MENU SCREEN ■ Menu items and Default settings (Continued) NOTE: The default settings shown below are for the USA version. The default settings may differ, depending on your transceiver version. In this item, set the Broadcast (BC) Radio options. BC Radio DESCRIPTIONS RANGE OR VALUE (Default is shown in bold)
- Page 262 Previous view MENU SCREEN ■ Menu items and Default settings (Continued) NOTE: The default settings shown below are for the USA version. The default settings may differ, depending on your transceiver version. In this item, set the GPS options. DESCRIPTIONS RANGE OR VALUE (Default is shown in bold) Selects the GPS receiver that the trans- GPS Set...
- Page 263 Previous view MENU SCREEN ■ Menu items and Default settings (Continued) NOTE: The default settings shown below are for the USA version. The default settings may differ, depending on your transceiver version. In this item, set the GPS options. GPS (Continued) DESCRIPTIONS RANGE OR VALUE (Default is shown in bold) Select D-PRS (DV-A) or NMEA (DV-G) as...
- Page 264 Previous view MENU SCREEN ■ Menu items and Default settings (Continued) NOTE: The default settings shown below are for the USA version. The default settings may differ, depending on your transceiver version. In this item, set and display the call signs used in the DV mode. Call Sign DESCRIPTIONS Displays the operating call signs.
- Page 265 Previous view MENU SCREEN ■ Menu items and Default settings (Continued) NOTE: The default settings shown below are for the USA version. The default settings may differ, depending on your transceiver version. In this item, set infrequently changed values or functions in the DV mode. DV Set DESCRIPTIONS RANGE OR VALUE (Default is shown in bold)
- Page 266 Previous view MENU SCREEN ■ Menu items and Default settings (Continued) NOTE: The default settings shown below are for the USA version. The default settings may differ, depending on your transceiver version. In this item, set the Speech functions. SPEECH DESCRIPTIONS RANGE OR VALUE (Default is shown in bold) Selects the RX call sign speech function op-...
- Page 267 Selects whether or not to use the [DATA] OFF, ON (Echo Back OFF) or ON (Echo Back ON) CI-V CI-V (DATA Jack) jack to remotely control the ID-51A/E. Sets the transceiver's unique CI-V CI-V Address 01~86~DF hexadecimal address code.
- Page 268 Previous view MENU SCREEN ■ Menu items and Default settings (Continued) NOTE: The default settings shown below are for the USA version. The default settings may differ, depending on your transceiver version. In this item, set other options. Function (Continued) DESCRIPTIONS RANGE OR VALUE (Default is shown in bold) Sets the 1st Local Oscillator frequency.
- Page 269 Previous view MENU SCREEN ■ Menu items and Default settings (Continued) NOTE: The default settings shown below are for the USA version. The default settings may differ, depending on your transceiver version. In this item, set the Sound options. Sounds DESCRIPTIONS RANGE OR VALUE (Default is shown in bold) Selects to adjust the audio output level of...
- Page 270 Reads or writes the CS-51PLUS2 data Clone Clone Mode from or to the PC, and/or to receive data from a Master transceiver. Writes your ID-51A/E (Master) data to an- Clone Master Mode other ID-51A/E (Sub). Returns all settings to their defaults, with- Reset...
-
Page 271: Dup/Tone Items
Previous view MENU SCREEN ■ DUP/TONE items Offset Freq (Default: 0.600.00*) DUP/TONE... > Offset Freq Set the frequency offset for duplex (repeater) operation to between 0 and 59.99500 MHz. • The selected tuning step in the VFO mode is used when setting the offset. •... - Page 272 Previous view MENU SCREEN ■ DUP/TONE items (Continued) Tone Burst (Default: OFF) DUP/TONE... > Tone Burst Turn the Tone Burst function ON or OFF in the FM mode when using tone squelch. • OFF: When you transmit a signal that superimposes the CTCSS tone, the other station may hear a short burst of noise from their receiver, just after you stop transmitting.
-
Page 273: Scan Items
Previous view MENU SCREEN ■ Scan items Pause Timer (Default: 10sec) Scan > Pause Timer Select the scan Pause time. When receiving a signal, the scan pauses for the scan Pause timer Time. • 2 to 20sec: When a signal is received, the scan pauses for 2 to 20 seconds (set in 2 seconds steps). - Page 274 Previous view MENU SCREEN ■ Scan items (Continued) Program Skip (Default: ON) Scan > Program Skip Turn the Program Skip Scan function ON or OFF for a VFO mode scan. This function enables the transceiver to skip the unwanted frequencies or channels that inconveniently stop scanning.
- Page 275 Previous view MENU SCREEN ■ Scan items (Continued) Program Link (Default: Refer to the diagram below) Scan > Program Link This item sets the link function for more than two pair of Program Scan Edge channels to be sequentially scanned during the Program Link Scan. The link function scans all frequencies in the scan range.
- Page 276 Previous view MENU SCREEN ■ Scan items (Continued) Deleting the link channel q Push D-pad() to select the programmed scan link number that the chan- nel you wish to delete is assigned to, and then push D-pad(Ent). D-pad (Ent) w Push D-pad() to select programmed scan number you wish to delete. (For example: 01: 144.000-450.000) e Push [QUICK] r Push D-pad() to select “Delete,”...
-
Page 277: Voice Memo Items
Previous view MENU SCREEN ■ Voice Memo items <<REC Start>> Voice Memo > QSO Recorder > <<REC Start>> Push D-pad() to select “<<REC Start>>,” and then push D-pad(Ent). “Recording started. ” appears and voice recording starts. • “<<REC Stop>>” item is displayed while recording. To stop recording, push D-pad(Ent). - Page 278 Previous view MENU SCREEN ■ Voice Memo items (Continued) NOTE: • The folder name is automatically created, as shown in the example below: Recording date: 2016/10/1 Folder name: 20161001 • The file name is automatically created, as shown in the example below: Recording date: 2016/10/1 15:30:00 File name: 20161001_153000...
- Page 279 Previous view MENU SCREEN ■ Voice Memo items (Continued) File Split (Default: ON) Voice Memo > QSO Recorder > Recorder Set > File Split Turn the File Split function ON or OFF. • OFF: When the recording starts, a new file is automatically created in the folder of the microSD card.
- Page 280 Previous view MENU SCREEN ■ Voice Memo items (Continued) Record (Continued) q Push [PTT] to start recording. • “Recording” appears and the microphone audio recording starts. w Push [PTT] again to stop. Play Files Voice Memo > Voice Recorder > Play Files ➥...
- Page 281 Previous view MENU SCREEN ■ Voice Memo items (Continued) MIC Gain (Default: 3) Voice Memo > Voice Recorder > Recorder Set > MIC Gain Set the internal microphone sensitivity to between 1 (minimum sensitivity) and 4 (maximum sensitivity), to suit your needs. Higher values make the microphone more sensitive to your voice.
- Page 282 Previous view MENU SCREEN ■ Voice Memo items (Continued) DV Auto Reply Voice Memo > DV Auto Reply Up to 10 seconds of audio can be recorded for the automatic reply function (p. 9-11). TIP: Insert a microSD card into the transceiver before selecting these items. q While pushing and holding [PTT], speak into the microphone at your nor- mal voice level.
-
Page 283: Voice Tx Items
Previous view MENU SCREEN ■ Voice TX items Record Voice TX > Record Up to 1 minute of audio can be recorded onto a microSD card for voice trans- mission. (p. 17-3) While recording a QSO voice audio, this function is disabled. TIP: Insert a microSD card into the transceiver before selecting these items. - Page 284 Previous view MENU SCREEN ■ Voice TX items (Continued) Repeat Time (Default: 5sec) Voice TX > TX Set > Repeat Time Set the repeat interval to between 1 and 15 seconds (in 1 second steps). The transceiver repeatedly transmits the recorded voice audio at this inter- val.
-
Page 285: Broadcast (Bc) Radio Items
Previous view MENU SCREEN ■ Broadcast (BC) Radio items BC Radio Memory BC Radio > BC Radio Memory A total of 26 banks are selectable for BC Radio Memory. You can assign up to 50 BC Radio memory channels (combined FM and AM) to each bank, for easy memory management. - Page 286 Previous view MENU SCREEN ■ BC Radio items (Continued) FM Antenna (Default: External) BC Radio > BC Radio Set > FM Antenna Select the desired antenna for FM radio. • External: The connected antenna is used. • Earphone: The earphone cable antenna is used. Power Save (BC Radio) (Default: ON) BC Radio >...
-
Page 287: Gps Items
Previous view MENU SCREEN ■ GPS items GPS Select (Default: Internal GPS) GPS > GPS Set > GPS Select Select either an internal or external GPS receiver that the transceiver re- ceives its position data from. • OFF: A GPS receiver is not used. •... - Page 288 Previous view MENU SCREEN ■ GPS items (Continued) GPS Indicator (Default: ON) GPS > GPS Set > GPS Indicator Select whether or not to display the GPS icon( • OFF: The GPS icon is not displayed. • ON: The GPS icon appears when valid position data is received, and blinks when no position data is received.
-
Page 289: Gps Information
Previous view MENU SCREEN ■ GPS items (Continued) GPS Information GPS > GPS Information Displays the GPS satellite direction, altitude, satellite number and receiving status. Example: tracking 5 satellites Non tracking satellites Regular characters Tracking satellites (weak signal) (Example: 01) Reversed characters Tracking satellites (strong signal) (Example:... - Page 290 Previous view MENU SCREEN ■ GPS items (Continued) GPS Position (Continued) [MY] screen (MY Position) Compass* Your direction Latitude Your latitude Longitude Your longitude Shows the grid locator based on the latitude and longitude of your position. Your own altitude SPEED Your speed over ground TIME...
- Page 291 Previous view MENU SCREEN ■ GPS items (Continued) GPS Position (Continued) 3. When the caller’s TX format is D-PRS Position (Base station) Compass* Displays the caller’s direction from your position Symbol Displays the caller’s D-PRS symbol Latitude Displays the caller’s latitude Longitude Displays the caller’s longitude Displays the grid locator based on the caller’s latitude and...
- Page 292 Previous view MENU SCREEN ■ GPS items (Continued) GPS Position (Continued) 5. When the caller’s TX format is D-PRS Weather Compass* Displays the caller’s direction from your position Symbol Displays the caller station’s D-PRS symbol Latitude Displays the caller’s latitude Longitude Displays the caller’s longitude Displays the grid locator based on the caller’s latitude and...
- Page 293 Previous view MENU SCREEN ■ GPS items (Continued) GPS Memory GPS > GPS Memory The transceiver has 200 GPS memory channels to store the received posi- tion data, or often-used position data, along with an alphanumeric channel name. The channels can be divided into the “(No Group)” group and each memory group for easy memory management.
- Page 294 Previous view MENU SCREEN ■ GPS items (Continued) Alarm Select (Default: OFF) GPS > GPS Alarm> Alarm Select Select the target position(s) for the GPS alarm function. • OFF: Turns the function OFF. • RX: The last position data received from a station is stored in a tem- porary memory, and is used for the GPS alarm function.
- Page 295 Previous view MENU SCREEN ■ GPS items (Continued) Alarm Area (RX/Memory) (Default: Both) GPS > GPS Alarm> Alarm Area (RX/Memory) Select the GPS active alarm range. When the Alarm Select is set to “RX” or “Memory,” set the GPS alarm active range to “Both,”...
- Page 296 Previous view MENU SCREEN ■ GPS items (Continued) GPS Logger (Default: ON) GPS > GPS Logger > GPS Logger Turn the GPS Logger function ON or OFF. This function logs the position, altitude, course, speed and number of satel- lites being used. •...
- Page 297 Previous view MENU SCREEN ■ GPS items (Continued) <<GPS Logger Only>> GPS > GPS Logger > <<GPS Logger Only>> The transceiver switches into an exclusive GPS logger mode where only the logger is functioning. TIP: • Select “Internal GPS” or “External GPS” in GPS Select screen and insert a microSD card.
-
Page 298: Unproto Address
Previous view MENU SCREEN ■ GPS items (Continued) GPS TX Mode (Default: OFF) GPS > GPS TX Mode Select a GPS transmission mode to send position data received from a GPS receiver while in the DV mode. • OFF: Position data is not transmitted. •... - Page 299 Previous view MENU SCREEN ■ GPS items (Continued) Symbol (Default: Person) GPS > GPS TX Mode > D-PRS (DV-A) > Symbol The symbol is an icon which represents your means of transportation or location. The stored symbol in the selected symbol memory (1 to 4) is trans- mitted with position data while in the D-PRS (DV-A) mode.
- Page 300 Pushing D-pad(Ent) again to set the symbol memory, selected in step q, which is used for D-PRS (DV-A) operation. Selecting “1: Campground” Symbol list Sheriff Recreational Vehicle Truck Radio Digipeater Shuttle Node Icom Radio Gateway SSTV Rover Aircraft Small Aircraft Repeater Overlayed WX Station Red Cross Ship(powerboat) Overlayed Diamond...
- Page 301 Previous view MENU SCREEN ■ GPS items (Continued) SSID (Default: -- -) GPS > GPS TX Mode > D-PRS (DV-A) > SSID Select an SSID based on APRS ® to add to your call sign, to show your op- erating style to other stations. The addition methods of the SSID may differ, depending on whether the call sign includes a space or not.
- Page 302 Previous view MENU SCREEN ■ GPS items (Continued) Comment GPS > GPS TX Mode > D-PRS (DV-A) > Comment Enter a comment of up to 43 characters to transmit with the position data. Comment edit screen (In case of up to 43 characters) The number of characters to enter will differ, depending on the Data Extension and Altitude settings.
-
Page 303: Options
Previous view MENU SCREEN ■ GPS items (Continued) Time Stamp (Default: OFF) GPS > GPS TX Mode > D-PRS (DV-A) > Time Stamp Sets the transmitting time stamp type to DHM, HMS or OFF. The time stamp is transmitted with the position data in the D-PRS (DV-A) mode, and UTC (Universal Time Coordinated) time is used. - Page 304 Previous view MENU SCREEN ■ GPS items (Continued) GPS Sentence □RMC/□ ✔ GGA/□GLL/□VTG/□GSA/□GSV (Default: GPS > GPS TX Mode > NMEA(DV-G) > GPS Sentence Select sentences to be transmitted in the GPS mode to transmit position data. • Select up to 4 of the 6 GPS sentences to transmit at the same time. RMC, GGA, GLL, VTG, GSA and GSV sentences are selectable.
- Page 305 Previous view MENU SCREEN ■ GPS items (Continued) GPS Message GPS > GPS TX Mode > NMEA (DV-G) > GPS Message Enter a GPS message of up to 20 alphanumeric characters. (p. 10-32) GPS Message edit screen This GPS Message item will be hidden when “D-PRS (DV-A)” or “OFF” is selected in “GPS TX Mode.”...
-
Page 306: Call Sign Items
Previous view MENU SCREEN ■ Call sign items Call Sign Call Sign Sets or displays the “UR,” “R1,” “R2” and “MY” call signs to be used for DV operation. Except for the DR function, sets the desired call signs to be used for DV op- eration in this screen. - Page 307 Previous view MENU SCREEN ■ Call sign items (Continued) 2. Gateway (“R2”) setting q Push D-pad( ) to select “R2,” and then push D-pad(Ent). w Push D-pad( ) to select “GW,” and then push D-pad(Ent). • When you manually enter the call sign, push in step q.
-
Page 308: Rx History Items
Previous view MENU SCREEN ■ RX History items RX History RX History When a call is received in the DV mode, call information such as the caller sta- tion call sign, used repeater call sign, and so on, are stored in this screen. Up to 50 records can be stored. - Page 309 Previous view MENU SCREEN ■ RX History items (Continued) To display the RX record contents q Push D-pad( ) to select the desired RX History number “RX01” to “RX50,” and then push D-pad(Ent). w Push D-pad( ) to switch the RX History contents screen. ...
- Page 310 Previous view MENU SCREEN ■ RX History items (Continued) 2. When the caller’s TX format is D-PRS Position 4. When the caller’s TX format is D-PRS Object/Item (Mobile station) Displays Object/Item station’s Compass* direction from your position Displays the caller’s direction from your Compass* Displays the Object/Item station’s D-PRS position...
-
Page 311: Dv Memory Items
We recommend that memory data be backed up using a microSD card, or be saved to a PC using the supplied CS-51PLUS2 cloning software. About the Repeater List: The Repeater List can be downloaded from the Icom web site. http://www.icom.co.jp/world/support/download/firm/index.html 16-56... - Page 312 Previous view MENU SCREEN ■ DV Memory items (Continued) Repeater Group (01 to 30) Repeater group name of up to 16 alphanumeric charac- Group name ters The Skip setting can be turned ON or OFF in the QUICK MENU screen. Repeater List <DV Repeater>...
- Page 313 Previous view MENU SCREEN ■ DV Memory items (Continued) <FM Repeater> TYPE FM repeater NAME FM repeater name of up to 16 alphanumeric characters SUB NAME FM repeater sub name of up to 8 alphanumeric characters CALL SIGN FM repeater call sign GROUP Repeater group where the repeater is assigned Select whether or not to use the FM repeater as an access re-...
-
Page 314: My Station Items
Previous view MENU SCREEN ■ My Station items My Call Sign My Station > My Call Sign The transceiver has a total of 6 memories to store your own (MY) call signs. A call sign of up to 8 digits can be entered. Also, a note of up to 4 characters, for operating radio type, area, and so on, can be entered. -
Page 315: Dv Set Items
Previous view MENU SCREEN ■ DV Set items RX Bass (Default: Normal) DV Set > Tone Control > RX Bass Set the DV mode received audio bass filter level to Cut, Normal or Boost. • Cut: Cuts the bass tone •... - Page 316 Previous view MENU SCREEN ■ DV Set items (Continued) Auto Reply (Default: OFF) DV Set > Auto Reply Set the automatic reply function to ON, OFF, Voice or Position. This function automatically replies to a call addressed to your own call sign, even if you are away from the transceiver.
- Page 317 Previous view MENU SCREEN ■ DV Set items (Continued) GPS Data Speed (Default: Slow) DV Set > DV Fast Data > GPS Data Speed Set the GPS data speed when the DV data is sent by using the DV Fast Data.
-
Page 318: Rx Repeater Write
Previous view MENU SCREEN ■ DV Set items (Continued) Digital Repeater Set (Default: ON) DV Set > Digital Repeater Set Turn the digital repeater setting function ON or OFF. In any DV mode except for the DR function, and when accessing a repeater that has a call sign that is different than the transceiver’s setting, this function reads the repeater’s signal and automatically sets the repeater call sign into R1 and R2. - Page 319 Previous view MENU SCREEN ■ DV Set items (Continued) RX Record (RPT) (Default: ALL) DV Set > RX Record (RPT) The transceiver can record the data of up to 50 individual calls. When the received signal includes a status message (“UR?” or “RPT?”) that is sent back from the access repeater, you can record up to 50 messages or only the latest one, in the Received Call Record.
- Page 320 Previous view MENU SCREEN ■ DV Set items (Continued) EMR AF Level (Default: 19) DV Set > EMR AF Level Set the audio output level to between 0 and 39 for when an EMR communi- cation mode signal is received. When an EMR signal is received, the audio will be heard at the set level, or the [VOL] control level, whichever is higher.
-
Page 321: Speech Items
Previous view MENU SCREEN ■ SPEECH items RX Call Sign SPEECH (Default: ON (Kerchunk)) SPEECH > RX Call Sign SPEECH Turn the RX call sign speech function ON or OFF for calls received in the DV mode. • OFF: No announcement is made even when a call is received. •... -
Page 322: Speech Language
Previous view MENU SCREEN ■ SPEECH items (Continued) MODE SPEECH (Default: OFF) SPEECH > MODE SPEECH Turn the Operating Mode Speech function ON or OFF. When this function is ON, the selected operating mode is announced when the mode switch is pushed. •... -
Page 323: Dtmf/T-Call Items
Previous view MENU SCREEN ■ DTMF/T-CALL items Enters and sets the DTMF tone code and DTMF memory channel for DTMF tone operation. See pages 17-8 to 17-12 for details. DTMF Memory (Default: d0) DTMF/T-CALL > DTMF Memory Shows a list of the DTMF memory channels. •... -
Page 324: Qso/Rx Log Items
Previous view MENU SCREEN ■ QSO/RX Log items QSO Log (Default: ON) QSO/RX Log > QSO Log Select whether or not to make a communication log on the microSD card. The communication log can be made, and saved in the “csv” format. Be sure to insert the microSD card into the transceiver before making a com- munication log. - Page 325 Previous view MENU SCREEN ■ QSO/RX items (Continued) RX History Log (Default: OFF) QSO/RX Log > RX History Log Select whether or not to make a DV mode’s receive history log on the mi- croSD card. The receive history log can be made on a microSD card, and saved in the “csv”...
- Page 326 Previous view MENU SCREEN ■ QSO/RX items (Continued) Contents Example Descriptions Height Antenna height (unit: m) Gain Antenna gain (unit: dB) Directivity Omni Antenna directivity (Omni, 45, 90, 135, 180, 225, 270, 315 or 360) Object/Item HAM FES Object name or Item name (up to 9 characters) Name Data Type Live Object...
-
Page 327: Function Items
Previous view オー ト(短) FM/FM-N MENU SCREEN 30 milliseconds Stand-by Reception is disabled 60 milliseconds ■ Function items No signal is received for 5 seconds Power Save (Default: Auto (Short)) オー ト(短) 50 milliseconds 50 milliseconds 50 milliseconds FM/FM-N Function > Power Save Stand-by Set the power save function to reduce current drain and conserve battery Reception is... -
Page 328: Auto Repeater
Previous view MENU SCREEN ■ Function items (Continued) Monitor (Default: Push) Function > Monitor Select the [SQL] monitor function method. • Push: Hold down [SQL] to monitor the frequency. Release to stop monitor- ing. • Hold: Push [SQL] momentarily to monitor the frequency and push momen- tarily again to cancel it. - Page 329 Previous view MENU SCREEN ■ Function items (Continued) Remote MIC Key Function > Remote MIC Key The function assignments for keys on the optional HM-75LS SPEAKER-MI- CROPHONE can be changed for simple remote control operation. • During RX/Standby: Function Description No function Push to increase the frequency, Memory channel, repeater or station call sign.
-
Page 330: Key Lock
Previous view MENU SCREEN ■ Function items (Continued) Remote MIC Key (Continued) • During TX: Function Description No function VOL UP Push to turn up the volume level. VOL DOWN Push to turn down the volume level. Push to transmit the voice audio recorded on the microSD. Voice TX Hold down for 1 second to repeatedly transmit the voice audio. - Page 331 Previous view MENU SCREEN ■ Function items (Continued) Active Band (Default: All) Function > Active Band Allows continuous frequency selection of the operating frequency across all bands using [DIAL]. • Single: The operating frequency can be selected within the current band. •...
-
Page 332: Vox Delay
Previous view MENU SCREEN ■ Function items (Continued) VOX Level (Default: 5) Function > VOX > VOX Level Set the VOX gain level to between 1 and 10 or OFF. Higher values make the VOX function more sensitive to your voice. To turn the VOX function OFF, select “OFF.”... - Page 333 To distinguish equipment, each CI-V transceiver has its own Icom standard address in hexadecimal code. The ID-51A/E’s default address is 86. When 2 or more ID-51A/Es are controlled through a PC at the same time, set a different address for each device between 01h and DFh (hexadecimal). CI-V Baud Rate (Default: Auto) Function >...
- Page 334 Previous view MENU SCREEN ■ Function items (Continued) Heterodyne (Default: Normal) Function > Heterodyne Set the 1st Local Oscillator frequency. Depending on a combination of the two operating frequencies in the VHF/ UHF Dualwatch mode, the transceiver might generate a spurious signal on a specific receive frequency.
-
Page 335: Display Items
Previous view MENU SCREEN ■ Display items Backlight (Default: Auto (DC IN:ON)) Display > Backlight Select the transceiver backlight option. • OFF: The backlight does not light. • ON: The backlight lights continuously. • Auto: The backlight lights when an operation is performed, and goes out after the time period set in the Backlight Timer. -
Page 336: Busy Led
Previous view MENU SCREEN ■ Display items (Continued) Busy LED (Default: ON) Display > Busy LED The TX/RX indicator lights green while receiving a signal, or the squelch is open. It can be turned OFF to conserve battery power, if desired. •... - Page 337 Previous view MENU SCREEN ■ Display items (Continued) RX Message (Default: Auto) Display > RX Message Select whether or not to display and scroll a received message. • OFF: Does not display the message. To check the message, hold down [CD] for 1 second to display the call record.
-
Page 338: Scroll Speed
Previous view MENU SCREEN ■ Display items (Continued) DV RX Backlight (Default: ON) Display > DV RX Backlight Turn the DV RX Backlight function ON or OFF. In the DV mode, this function turns ON the LCD backlight while displaying the calling station’s call sign or a received message on the LCD. -
Page 339: Opening Message
Select the opening message that is displayed on the LCD at power ON. • OFF: Opening message display is skipped. • ON: Icom logo, MY call sign and the product model (“ID-51A” or “ID-51E”)* are displayed at power ON. * Depending on the transceiver version. - Page 340 Previous view MENU SCREEN ■ Display items (Continued) Latitude/Longitude (Default: ddd ºmm.mm') Display > Display Unit > Latitude/Longitude Select either the ddd ºmm.mm' or ddd ºmm'ss'' format to display the latitude and longitude. Altitude/Distance (Default: ft/ml*) Display > Display Unit > Altitude/Distance Select either the meter or feet/mile format to display the distance and alti- tude.
-
Page 341: Display Language
Previous view MENU SCREEN ■ Display items (Continued) Barometric (Default: inHg*) Display > Display Unit > Barometric Select between the hPa, mb, mmHg, and inHg format to display the baro- metric pressure. Rainfall (Default: inch*) Display > Display Unit > Rainfall Select either the mm or inch format to display the amount of rainfall. - Page 342 English in “Display Language” or “System Language” (this item), or by doing a partial reset of the ID-51A/E CPU. A partial reset will not clear your call sign databases.
-
Page 343: Sounds Items
Previous view MENU SCREEN ■ Sounds items Volume Select (Default: All) Sounds > Volume Select Selects to adjust the audio output level of all bands together, all separately, or just the BC Radio separately. • All: The audio output level of the BC Radio, A band and B band are adjusted together. -
Page 344: Beep Level
Previous view MENU SCREEN ■ Sounds items (Continued) Beep Level (Default: 3) Sounds > Beep Level Select a beep audio output level between 0 (OFF), 1 (minimum) and 9 (maxi- mum). Beep/Vol Level Link (Default: OFF) Sounds > Beep/Vol Level Link Select whether or not the beep output level can be adjusted by the [VOL] control. -
Page 345: Scan Stop Beep
Previous view MENU SCREEN ■ Sounds items (Continued) Band Edge Beep (Default: OFF) Sounds > Band Edge Beep Turn the Band edge beep ON or OFF. • OFF: Band edge beep is OFF. • ON: When you tune into or out of the AIR, VHF and UHF band’s frequency range with [DIAL], a beep sounds. -
Page 346: Sub Band Mute
Previous view MENU SCREEN ■ Sounds items (Continued) Sub Band Mute (Default: OFF) Sounds > Sub Band Mute Select whether or not to mute the SUB band audio signal while receiving on the MAIN band, and/or sound a beep when a signal disappears on the SUB band. -
Page 347: Time Set Items
Previous view MENU SCREEN ■ Time set items Date/Time Time Set > Date/Time Manually set the date and time that is displayed on the right hand corner of the screen. The time is displayed in the 24 hour format. Setting the date q Push D-pad( ), and then push D-pad(Ent) to select “DATE”. -
Page 348: Auto Power Off
Previous view MENU SCREEN ■ Time set items (Continued) GPS Time Correct (Default: Auto) Time Set > GPS Time Correct This function can correct its time by using the time information that a GPS sentence contains. It is corrected by calculating the received UTC (Universal Time of Coordi- nated) time and the set [UTC Offset]. -
Page 349: Dv Gateway Items
MENU SCREEN ■ DV Gateway items Enters the Terminal mode or Access Point mode. See “About the DV Gateway function” on the Icom WEB site, http://www.icom.co.jp/world/ for details. <<Terminal Mode>> DV Gateway > <<Terminal Mode>> The Terminal mode enables you to make a Gateway call through the internet ®... -
Page 350: Sd Card Items
Previous view MENU SCREEN ■ SD Card items Settings and functions for microSD card. See Section 2 for details. Load Setting SD Card > Load Setting Select from the list when you load the setting file. Save Setting SD Card > Save Setting Save the setting file. - Page 351 Previous view MENU SCREEN ■ SD Card (Continued) SD Card Info SD Card > SD Card Info Displays the SD card’s free space and its remaining recording time. Format SD Card > Format Formats the microSD care, deleting all data. Unmount SD Card >...
-
Page 352: Others Items
Select to read or write the CS-51PLUS2 data from or to the PC, and/or to receive data from a Master transceiver. See page 17-21 for details. Clone Master Mode Others > Clone > Clone Master Mode Select to write your ID-51A/E (Master) data to another ID-51A/E (Sub). See page 17-21 for details. 16-97... -
Page 353: Partial Reset
Previous view MENU SCREEN ■ Other items (Continued) Partial Reset Others > Reset > Partial Reset A Partial reset resets operating settings to their default values (VFO frequen- cy, VFO settings, menu contents) without clearing the items below: • Memory channel contents •... -
Page 354: All Reset
Previous view MENU SCREEN ■ Other items (Continued) All Reset Others > Reset > All Reset Reset the CPU, if the internal CPU malfunctions due to static electricity, and so on. All reset clears all entries and returns all settings to their factory de- faults. - Page 355 Previous view Section OTHER FUNCTIONS ■ Voice TX function .............. 17-2 D Recording ..............17-2 D The recorded voice audio playing back ......17-2 D To transmit the recorded voice audio ......17-3 D Repeat Time setting ............. 17-4 D TX Monitor function ............17-4 ■...
-
Page 356: Voice Tx Function
Previous view OTHER FUNCTIONS ■ Voice TX function The Voice TX function transmits the recorded audio on a microSD card once, or repeatedly, for up to 10 min- utes at a specified interval. TIP: When the key function [Voice TX] is assigned to the key on the optional HM-75LS speaker micro... -
Page 357: D To Transmit The Recorded Voice Audio
Previous view OTHER FUNCTIONS ■ Voice TX function (Continued) D To transmit the recorded voice audio q Push [MENU] w Push D-pad( ) to select the root item (“Voice TX”), and then push D-pad(Ent). D-pad (Ent) e Push D-pad( ) to select “<<Single TX>>”... -
Page 358: D Repeat Time Setting
Previous view OTHER FUNCTIONS ■ Voice TX function (Continued) D Repeat Time setting Set the repeat interval to between 1 and 15 seconds (in 1 second steps) for the voice repeat transmission. The transceiver repeatedly transmits the recorded voice audio at this interval. q Push [MENU] w Push D-pad() to select the root item (Voice TX), and then push D-pad(Ent) to go to the next screen. -
Page 359: Home Ch Beep Function
Previous view OTHER FUNCTIONS ■ Home CH Beep function When the specified Home CH is selected by rotating [DIAL], a beep sounds. You will know the Home CH selection without looking at the display. Example: Set “146.010 MHz” frequency in the VFO as the Home CH. -
Page 360: Speech Function
Previous view OTHER FUNCTIONS ■ Speech function Example: When “Dallas” (K5TIT B) is selected in “FROM,” hold down [SPCH] When holding down [SPCH] , the Speech function audibly announces the displayed frequency and oper- ating mode in the VFO, Memory or Call channel modes, or call sign on the DR screen. -
Page 361: D Mode Speech Function Setting
Previous view OTHER FUNCTIONS ■ Speech function (Continued) D Mode speech function setting The Mode Speech function enables the transceiver to announce the selected operating mode when the mode switch is pushed. q Push [MENU] w Push D-pad( ) to select the root item (“SPEECH”), ... -
Page 362: Using The Dtmf Memory
Previous view OTHER FUNCTIONS ■ Using the DTMF memory Example: Stores the DTMF code, “012345” into the The transceiver can stores up to 16 channels of DTMF DTMF memory channel “d0.” memory with 24-digit DTMF code. D DTMF code programming q Push [MENU] to select the MENU list screen. -
Page 363: D Monitoring The Stored Dtmf Code
Previous view OTHER FUNCTIONS ■ Using the DTMF memory D Monitoring the stored DTMF code Select the desired DTMF memory channel to be moni- tored in DTMF memory screen, then push [SQL]. The stored DTMF code sounds. • DTMF code can also be monitored with the following steps: Select the desired DTMF memory channel to be monitored, then push [QUICK] Push D-pad() to select “DTMF Monitor,”... -
Page 364: D Dtmf Code Transmission
Previous view OTHER FUNCTIONS ■ Using the DTMF memory (Continued) D DTMF code transmission Example: Set the DTMF code “012345” stored in DTMF q Push [MENU] to select the MENU list screen. memory channel “d1” for transmission. w Push D-pad( ) to select the root item (“DTMF/T- ... -
Page 365: D Dtmf Code Transmission (Direct Input)
Previous view OTHER FUNCTIONS ■ Using the DTMF memory (Continued) D DTMF code transmission (Direct Input) Example: Directly input the DTMF code “013579AB” q Push [QUICK] for transmission. w Push D-pad( ) to select “Direct Input,” and then push D-pad(Ent). •... -
Page 366: D Setting Dtmf Transfer Speed
Previous view OTHER FUNCTIONS ■ Using the DTMF memory (Continued) D Setting DTMF transfer speed The DTMF transfer speed can be selected. Example: Set the DTMF transfer speed to 300 milli- seconds. q Push [MENU] to select the MENU list screen. w Push D-pad( ) to select the root item (“DTMF/T- ... -
Page 367: Tone Squelch Operation
Previous view OTHER FUNCTIONS ■ Tone squelch operation The tone squelch opens only when you receive a signal containing a matching subaudible tone in the FM or FM Select FM or narrow mode. You can silently wait for calls from others FM-N mode. - Page 368 Previous view OTHER FUNCTIONS ■ Tone squelch operation D Tone squelch frequency setting and operation (Continued) Continued from step u on the previous page. i Push [MENU] to exit the MENU screen. o Push [QUICK] !0 Push D-pad() to select “TONE,” and then push D- pad(Ent).
-
Page 369: Dtcs Squelch Operation
Previous view OTHER FUNCTIONS ■ DTCS squelch operation The tone squelch opens only when you receive a sig- nal containing a matching DTCS code in the FM or FM narrow mode. You can silently wait for calls from others using the same tone. Select FM or FM-N mode. - Page 370 Previous view OTHER FUNCTIONS ■ Tone squelch operation D DTCS code setting and operation (Continued) Continued from step u on the previous page. i Push [MENU] to exit the MENU screen. o Push [QUICK] !0 Push D-pad() to select “TONE,” and then push D- pad(Ent).
-
Page 371: Cloning Function
Previous view OTHER FUNCTIONS ■ Cloning function The transceiver has data cloning capability. This func- TIP: You can convert the “icf” file between the cur- tion is useful when you want to copy all of the pro- rent model format (ID-51PLUS2) and the old model grammed contents from one transceiver to another. - Page 372 Previous view OTHER FUNCTIONS ■ Cloning function D Transceiver-to-Transceiver cloning using a microSD card (Continued) y Push D-pad(Ent) to set the file name. D-pad (Ent) The confirmation screen “Save file?” appears. u Push D-pad() to select “YES,” and then push D- pad(Ent) to save.
- Page 373 Previous view OTHER FUNCTIONS ■ Cloning function D Transceiver-to-Transceiver cloning using a microSD card (Continued) 3. Loads the setting data into the sub transceiver. !2 Push [MENU] !3 Push D-pad( ) to select the root item (“SD card”), and then push D-pad(Ent). D-pad (Ent) !4 Push D-pad(...
-
Page 374: D Cloning From A Pc Using A Microsd Card
(contained in the CD) and the optional data communi- cation cable. See the CS-51PLUS2 instruction manual contained in the CD and the data communication cable’s instruction manual (downloaded from the Icom WEB site; http://www. NOTE: When using the optional data communica- icom.co.jp/world/). tion cable •... -
Page 375: D Transceiver-To-Transceiver Cloning Using A Cable
Previous view OTHER FUNCTIONS ■ Cloning function (Continued) D Transceiver-to-Transceiver cloning using a cable • Connections Connects two transceivers (master and sub transceiv- Master transceiver Sub transceiver er) using a stereo audio cable (purchase separately). (sends the cloning data) (receives the cloning data) ″), purchase Use the stereo audio cable (3.5 (d) mm;... -
Page 376: Ci-V Information
RS-232C port. CT-17 The Icom Communications Interface-V (CI-V) controls the transceiver. Up to 4 Icom CI-V transceivers or receivers can be con- nected to the PC. 2-conductor 3.5(d) mm plug must be used. See the CT-17 instruction manual for details of remotely 3-conductor 3.5(d) mm... -
Page 377: D Command Table
Previous view OTHER FUNCTIONS ■ CI-V information (Continued) D Command table Cmd. Sub Data Cmd. Sub Data Description Description cmd. cmd. see p. 17-24 Send operating frequency for transceive see p. 17-24 Send/read Repeater tone frequency see p. 17-24 Send operating mode for transceive see p. -
Page 378: Squelch Level Setting
Previous view OTHER FUNCTIONS ■ CI-V information D Command table (Continued) • Audio output level setting Cmd. Sub Data Description cmd. Command: 1401 23 00 see p. 17-28 Read the position VOL0 VOL1 VOL2 VOL3 VOL4 Send/read the internal GPS OFF 0000 ~ 0005 0006 ~ 0012 0013 ~ 0018... - Page 379 0 0 X X X X Previous view OTHER FUNCTIONS ■ CI-V information (Continued) • DTCS code and polarity setting • Character’s code of the call sign Command : 1B 02 Character ASCII code 0 ~ 9 30 ~ 39 A ~ Z 41 ~ 5A X X 0 X X X...
- Page 380 Previous view OTHER FUNCTIONS ■ CI-V information (Continued) • DV RX call sign setting • GPS/D-PRS data Command : 20 0001, 20 0002 Command: 20 0301, 20 0302 q Header flag data (First byte) Data Description Data number and description bit7 (0: Fixed) —...
- Page 381 X X X X X X X X X X Data number Variable length Previous view OTHER FUNCTIONS X X X X X X X X X X X X X X GPS MANUAL DATA X X X X X X X X X X X X ■...
- Page 382 X X X X X X X X X X X X X X Previous view GPS/D-PRS MSG MY POSITION DATA X X X X X X X X OTHER FUNCTIONS q, w Variable length X X X X X X X X X X X X X X ■...
- Page 383 Previous view Section OPTIONS ■ Option list ................. 18-2 ■ Optional HM-75LS .. 18-4 remote control speaker microphone D Remote control function setting ........18-4 ■ VOX function ..............18-5 D Optional unit connection ..........18-5 D Selecting the headset type ........... 18-5 D Turning the VOX function ON or OFF ......
-
Page 384: Option List
Previous view OPTIONS ■ Option list • HM-186LS • HM-75LS • HM-183LS speaker microphone remote control speaker microphone For operation while con- For operation while conveniently hanging the trans- speaker microphone veniently hanging the Allows you to remotely ceiver from your belt, and so on. transceiver from your select operating chan- Allows you to operate in wet environments. - Page 385 The OPC-2350LU is required. • RS-MS3W remote control software Free download software. Allows using the DV Gateway function. See “About the DV Gateway function” on the Icom WEB site, http://www.icom.co.jp/world/ for details. The OPC-2350LU is required. • RS-MS3A remote control software Free download software.
-
Page 386: Optional Hm-75Ls Remote Control Speaker Microphone
Previous view OPTIONS ■ Optional HM-75LS remote control speaker microphone The optional HM-75LS allows you to remotely select Microphone Transmit LED operating frequencies, memory channels, and other PTT switch functions. The function assignments for keys can be changed in the MENU screen for simple remote control operation. Speaker (p. -
Page 387: D Optional Unit Connection
Previous view OPTIONS ■ VOX function The transceiver has a VOX function, which allows hands-free operation. An optional HS-94, HS-95 or HS-97 headset and the OPC-2006LS plug adapter cable are required. • The VOX (voice operated transmission) function starts trans- mission when you speak into the microphone, without need- ing to push [PTT]. -
Page 388: D Turning The Vox Function On Or Off
Previous view OPTIONS ■ VOX function (Continued) D Turning the VOX function ON or OFF q Push [MENU] w Push D-pad() to select the root item (“Function”), and then push D-pad(Ent) to go to the next screen. D-pad (Ent) (MENU > Function > VOX > VOX) e Refer to the menu sequence shown directly above and push D-pad() to select, and then D-pad(Ent) to enter, one or more times until the last screen is... -
Page 389: D Vox Level Setting
Previous view OPTIONS ■ VOX function (Continued) D VOX Level setting NOTE: Set the external microphone gain before set- ting the VOX gain in the MENU screen. We recom- mend you set the microphone gain level to 3. (MENU > Function > MIC Gain (External)) q Push [MENU] w Push D-pad() to select the root item (“Function”), and then push D-pad(Ent) to go to the next screen. -
Page 390: D Vox-Related Settings
Previous view OPTIONS ■ VOX function (Continued) D VOX-related settings The VOX Delay and the VOX time-out timer can be set in the MENU screen. • VOX delay Sets the VOX delay to between 0.5 and 3.0 seconds (in 0.5 seconds steps). The VOX delay is the amount of time the transmitter stays ON after you stop speaking. -
Page 391: Using The Rs-Ms1A
Previous view OPTIONS ■ Using the RS-MS1A The RS-MS1A is a freeware application for Android ™ NOTE: Before starting, be sure to set the following devices. items in the MENU screen: With the RS-MS1A, you can use the extended D-STAR •... -
Page 392: Specifications
Previous view Section SPECIFICATIONS ■ Transceiver ............... 19-2 D General ................. 19-2 D Transmitter ..............19-2 D Receiver ............... 19-3 ■ BC-202 ..........19-3 desktop charger 19-1... - Page 393 ±2.5 ppm (–20°C ~ +60°C, –4°F ~ +140°F) • Power source : 10 ~16 V DC for external DC pow- er, or specified Icom’s battery pack • Digital transmission speed: 4.8 kbps • Voice coding speed: 2.4 kbps • Current drain...
- Page 394 ■ Transceiver (Continued) desktop charger D Receiver • Power source requirement: 12 ~ 16 V DC or the specified Icom power adapter (BC-123S) • Receive system: Double-conversion • Charging temperature range: 0˚C ~ +40˚C, +32˚F ~ +104˚F superheterodyne • Weight: Approximately 104 g, 3.7 oz...
-
Page 395: Troubleshooting
The following chart is designed to help you correct problems which are not equipment malfunctions. If you are unable to locate the cause of a problem or solve it through the use of this chart, contact your nearest Icom Dealer or Service Center. - Page 396 Previous view TROUBLESHOOTING D While operating D-STAR (Continued) PROBLEM POSSIBLE CAUSE SOLUTION REF. The simplex operation can- • A call sign is programmed in “CALL • Delete the Call sign in “CALL SIGN” p. 9-28 not be made using the DR SIGN”...
- Page 397 Previous view TROUBLESHOOTING D Others PROBLEM POSSIBLE CAUSE SOLUTION REF. Transceiver does not turn • The battery is exhausted. • Charge the battery pack, or replace the pp. 4-3, 4-4 batteries. • The battery polarity is reversed. • Check the battery polarity in the case. p.
- Page 398 Previous view TROUBLESHOOTING D Others (Continued) PROBLEM POSSIBLE CAUSE SOLUTION REF. The SUB band audio signal • The combination of operating band and • Change the settings. p. 5-4 is muted. mode is incorrect. A distorted noise is heard • The earphone mode is OFF. •...
- Page 399 Previous view INDEX Listening while monitoring two ham bands …… 6-3 Rearranging the display order ………………… 6-14 Active band ……………………………………… 16-76 Searching for a BC Radio signal ………………… 6-5 Alarm Area (Group) ……………………………… 16-39 Selecting the AM/FM radio mode ……………… 6-5 Alarm Area (RX/Memory) ………………………...
- Page 400 Previous view INDEX Cloning Repeater List …………………………… 9-23, 16-56 Clone Master Mode …………………………… 16-97 About the Repeater List default values …… 9-47 Clone Mode ……………………………………… 16-97 Deleting a Repeater List ……………………… 9-36 Cloning from a PC Editing a Repeater List ……………………… 9-35 Using a microSD card …………………………...
-
Page 401: Function Display
Previous view INDEX DTCS DTCS Code ……………………………………… 16-17 DTCS code setting and operation …………… 17-15 Add a GPS memory …………………………… 10-13 DTCS Polarity …………………………………… 16-17 Alarm Area (Group) …………………………… 16-39 DTCS squelch operation ……………………… 17-15 Alarm Area (RX/Memory) ……………………… 16-40 DTMF Caller’s TX format ………………………………... -
Page 402: Hand Strap
Previous view INDEX GPS (Continued) GPS operation ………………………………… 10-2 MAIN band selection ……………………………… 5-3 GPS Out ………………………………………… 16-33 Manual Position ………………………………… 16-32 GPS Position …………………………………… 16-34 Memory bank GPS record interval …………………………… 10-35 Memory bank scan …………………… 13-2, 13-10 GPS record sentence ………………………… 10-35 Selecting a Memory bank ………………………... - Page 403 Previous view INDEX MIC Gain (External) ……………………………… 16-76 MIC Gain (Internal) ……………………………… 16-76 Partial Reset ……………………………………… 16-98 MIC Gain setting ………………………………… 11-19 Pause microSD card Rewind the file ………………………………… 11-5 About the microSD card ………………………… 2-2 Fast forward the file …………………………… 11-5 About the microSD card’s folder ………………...
- Page 404 Previous view INDEX Rainfall …………………………………………… 16-86 Save Setting ……………………………………… 16-95 REC Mode ………………………………………… 16-23 Saving your own or received position data …… 10-11 Record Interval …………………………………… 16-41 Scan Record Sentence ………………………………… 16-41 About the scan function ……………………… 13-2 <<REC Start>> …………………………………… 16-22 Clearing the skip setting ………………………...
- Page 405 Previous view INDEX Specifications Selecting a tuning step …………………………… 5-7 Transceiver ……………………………………… 19-2 Tuning step for a VFO scan …………………… 13-3 General ………………………………………… 19-2 TX Bass …………………………………………… 16-60 Receiver ……………………………………… 19-3 TX Call Sign ……………………………………… 16-83 Transmitter …………………………………… 19-2 TX format BC-202 ……………………...
- Page 406 Previous view INDEX Voice memory (Continued) Pause at the beginning of the previously file (Fast forward the file) …………………………… 11-5 Pause while playing …………………………… 11-5 Playing back the recorded audio ……… 11-4, 11-17 Playing back the voice memory data on a PC 11-23 Playing the next file ……………………………...
-
Page 407: Index For Menu Items
Previous view INDEX FOR MENU ITEMS Active Band ……………………………………………………………………………………………… [Function>] 16-76 <<Access Point Mode>> ………………………………………………………………………………[DV Gateway>] 16-94 Alarm Area (Group) …………………………………………………………………………… [GPS>GPS Alarm>] 16-39 Alarm Area (RX/Memory) …………………………………………………………………… [GPS>GPS Alarm>] 16-40 Alarm Select …………………………………………………………………………………… [GPS>GPS Alarm>] 16-39 All Reset……………………………………………………………………………………………… [Others>Reset>] 16-99 Alphabet ……………………………………………………………………………………………………... - Page 408 Previous view INDEX FOR MENU ITEMS Date ………………………………………………………………………………… [QSO/RX Log>CSV Format>] 16-71 Date ……………………………………………………………………… [SD Card>Import/Export/CSV Format>] 16-95 Data Extension …………………………………………………………… [GPS>GPS TX Mode>D-PRS (DV-A)] 16-48 Data Speed ……………………………………………………………………………………………… [Function>] 16-76 Date/Time ………………………………………………………………………………………………… [Time Set>] 16-92 DIAL SPEECH …………………………………………………………………………………………… [SPEECH>] 16-66 Dial Speed-UP ……………………………………………………………………………………………...
- Page 409 Previous view INDEX FOR MENU ITEMS GPS …………………………………………………………………………………………………………… [Root] 16-32 GPS Alarm……………………………………………………………………………………………………… [GPS>] 16-39 GPS Auto TX…………………………………………………………………………………………………… [GPS>] 16-50 GPS Data Speed ………………………………………………………………………… [DV Set>DV Fast Data>] 16-62 GPS Indicator …………………………………………………………………………………… [GPS>GPS Set>] 16-33 GPS Information ……………………………………………………………………………………………… [GPS>] 16-34 GPS Logger …………………………………………………………………………………………………… [GPS>] 16-41 GPS Logger ……………………………………………………………………………………...
- Page 410 Previous view INDEX FOR MENU ITEMS <<New File>> …………………………………………………………………………… [SD Card>Save Setting>] 16-95 NMEA (DV-G) ……………………………………………………………………………… [GPS>GPS TX Mode>] 16-49 Offset Freq……………………………………………………………………………………………… [DUP/TONE>] 16-16 Opening Message ………………………………………………………………………………………… [Display>] 16-84 Others…………………………………………………………………………………………………………… [Root] 16-97 Partial Reset ………………………………………………………………………………………… [Others>Reset>] 16-98 Pause Timer …………………………………………………………………………………………………… [Scan>] 16-18 Play Files …………………………………………………………………………...
- Page 411 Previous view INDEX FOR MENU ITEMS RX Call Sign ………………………………………………………………………………………………… [Display>] 16-81 RX Call Sign SPEECH ………………………………………………………………………………… [SPEECH>] 16-66 RX Call Sign Write ………………………………………………………………………………………… [DV Set>] 16-63 RX History ……………………………………………………………………………………………………… [Root] 16-53 RX History Log ……………………………………………………………………………………… [QSO/RX Log>] 16-70 RX Message ………………………………………………………………………………………………… [Display>] 16-82 RX REC Condition ………………………………………………...
- Page 412 Previous view INDEX FOR MENU ITEMS Unmount ………………………………………………………………………………………………… [SD Card>] 16-96 Unproto Address ………………………………………………………… [GPS>GPS TX Mode>D-PRS (DV-A)] 16-43 UTC Offset………………………………………………………………………………………………… [Time Set>] 16-93 Version ……………………………………………………………………………………… [Others>Information>] 16-97 Voice Memo …………………………………………………………………………………………………… [Root] 16-22 Voice Recorder ……………………………………………………………………………………… [Voice Memo>] 16-24 Voice TX ……………………………………………………………………………………………………… [Root] 16-28 Voltage ………………………………………………………………………………………...
- Page 413 A-7331-3EX 1-1-32 Kamiminami, Hirano-ku, Osaka 547-0003, Japan © 2016 Icom Inc.