Sign In
Upload
Manuals
Brands
RTS Manuals
Intercom System
KP-32
RTS KP-32 Intercom Key Panel Manuals
Manuals and User Guides for RTS KP-32 Intercom Key Panel. We have
6
RTS KP-32 Intercom Key Panel manuals available for free PDF download: User Instructions, User Manual, System Installation Manual, Installation Manual
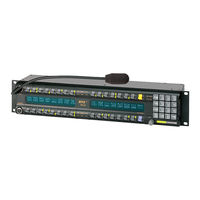
RTS KP-32 User Instructions (120 pages)
Brand:
RTS
| Category:
Intercom System
| Size: 2 MB
Table of Contents
Important Safety Instructions
3
Table of Contents
5
Introduction
15
Description
15
Features
15
Options
16
Connector Module
16
CSI-100 Coaxial System Interface Module
17
EKP-32 Expansion Keypanel
17
LCP-32/16 Level Control Panels
18
Installation
19
Rack Mount Considerations
19
Option DIP Switch Settings
20
Switch 1: Latch Enable/Disable
20
Switch 2: Key Gain Enable / Disable
20
Switch 3: Screen Saver Enable / Disable
20
Switch 4: Call Flash Timeout
20
Switch 5: Footswitch Enable / Disable
21
Switch 6: Network Mode Selection
21
Switch 7: Test/Debug
21
Switch 8: Test/Debug
21
Address Switch Setting
22
General Information
22
Address Setting for Zeus
22
Address Setting for ADAM CS
22
ADAM CS with RJ12 or DB-9 Back Panel
22
ADAM CS with 50-Pin Telco Back Panel
24
Address Setting for ADAM
24
Connections
25
EXP and LCP Connectors
25
Frame Connector
25
Power Supply Connector
26
Headset Connector
26
Headset Microphone Gain Adjustment
26
Panel Microphone Connector
26
Panel Microphone Gain Adjustment
26
Basic Operation
27
Screen Saver Operation
27
Selecting Headset or Speaker
27
Listen Volume Adjustments
27
Intercom Keys and Displays
28
Alphanumeric Display Indications for Intercom Keys
28
Talk LED Indications
28
Continuous Green
28
Continuous Red Talk LED & Flashing Display Alpha (In-Use)
28
Flashing Red Talk LED & Flashing Display Alternating Pattern of Alpha & (-**-) (Busy)
29
Flashing Green Talk LED & Display Alpha (on Time Equal to off Time)
29
Winking Green Talk LED (on Time Less than off Time)
29
Listen LED Indication
29
Intercom Key Operation
29
Basic Intercom Key Operation
29
Operation of Intercom Keys with Auto Functions
30
Talk + Auto Follow
30
Talk + Auto Listen
30
Talk + Auto Mute
30
Talk + Auto Reciprocal
30
Talk + Auto Table
30
All Call Key
30
Talk + DIM
30
Operation of Intercom Keys with Options
30
Group Option Keys
30
Operation of Intercom Talk Keys with the Speaker DIM Setting
31
Operation of Intercom Keys Assigned to TIF Ports
31
Muting the Microphone
31
Call Waiting Operation
31
Telephone Operation
33
Receiving a Phone Call
33
Dialing and Hanging up Using KP9X Keypad Sequences
33
KP9X Keypad Hang-Up Sequence
33
KP9X Manual Dial Sequence
34
KP9X Redial Sequence
34
KP9X Autodial Sequences
34
Storing an Autodial Number in the TIF-951
35
Storing an Autodial Number in the KP-32
35
Dialing an Autodial Number
35
Dialing and Hanging up Using the KP-32 Dialing Menu
36
Manual Dialing
36
Redial
36
Autodial
37
Kp9X Series Keypad Programming
39
Keypad Programming, Display Requests
39
Display Requests Using Keypad Sequences
39
Display Panel ID
39
Func Display 1
39
Display Level 2 Talk Key Assignments
39
Func Display 2
39
Display Listen Key Assignments
39
Func Display 3
39
Display Setup Page Assignments
40
Func Display E-Pnl
40
Test Keys and Displays
40
Func Display 0
40
Tone Generator Activation (FUNC-DISPLAY-7)
40
Func Display 7
40
Display Requests Using Scrolling
41
Keypad Programming, Assigning Setup Pages
42
Keypad Programming, Assigning Intercom Keys
42
General
42
Assigning Keys Using Keypad Numeric Entry
42
General Procedure
42
Programming Key Assignments Using Copy
43
Copying a Call from the Call Waiting Window to a Key
43
Copying One Key Assignment to Another Key
43
Programming Key Assignments Using Alpha Scrolling
44
Clearing a Key Assignment
45
Method 1: Clearing the Call Waiting Window and Copying It to a Key
45
Method 2: Copying a Blank Key Assignment to the Key You Want to Clear
45
Menu System
47
Menu System, Menu Access
47
Menu System, Display Menu
48
Display Menu, Asgn Type
48
Display Menu, Chans on
48
Display Menu, Key Groups
48
Display Menu, Key List
48
Display Menu, Level 2
48
Display Menu, Listen
48
Display Menu, Matrix (Trunked Systems Only)
48
Display Menu, Panel ID
49
Display Menu, Version
49
Menu System, Key Assign Menu
49
General Procedure to Use the Key Assign Menu
49
Key Assign Menu, Matrix
51
Key Assign Menu, Pt-To-Pt
51
Key Assign Menu, Party Line
51
Key Assign Menu, IFB
51
Key Assign Menu, Spcl List
51
Key Assign Menu, Sys Relay
51
Key Assign Menu, Camera ISO
51
Key Assign Menu, UPL Resrc
51
Key Assign Menu, IFSL
52
Key Assign Menu, Auto Func
52
Key Assign Menu, Key Gain
52
Key Assign Menu, Reset Vols
53
Key Assign Menu, Setup Page
53
Key Option Menu
54
Key Option Menu, Auto Dial
54
Key Option Menu, Chime
54
Removing the Chime Option from a Key
54
Key Option Menu, Key Groups
54
Clearing a Key Group
55
Key Option Menu, solo
55
RVON Conn. Menu
56
Service Menu
56
Service Menu, Aux Inputs (GPI Option Only)
56
Service Menu, Intercom
56
Service Menu, Baud Rate
56
Service Menu, Caller Vol
57
Service Menu, DIM
57
Service Menu, Disply DIM
57
Service Menu, DSP Func (GPI Option Only)
58
Filtering
58
Gating
58
Metering
59
Mixing
60
Service Menu, Hdst Sel
60
Service Menu, LCP-32 (GPI Option Only)
61
Service Menu, Local GPIO (GPI Option Only)
61
Assigning an Input to Activate a Key
61
Assigning an Input to Activate a Key Group
62
Removing an Input Assignment
62
Adding or Removing a GPI Output Key Assignment
62
Service Menu, Matrix out
63
Service Menu, MIC Select
63
Service Menu, Min Volume
63
Service Menu, Mod Assign
64
Service Menu, Output Level
64
Service Menu, Preamp out (GPI Option Only)
65
Service Menu, Reset Cfg
65
Service Menu, RVON Setup (RVON Option Only)
65
Service Menu, Save Cfg
65
Service Menu, Scr Saver
66
Service Menu, Sidetone
66
Service Menu, Snoop Tally
66
Service Menu, Test Panel
66
Service Menu, Tone Gen
66
Specifications
67
Microphone Preamplifier
67
Tone Generator
67
Headphone Amplifier
67
Speaker Amplifier and Speaker
67
Intercom Input/Output
68
External Line Input: (Program Input)
68
General
68
AC Supply
68
Environmental
68
Approvals
68
Connectors (Other Connector Options Available)
68
Panel Microphone Connector
68
Headset Connector
68
Power Input Connector
69
Intercom Connectors: Parallel-Wired DE9S and RJ12 Connectors
69
Expansion Connector
69
LCP Connector
69
GPI Module Connectors (Optional)
70
Aux 1 in (Auxiliary Program Input 1)
70
Aux 2 in (Auxiliary Program Input 2)
70
Relay 1 & 2 out
70
Relay 3 & 4 out
71
Opto 1-4 in (Opto-Isolated Control Inputs)
71
OC 1 & 2 out (J2)
72
Headset (External Headset Connector)
72
Foot Switch/Speaker
72
MIC in (J7) Unbalanced Panel Microphone Input
73
MIC out (J8) Balanced Microphone Output
73
Kp9X Keypad Sequence Quick Reference
75
KP9X Display Sequences
75
KP9X Setup Page Assignment
76
Key Assignments Using Keypad Numeric Entry
76
KP9X Phone Operation
77
KP9X Hang-Up Sequence
77
KP9X Dial Sequence
77
KP9X Redial Sequence
77
KP9X Autodial Sequences
77
Storing an Autodial Number in the TIF
77
Dialing an Autodial Number Stored in the TIF
78
KP-32 Menu System Quick Reference
79
Menu Access
79
Menu List
79
Mode 2 Operation
81
Section 2
81
Switch 4: Call Flash Timeout
81
Switch 5: Footswitch Enable / Disable
81
Section 3
81
LED Indications for Intercom Keys
81
Talk LED Indications
81
Continuous Red
81
Flashing Display Alpha (In-Use)
81
Solid Red Talk LED & Flashing Display Alternating Pattern of Alpha & (-**-) (Busy)
82
Flashing Display Alpha (on Time Equal to off Time)
82
Amber Talk LED
82
Glossary
83
All Call
83
Alpha
83
Auto Follow (AF)
83
Auto Functions
83
Auto Listen (AL)
83
Auto Mute (AM)
83
Auto Reciprocal (AR)
84
Auto Table (AT)
84
Crosspoint
84
Destination
84
DIM
84
Gpio
85
Ifb
85
ISO (Camera ISO)
85
Matrix
85
Party Line (PL)
86
Port
86
Relay
87
Special List
87
Stacked Key
87
Talk Level 1
87
Talk Level 2
87
Trunking
87
Rvon-1
89
General Description of the RVON-1 Voice over Network Card
89
Features
89
Specifications
90
Default Addresses for the RVON Product Line
91
Dip Switches
91
Firmware Compatibility Requirements for the RVON-1 Card
92
Flash Chip Replacement
92
Installation of the RVON-1 Card
93
RVON-1 Relay
94
Addresses and the RVON-1
95
Configure the RVON-1 from the KP-32
96
Top Level Menu, Service, RVON Setup
96
Set the IP Address from the Service Level Menu
96
Top Level Menu, RVON Conn
97
Select an RVON Connection from the Top Level Menu
97
Configure the RVON-1 from the KP-812
98
Top Level Menu, Service, RVON Setup
98
Set the IP Address from the Service Level Menu
98
Top Level Menu, RVON Conn
99
Select an RVON Connection from the Top Level Menu
99
Configure the RVON-8 Using Azedit to Contact the RVON-1
100
Download RVON-1 Firmware through Azedit
101
Basic Network Configuration
103
LAN Vs. WAN
103
Local Area Network
103
Wide Area Network
104
Accessing the Wide Area Network (WAN)
105
Network Address Translation (NAT)
105
Ports
105
IP Addresses
107
Ping a Computer
108
Possible Pitfall with Routers, Gateways, and Switches
108
RVON Configuration
109
Network Terminology
111
RVON Serial and Telnet Commands
115
Setup
115
How to Configure the RVON-1 Using Telnet
116
Advertisement
RTS KP-32 User Manual (112 pages)
KEYPANEL; EXPANSION PANEL; LEVEL CONTROL PANEL
Brand:
RTS
| Category:
Intercom System
| Size: 8 MB
Table of Contents
T Cable of
5
Copyright Notice
2
Customer Support
2
Proprietary Notice
2
Unpacking and Inspection
2
Warranty Information
2
Return Shipping Instructions
3
Table of Contents
5
Introduction
9
Description
9
Features
9
Options
10
Connector Module
10
CSI-100 Coaxial System Interface Module
10
EKP-32 Expansion Keypanel
11
LCP-32/16 Level Control Panels
11
Installation
13
Option DIP Switch Settings
13
Switch 1: Latch Enable/Disable
13
Switch 2: Key Gain Enable / Disable
13
Switch 3: Screen Saver Enable / Disable
13
Switch 4: Call Flash Timeout
14
Switch 5: Footswitch Enable / Disable
14
Switch 6: Network Mode Selection
14
Switch 7: Test/Debug
14
Switch 8: Test/Debug
14
Address Switch Setting
14
General Information
14
ADAM CS with RJ12 or DB-9 Back Panel
15
Address Setting for ADAM CS
15
Address Setting for Zeus
15
ADAM CS with 50-Pin Telco Back Panel
16
Address Setting for ADAM
17
Connections
17
EXP. and LCP Connectors
17
Frame Connector
17
Power Supply Connector
18
Headset Connector
18
Headset Microphone Gain Adjustment
18
Panel Microphone Connector
18
Panel Microphone Gain Adjustment
19
Basic Operation
21
Screen Saver Operation
21
Selecting Headset or Speaker
21
Listen Volume Adjustments
21
Intercom Keys and Displays
22
Alphanumeric Display Indications for Intercom Keys
22
Continuous Green
22
Continuous Red Talk LED & Flashing Display Alpha ("In-Use")
22
Flashing Red Talk LED & Flashing Display Alternating Pattern of Alpha & (-**-) ("Busy")
22
LED Indications for Intercom Keys
22
Talk LED Indications
22
Basic Intercom Key Operation
23
Flashing Green Talk LED & Display Alpha (on Time Equal to off Time)
23
Intercom Key Operation
23
Listen LED Indication
23
Operation of Intercom Keys with Auto Functions
23
Talk + Auto Follow
23
Talk + Auto Listen
23
Talk + Auto Mute
23
Winking Green Talk LED (on Time Less than off Time)
23
All Call Key
24
Group Option Keys
24
Operation of Intercom Keys Assigned to TIF Ports
24
Operation of Intercom Keys with Options
24
Operation of Intercom Talk Keys with the Speaker DIM Setting
24
Solo Key
24
Talk + Auto Reciprocal
24
Talk + Auto Table
24
Talk + DIM
24
Muting the Microphone
25
Call Waiting Operation
25
Telephone Operation
27
Receiving a Phone Call
27
Dialing and Hanging up Using Kp9X Keypad Sequences
27
KP9X Keypad Hang-Up Sequence
27
KP9X Manual Dial Sequence
27
KP9X Autodial Sequences
28
KP9X Redial Sequence
28
Storing an Autodial Number in the TIF-951
28
Dialing an Autodial Number Stored in the TIF-951
29
Dialing and Hanging up Using the Kp-32 Dialing Menu
29
Manual Dialing
29
Redial
29
Autodial
30
KP9X Series Keypad Programming
31
Keypad Programming, Display Requests
31
Display Level 2 Talk Key Assignments
31
Display Listen Key Assignments
31
Display Panel ID
31
Display Requests Using Keypad Sequences
31
Display Setup Page Assignments
32
Test Keys and Displays
32
Display Requests Using Scrolling
33
Tone Generator Activation (FUNC-DISPLAY-7)
33
Keypad Programming, Assigning Setup Pages
33
Keypad Programming, Assigning Intercom Keys
34
Assigning Keys Using Keypad Numeric Entry
34
General
34
General Procedure
34
Copying a Call from the Call Waiting Window to a Key
35
Copying One Key Assignment to Another Key
35
Programming Key Assignments Using Copy
35
Programming Key Assignments Using Alpha Scrolling
36
Clearing a Key Assignment
37
Method 1: Clearing the Call Waiting Window and Copying It to a Key
37
Method 2: Copying a Blank Key Assignment to the Key that You Want to Clear
37
Menu System
39
Menu System, Menu Access
39
Menu System, Display Menu
39
Display Menu, Asgn Type
39
Display Menu, Chans on
40
Display Menu, Key Groups
40
Display Menu, Key List
40
Display Menu, Level 2
40
Display Menu, Listen
40
Display Menu, Matrix
40
Display Menu, Panel ID
40
Display Menu, Version
40
Menu System, Key Assign Menu
41
General Procedure to Use the Key Assign Menu
41
Key Assign Menu, Matrix
42
Key Assign Menu, Pt-To-Pt
42
Key Assign Menu, Auto Func
43
Key Assign Menu, Camera ISO
43
Key Assign Menu, IFB
43
Key Assign Menu, Party Line
43
Key Assign Menu, Spcl List
43
Key Assign Menu, Sys Relay
43
Key Assign Menu, UPL Resrc
43
Key Assign Menu, Key Gain
44
Key Assign Menu, Reset Vols
44
Key Assign Menu, Setup Page
45
Key Option Menu
45
Key Option Menu, Auto Dial
45
Key Option Menu, Chime
45
Clearing a Key Group
46
Key Option Menu, Key Groups
46
Removing the Chime Option from a Key
46
Key Option Menu, solo
47
Removing the solo Key Option
47
Service Menu
47
Service Menu, aux Inputs
47
Service Menu, DIM
48
Service Menu, Disply DIM
48
Filtering
49
Gating
49
Service Menu, DSP Func
49
Metering
50
Mixing
50
Service Menu, Hdst Sel
51
Service Menu, LCP-32
51
Assigning an Input to Activate a Key
52
Assigning an Input to Activate a Key Group
52
Removing an Input Assignment
52
Service Menu, Local GPIO
52
Adding or Removing a GPI Output Key Assignment
53
Service Menu, Matrix out
53
Service Menu, MIC Select
53
Service Menu, Min Volume
54
Service Menu, Mod Assign
54
Service Menu, Output Level
55
Service Menu, Preamp out (GPI Option Only)
55
Service Menu, Reset Cfg
56
Service Menu, Save Cfg
56
Service Menu, Sidetone
56
Service Menu, Test Panel
56
Service Menu, Tone Gen
56
Kp9X Display Sequences
57
Kp9X Setup Page Assignment
57
Specifications
61
Microphone Preamplifier
61
Tone Generator
61
Headphone Amplifier
61
Speaker Amplifier and Speaker
61
Intercom Input/Output
62
External Line Input: (Program Input)
62
General
62
AC Supply
62
Approvals:
62
Environmental
62
Headset Connector
62
Panel Microphone Connector
62
Expansion Connector
63
Intercom Connectors: Parallel-Wired DE9S and RJ12 Connectors
63
LCP Connector
63
Power Input Connector
63
GPI Module Conntectors (Optional)
64
Aux 1 in (Auxiliary Program Input 1)
64
Aux 2 in (Auxiliary Program Input 2)
64
Headset (External Headset Connector)
65
Opto 1-4 in (Opto-Isolated Control Inputs)
65
Foot Switch/Speaker
66
MIC in (J7) Unbalanced Panel Microphone Input
66
MIC out (J8) Balanced Microphone Output
66
Menu Access
67
Menu List
67
Mode 2 Operation
69
Section 2
69
Switch 4: Call Flash Timeout
69
Switch 5: Footswitch Enable / Disable
69
Section 3
69
Continuous Red
69
Flashing Display Alpha ("In-Use")
69
LED Indications for Intercom Keys
69
Talk LED Indications
69
Amber Talk LED
70
Flashing Display Alpha (on Time Equal to off Time)
70
Solid Red Talk LED & Flashing Display Alternating Pattern of Alpha & (-**-) ("Busy")
70
Glossary
71
Table of Contents
81
Features
83
General Description of the RVON-1 Voice over Network Card
83
Connections
84
Digital
84
Dip Switches
84
Specifications
84
Flash Chip Replacement
85
Addresses and the RVON-1
87
Installation of the RVON-1 Card (Cont.)
87
RVON-1 Relay
87
Configure the RVON-8 Using Azedit to Contact the RVON-1
92
Download RVON-1 Firmware through Azedit
93
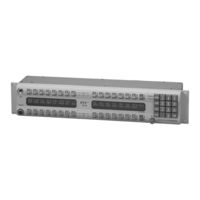
RTS KP-32 User Instructions (106 pages)
Digital Matrix Series Keypanel; Expansion panel; Level Control Panel
Brand:
RTS
| Category:
Intercom System
| Size: 4 MB
Table of Contents
Table of Contents
3
Introduction
7
Description
7
Features
7
Options
8
Connector Module
8
CSI-100 Coaxial System Interface Module
8
EKP-32 Expansion Keypanel
9
LCP-32/16 Level Control Panels
9
Installation
11
Option DIP Switch Settings
11
Switch 1: Latch Enable/Disable
11
Switch 2: Key Gain Enable / Disable
11
Switch 3: Screen Saver Enable / Disable
11
Switch 4: Call Flash Timeout
12
Switch 5: Footswitch Enable / Disable
12
Switch 6: Network Mode Selection
12
Switch 7: Test/Debug
12
Switch 8: Test/Debug
12
Address Switch Setting
12
General Information
12
Address Setting for Zeus
13
Address Setting for ADAM CS
13
ADAM CS with RJ12 or DB-9 Back Panel
13
ADAM CS with 50-Pin Telco Back Panel
14
Address Setting for ADAM
15
Connections
15
EXP. and LCP Connectors
15
Frame Connector
15
Power Supply Connector
16
Headset Connector
16
Headset Microphone Gain Adjustment
16
Panel Microphone Connector
16
Panel Microphone Gain Adjustment
17
Basic Operation
19
Screen Saver Operation
19
Selecting Headset or Speaker
19
Listen Volume Adjustments
19
Intercom Keys and Displays
20
Alphanumeric Display Indications for Intercom Keys
20
LED Indications for Intercom Keys
20
Continuous Green
20
Continuous Red Talk LED & Flashing Display Alpha ("In-Use")
20
Flashing Red Talk LED & Flashing Display Alternating Pattern of Alpha & (-**-) ("Busy")
20
Talk LED Indications
20
Flashing Green Talk LED & Display Alpha (on Time Equal to off Time)
21
Listen LED Indication
21
Winking Green Talk LED (on Time Less than off Time)
21
Intercom Key Operation
21
Basic Intercom Key Operation
21
Operation of Intercom Keys with Auto Functions
21
Talk + Auto Follow
21
Talk + Auto Listen
21
Talk + Auto Mute
21
All Call Key
22
Group Option Keys
22
Operation of Intercom Keys Assigned to TIF Ports
22
Operation of Intercom Keys with Options
22
Operation of Intercom Talk Keys with the Speaker DIM Setting
22
Solo Key
22
Talk + Auto Reciprocal
22
Talk + Auto Table
22
Talk + DIM
22
Muting the Microphone
23
Call Waiting Operation
23
Telephone Operation
25
Receiving a Phone Call
25
Dialing and Hanging up Using Kp9X Keypad Sequences
25
KP9X Keypad Hang-Up Sequence
25
KP9X Manual Dial Sequence
25
KP9X Redial Sequence
26
KP9X Autodial Sequences
26
Storing an Autodial Number in the TIF-951
26
Dialing an Autodial Number Stored in the TIF-951
27
Dialing and Hanging up Using the Kp-32 Dialing Menu
27
Manual Dialing
27
Redial
27
Autodial
28
KP9X Series Keypad Programming
29
Keypad Programming, Display Requests
29
Display Requests Using Keypad Sequences
29
Display Panel ID
29
Display Level 2 Talk Key Assignments
29
Display Listen Key Assignments
29
Display Setup Page Assignments
30
Test Keys and Displays
30
Tone Generator Activation (FUNC-DISPLAY-7)
31
Display Requests Using Scrolling
31
Keypad Programming, Assigning Setup Pages
31
Keypad Programming, Assigning Intercom Keys
32
General
32
Assigning Keys Using Keypad Numeric Entry
32
General Procedure
32
Programming Key Assignments Using Copy
33
Copying a Call from the Call Waiting Window to a Key
33
Copying One Key Assignment to Another Key
33
Programming Key Assignments Using Alpha Scrolling
34
Clearing a Key Assignment
35
Method 1: Clearing the Call Waiting Window and Copying It to a Key
35
Method 2: Copying a Blank Key Assignment to the Key that You Want to Clear
35
Menu System
37
Menu System, Menu Access
37
Menu System, Display Menu
37
Display Menu, Asgn Type
37
Display Menu, Chans on
38
Display Menu, Key Groups
38
Display Menu, Key List
38
Display Menu, Level 2
38
Display Menu, Listen
38
Display Menu, Matrix
38
Display Menu, Panel ID
38
Display Menu, Version
38
Menu System, Key Assign Menu
39
General Procedure to Use the Key Assign Menu
39
Key Assign Menu, Matrix
40
Key Assign Menu, Pt-To-Pt
40
Key Assign Menu, Party Line
41
Key Assign Menu, IFB
41
Key Assign Menu, Spcl List
41
Key Assign Menu, Sys Relay
41
Key Assign Menu, Camera ISO
41
Key Assign Menu, UPL Resrc
41
Key Assign Menu, Auto Func
41
Key Assign Menu, Key Gain
42
Key Assign Menu, Reset Vols
42
Key Assign Menu, Setup Page
43
Key Option Menu
43
Key Option Menu, Auto Dial
43
Key Option Menu, Chime
43
Removing the Chime Option from a Key
44
Key Option Menu, Key Groups
44
Clearing a Key Group
44
Key Option Menu, solo
45
Removing the solo Key Option
45
Service Menu
45
Service Menu, aux Inputs
45
Service Menu, Baud Rate
45
Caller Vol
46
Service Menu, DIM
46
Service Menu, Disply DIM
46
Service Menu, DSP Func
47
Filtering
47
Gating
47
Metering
48
Mixing
48
Service Menu, Hdst Sel
49
Service Menu, LCP-32
49
Service Menu, Local GPIO
50
Assigning an Input to Activate a Key
50
Assigning an Input to Activate a Key Group
50
Removing an Input Assignment
50
Adding or Removing a GPI Output Key Assignment
51
Service Menu, Matrix out
51
Service Menu, MIC Select
51
Service Menu, Min Volume
52
Service Menu, Mod Assign
52
Service Menu, Output Level
53
Service Menu, Preamp out (GPI Option Only)
53
Service Menu, Reset Cfg
54
Service Menu, Save Cfg
54
Service Menu, Sidetone
54
Service Menu, Test Panel
54
Service Menu, Tone Gen
54
KP9X Keypad Sequence Quick Reference
55
Kp9X Display Sequences
55
Kp9X Setup Page Assignment
55
Key Assignments Using Keypad Numeric Entry
56
Kp9X Phone Operation
56
KP9X Hang-Up Sequence
56
KP9X Dial Sequence
57
KP9X Redial Sequence
57
KP9X Autodial Sequences
57
Dialing an Autodial Number Stored in the TIF-951
57
Storing an Autodial Number in the TIF-951
57
Specifications
59
Microphone Preamplifier
59
Tone Generator
59
Headphone Amplifier
59
Speaker Amplifier and Speaker
59
Intercom Input/Output
60
External Line Input: (Program Input)
60
General
60
AC Supply
60
Environmental
60
Approvals
60
Connectors (Other Connector Options Available)
60
Panel Microphone Connector
60
Headset Connector
60
Power Input Connector
61
Intercom Connectors: Parallel-Wired DE9S and RJ12 Connectors
61
Expansion Connector
61
LCP Connector
61
GPI Module Conntectors (Optional)
62
Aux 1 in (Auxiliary Program Input 1)
62
Aux 2 in (Auxiliary Program Input 2)
62
Relay 1 & 2 out
62
Relay 3 & 4 out
62
Opto 1-4 in (Opto-Isolated Control Inputs)
63
OC 1 & 2 out (J2)
63
Headset (External Headset Connector)
63
Foot Switch/Speaker
64
MIC in (J7) Unbalanced Panel Microphone Input
64
MIC out (J8) Balanced Microphone Output
64
KP-32 Menu System Quick Reference
65
Menu Access
65
Menu List
65
Mode 2 Operation
67
Section 2
67
Switch 4: Call Flash Timeout
67
Switch 5: Footswitch Enable / Disable
67
Section 3
67
LED Indications for Intercom Keys
67
Continuous Red
67
Flashing Display Alpha ("In-Use")
67
Talk LED Indications
67
Amber Talk LED
68
Flashing Display Alpha (on Time Equal to off Time)
68
Solid Red Talk LED & Flashing Display Alternating Pattern of Alpha & (-**-) ("Busy")
68
Glossary
69
Dip Switches
79
Flash Chip Replacement
80
Basic Network Configuration
91
Rvon Configuration
97
Network Terminology
98
Rvon Serial and Telnet Commands
101
Advertisement
RTS KP-32 System Installation Manual (60 pages)
ADAM Advanced Digital Audio Matrix
Brand:
RTS
| Category:
Intercom System
| Size: 7 MB
Table of Contents
Table of Contents
3
Chapter 1 - Introduction
7
Unpacking the Components
7
Mounting the Central Matrix Components
7
ADAM Circuit Cards
7
Front Card Access
7
Card Removal and Installation
8
Unused Back Card Slots
8
Master Controller Card DIP Switches
8
Power Supply Removal and Installation
8
AC Power Connection
9
ADAM Frame Power-Up
9
Circuit Card Reset and Fail Indication
9
Alarm Operation
9
Chapter 2 - Intercom Port Connections
11
General Information
11
Logical Keypanel Numbers
11
General Procedure for Connecting Devices to the Intercom
12
KP-12 Installation Notes
12
Installation Notes
13
Addressing the KP-32
13
Program Source Notes
13
TIF Telephone Interface Installation Notes
13
Rear Panel DIP Switch (S201)
13
Password Required
13
Intercom Port Address
13
Connections
14
CDP-950 Camera Delegate Panel Installation Notes
14
CDP-950 General Description
14
CDP-950 Theory of Operation
14
Installing the CDP-950
15
Programming the CDP-950
15
KP-32 Addressing
19
Chapter 3 - Device Connections
25
Connections to the ADAM Frame
25
Configuration Computer Connection and Check
25
Program Assign Panel (PAP) Installation
25
General
25
Connecting a Single PAP
26
Connecting Additional Paps
26
Programming IFB Defaults to Initialize Paps
26
Checking PAP Operation
26
PAP-32 Program Assign Panel
27
Viewing the Program Source for an IFB
28
Viewing What Ifbs a Program Source Feeds
28
Assigning Source and IFB Keys
28
UIO-256 Input/Output Frame
29
Connecting a Single UIO-256 Frame
29
Connecting Additional UIO-256 Frames
29
Programming the UIO-256
29
Connecting to the SSA-324
30
General Description
30
Installation
30
Mechanical Installation
30
Electrical Installation
30
TB1 Four Wire Connections
31
J104 Power Input
31
J103 I/O
31
Front Panel Dyn. MIC Headset Connector
32
Motherboard Test Signal Jumper
32
Operation
32
Controls and Connections
32
Rear Panel
33
Operation Nulling
33
Press Test Switch
33
Level Setting
33
Duck Setting
33
Connecting to an SSA-424
34
General Description
34
4-Wire Audio Connections for ADAM, ADAM CS or Zeus
34
Audio Connections for Other 4-Wire Communications Systems
34
4-Wire Call Signal Connections
35
Call Signal Connections for ADAM, ADAM CS, and Zeus
35
Call Signal Connections for Other 4-Wire Communications Systems
35
4-Wire Call Send and Call Enable/Inhibit
35
4-Wire Call Receive
35
Chapter 4 -Drawings
37
ADAM-101 ADAM Intercom System XCP-40-RJ11 Interconnect Diagram
39
ADAM-102 ADAM Intercom System XCP-40-DB9 Interconnect Diagram
40
ADAM-103 ADAM Intercom System XCP-955 / Jack Fields / SCSI Interconnect Diagram
41
ADAM-104 ADAM Intercom System XCP-955 / Jack Fields / RJ Interconnect Diagram
42
ADAM-105 ADAM Intercom System XCP-955 / Jack Fields / SCSI Interconnect Diagram
43
ADAM-106 ADAM Intercom System XCP-955 / Jack Fields / RJ Interconnect Diagram
44
ADAM-107 ADAM Intercom System XCP-954-48 / Jack Fields / SCSI Interconnect Diagram
45
ADAM-108 ADAM Intercom System XCP-954-48 / Jack Fields / RJ Interconnect Diagram
46
ADAM-301 ADAM Intercom System Matrix Frame Layout - AIO-8
47
ADAM Intercom System Matrix Frame Layout - AIO-16
48
ADAM-801 ADAM Intercom System Audio Input / Output / Data 50 Pins SCSI-2 Cable
49
ADAM-802 ADAM Intercom System Audio Input / Output 25 Pairs Telco Cable
50
ADAM-803 ADAM Intercom System Audio Input / Output 25 Pairs to RJ-45 Cable
51
ADAM-804 ADAM Intercom Matrix RJ11 to 50 Pins Telco Translation Cable
52
ADAM-805 ADAM Intercom Matrix DB9 to 50 Pins Telco Translation Cable
53
ADAM-806 ADAM Intercom System Master Controller 68 Pins SCSI-2 Cable
54
ADAM-807 ADAM Intercom System Azedit to PC RS-232-C Cable
55
ADAM-808 ADAM Intercom System Matrix to Trunk Aster RS-485/ RS232C Cable
56
ADAM-809 ADAM Intercom System UIO-256 and PAP Cables
57
Intercom Station Cables
58
ADAM-811 ADAM Intercom System CDP-950 Cables
59
RTS KP-32 User Manual (34 pages)
Telex KP-32 IntercomSystem: User Manual
Brand:
RTS
| Category:
Intercom System
| Size: 2 MB
Table of Contents
Table of Contents
3
Chapter 1 Introduction
5
General Description of the RVON-1 Voice over Network Card
5
Features
5
Specifications
6
Dip Switches
7
Firmware Compatibility Requirements for the RVON-1 Card
7
Flash Chip Replacement
8
Chapter 2 Installation
9
Installation of the RVON-1 Card
9
RVON-1 Relay
11
Addresses and the RVON-1
11
Configure the RVON-1 from the KP-32
12
Set the IP Address from the Service Level Menu
12
Select an RVON Connection from the Top Level Menu
13
Configure the RVON-1 from the KP-812
14
Set the IP Address from the Service Level Menu
14
Select an RVON Connection from the Top Level Menu
15
Configure the RVON-8 Using Azedit to Contact the RVON-1
15
Chapter 3 Configuration
17
Download RVON-1 Firmware through Azedit
17
Appendix A
17
Basic Network Configuration
19
LAN (Local Area Network) Vs. WAN (Wide Area Network)
19
Local Area Network
19
Wide Area Network
20
Accessing the Wide Area Network (Wan)
21
Network Address Translation (Nat)
21
Ports
21
Ip Addresses
22
Ping a Computer
23
Possible Pitfall with Routers, Gateways, and Switches
24
RVON Configuration
25
Network Terminology
26
Telnet & Serial Port Programming
29
RVON Serial and Telnet Commands
29
Setup
29
How to Configure the RVON-1 Using Telnet
30
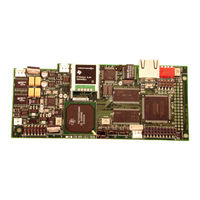
RTS KP-32 Installation Manual (2 pages)
Coaxial System Interface
Brand:
RTS
| Category:
Recording Equipment
| Size: 0 MB
Table of Contents
Installation Guide
1
Step 1
1
Step 2
1
Step 3
1
Step 4
1
Step 5
1
Step 6
1
Step 7
1
Step 8
1
Step 9
2
Step 10
2
Step 11
2
End of Procedure
2
Advertisement
Related Products
RTS CLD Color Keypanel Family KP 32 CLD
RTS KP 32 CLD
RTS KP97 SERIES
RTS KP-98
RTS KP95
RTS KP-98-7
RTS KP-812
RTS KP-632-24
RTS KP-832-20
RTS KP95-0
RTS Categories
Intercom System
Toy
Recording Equipment
Control Panel
Radio
More RTS Manuals
Login
Sign In
OR
Sign in with Facebook
Sign in with Google
Upload manual
Upload from disk
Upload from URL