Sign In
Upload
Manuals
Brands
Konica Minolta Manuals
Printer
Di1610
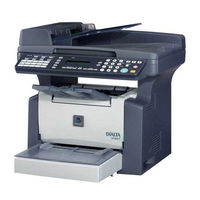
Konica Minolta Di1610 All-in-One Printer Manuals
Manuals and User Guides for Konica Minolta Di1610 All-in-One Printer. We have
3
Konica Minolta Di1610 All-in-One Printer manuals available for free PDF download: Service Manual, User Manual
Konica Minolta Di1610 Service Manual (292 pages)
Brand:
Konica Minolta
| Category:
Printer
| Size: 7 MB
Table of Contents
Index (General) General
12
Table of Contents
12
General
14
Specifications
15
Main Unit
15
GDI Printer Function
17
Precautions for Installation
18
Installation Site
18
Power Source
18
Power Requirements
19
To Ensure the Printer Is Used in an Optimum Condition
19
Operating Environment
19
Precautions for Use
19
Handling of the Consumables
20
Miscellaneous Precautions
20
Parts Identification
21
Mechanical/Electrical
22
Components Layout
23
Copy Process
24
Paper Path
26
Drive System
27
Operating Sequence
28
Print Start Sequence
28
When the Pre-Start Control Is Not Provided
28
When the Pre-Start Control Is Provided
29
Print End Sequence
29
IC (Imaging Cartridge) Section
30
Overview
30
PC Drum
32
Developing System
33
Detection of Toner Cartridge
34
Installation Detection
34
Interchangeability Detection
34
Toner Near Empty and Toner Empty Detection
34
Drum Charge
36
Overview
36
Ir Section
37
Image Data Processing
37
Exposure Components Section
38
Scanner Drive Mechanism
39
Scanner Motor Drive Control
39
Print Head (Ph
40
Construction
40
Laser Exposure Process
41
Laser Emission Timing
42
Laser Emission Area
43
Main Scanning Direction
43
Sub-Scanning Direction
43
10. Paper Take-Up Section
44
Paper Take-Up Mechanism
44
Double Feed Preventive Mechanism
45
Paper Empty Detection
45
Paper Take-Up Retry Function
45
11. Image Transfer
46
12. Fusing Unit
47
Temperature Control Mode
48
Temperature Control
48
Temperature Changes (Plain Paper Having a Length of 186 MM or more
48
Printing Temperature by Paper Type in Different Temperature Control Modes
49
Fusing Temperature Protect Control
50
13. Paper Exit
51
13-1.Paper Exit Mechanism
51
14. Miscellaneous
52
14-2.Original Cover Open/Close Detection Mechanism
53
Service Manual
55
Specifications
57
Mechanical/Electrical
58
Components Layout
59
Drive System
60
Electrical Parts Layout
61
Document Take-Up Mechanism
62
Document Separation Mechanism
63
Document Transport Mechanism
64
Document Transport/Exit Mechanism
64
Document Exit Mechanism
65
Document Feeder Raised/Lowered Position Detection Mechanism
66
Miscellaneous
66
Service Manual
68
Specifications
70
Mechanical/Electrical
71
Components Layout
72
Paper Take-Up Mechanism
73
Cassette Type Detection
74
Paper Empty Detection
74
Index (Field Service) General
88
Main Unit
93
Specifications
93
GDI Printer Function
95
Installation Site
96
Power Source
96
Precautions for Installation
96
Operating Environment
97
Power Requirements
97
Precautions for Use
97
To Ensure the Printer Is Used in an Optimum Condition
97
Handling of the Consumables
98
Miscellaneous Precautions
98
Parts Identification
99
Maintenance Schedule
101
Guidelines for Life Specifications Values by Unit
102
Life Specifications Values
102
Cleaning of the Paper Take-Up Roll
103
Replacement of the Paper Take-Up Roll
103
Replacement/Cleaning of Parts
103
Replacement of the Image Transfer Roller
104
Replacement of the Drum Cartridge
107
Replacement of the Fusing Unit
108
Dis/Reassembly, Adjustment
110
Internal Laser Radiation
111
Laser Safety
111
Safety Information
111
Laser Caution Label
114
Laser Safety Label
114
Precautions for Handling the Laser Equipment
115
Other Screws Not Marked with Red Paint
116
Parts that Must Not be Touched
116
Precautions for Disassembly/Adjustments
116
Red Painted Screws
116
Variable Resistors on Board
116
Disassembly/Reassembly
117
Identification of Exterior Parts and Removal Procedures for Them
117
Removal of Circuit Boards and Other Electrical Components
119
Removal of the Control Panel
120
Removal of the Controller/Mechanical Control Board
120
Removal of the Interface Board
121
Removal of the Power Unit
122
Removal of the High Voltage Unit
124
Removal of the IR Unit
125
Removal of Units
125
Removal of the PH Unit
126
Disassembly of the Image Reading Section
128
Removal of the Original Cover Set Sensor
128
Removal of the Scanner Motor
128
Removal of the Upper Cover Assy. (Original Glass
128
Removal of the Scanner Assy
129
Disassembly of the Main Drive Section
131
Removal of the Main Motor
131
Removal of the Paper Empty Sensors
131
Removal of the Paper Take-Up Solenoid
133
Removal of the Paper Take-Up Clutch Gear
134
Removal of the Torque Limiter
135
Disassembly of the Fusing Unit
136
Accessing the "ADJUST" Menu
139
Accessing the Service Mode
139
Adjustments
139
Electrical/Image Adjustment
139
Printing a Test Pattern
139
Margin Adjustment (Leading Edge/Trailing Edge/Both Sides
140
Printer's Main Scanning Registration Adjustment
141
Printer's Sub-Scanning Registration Adjustment
142
Scanner's Main Scanning Zoom Ratio Adjustment
143
Scanner's Sub-Scanning Zoom Ratio Adjustment
145
Scanner's Main Scanning Registration Adjustment
147
(10) Scanner's Sub-Scanning Registration Adjustment
149
Miscellaneous
150
Removal of the Mechanical Counter (Option
150
Installing the GDI Printer/Twain Driver Using Plug and Play
151
Updating the Firmware
151
Procedure for Updating the GDI Firmware
153
Remedy for a Failed Updating of the Firmware
155
Moving the EEPROM
157
Control Panel/Service Mode Descriptions
158
Control Panel Descriptions
159
Names of Control Panel Parts and Their Functions
159
Circuit Board Locations
161
FUNCTIONS of SWITCHES and PARTS on Pwbs
161
PWB-P (Controller/Mechanical Control Board
161
PWB-IF (Interface Board
162
Utility Mode
163
Utility Mode Function Tree
163
Machine Setting
164
Utility Mode Setting Procedure
164
Copy Setting
166
Paper Source Setting
166
Service Mode
167
Service Mode Function Tree
167
Service Mode Setting Procedure
169
Service Mode Functions
170
Service's Choice
170
Adjust
172
Counter
176
Display
177
Function
177
Fixed Zoom Change
179
Clear Data
180
Factory Test
180
Security
181
Security Mode
181
Security Mode Function Tree
181
Security Mode Setting Procedure
181
Troubleshooting
182
Electric Components Check Procedures
183
Introduction
183
Sensors
183
Solenoids
184
Switches
184
Motors
185
Overall Control Configuration
187
Initial Check Items
188
Paper Misfeed
188
Paper Misfeed Displays
189
Locations of Misfeed Detection Sensors
190
Misfeed Detection Timing and Troubleshooting Procedures
191
Paper Take-Up/Transport Misfeed
191
Fusing/Exit Misfeed
192
List of Malfunctions
193
Malfunctions/Warning
193
Malfunction Detection Timing and Troubleshooting Procedures
196
C0500: Fuser Warm up Error
198
C0510: Fuser Temperature Low
199
C0520: Fuser Overheat
200
C0650: Scanner Home Sensor Error
200
C1200: ASIC Memory Abnormal
201
C1300: Polygon Mirror Motor Error
201
(10) C133D: ROM Checksum Error
202
C133B: Communication with Option Error
202
(11) C13F0: Laser Error
203
(12) C1468: EEPROM Error
203
(13) C14A3: IR Lamp Malfunction
204
Malfunctions Related to Power Supply
205
Power Is Not Turned on
205
Image Quality Problems
206
Initial Checks
206
Troubleshooting Image Quality Problems
206
Troubleshooting for Specific Image Quality Problems
207
Image Reading System: Blank or Black Prints
208
Image Reading System: Low Image Density
209
Image Reading System: Foggy Background or Rough Image
210
Image Reading System: Black Streaks or Bands
211
Image Reading System: Black Spots
212
Image Reading System: Blank Streaks or Bands
213
Image Reading System: Uneven Image
214
Printer System: Blank or Black Prints
215
(10) Printer System: Smears on Back
216
Printer System: Blank Spots
216
(11) Printer System: Low Image Density
217
(12) Printer System: Foggy Background
218
(13) Printer System: Blank Streaks or Bands
219
(14) Printer System: Black Streaks or Bands
220
(15) Printer System: Offset Image
220
(16) Printer System: Uneven Image
221
Service Manual
223
Specifications
226
Dis/Reassembly,Adjustment
227
Maintenance Schedule
228
Cleaning of the Paper Take-Up Roll
229
Replacement of the Paper Take-Up Roll
229
Replacement/Cleaning of Parts
229
Cleaning of the Pick-Up Roller
230
Cleaning of the Exit Roller
231
Cleaning of the Registration Rollers
231
Cleaning of the Transport Roller
231
Removal of the Pick-Up Roller
231
Cleaning of the Paper Separator Pad
232
Removal of the Paper Separator Pad
232
Disassembly/Reassembly
233
Names/Removal of External Parts
233
Removal of Circuit Boards
234
Removal of the Automatic Document Feeder Control Board
234
Disassembly
235
Removal of the Automatic Document Feeder Main Motor
235
Accessing the "ADJUST" Menu
236
Accessing the Service Mode
236
Adjustments
236
Electrical/Image Adjustment
236
Printing a Test Page
236
Height Adjustment
237
Leading Edge Tilt Adjustment
238
Automatic Document Feeder Sub-Scanning Zoom Ratio Adjustment
239
Automatic Document Feeder Main Scanning Registration Adjustment
241
Automatic Document Feeder Sub-Scanning Registration Adjustment
242
Troubleshooting
243
Electric Components Check Procedures
244
Introduction
244
Sensors
244
Clutches
245
Motors
245
Initial Check Items
247
Paper Misfeed
247
Paper Misfeed Displays
248
Locations of Misfeed Detection Sensors
249
Misfeed Detection Timing and Troubleshooting Procedures
250
Service Manual
253
Specifications
255
Dis/Reassembly,Adjustment
256
Maintenance Schedule
257
Cleaning of the Paper Take-Up Roll
258
Replacement of the Paper Take-Up Roll
258
Replacement/Cleaning of Parts
258
Disassembly/Reassembly
259
Identification of Exterior Parts and Removal Procedures for Them
259
Removal of Circuit Boards
260
Removal of the Paper Feed Cassette Control Board
260
Disassembly
261
Removal of the Paper Feed Cassette Paper Take-Up Unit
261
Removal of the Paper Size Detecting Switch
261
Removal of the Paper Feed Cassette Paper Take-Up Solenoid
262
Housing
267
Optical Section
275
Transport/Paper Take-Up Section
277
Fusing/Paper Exit Unit
279
Drive Section
281
Electrical Components (A)
283
Electrical Components (B)
283
Wiring Accessories and Jigs
287
Screws and Washers
289
Advertisement
Konica Minolta Di1610 User Manual (148 pages)
Konica Minolta Printer User Manual
Brand:
Konica Minolta
| Category:
Printer
| Size: 2 MB
Table of Contents
User Manual
1
Table of Contents
2
1 Introduction
8
We Want You to be a Satisfied Customer
9
For U.S.A. Users FCC Part 15-Radio Frequency Devices
9
For Canada Users Interference-Causing Equipment Standard (ICES-003 Issue 3)
10
For Users in Countries Subject to Class B Regulations
10
For Users in Countries Not Subject to Class B Regulations
10
Safety Information
11
Warning and Precaution Symbols
11
Meaning of Symbols
11
Warning
12
Caution
13
Precautions for Routine Use
14
Safety Information
15
Laser Safety
15
Internal Laser Radiation
15
CDRH Regulation
16
For European Users
16
For Denmark Users
17
For Finland, Sweden Users
17
For Norway Users
18
Laser Safety Label
18
Ozone Release
19
Acoustic Noise
19
Energy Star
20
What Is an ENERGY STAR ® Product
20
Explanation of Manual Conventions
21
Explanation of Basic Concepts and Symbols
22
Paper Feeding
22
Width" and "Length
23
Paper Orientation
23
2 Precaution
24
Installation Precautions
25
Installation Site
25
Power Source
25
Space Requirements
26
Operation Precautions
27
Operating Environment
27
Proper Use
27
Transporting the Machine
28
Care of Machine Supplies
28
Legal Restrictions on Copying
29
3 Before Making Copies
30
Available Features
31
Components and Their Functions
32
Parts Names and Their Functions
33
Main Unit
33
Inside the Machine
34
Adjusting the Angle of the Copy Tray
35
Options
36
Control Panel
37
Names of Control Panel Parts and Their Functions
37
Display Indications
38
Turning the Machine On/Off and the Initial Mode
39
Turning the Machine On/Off
39
To Turn on the Machine
39
To Turn off the Machine
39
When the Machine Is Turned on
39
Default Settings
40
Useful Functions
41
Panel Resetting
41
Auto Panel Reset
41
Energy Save Mode
41
Auto Copy Start
42
Auto Tray Switching
42
Copy Paper
43
Paper Specifications
43
Precautions for Loading Paper
43
Unsuitable Paper
44
Loading Paper
45
Loading Paper into Tray1
47
Loading Paper into the Bypass Tray
49
Loading Paper into Tray2 (Optional)
50
Loading Originals
51
Two Ways of Loading the Original
51
Specific Types of Originals
51
Loading Originals in the Auto Document Feeder
51
Precautions for Loading Paper into the Auto Document Feeder
51
Loading Originals into the Auto Document Feeder
52
Placing the Original on the Original Glass
53
Precautions for Placing the Original on the Original Glass
53
Positioning a Sheet Original
54
Positioning Highly Transparent Originals
55
Positioning Books
56
Checking the Machine Status
57
Checking the "TOTAL PAGE" Counts
57
To Output a Report/List
59
Configuration Page
59
PCL Font List
59
Print Area
60
4 Making Copies
62
Making a Basic Copy
63
Selecting the Paper
65
Manual Paper Selection
65
Selecting Manually Fed Paper
65
Manually Selecting the Paper Size
65
Specifying the Size and Type of Manually Fed Paper
66
Specifying the Zoom Ratio
71
Zoom Ratio Settings
71
Setting the Zoom Ratio
72
Adjusting the Image Density
73
Image Density Setting
73
Setting the Image Density
73
Making 2In1 Copies
75
Specifying Settings for 2In1 Copies
75
Finishing Copies
76
Specifying Sorting
77
5 Using the Utility Mode
78
Utility Mode
79
Specifying the Machine Settings
79
Selecting the "MACHINE SETTING" Menu
80
Specifying the Setting for "AUTO PANEL RESET
81
Specifying the Setting for "ENERGY SAVE MODE
82
Specifying the Setting for "DENSITY (ADF)
83
Specifying the Setting for "DENSITY (BOOK)
84
Specifying the Setting for "PRINT DENSITY
85
Specifying the Setting for "LCD CONTRAST
86
Specifying the Setting for "LANGUAGE
87
Specifying the Setting for "LAMP off TIME
88
Setting up the Paper Sources
89
Selecting the "PAPER SOURCE SETUP" Menu
89
Specifying the Setting for "TRAY1 PAPER
90
Specifying the Setting for "TRAY SETTING
93
Specifying User Management Settings ("USER MANAGEMENT" Menu)
94
To Select the "USER MANAGEMENT" Menu
94
Specifying Copy Settings
95
Selecting the "COPY SETTING" Menu
96
Specifying the Setting for "PAPER PRIORITY
97
Specifying the Setting for "DENSITY PRIORITY
98
Specifying the Setting for "DENSITY LEVEL (A)
99
Specifying the Setting for "DENSITY LEVEL (M)
100
Specifying the Setting for "OUTPUT PRIORITY
101
Specifying the Setting for "RESOLUTION
102
6 When a Message Appears
104
When the Message "PAPER EMPTY" Appears
105
Loading Paper into Tray1
106
Loading Paper into the Bypass Tray
106
Loading Paper into Tray2 (Optional)
107
When the Message "TONER EMPTY" Appears
108
Replacing the Toner Cartridge
109
When the Message "D/C LIFE" Appears
113
Replacing the Drum Cartridge
113
When the Message "PAPER MISFEED" Appears
116
Clearing a Paper Misfeed in the Paper Trays
116
When the Message "PAPER JAM" Appears
119
Clearing a Paper Misfeed in the Machine
119
When the Message "ORIGINAL DOC. JAM" Appears
122
Clearing a Paper Misfeed in Auto Document Feeder
122
When the Message "PAPER SIZE ERROR" Appears
124
For Tray1
124
For the Bypass Tray
126
When the Message "MACHINE TROUBLE" Appears
127
What Does each Message Mean
128
When Incorrect Copies Are Produced
129
The Machine Is Not Functioning as Designed
132
7 Miscellaneous
134
Specifications
135
Auto Document Feeder AF-11
136
Paper Feed Cassette PF-125
136
Care of the Machine
137
Cleaning
137
Housing Cover
137
Original Glass
137
Original Pad
138
Control Panel
138
Function Combination Matrix
139
Conditions for Combined Functions
139
Paper Size and Zoom Ratio Tables
140
Paper Sizes
140
Zoom Ratios
141
8 Index
144
Index
144
Konica Minolta Di1610 User Manual (136 pages)
Brand:
Konica Minolta
| Category:
Copier
| Size: 2 MB
Table of Contents
Table of Contents
3
1 Introduction
9
We Want You to be a Satisfied Customer
9
CE Marking (Declaration of Conformity)
9
For U.S.A. Users
9
FCC Part 15-Radio Frequency Devices
9
For Canada Users
10
Interference-Causing Equipment Standard (ICES-003 Issue 3).1-2
10
For Users in Countries Subject to Class B Regulations
10
For Users in Countries Not Subject to Class B Regulations
10
Safety Information
11
Warning and Precaution Symbols
11
Meaning of Symbols
11
Warning
12
Caution
13
Precautions for Routine Use
14
Laser Safety
14
Internal Laser Radiation
14
CDRH Regulation
16
For European Users
16
For Denmark Users
16
For Finland, Sweden Users
17
For Norway Users
17
Laser Safety Label
18
Ozone Release
18
Acoustic Noise
18
Energy Star
19
What Is an ENERGY STAR® Product
19
Explanation of Manual Conventions
20
Explanation of Basic Concepts and Symbols
21
Paper Feeding
21
Width" and "Length
22
Paper Orientation
22
2 Precaution
23
Installation Precautions
23
Installation Site
23
Power Source
23
Space Requirements
24
Operation Precautions
25
Operating Environment
25
Proper Use
25
Transporting the Machine
26
Care of Machine Supplies
26
Legal Restrictions on Copying
27
3 Before Making Copies
29
Available Features
29
Components and Their Functions
30
Parts Names and Their Functions
31
Main Unit
31
Inside the Machine
33
Adjusting the Angle of the Copy Tray
34
Options
35
Control Panel
36
Names of Control Panel Parts and Their Functions
36
Display Indications
37
Turning the Machine On/Off and the Initial Mode
38
Turning the Machine On/Off
38
To Turn on the Machine
38
To Turn off the Machine
38
When the Machine Is Turned on
38
Default Settings
39
Useful Functions
40
Panel Resetting
40
Auto Panel Reset
40
Energy Save Mode
40
Auto Copy Start
41
Auto Tray Switching
41
Copy Paper
42
Paper Specifications
42
Precautions for Loading Paper
43
Unsuitable Paper
43
Loading Paper
44
Loading Paper into Tray1
46
Loading Paper into the Bypass Tray
48
Loading Paper into Tray2 (Optional)
49
Loading Originals
50
Two Ways of Loading the Original
50
Specific Types of Originals
50
Loading Originals in the Auto Document Feeder
50
Precautions for Loading Paper into the Auto Document Feeder
50
Loading Originals into the Auto Document Feeder
51
Placing the Original on the Original Glass
52
Precautions for Placing the Original on the Original Glass
52
Positioning a Sheet Original
53
Positioning Highly Transparent Originals
54
Positioning Books
55
Checking the Machine Status
56
Checking the "TOTAL PAGE" Counts
56
To Output a Report/List
58
Configuration Page
58
PCL Font List
58
Print Area
59
4 Making Copies
61
Making a Basic Copy
61
Selecting the Paper
63
Manual Paper Selection
63
Selecting Manually Fed Paper
63
Manually Selecting the Paper Size
64
Specifying the Size and Type of Manually Fed Paper
65
Specifying the Zoom Ratio
69
Zoom Ratio Settings
69
Setting the Zoom Ratio
70
Adjusting the Image Density
71
Image Density Setting
71
Setting the Image Density
72
Making 2In1 Copies
74
Specifying Settings for 2In1 Copies
74
Finishing Copies
75
Specifying Sorting
76
5 Using the Utility Mode
77
Utility Mode
77
Specifying the Machine Settings
77
Selecting the "MACHINE SETTING" Menu
79
Specifying the Setting for "AUTO PANEL RESET
80
Specifying the Setting for "ENERGY SAVE MODE
81
Specifying the Setting for "DENSITY (ADF)
81
Specifying the Setting for "DENSITY (BOOK)
82
Specifying the Setting for "PRINT DENSITY
82
Specifying the Setting for "LCD CONTRAST
83
Specifying the Setting for "LANGUAGE
83
Specifying the Setting for "LAMP off TIME
84
Setting up the Paper Sources
85
Selecting the "PAPER SOURCE SETUP" Menu
85
Specifying the Setting for "TRAY1 PAPER
86
Specifying the Setting for "TRAY SETTING
88
Specifying User Management Settings ("USER MANAGEMENT" Menu)
89
To Select the "USER MANAGEMENT" Menu
89
Specifying Copy Settings
90
Selecting the "COPY SETTING" Menu
91
Specifying the Setting for "PAPER PRIORITY
92
Specifying the Setting for "DENSITY PRIORITY
92
Specifying the Setting for "DENSITY LEVEL (A)
93
Specifying the Setting for "DENSITY LEVEL (M)
93
Specifying the Setting for "OUTPUT PRIORITY
94
Specifying the Setting for "RESOLUTION
94
6 When a Message Appears
95
When the Message "PAPER EMPTY" Appears
95
Loading Paper into Tray1
96
Loading Paper into the Bypass Tray
96
Loading Paper into Tray2 (Optional)
97
When the Message "TONER EMPTY" Appears
98
Replacing the Toner Cartridge
100
When the Message "D/C LIFE" Appears
103
Replacing the Drum Cartridge
104
When the Message "PAPER MISFEED" Appears
107
Clearing a Paper Misfeed in the Paper Trays
107
When the Message "PAPER JAM" Appears
110
Clearing a Paper Misfeed in the Machine
110
When the Message "ORIGINAL DOC. JAM" Appears
113
Clearing a Paper Misfeed in Auto Document Feeder
113
When the Message "PAPER SIZE ERROR" Appears
115
For Tray1
115
For the Bypass Tray
116
When the Message "MACHINE TROUBLE" Appears
117
What Does each Message Mean
118
When Incorrect Copies Are Produced
119
The Machine Is Not Functioning as Designed
122
7 Miscellaneous
123
Specifications
123
Auto Document Feeder AF-11
124
Paper Feed Cassette PF-125
124
Care of the Machine
125
Cleaning
125
Housing Cover
125
Original Glass
125
Original Pad
125
Control Panel
126
Function Combination Matrix
127
Conditions for Combined Functions
127
Paper Size and Zoom Ratio Tables
128
Paper Sizes
128
Zoom Ratios
129
8 Index
133
Advertisement
Advertisement
Related Products
Konica Minolta Di1610p
Konica Minolta DRYPRO793
Konica Minolta DRYPRO SIGMA
Konica Minolta DF-612
Konica Minolta DRYPRO SIGMA 2
Konica Minolta Di1611
Konica Minolta Di1610f
Konica Minolta Di183
Konica Minolta Di152
Konica Minolta Di1610fp
Konica Minolta Categories
All in One Printer
Printer
Digital Camera
Measuring Instruments
Copier
More Konica Minolta Manuals
Login
Sign In
OR
Sign in with Facebook
Sign in with Google
Upload manual
Upload from disk
Upload from URL