Sign In
Upload
Manuals
Brands
KONICA MINOLTA Manuals
Copier
7118
KONICA MINOLTA 7118 Manuals
Manuals and User Guides for KONICA MINOLTA 7118. We have
4
KONICA MINOLTA 7118 manuals available for free PDF download: Service Manual, Manual, User Manual, Operating Instructions Manual
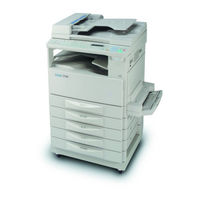
Konica Minolta 7118 Service Manual (292 pages)
Brand:
Konica Minolta
| Category:
All in One Printer
| Size: 16 MB
Table of Contents
Table of Contents
21
Service Manual
1
Important Notice
4
General
7
1 Specification
23
2 Precautions for Installation
27
Installation Site
27
Power Source
27
Grounding
27
3 Precautions for Use
28
To Ensure that the Copier Is Used in an Optimum Condition
28
Operating Environment
28
Power Requirements
28
Note
28
4 Handling of Consumables
29
5 Other Precautions
30
6 System Options
31
Table of Contents
35
1 Cross Sectional View
37
2 Copy Process
38
3 Drive System
40
4 Sequential Explanation
41
5 Watchdog Function (Cpu Overrun Monitor
42
Watchdog Function Post-Processing
42
6 Image Stabilization System
43
7 Imaging Unit (I/U
44
Imaging Unit (IU) Drive Mechanism
45
8 Pc Drum Section
46
PC Drum Drive Mechanism
46
Grounding of the PC Drum
47
9 Pc Drum Charging Section
48
10 Image Reading Section
49
10-1.Image Processing Process
50
10-2.Exposure Components Section
51
10-3.Scanner and Mirrors Carriage Movement Mechanism
52
2Nd/3Rd Mirrors Carriage Movement Mechanism
52
Scanner Movement Mechanism
52
10-4.Scanner Motor Drive Control
53
11 Memory Storage Image Processing System
54
11-1.Laser Exposure Process
55
12 Developing Unit Section
56
12-1.Developing Unit Drive Mechanism
57
12-3.Developing Bias
58
Sleeve/Magnet Roller
58
ATDC Sensor Automatic Adjustment
59
12-5.Toner Replenishing Mechanism
60
12-6.Toner Replenishing Control
61
12-7.T/C Recovery Mode
62
12-8.Toner Bottle Home Position Detection Mechanism
63
13 Paper Take Up/Feed Section
64
13-1.Drawer in Position Detection
65
13-2.Paper Empty Detection Mechanism
65
13-3.Paper Lifting Plate
66
13-4.Universal Tray Paper Size Detection Mechanism
66
13-5.Paper Take up Mechanism
68
Paper Separating Mechanism
68
13-6.Paper Take up Control
69
Paper Take up Retry Control
69
14 Manual Bypass Section
70
14-1.Paper Take up Drive Mechanism
72
15 Multiple Bypass Section
72
15-1.Paper Take up Drive Mechanism
73
15-2.Paper Take-Up Mechanism
73
15-3.Paper Empty Detection Mechanism
74
15-5.Paper Take up Retry Control
74
16 Image Transfer and Paper Separation Section
76
17 Pc Drum Cleaning Section
77
18 Main Erase Section
78
19 Fusing Unit Section
79
19-1.Fusing Unit Drive Mechanism
80
19-2.Fusing Rollers Pressure Mechanism
80
Fusing Temperature Control
81
20 JOB TRAY (IT-102): Option
82
20-1.Tray Selecting Mechanism
83
20-2.Tray-Full Detecting Mechanism
84
20-3.Job Tray Paper Detecting Mechanism
84
21 SHIFTING UNIT (IS-101): Option
85
21-1.Exit Position Shifting Mechanism
86
22 Other Mechanism
88
22-1.Cooling Mechanism
88
Power Supply Section Cooling Mechanism
88
Fusing Section Cooling Mechanism
89
Table of Contents
93
Safety Precautions
99
Safety Precautions for Inspection and Service
101
Dis/Reassembly, Adjustment
111
Safety Information
113
Internal Laser Radiation
113
Laser Safety
113
Laser Caution Label
116
Laser Safety Label
116
Precautions for Handling the Laser Equipment
116
Service Instructions
117
Identification of Fuses and Circuit Breakers
117
Parts Which Must Not be Touched
118
Red Painted Screws
118
Variable Resistors on Board
118
Disassembly/Reassembly
119
Doors, Covers, and Exterior Parts: Identification and Removal Procedures
119
Removal of Circuit Boards and Other Electrical Components
121
Removal of the Master Board
122
Removal of the Control Board
123
Removal of the High Voltage Unit
123
Removal of the DC Power Supply
125
Maintenance Schedule
128
Cleaning of the Paper Separator Roll
130
Cleaning of the Paper Take-Up Roll
130
Paper Take-Up/Transport Section
130
Removal of the Paper Separator Roll Assy and Paper Take-Up Roll
130
Cleaning of the Right and Left Synchronizing Rollers
131
Removal of the Cleaning Pad
131
Cleaning of the Bypass Transport Roller
132
Cleaning of the Cleaning Pad
132
Cleaning of Mirrors
133
Cleaning of the Lens
133
Cleaning of the Original Glass and ADF Glass
133
Optical Section
133
Cleaning of the CCD Sensor
134
Cleaning of the Scanner Rails/Bushings
134
Removal of the CCD Unit
135
Removal of the Scanner, Exposure Lamp, and Inverter Board
135
Removal of the Scanner Drive Cables
137
Winding of the Scanner Drive Cables
139
Cleaning of the PH Window
141
Removal of the PH Unit
141
Disassembly of the IU
142
Imaging Unit (IU
142
Removal of the IU
142
Application of Toner
146
Replacement of the ATDC Sensor
147
Cleaning of the Charge Neutralizing Plate
148
Cleaning of the Pre-Image Transfer Lower Guide Plate
148
Image Transfer Section
148
Removal of the Image Transfer Roller Assy
148
Disassembly of the Fusing Unit
149
Fusing Section
149
Removal of the Fusing Unit
149
Removal of the Paper Take-Up Roll
154
Removal of the Separator Roll Assy
154
Cleaning of the Paper Take-Up Roll
157
Cleaning of the Separator Roll/Paper Take-Up Roll
157
Removal of the Main Board
158
Paper Detecting Board
160
Removal of the Main Board
161
Adjustment
163
Adjustment Jigs and Tools Used
163
Timing Belt Tension Adjustment
163
Accessing the Function, Tech. Rep. Choice, and Adjust Mode
164
Adjust Mode
164
Function Mode
164
Tech. Rep. Choice Mode
164
Edge Erase Adjustment (Leading, Trailing, and Top/Bottom Edges
165
Electrical/Image Adjustment
165
Loop Length Adjustment (1St and 2Nd Trays, Bypass Tray
166
Printer CD Registration Adjustment
167
Printer FD Registration Adjustment
168
Scanner CD Registration Adjustment
169
Scanner FD Registration Adjustment
170
Scanner CD Zoom Adjustment
171
Scanner FD Zoom Adjustment
172
(10) 2Nd Mirrors Carriage Distortion Adjustment
173
ATDC Sensor Automatic Adjustment (F8
173
(11) Manual Bypass Registration Adjustment
174
(12) Multiple Bypass Registration Adjustment (MT-102): Option
175
Adjustment of the Position of the Scanner and 2Nd/3Rd Mirrors Carriage
176
Other Adjustments
176
CCD Unit Position Adjustment
177
Adjustment of the Gap between the Doctor Blade and Sleeve Roller (Db Adjustment
178
Miscellaneous
180
Remounting the EEPROM (U29
180
Installation of the Plug-In Counter Socket (Option
181
Installation of the Total Counter (Option
182
SWITCHES on Pwbs, TECH. REP. SETTINGS
183
Control Panel Keys and Touch Panel
185
Control Panel Keys
185
Utility Mode
188
Custom Size Input Mode (Display
188
Drum Dehumidify Mode (Display
188
Settings in the Utility Mode
188
Toner Replenisher Mode (Display
188
User's Choice Mode (Display
188
Utility Mode Setting Procedure
188
Administrator Mode (Display
195
Tech.rep.mode
197
Tech.rep.mode Menu Function Tree
197
Tech.rep.mode Function Setting Procedure
198
Control Panel LED Check (Display: - - 0
199
Function (Display: - - 1
199
Setting in the Tech.rep.mode
199
Tech.rep.choice (Display: - - 2
200
Counter Mode (Display: - - 3
202
ATDC Sensor Output (Display: - - 4
205
Level History (Display: - - 5
205
ROM Version (Display: - - 6
205
Administrator No. Input (Display: - - 7
206
Change Fixed Zoom (Display: - - 8
206
Marketing Area Setting (Display: - - 9
206
ADF Document Passage Test (Display: - 12
207
Memory Clear (Display: - 10
207
Total Clear (Display: - 11
207
ADF Original Glass Check (Display: - 13
208
Scanner Move Check (Display: - 14
208
Serial No. Display (Display: - 20
208
Security Mode
209
Security Mode Setting Procedure
209
Settings in the Security Mode
209
Setting in the Security Mode
210
Adjust Mode
211
Adjust Mode Setting Procedure
211
Settings in the Adjust Mode
211
Setting in the Adjust Mode
212
Troubleshooting
215
Reading the Text
217
Paper Transport Failure
218
Outline
218
Paper Misfeed
218
Paper Misfeed Detection
218
Misfeed Detection Sensor Layout
220
Types of Misfeed Detection and Detection Timings
222
Misfeed Troubleshooting Procedures
223
Misfeed at Copier Paper Take-Up J01 and Misfeed at Bypass Tray J06
223
Misfeed at Paper Feed Cabinet Paper Take-Up and Transport Section J02, J03, J04, J05, J1
227
Misfeed at PC Drum J2
229
Misfeed at Fusing Unit J3
232
Paper Exit Section
232
Malfunction
234
Detection Timing by Malfunction Code
234
Resetting Procedure by Malfunction Code
238
C0000: Main Motor Malfunction
239
Troubleshooting Procedures by Malfunction Code
239
C0045: Fusing Cooling Fan Motor Malfunction
240
C004E: Power Supply Cooling Fan Motor Malfunction
241
C0070: Toner Replenishing Motor Malfunction
242
Developing Section
242
C0210: Abnormal Image Transfer Voltage
243
C0500: Warm-Up Failure C0510: Abnormally Low Fusing Temperature C0520: Abnormally High Fusing Temperature
244
C0650: Faulty Scanner Home Position Sensor
246
C0B60: bin Switching Motor Malfunction
247
C0B80 Shift Motor Malfunction
249
C0F32: Faulty ATDC Sensor C0F33: Improperly Adjusted ATDC Sensor
250
(11) C1038: Engine Connection Failure
251
(12) C1200: Faulty Asic/Memory
251
C1300: Polygon Motor Malfunction (Startup Failure, Lock Signal Failure, Faulty Lock Signal) C13F0: Faulty HSYNC
252
(14) C1468: Faulty EEPROM
253
(15) C14A3: IR Fluorescent Lamp Fault
254
(16) the Copier Does Not Turn on
256
Image Failure
258
Image Failure Troubleshooting
258
Initial Checks
258
Image Failure Samples
260
Blank Copy
261
Troubleshooting Procedures by Image Failure
261
Black Copy
262
Low Image Density
263
Foggy Background or Rough Image
265
Black Streaks or Bands
267
Black Spots
268
Blank Streaks or Bands
269
Void Areas
270
Smear on Back
271
(10) Uneven Image Density
272
(11) Gradation Reproduction Failure
274
(12) Periodically Uneven Image
275
Other Error Codes
276
Service/Adjustment Item List
279
Electrical Parts Layout
280
Connector Layout
281
Wiring Diagrams
282
Advertisement
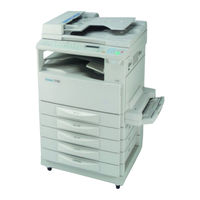
KONICA MINOLTA 7118 Manual (166 pages)
Brand:
KONICA MINOLTA
| Category:
Copier
| Size: 2 MB
Table of Contents
Energy Star
3
Table of Contents
5
1 Introduction
11
We Want You to be a Satisfied Customer
11
CE Marking (Declaration of Conformity)
11
Safety Information
12
Warning and Precaution Symbols
12
Meaning of Symbols
12
Warning
13
Caution
14
Precautions for Routine Use
15
Safety Information
16
Laser Safety
16
Internal Laser Radiation
16
LED Radiation Safety
18
Ozone Release
18
Acoustic Noise
18
About the User Manual
19
Explanation of Manual Conventions
19
] Key
19
Explanation of Basic Concepts and Symbols
20
Paper Feeding
20
Width" and "Length
21
Paper Orientation
21
2 Precautions
23
Installation Precautions
23
Installation Site
23
Power Source
23
Space Requirements
24
Operation Precautions
25
Operating Environment
25
Proper Use
25
Transporting the Copier
26
Care of Copier Supplies
26
Legal Restrictions on Copying
27
3 Before Making Copies
29
Available Features
29
Components and Their Functions
32
Parts Names and Their Functions
34
Copier
34
Inside the Copier
36
Options
37
Paper Feed Unit
38
Job Separator
39
Control Panel
40
Names of Control Panel Parts and Their Functions
40
Icons on the Control Panel
42
Turning on and off and the Initial Mode
43
How to Turn ON/OFF the Copier
43
When Copier Is Turned on
43
Default Settings
44
Useful Functions
45
Panel Resetting
45
Auto Panel Reset
45
Power Save
46
Auto Shut off
46
Auto Copy Start
46
Interrupting Copy Jobs
47
Auto Tray Switching
47
Account Number
48
To Enter an Account Number
48
Printing from the Personal Computer
49
Sending and Receiving Faxes Using the Copier
49
Copy Paper
50
Paper Specifications
50
4 Loading Originals
53
Two Ways of Loading the Original
53
Specific Types of Originals
53
Loading Originals in the Automatic Document Feeder
54
Precautions for Using the Automatic Document Feeder
54
Mixed Originals
56
Place the Original on the Original Glass
58
Precautions for Placing the Original on the Original Glass
58
How to Position a Sheet Original
59
Highly Transparent Originals
60
Books
61
5 Making Copies
63
Copying
63
Selecting the Paper
65
Feeding Paper Manually
67
Making Copies by Using the Bypass Tray
68
Specifying the Zoom Ratio
73
Setting the Zoom Ratio
74
Adjusting the Image Density
78
Interrupting a Copy Job
80
6 Advanced Copying
83
Making 1-Sided Copies
83
Output Copies (Sort and Group)
87
Three Output Types
87
Sorting
88
Grouping
90
Erasing Part of Original Image (Erase)
92
Precautions for Erase Position
93
Reversing Original Tonal Arrangements
95
Providing a Image Shift
96
Precautions for Image Shift Position
96
7 Using the Utility Mode
97
User's Choice
98
Mixed Orig
102
Paper Priority
102
Copy Priority
102
Density Priority
102
Density Level Priority (Auto)
102
Density Level Priority (Manual)
103
Output Priority
103
Crisscross Mode
103
4In1 Copy Order
103
Book Binding Position
103
Margin Setting
103
Erase Setting (Left, Top, and Frame)
104
Auto Panel Reset
104
Power Save
104
Auto Shut off
104
Density (ADF)
104
Printer Density
104
Paper Auto Detection
105
Paper Size Detection
105
Paper Type (1St Tray)
105
Paper Type (Bypass Tray)
105
Special Paper Setting
105
Making the User's Choice Settings
106
Drum Dehumidify
108
Toner Replenisher (Auxiliary Toner Replenishing)
109
Custom Size Input
110
Administrator Mode
112
Copy Track
114
Disable Auto Shut off
122
Checking the Total Number of Copies/Prints Produced
124
Storing a Job
126
8 Error Displays and Other Indicators
129
Major Error Displays and Remedial Actions
129
When the Add Paper Indicator Lights up
132
Adding Paper
132
When the Add Toner Indicator Lights up
136
When the Paper Misfeed Indicator Lights
139
Misfeed Indications and Misfeed Locations
139
Clearing a Paper Misfeed
140
9 Troubleshooting Tips
149
When this Type of Copy Is Produced
149
When the Copier Is Not Operating Correctly
152
10 Appendix
153
Specifications
153
Copier Konica 7115/7118
153
Automatic Document Feeder DF-217
155
Paper Feed Unit PF-121
155
Shifting Unit IS-101
156
Job Separator IT-102
156
Multiple Bypass Tray MT-102
156
Care of the Copier
157
Cleaning
157
Function Combination Table
158
Conditions for Combined Functions
158
List of Paper Sizes and Zoom Ratios
159
Paper Sizes
159
Zoom Ratios (Original Size to Paper Size)
160
II Konica
164
Konica Minolta 7118 User Manual (163 pages)
Brand:
Konica Minolta
| Category:
Copier
| Size: 5 MB
Table of Contents
Energy Star
1
Table of Contents
2
1 Introduction
8
We Want You to be a Satisfied Customer
8
Safety Information
9
Warning and Precaution Symbols
9
Meaning of Symbols
9
Warning
10
Caution
11
Precautions for Routine Use
12
Safety Information
13
Laser Safety
13
Internal Laser Radiation
13
Laser Safety Label
15
Warning Label
15
Ozone Release
16
About the Instruction Manual
17
Explanation of Manual Conventions
17
] Key
17
Explanation of Basic Concepts and Symbols
18
Paper Feeding
18
Width" and "Length
19
Paper Orientation
19
2 Precautions
20
Installation Precautions
20
Installation Site
20
Power Source
20
Space Requirements
21
Operation Precautions
22
Operating Environment
22
Proper Use
22
Transporting the Copier
23
Care of Copier Supplies
23
Legal Restrictions on Copying
24
3 Before Making Copies
26
Available Features
26
Components and Their Functions
29
Parts Names and Their Functions
31
Copier
31
Inside the Copier
33
Options
34
Control Panel
37
Names of Control Panel Parts and Their Functions
37
Icons on the Control Panel
39
Turning on and off and the Initial Mode
40
How to Turn ON/OFF the Copier
40
When Copier Is Turned on
40
Default Settings
41
Useful Functions
42
Auto Resetting
42
Auto Panel Reset
42
Power Save
43
Auto Shut off
43
Auto Copy Start
43
Interrupting Copy Jobs
44
Auto Tray Switching
44
Account Number
45
To Enter an Account Number
45
Printing from the Personal Computer
46
Sending and Receiving Faxes Using the Copier
46
Copy Paper
47
Paper Specifications
47
4 Loading Originals
50
Two Ways of Loading the Original
50
Specific Types of Originals
50
Loading Originals in the Automatic Document Feeder
51
Precautions for Using the Automatic Document Feeder
51
Mixed Originals
53
Place the Original on the Original Glass
55
Precautions for Placing the Original on the Original Glass
55
How to Position a Sheet Original
56
Highly Transparent Originals
57
Books
58
5 Making Copies
60
Copying
60
Selecting the Paper
62
Feeding Paper Manually
64
Making Copies by Using the Bypass Tray
65
Specifying the Zoom Ratio
70
Setting the Zoom Ratio
71
Adjusting the Image Density
75
Interrupting a Copy Job
77
6 Advanced Copying
80
Making 1-Sided Copies
80
Sorting
85
Grouping
87
Erasing Part of Original Image (Erase)
89
Precautions for Erase Position
90
Reversing Original Tonal Arrangements
92
Providing a Image Shift
93
Precautions for Image Shift Position
93
7 Using the Utility Mode
94
User's Choice
95
Mixed Orig
99
Paper Priority
99
Copy Priority
99
Density Priority
99
Density Level Priority (Auto)
99
Density Level Priority (Manual)
100
Output Priority
100
Crisscross Mode
100
4In1 Copy Order
100
Book Binding Position
100
Margin Setting
100
Erase Setting (Left, Top, and Frame)
101
Auto Panel Reset
101
Power Save
101
Auto Shut off
101
Density (ADF)
101
Printer Density
101
Paper Auto Detection
102
Paper Size Detection
102
Paper Type (1St Tray)
102
Paper Type (Bypass Tray)
102
Special Paper Setting
102
Making the User's Choice Settings
103
Drum Dehumidify
105
Toner Replenisher (Auxiliary Toner Replenishing)
106
Custom Size Input
107
Administrator Mode
109
Copy Track
111
Disable Auto Shut off
119
Checking the Total Number of Copies/Prints Produced
121
Storing a Job
123
8 Error Displays and Other Indicators
126
Major Error Displays and Remedial Actions
126
When the Add Paper Indicator Lights up
129
Adding Paper
129
When the Add Toner Indicator Lights up
133
When the Paper Misfeed Indicator Lights
136
Misfeed Indications and Misfeed Locations
136
Clearing a Paper Misfeed
137
9 Troubleshooting Tips
146
When this Type of Copy Is Produced
146
When the Copier Is Not Operating Correctly
149
10 Appendix 10.1 Specifications
150
10 Appendix
150
Copier Konica 7115/7118
150
Automatic Document Feeder DF-217
152
Paper Feed Cabinet PF-121
152
Job Tray IT-102
153
Multiple Bypass Tray MT-102
153
Shifting Unit IS-101
153
Care of the Copier
154
Cleaning
154
Function Combination Table
155
Conditions for Combined Functions
155
List of Paper Sizes and Zoom Ratios
156
Paper Sizes
156
Zoom Ratios(Original Size to Paper Size)
157
Advertisement
Konica Minolta 7118 Operating Instructions Manual (148 pages)
Brand:
Konica Minolta
| Category:
Copier
| Size: 2 MB
Table of Contents
Table of Contents
1
1 Introduction
7
We Want You to be a Satisfied Customer
7
CE Marking (Declaration of Conformity)
7
Safety Information
8
Warning and Precaution Symbols
8
Meaning of Symbols
8
Warning
9
Caution
10
Precautions for Routine Use
11
Safety Information
12
Laser Safety
12
Internal Laser Radiation
12
LED Radiation Safety
14
Ozone Release
14
Acoustic Noise
14
About the User Manual
15
Explanation of Manual Conventions
15
] Key
15
Explanation of Basic Concepts and Symbols
16
Paper Feeding
16
Width" and "Length
17
Paper Orientation
17
2 Precautions
19
Installation Precautions
19
Installation Site
19
Power Source
19
Space Requirements
20
Operation Precautions
21
Operating Environment
21
Proper Use
21
Transporting the Copier
22
Care of Copier Supplies
22
Legal Restrictions on Copying
23
3 Before Making Copies
25
Available Features
25
Components and Their Functions
28
Parts Names and Their Functions
30
Copier
30
Inside the Copier
32
Options
33
Control Panel
36
Names of Control Panel Parts and Their Functions
36
Icons on the Control Panel
38
Turning on and off and the Initial Mode
39
How to Turn ON/OFF the Copier
39
When Copier Is Turned on
39
Default Settings
40
Useful Functions
41
Panel Resetting
41
Auto Panel Reset
41
Power Save
42
Auto Shut off
42
Auto Copy Start
42
Interrupting Copy Jobs
43
Auto Tray Switching
43
Account Number
44
To Enter an Account Number
44
Printing from the Personal Computer
45
Sending and Receiving Faxes Using the Copier
45
Copy Paper
46
Paper Specifications
46
4 Loading Originals
49
Two Ways of Loading the Original
49
Specific Types of Originals
49
Loading Originals in the Automatic Document Feeder
50
Precautions for Using the Automatic Document Feeder
50
Mixed Originals
52
Place the Original on the Original Glass
54
Precautions for Placing the Original on the Original Glass
54
How to Position a Sheet Original
55
Highly Transparent Originals
56
Books
57
5 Making Copies
59
Copying
59
Selecting the Paper
61
Feeding Paper Manually
63
Making Copies by Using the Bypass Tray
64
Specifying the Zoom Ratio
69
Setting the Zoom Ratio
70
Adjusting the Image Density
74
Interrupting a Copy Job
76
6 Advanced Copying
79
Making 1-Sided Copies
79
Output Copies (Sort and Group)
83
Three Output Types
83
Sorting
84
Grouping
86
Erasing Part of Original Image (Erase)
88
Precautions for Erase Position
89
Reversing Original Tonal Arrangements
91
Providing a Image Shift
92
Precautions for Image Shift Position
92
7 Using the Utility Mode
93
User's Choice
94
Paper Sizes
97
Copy Priority
98
Density Level Priority (Auto)
98
Density Priority
98
Mixed Orig
98
Paper Priority
98
4In1 Copy Order
99
Book Binding Position
99
Crisscross Mode
99
Density Level Priority (Manual)
99
Margin Setting
99
Output Priority
99
Auto Panel Reset
100
Auto Shut off
100
Density (ADF)
100
Erase Setting (Left, Top, and Frame)
100
Power Save
100
Printer Density
100
Paper Auto Detection
101
Paper Size Detection
101
Paper Type (1St Tray)
101
Paper Type (Bypass Tray)
101
Special Paper Setting
101
Making the User's Choice Settings
102
Drum Dehumidify
104
Toner Replenisher (Auxiliary Toner Replenishing)
105
Custom Size Input
106
Administrator Mode
108
Copy Track
110
Disable Auto Shut off
118
Checking the Total Number of Copies/Prints Produced
120
Storing a Job
122
8 Error Displays and Other Indicators
125
Major Error Displays and Remedial Actions
125
When the Add Paper Indicator Lights up
128
Adding Paper
128
When the Add Toner Indicator Lights up
132
When the Paper Misfeed Indicator Lights
135
Misfeed Indications and Misfeed Locations
135
Clearing a Paper Misfeed
136
9 Troubleshooting Tips
145
When this Type of Copy Is Produced
145
When the Copier Is Not Operating Correctly
148
Advertisement
Related Products
Konica Minolta 7235
Konica Minolta 7228
Konica Minolta 7222
Konica Minolta 7075
KONICA MINOLTA 7115
Konica Minolta 7920
Konica Minolta 7915
Konica Minolta 7415
Konica Minolta 7075/FORCE 75
Konica Minolta 7085/FORCE 85
KONICA MINOLTA Categories
All in One Printer
Printer
Digital Camera
Measuring Instruments
Copier
More KONICA MINOLTA Manuals
Login
Sign In
OR
Sign in with Facebook
Sign in with Google
Upload manual
Upload from disk
Upload from URL