Sign In
Upload
Manuals
Brands
Daikin Manuals
Air Conditioner
Altherma ERHQ011-014-016BA
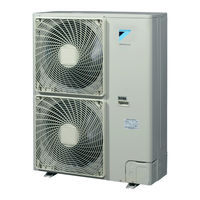
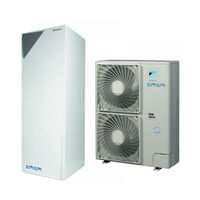
Daikin Altherma ERHQ011-014-016BA Manuals
Manuals and User Guides for Daikin Altherma ERHQ011-014-016BA. We have
5
Daikin Altherma ERHQ011-014-016BA manuals available for free PDF download: Installer's Reference Manual
Daikin Altherma ERHQ011-014-016BA Installer's Reference Manual (144 pages)
Low temperature split
Brand:
Daikin
| Category:
Air Conditioner
| Size: 10.07 MB
Table of Contents
Installer Reference Guide
2
Table of Contents
2
1 General Safety Precautions
4
About the Documentation
4
Meaning of Warnings and Symbols
4
For the Installer
4
General
4
Installation Site
4
Brine
5
Refrigerant
5
Water
5
Electrical
6
2 About the Documentation
6
About this Document
6
Installer Reference Guide at a Glance
6
3 About the Box
7
Overview: about the Box
7
Outdoor Unit
7
To Handle the Outdoor Unit
7
To Unpack the Outdoor Unit
7
Indoor Unit
7
To Unpack the Indoor Unit
7
To Remove the Accessories from the Indoor Unit
8
4 About the Units and Options
8
Overview: about the Units and Options
8
Identification
8
Identification Label: Indoor Unit
9
Identification Label: Outdoor Unit
9
Combining Units and Options
9
Possible Options for the Indoor Unit
9
Possible Options for the Outdoor Unit
9
Possible Combinations of Indoor Unit and Domestic Hot Water Tank
10
Possible Combinations of Indoor Unit and Outdoor Unit
10
5 Application Guidelines
11
Overview: Application Guidelines
11
Setting up the Space Heating/Cooling System
11
Single Room
11
Multiple Rooms - One LWT Zone
13
Multiple Rooms - Two LWT Zones
15
Setting up an Auxiliary Heat Source for Space Heating
16
Setting up the Domestic Hot Water Tank
17
System Layout - Integrated DHW Tank
17
System Layout - Standalone DHW Tank
17
Selecting the Volume and Desired Temperature for the DHW Tank
18
Setup and Configuration - DHW Tank
18
Combination: Standalone DHW Tank + Solar Panels
19
DHW Pump for Disinfection
19
DHW Pump for Instant Hot Water
19
Setting up the Energy Metering
19
Produced Heat
19
Consumed Energy
20
Normal Kwh Rate Power Supply
20
Preferential Kwh Rate Power Supply
20
Setting up the Power Consumption Control
21
Permanent Power Limitation
21
Power Limitation Activated by Digital Inputs
21
Power Limitation Process
22
Setting up an External Temperature Sensor
22
6 Preparation
23
Overview: Preparation
23
Preparing Installation Site
23
Additional Installation Site Requirements of the Outdoor Unit in Cold Climates
23
Installation Site Requirements of the Outdoor Unit
23
Installation Site Requirements of the Indoor Unit
24
Preparing Refrigerant Piping
24
Refrigerant Piping Insulation
24
Refrigerant Piping Requirements
24
Preparing Water Piping
25
Water Circuit Requirements
25
Formula to Calculate the Expansion Vessel Pre-Pressure
26
To Check the Water Volume and Flow Rate
26
Changing the Pre-Pressure of the Expansion Vessel
27
To Check the Water Volume: Examples
27
Preparing Electrical Wiring
27
About Preparing Electrical Wiring
27
About Preferential Kwh Rate Power Supply
28
Overview of Electrical Connections Except External Actuators
28
Overview of Electrical Connections for External and Internal Actuators
28
Overview: Installation
29
Opening the Units
29
About Opening the Units
29
To Open the Indoor Unit
29
To Open the Outdoor Unit
29
To Open the Switch Box Cover of the Indoor Unit
30
Mounting the Outdoor Unit
30
About Mounting the Outdoor Unit
30
Precautions When Mounting the Outdoor Unit
30
To Install the Outdoor Unit
30
To Provide Drainage
30
To Provide the Installation Structure
30
To Prevent the Outdoor Unit from Falling over
31
Mounting the Indoor Unit
31
About Mounting the Indoor Unit
31
Erhq_V3
31
Erhq_W1
31
Precautions When Mounting the Indoor Unit
31
To Install the Indoor Unit
31
To Install the Drain Pan Kit
32
Connecting the Refrigerant Piping
32
About Connecting the Refrigerant Piping
32
Guidelines When Connecting the Refrigerant Piping
33
Pipe Bending Guidelines
33
Precautions When Connecting the Refrigerant Piping
33
To Flare the Pipe End
33
To Braze the Pipe End
34
Using the Stop Valve and Service Port
34
To Connect the Refrigerant Piping to the Outdoor Unit
35
To Connect the Refrigerant Piping to the Indoor Unit
36
To Determine if Oil Traps Are Required
36
Checking the Refrigerant Piping
36
About Checking the Refrigerant Piping
36
Checking Refrigerant Piping: Setup
36
Precautions When Checking the Refrigerant Piping
36
To Check for Leaks
36
To Perform Vacuum Drying
37
Charging Refrigerant
37
About Charging Refrigerant
37
Precautions When Charging Refrigerant
37
To Determine the Additional Refrigerant Amount
37
Charging Refrigerant: Setup
38
To Charge Refrigerant
38
To Determine the Complete Recharge Amount
38
To Fix the Fluorinated Greenhouse Gases Label
38
Connecting the Water Piping
38
About Connecting the Water Piping
38
Precautions When Connecting the Water Piping
38
To Connect the Water Piping
38
About Connecting the Electrical Wiring
39
About Electrical Compliance
39
Connecting the Electrical Wiring
39
Erlq_V3
39
To Fill the Domestic Hot Water Tank
39
To Fill the Water Circuit
39
To Insulate the Water Piping
39
Erlq_W1
40
Guidelines When Connecting the Electrical Wiring
40
Precautions When Connecting the Electrical Wiring
40
Specifications of Standard Wiring Components
40
To Connect the Electrical Wiring on the Outdoor Unit
41
To Connect the Electrical Wiring on the Indoor Unit
42
To Reposition the Air Thermistor on the Outdoor Unit
42
To Connect the Main Power Supply
43
To Connect the Backup Heater Power Supply
44
To Connect the User Interface
45
To Connect the Alarm Output
46
To Connect the Domestic Hot Water Pump
46
To Connect the Electrical Meters
46
To Connect the Shut-Off Valve
46
To Connect the Space Cooling/Heating ON/OFF Output
46
Finishing the Indoor Unit Installation
47
Finishing the Outdoor Unit Installation
47
To Close the Outdoor Unit
47
To Connect the Changeover to External Heat Source
47
To Connect the Power Consumption Digital Inputs
47
To Finish the Outdoor Unit Installation
47
To Fix the User Interface Cover to the Indoor Unit
47
To Close the Indoor Unit
48
8 Configuration
48
Overview: Configuration
48
To Access the most Used Commands
48
To Connect the PC Cable to the Switch Box
48
To Copy the Language Set from the First to the Second User Interface
49
To Copy the System Settings from the First to the Second User Interface
49
Quick Wizard: Set the System Layout after First Power on
50
Basic Configuration
50
Quick Wizard: Language / Time and Date
50
Quick Wizard: Standard
50
Quick Wizard: Options
52
Quick Wizard: Capacities (Energy Metering)
54
Space Heating/Cooling Control
54
Domestic Hot Water Control
57
Contact/Helpdesk Number
58
Advanced Configuration/Optimization
58
Space Heating/Cooling Operation: Advanced
58
Domestic Hot Water Control: Advanced
61
Heat Source Settings
65
System Settings
68
Menu Structure: Overview User Settings
72
Menu Structure: Overview Installer Settings
73
9 Commissioning
74
Overview: Commissioning
74
Precautions When Commissioning
74
Checklist before Commissioning
74
Checklist During Commissioning
74
To Check the Minimum Flow Rate
74
Air Purge Function
75
To Perform a Test Run
75
To Perform an Actuator Test Run
76
Underfloor Heating Screed Dryout
76
10 Hand-Over to the User
77
11 Maintenance and Service
77
Overview: Maintenance and Service
77
Maintenance Safety Precautions
77
Opening the Indoor Unit
77
Checklist for Yearly Maintenance of the Outdoor Unit
78
Checklist for Yearly Maintenance of the Indoor Unit
78
12 Troubleshooting
78
Overview: Troubleshooting
78
Precautions When Troubleshooting
79
Solving Problems Based on Symptoms
79
Symptom: the Compressor Does NOT Start (Space Heating or Domestic Water Heating)
79
Symptom: the Pressure Relief Valve Opens
79
Symptom: the Pump Is Making Noise (Cavitation)
79
Symptom: the Unit Is NOT Heating or Cooling as Expected
79
Symptom: Decoration Panels Are Pushed Away Due to a Swollen Tank
80
Symptom: Tank Disinfection Function Is NOT Completed Correctly (AH-Error)
80
Symptom: the Pressure at the Tapping Point Is Temporarily Unusual High
80
Symptom: the Space Is NOT Sufficiently Heated at Low Outdoor Temperatures
80
Symptom: the Water Pressure Relief Valve Leaks
80
Solving Problems Based on Error Codes
81
Error Codes: Overview
81
13 Disposal
82
Overview: Disposal
82
About Pump down
82
To Pump down
82
14 Technical Data
83
Overview: Technical Data
83
Dimensions and Service Space
83
Dimensions: Outdoor Unit
83
Service Space: Outdoor Unit
87
Dimensions and Service Space: Indoor Unit
89
Center of Gravity
91
Center of Gravity: Outdoor Unit
91
Components
92
Components: Outdoor Unit
92
Components: Indoor Unit
94
Components: Switch Box (Indoor Unit)
94
Piping Diagram
95
Piping Diagram: Outdoor Unit
95
Piping Diagram: Indoor Unit
96
Wiring Diagram
97
Wiring Diagram: Outdoor Unit
97
Wiring Diagram: Indoor Unit
105
Power Supply
109
Advertisement
Daikin Altherma ERHQ011-014-016BA Installer's Reference Manual (108 pages)
Brand:
Daikin
| Category:
Cables and connectors
| Size: 7.47 MB
Table of Contents
Table of Contents
2
1 General Safety Precautions
3
About the Documentation
3
Meaning of Warnings and Symbols
4
For the Installer
4
General
4
Installation Site
4
Refrigerant
5
Brine
5
Water
5
Electrical
6
2 About the Documentation
6
About this Document
6
Installer Reference Guide at a Glance
7
3 About the Box
7
Overview: about the Box
7
Outdoor Unit
7
To Unpack the Outdoor Unit
7
To Handle the Outdoor Unit
7
To Remove the Accessories from the Outdoor Unit
8
Indoor Unit
8
To Unpack the Indoor Unit
8
To Remove the Accessories from the Indoor Unit
8
Backup Heater
9
To Unpack the Backup Heater
9
To Remove the Accessories from the Backup Heater
9
4 About the Units and Options
9
Overview: about the Units and Options
9
Identification
9
Identification Label: Outdoor Unit
9
Identification Label: Indoor Unit
9
Identification Label: Backup Heater
10
Combining Units and Options
10
Possible Options for the Outdoor Unit
10
Possible Options for the Indoor Unit
10
Possible Combinations of Indoor Unit and Outdoor Unit
11
Possible Combinations of Indoor Unit and Domestic Hot Water Tank
12
5 Application Guidelines
12
Overview: Application Guidelines
12
Setting up the Space Heating System
12
Single Room
12
Multiple Rooms - One LWT Zone
14
Multiple Rooms - Two LWT Zones
15
Setting up an Auxiliary Heat Source for Space Heating
16
Setting up the Domestic Hot Water Tank
18
System Layout - Standalone DHW Tank
18
Selecting the Volume and Desired Temperature for the DHW Tank
18
Setup and Configuration - DHW Tank
19
Combination: Standalone DHW Tank + Solar Panels
19
DHW Pump for Instant Hot Water
19
DHW Pump for Disinfection
19
DHW Pump for Tank Preheating
19
Setting up the Energy Metering
19
Produced Heat
20
Consumed Energy
20
Normal Kwh Rate Power Supply
20
Preferential Kwh Rate Power Supply
21
Setting up the Power Consumption Control
21
Permanent Power Limitation
21
Power Limitation Activated by Digital Inputs
21
Power Limitation Process
22
Setting up an External Temperature Sensor
22
6 Preparation
23
Overview: Preparation
23
Preparing Installation Site
23
Installation Site Requirements of the Outdoor Unit
23
Additional Installation Site Requirements of the Outdoor Unit in Cold Climates
24
Installation Site Requirements of the Indoor Unit
24
Installation Site Requirements of the Backup Heater
24
Preparing Refrigerant Piping
25
Refrigerant Piping Requirements
25
Refrigerant Piping Insulation
25
Preparing Water Piping
25
Water Circuit Requirements
25
Formula to Calculate the Expansion Vessel Pre-Pressure
26
To Check the Water Volume and Flow Rate
26
Changing the Pre-Pressure of the Expansion Vessel
27
To Check the Water Volume: Examples
27
Preparing Electrical Wiring
28
About Preparing Electrical Wiring
28
About Preferential Kwh Rate Power Supply
28
Overview of Electrical Connections Except External Actuators
28
Overview of Electrical Connections for External and Internal Actuators
28
7 Installation
29
Overview: Installation
29
Opening the Units
30
About Opening the Units
30
To Open the Outdoor Unit
30
To Open the Indoor Unit
30
To Open the Switch Box Cover of the Indoor Unit
30
To Open the Backup Heater
30
To Open the Switch Box Cover of the Backup Heater
30
Mounting the Outdoor Unit
31
About Mounting the Outdoor Unit
31
Precautions When Mounting the Outdoor Unit
31
To Provide the Installation Structure
31
To Install the Outdoor Unit
31
To Provide Drainage
31
To Prevent the Outdoor Unit from Falling over
32
Mounting the Indoor Unit
32
About Mounting the Indoor Unit
32
Precautions When Mounting the Indoor Unit
32
To Install the Indoor Unit
32
To Install the Drain Pan Kit
33
Mounting the Backup Heater
33
Precautions When Mounting the Backup Heater
33
To Install the Backup Heater
33
Connecting the Refrigerant Piping
34
About Connecting the Refrigerant Piping
34
Precautions When Connecting the Refrigerant Piping
34
Guidelines When Connecting the Refrigerant Piping
34
Pipe Bending Guidelines
35
To Flare the Pipe End
35
To Braze the Pipe End
35
Using the Stop Valve and Service Port
35
To Connect the Refrigerant Piping to the Outdoor Unit
36
To Connect the Refrigerant Piping to the Indoor Unit
37
To Determine if Oil Traps Are Required
37
Checking the Refrigerant Piping
37
About Checking the Refrigerant Piping
37
Precautions When Checking the Refrigerant Piping
38
Checking Refrigerant Piping: Setup
38
To Check for Leaks
38
To Perform Vacuum Drying
38
Charging Refrigerant
38
About Charging Refrigerant
38
Precautions When Charging Refrigerant
39
To Determine the Additional Refrigerant Amount
39
To Determine the Complete Recharge Amount
39
Charging Refrigerant: Setup
39
To Charge Refrigerant
39
To Fix the Fluorinated Greenhouse Gases Label
39
Connecting the Water Piping
39
About Connecting the Water Piping
39
Precautions When Connecting the Water Piping
40
To Connect the Water Piping
40
To Connect the Water Piping to the Backup Heater
40
To Fill the Water Circuit
40
To Fill the Domestic Hot Water Tank
41
To Insulate the Water Piping
41
Connecting the Electrical Wiring
41
About Connecting the Electrical Wiring
41
About Electrical Compliance
41
Precautions When Connecting the Electrical Wiring
42
Guidelines When Connecting the Electrical Wiring
42
Specifications of Standard Wiring Components
42
To Connect the Electrical Wiring on the Outdoor Unit
42
To Reposition the Air Thermistor on the Outdoor Unit
43
To Connect the Electrical Wiring on the Indoor Unit
44
To Connect the Main Power Supply
44
7.10.10 to Connect the User Interface
45
7.10.11 to Connect the Shut-Off Valve
46
7.10.12 to Connect the Electrical Meters
46
7.10.13 to Connect the Domestic Hot Water Pump
46
7.10.14 to Connect the Alarm Output
46
To Connect the Space Heating ON/OFF Output
46
To Connect the Changeover to External Heat Source
47
To Connect the Power Consumption Digital Inputs
47
To Connect the Safety Thermostat (Normal Closed Contact)
47
To Connect the Electrical Wiring on the Backup Heater
47
To Connect the Backup Heater Power Supply
48
To Connect the Backup Heater to the Indoor Unit
49
Finishing the Outdoor Unit Installation
49
To Finish the Outdoor Unit Installation
49
To Close the Outdoor Unit
49
Finishing the Indoor Unit Installation
49
To Fix the User Interface Cover to the Indoor Unit
49
To Close the Indoor Unit
49
Finishing the Backup Heater Installation
49
To Close the Backup Heater
49
8 Configuration
50
Overview: Configuration
50
To Connect the PC Cable to the Switch Box
50
To Access the most Used Commands
50
To Copy the System Settings from the First to the Second User Interface
51
To Copy the Language Set from the First to the Second User Interface
51
Quick Wizard: Set the System Layout after First Power on
51
Basic Configuration
52
Quick Wizard: Language / Time and Date
52
Quick Wizard: Standard
52
Quick Wizard: Options
54
Quick Wizard: Capacities (Energy Metering)
56
Space Heating Control
56
Domestic Hot Water Control
59
Contact/Helpdesk Number
59
Advanced Configuration/Optimization
60
Space Heating Operation: Advanced
60
Domestic Hot Water Control: Advanced
63
Heat Source Settings
66
System Settings
68
Menu Structure: Overview User Settings
72
Menu Structure: Overview Installer Settings
73
9 Commissioning
74
Overview: Commissioning
74
Precautions When Commissioning
74
Checklist before Commissioning
74
Checklist During Commissioning
74
To Check the Minimum Flow Rate
75
Air Purge Function
75
To Perform a Test Run
76
To Perform an Actuator Test Run
76
Underfloor Heating Screed Dryout
76
10 Hand-Over to the User
78
11 Maintenance and Service
78
Overview: Maintenance and Service
78
Maintenance Safety Precautions
78
Opening the Indoor Unit
78
Opening the Backup Heater
78
Checklist for Yearly Maintenance of the Outdoor Unit
78
Checklist for Yearly Maintenance of the Indoor Unit
78
12 Troubleshooting
79
Overview: Troubleshooting
79
Precautions When Troubleshooting
79
Solving Problems Based on Symptoms
79
Symptom: the Unit Is NOT Heating as Expected
79
Symptom: the Compressor Does NOT Start (Space Heating or Domestic Water Heating)
80
Symptom: the Pump Is Making Noise (Cavitation)
80
Symptom: the Pressure Relief Valve Opens
80
Symptom: the Water Pressure Relief Valve Leaks
80
Symptom: the Space Is NOT Sufficiently Heated at Low Outdoor Temperatures
81
Symptom: the Pressure at the Tapping Point Is Temporarily Unusually High
81
Symptom: Decoration Panels Are Pushed Away Due to a Swollen Tank
81
Symptom: Tank Disinfection Function Is NOT Completed Correctly (AH-Error)
81
Solving Problems Based on Error Codes
81
Error Codes: Overview
81
Daikin Altherma ERHQ011-014-016BA Installer's Reference Manual (108 pages)
Low temperature split
Brand:
Daikin
| Category:
Air Conditioner
| Size: 6.54 MB
Table of Contents
Table of Contents
2
General Safety Precautions
3
About the Documentation
3
Meaning of Warnings and Symbols
3
General
4
Installation Site
4
Refrigerant
4
Brine
5
Water
5
Electrical
6
About the Documentation
6
About this Document
6
Installer Reference Guide at a Glance
7
About the Box
7
Installation
7
Overview: about the Box
7
Outdoor Unit
7
To Unpack the Outdoor Unit
7
To Handle the Outdoor Unit
7
To Remove the Accessories from the Outdoor Unit
8
Indoor Unit
8
To Unpack the Indoor Unit
8
About the Units and Options
8
Overview: about the Units and Options
8
Identification
9
Identification Label: Outdoor Unit
9
Identification Label: Indoor Unit
9
Combining Units and Options
9
Possible Options for the Outdoor Unit
9
Possible Options for the Indoor Unit
9
Possible Combinations of Indoor Unit and Outdoor Unit
10
Application Guidelines
11
Overview: Application Guidelines
11
Setting up the Space Heating/Cooling System
11
Single Room
11
Multiple Rooms - One LWT Zone
13
Multiple Rooms - Two LWT Zones
15
Setting up an Auxiliary Heat Source for Space Heating
16
Setting up the Domestic Hot Water Tank
17
System Layout - Integrated DHW Tank
17
Selecting the Volume and Desired Temperature for the DHW Tank
17
Setup and Configuration - DHW Tank
18
DHW Pump for Instant Hot Water
18
DHW Pump for Disinfection
18
Setting up the Energy Metering
18
Produced Heat
18
Consumed Energy
19
Normal Kwh Rate Power Supply
19
Preferential Kwh Rate Power Supply
19
Setting up the Power Consumption Control
20
Permanent Power Limitation
20
Power Limitation Activated by Digital Inputs
20
Power Limitation Process
21
Setting up an External Temperature Sensor
21
Preparation
22
Overview: Preparation
22
Preparing the Installation Site
22
Installation Site Requirements of the Outdoor Unit
22
Additional Installation Site Requirements of the Outdoor Unit in Cold Climates
23
Installation Site Requirements of the Indoor Unit
23
Preparing Refrigerant Piping
23
Refrigerant Piping Requirements
23
Refrigerant Piping Insulation
23
Preparing Water Piping
24
Water Circuit Requirements
24
Formula to Calculate the Expansion Vessel Pre-Pressure
25
To Check the Water Volume and Flow Rate
25
Changing the Pre-Pressure of the Expansion Vessel
26
To Check the Water Volume: Examples
26
Preparing Electrical Wiring
26
About Preparing Electrical Wiring
26
About Preferential Kwh Rate Power Supply
27
Overview of Electrical Connections Except External Actuators
27
Overview of Electrical Connections for External and Internal Actuators
27
Overview: Installation
28
Opening the Units
28
About Opening the Units
28
To Open the Outdoor Unit
28
To Open the Indoor Unit
28
To Open the Switch Box Cover of the Indoor Unit
29
Mounting the Outdoor Unit
29
About Mounting the Outdoor Unit
29
Precautions When Mounting the Outdoor Unit
29
To Provide the Installation Structure
29
To Install the Outdoor Unit
30
To Provide Drainage
30
To Prevent the Outdoor Unit from Falling over
30
Mounting the Indoor Unit
30
About Mounting the Indoor Unit
30
Precautions When Mounting the Indoor Unit
30
To Install the Indoor Unit
31
Connecting the Refrigerant Piping
31
About Connecting the Refrigerant Piping
31
Precautions When Connecting the Refrigerant Piping
31
Guidelines When Connecting the Refrigerant Piping
32
Pipe Bending Guidelines
32
To Flare the Pipe End
32
To Braze the Pipe End
32
Using the Stop Valve and Service Port
32
To Connect the Refrigerant Piping to the Outdoor Unit
33
To Connect the Refrigerant Piping to the Indoor Unit
34
To Determine if Oil Traps Are Required
34
Checking the Refrigerant Piping
34
About Checking the Refrigerant Piping
34
Precautions When Checking the Refrigerant Piping
35
Checking Refrigerant Piping: Setup
35
To Check for Leaks
35
To Perform Vacuum Drying
35
Charging Refrigerant
35
About Charging Refrigerant
35
Precautions When Charging Refrigerant
36
To Determine the Additional Refrigerant Amount
36
To Determine the Complete Recharge Amount
36
To Charge Additional Refrigerant
36
To Fix the Fluorinated Greenhouse Gases Label
36
Connecting the Water Piping
37
About Connecting the Water Piping
37
Precautions When Connecting the Water Piping
37
To Connect the Water Piping
37
To Connect the Recirculation Piping
37
To Connect the Pressure Relief Valve to the Drain
38
To Fill the Water Circuit
38
To Fill the Domestic Hot Water Tank
38
To Insulate the Water Piping
38
Connecting the Electrical Wiring
39
About Connecting the Electrical Wiring
39
About Electrical Compliance
39
Precautions When Connecting the Electrical Wiring
39
Guidelines When Connecting the Electrical Wiring
39
Specifications of Standard Wiring Components
40
To Connect the Electrical Wiring on the Outdoor Unit
40
To Reposition the Air Thermistor on the Outdoor Unit
41
To Connect the Electrical Wiring on the Indoor Unit
41
To Connect the Main Power Supply
42
To Connect the Backup Heater Power Supply
43
To Connect the User Interface
44
To Connect the Shut-Off Valve
45
To Connect the Electrical Meters
45
To Connect the Domestic Hot Water Pump
45
To Connect the Alarm Output
45
To Connect the Space Cooling/Heating ON/OFF Output
45
To Connect the Changeover to External Heat Source
46
To Connect the Power Consumption Digital Inputs
46
To Connect the Safety Thermostat (Normal Closed Contact)
46
Finishing the Outdoor Unit Installation
46
To Finish the Outdoor Unit Installation
46
To Close the Outdoor Unit
47
Finishing the Indoor Unit Installation
47
To Fix the User Interface Cover to the Indoor Unit
47
To Close the Indoor Unit
47
Configuration
47
Overview: Configuration
47
To Connect the PC Cable to the Switch Box
47
To Access the most Used Commands
48
To Copy the System Settings from the First to the Second User Interface
48
To Copy the Language Set from the First to the Second User Interface
49
Quick Wizard: Set the System Layout after First Power on
49
Basic Configuration
49
Quick Wizard: Language / Time and Date
49
Quick Wizard: Standard
50
Quick Wizard: Options
51
Quick Wizard: Capacities (Energy Metering)
54
Space Heating/Cooling Control
54
Domestic Hot Water Control
57
Contact/Helpdesk Number
58
Advanced Configuration/Optimization
58
Space Heating/Cooling Operation: Advanced
58
Domestic Hot Water Control: Advanced
62
Heat Source Settings
66
System Settings
68
Menu Structure: Overview User Settings
73
Menu Structure: Overview Installer Settings
74
Commissioning
75
Overview: Commissioning
75
Precautions When Commissioning
75
Checklist before Commissioning
75
Checklist During Commissioning
75
To Check the Minimum Flow Rate
76
Air Purge Function
76
To Perform a Test Run
77
To Perform an Actuator Test Run
77
Underfloor Heating Screed Dryout
77
10 Hand-Over to the User
79
Maintenance and Service
79
Overview: Maintenance and Service
79
Maintenance Safety Precautions
79
Opening the Indoor Unit
79
Checklist for Yearly Maintenance of the Outdoor Unit
79
Checklist for Yearly Maintenance of the Indoor Unit
79
To Drain the Domestic Hot Water Tank
80
12 Troubleshooting
80
Overview: Troubleshooting
80
Precautions When Troubleshooting
80
Solving Problems Based on Symptoms
81
Symptom: the Unit Is NOT Heating or Cooling as Expected
81
Symptom: the Compressor Does NOT Start (Space Heating or Domestic Water Heating)
81
Symptom: the Pump Is Making Noise (Cavitation)
81
Symptom: the Pressure Relief Valve Opens
81
Symptom: the Water Pressure Relief Valve Leaks
82
Symptom: the Space Is NOT Sufficiently Heated at Low Outdoor Temperatures
82
Symptom: the Pressure at the Tapping Point Is Temporarily Unusually High
82
Symptom: Decoration Panels Are Pushed Away Due to a Swollen Tank
82
Symptom: Tank Disinfection Function Is NOT Completed Correctly (AH-Error)
82
Solving Problems Based on Error Codes
83
Error Codes: Overview
83
Advertisement
Daikin Altherma ERHQ011-014-016BA Installer's Reference Manual (92 pages)
Low Temperature Split
Brand:
Daikin
| Category:
Heat Pump
| Size: 5.63 MB
Table of Contents
Table of Contents
2
Installation Site
4
Refrigerant
4
Water
4
Electrical
4
About the Box
5
Indoor Unit
5
To Unpack the Indoor Unit
5
To Remove the Accessories from the Indoor Unit
5
About the Units and Options
6
Identification
6
Identification Label: Indoor Unit
6
Possible Combinations of Units and Options
6
List of Options for Indoor Unit
6
Possible Combinations of Indoor Unit and Outdoor Unit
7
Application Guidelines
7
Overview: Application Guidelines
7
Setting up the Space Heating/Cooling System
7
Single Room
7
Multiple Rooms - One LWT Zone
9
Multiple Rooms - Two LWT Zones
11
Setting up an Auxiliary Heat Source for Space Heating
12
Setting up the Domestic Hot Water Tank
14
System Layout - Integrated DHW Tank
14
System Layout - Standalone DHW Tank
14
Selecting the Volume and Desired Temperature for the DHW Tank
14
Setup and Configuration - DHW Tank
15
Combination: Standalone DHW Tank + Solar Panels
15
DHW Pump for Instant Hot Water
15
DHW Pump for Disinfection
16
Setting up the Energy Metering
16
Produced Heat
16
Consumed Energy
16
Normal Kwh Rate Power Supply
16
Preferential Kwh Rate Power Supply
17
Setting up the Power Consumption Control
17
Permanent Power Limitation
18
Power Limitation Activated by Digital Inputs
18
Power Limitation Process
18
Setting up an External Temperature Sensor
19
Preparation
19
Preparing Installation Site
19
Installation Site Requirements of the Indoor Unit
19
Preparing Water Piping
20
Water Circuit Requirements
20
Formula to Calculate the Expansion Vessel Pre-Pressure
21
To Check the Water Volume
21
Changing the Pre-Pressure of the Expansion Vessel
22
To Check the Water Volume: Examples
22
Preparing Electrical Wiring
22
About Preparing Electrical Wiring
22
About Preferential Kwh Rate Power Supply
23
Overview of Electrical Connections Except External Actuators
23
Overview of Electrical Connections for External and Internal Actuators
23
Installation
24
Opening the Units
24
To Open the Indoor Unit
24
To Open the Switch Box Cover of the Indoor Unit
24
Mounting the Indoor Unit
24
To Install the Indoor Unit
24
To Lower the Sound Plate
25
Connecting the Water Piping
25
To Connect the Water Piping
25
To Connect the Pressure Relief Valve to the Drain
26
To Fill the Water Circuit
26
To Fill the Domestic Hot Water Tank
26
To Insulate the Water Piping
26
To Connect the Recirculation Piping
26
Connecting the Electrical Wiring
27
About Electrical Compliance
27
To Connect the Electrical Wiring on the Indoor Unit
27
To Connect the Main Power Supply
28
To Connect the Backup Heater Power Supply
29
To Connect the User Interface
30
To Connect the Shut-Off Valve
31
To Connect the Electrical Meters
31
To Connect the Domestic Hot Water Pump
31
To Connect the Alarm Output
32
To Connect the Space Cooling/Heating ON/OFF Output
32
To Connect the Changeover to External Heat Source
32
To Connect the Power Consumption Digital Inputs
32
Finishing the Indoor Unit Installation
32
To Fix the User Interface Cover to the Indoor Unit
32
To Close the Indoor Unit
32
Configuration
33
Overview: Configuration
33
To Connect the PC Cable to the Switch Box
33
To Access the most Used Commands
33
To Copy the System Settings from the First to the Second User Interface
33
To Copy the Language Set from the First to the Second User Interface
34
Quick Wizard: Set the System Layout after First Power on
34
Basic Configuration
34
Quick Wizard: Language / Time and Date
34
Quick Wizard: Standard
35
Quick Wizard: Options
36
Quick Wizard: Capacities (Energy Metering)
38
Space Heating/Cooling Control
38
Domestic Hot Water Control
42
Contact/Helpdesk Number
43
Advanced Configuration/Optimization
43
Space Heating/Cooling Operation: Advanced
43
Domestic Hot Water Control: Advanced
46
Heat Source Settings
50
System Settings
52
Menu Structure: Overview
56
Menu Structure: Overview Installer Settings
57
Commissioning
58
Overview: Commissioning
58
Checklist before Test Run
58
Air Purge Function
58
To Perform a Manual Air Purge
58
To Perform an Automatic Air Purge
59
To Interrupt Air Purge
59
To Perform a Test Run
59
To Perform an Actuator Test Run
59
Possible Actuator Test Runs
59
Underfloor Heating Screed Dryout
59
To Program an Underfloor Heating Screed Dryout Schedule
60
To Start an Underfloor Heating Screed Dryout
60
To Readout the Status of an Underfloor Heating Screed Dryout
60
To Interrupt an Underfloor Heating Screed Dryout
60
10 Hand-Over to the User
60
Maintenance and Service
60
Maintenance Safety Precautions
60
Opening the Indoor Unit
61
Checklist for Yearly Maintenance for Indoor Unit
61
To Drain the Domestic Hot Water Tank
62
Troubleshooting
62
General Guidelines
62
Solving Problems Based on Symptoms
62
Symptom: the Unit Is NOT Heating or Cooling as Expected
62
Symptom: the Compressor Does NOT Start (Space Heating or Domestic Water Heating)
63
Symptom: the Pump Is Making Noise (Cavitation)
63
Symptom: the Pressure Relief Valve Opens
63
Symptom: the Water Pressure Relief Valve Leaks
63
Symptom: the Space Is NOT Sufficiently Heated at Low Outdoor Temperatures
63
Symptom: the Pressure at the Tapping Point Is Temporarily Unusual High
64
Symptom: Decoration Panels Are Pushed Away Due to a Swollen Tank
64
Symptom: Tank Disinfection Function Is NOT Completed Correctly (AH-Error)
64
Solving Problems Based on Error Codes
64
Error Codes: Overview
64
Glossary
65
Technical Data
66
Dimensions and Service Space
66
Dimensions and Service Space: Indoor Unit
66
Components
68
Components: Indoor Unit
68
Components: Switch Box (Indoor Unit)
68
Functional Diagrams
70
Functional Diagram: Indoor Unit
70
Piping Diagram
71
Piping Diagram: Indoor Unit
71
Wiring Diagram
72
Wiring Diagram - Components: Indoor Unit
72
Technical Specifications
78
Technical Specifications: Indoor Unit
78
Operation Range
80
Operation Range: Heating and Cooling
80
Operation Range: Domestic Hot Water
81
Drain Pan Necessity
82
Sound Spectrum
83
Sound Spectrum: Outdoor Unit
83
ESP Curve
84
ESP Curve: Indoor Unit
84
Performance
85
Combination Table
88
Daikin Altherma ERHQ011-014-016BA Installer's Reference Manual (20 pages)
Brand:
Daikin
| Category:
Temperature Controller
| Size: 2.74 MB
Table of Contents
Table of Contents
2
General Safety Precautions
3
About the Documentation
3
Meaning of Warnings and Symbols
4
For the Installer
4
General
4
Installation Site
4
Refrigerant
4
Brine
5
Water
5
Electrical
5
About the Documentation
6
About this Document
6
Installer Reference Guide at a Glance
6
About the Box
7
Overview: about the Box
7
Outdoor Unit
7
To Unpack the Outdoor Unit
7
To Handle the Outdoor Unit
7
Indoor Unit
7
About the Units and Options
8
Overview: about the Units and Options
8
Identification
8
Identification Label: Outdoor Unit
8
Identification Label: Indoor Unit
8
Combining Units and Options
9
Possible Options for the Outdoor Unit
9
Possible Options for the Indoor Unit
9
Possible Combinations of Indoor Unit and Outdoor Unit
10
Application Guidelines
10
Overview: Application Guidelines
10
Setting up the Space Heating System
10
Multiple Rooms - Two LWT Zones
10
Setting up the Domestic Hot Water Tank
11
System Layout - Integrated DHW Tank
11
Selecting the Volume and Desired Temperature for the DHW Tank
11
Setup and Configuration - DHW Tank
12
DHW Pump for Instant Hot Water
12
DHW Pump for Disinfection
12
Setting up the Energy Metering
13
Produced Heat
13
Consumed Energy
13
Normal Kwh Rate Power Supply
13
Preferential Kwh Rate Power Supply
14
Setting up the Power Consumption Control
14
Permanent Power Limitation
14
Power Limitation Activated by Digital Inputs
14
Power Limitation Process
15
Setting up an External Temperature Sensor
15
Preparation
15
Overview: Preparation
15
Preparing Installation Site
15
Installation Site Requirements of the Outdoor Unit
16
Additional Installation Site Requirements of the Outdoor Unit in Cold Climates
16
Installation Site Requirements of the Indoor Unit
16
Preparing Refrigerant Piping
17
Refrigerant Piping Requirements
17
Refrigerant Piping Insulation
17
Preparing Water Piping
17
Water Circuit Requirements
17
Formula to Calculate the Expansion Vessel Pre-Pressure
18
To Check the Water Volume and Flow Rate
18
Changing the Pre-Pressure of the Expansion Vessel
19
To Check the Water Volume: Examples
20
Advertisement
Related Products
Daikin ERHQ011BA
Daikin ERHQ016BA
Daikin ERHQ014BA
Daikin ERHQ-BW1
Daikin ERHQ-BV3
Daikin ALTHERMA HT ERSQ 011 V1
Daikin ALTHERMA HT ERSQ 014 V1
Daikin ALTHERMA HT ERRQ 014 AA
Daikin Altherma ERYQ005ABV3
Daikin ERLQ014BAV3
Daikin Categories
Air Conditioner
Heat Pump
Remote Control
Chiller
Controller
More Daikin Manuals
Login
Sign In
OR
Sign in with Facebook
Sign in with Google
Upload manual
Upload from disk
Upload from URL