
Related Manuals for Daikin Altherma EHVH/X16S18+26CA


Summary of Contents for Daikin Altherma EHVH/X16S18+26CA
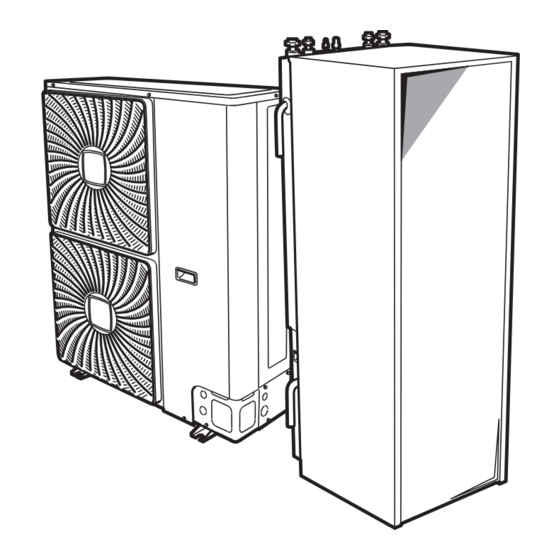
- Page 1 Installer reference guide Daikin Altherma - Low Temperature Split ERHQ011-014-016BA Installer reference guide ERLQ011-014-016CA English Daikin Altherma - Low Temperature Split EHVH/X16S18+26CA...
-
Page 2: Table Of Contents
To open the indoor unit ..........11.3 To drain the domestic hot water tank ........62 7.1.2 To open the switch box cover of the indoor unit ..Installer reference guide ERHQ011~016BA + ERLQ011~016CA + EHVH/X16S18+26CA Daikin Altherma - Low Temperature Split 4P313777-1C – 2012.11... - Page 3 Symptom: The pressure at the tapping point is Latest revisions of the supplied documentation may be available on temporarily unusual high ..........the regional Daikin website or via your dealer. 12.2.8 Symptom: Decoration panels are pushed away due to a swollen tank ............
-
Page 4: Installation Site
WARNING produced. Corrosion of copper pipes or soldered parts may cause Make sure installation, testing and applied materials the refrigerant to leak. comply with applicable legislation (on top of the instructions described in the Daikin documentation). 2.2.3 Refrigerant CAUTION NOTICE... -
Page 5: About The Box
▪ Bring the packed unit as close as possible to its final installation position to prevent damage during transport. 3 Remove the accessories. a General safety precautions ERHQ011~016BA + ERLQ011~016CA + EHVH/X16S18+26CA Installer reference guide Daikin Altherma - Low Temperature Split 4P313777-1C – 2012.11... -
Page 6: About The Units And Options
▪ 3V For installation instructions, see the installation manual of the remote ▪ 9W indoor sensor and addendum book for optional equipment. Installer reference guide ERHQ011~016BA + ERLQ011~016CA + EHVH/X16S18+26CA Daikin Altherma - Low Temperature Split 4P313777-1C – 2012.11... -
Page 7: Possible Combinations Of Indoor Unit And Outdoor Unit
Application guidelines temperature in each room, you need to answer the following questions first: ▪ How many rooms are heated (or cooled) by the Daikin heat pump system? Overview: Application guidelines ▪ Which heat emitter types are used in each room and what is their... - Page 8 Benefits ▪ Cost effective. You do NOT need an additional external room thermostat. ▪ Wireless. The Daikin external room thermostat is available in a wireless version. ▪ Highest comfort and efficiency. The smart room thermostat functionality can decrease or increase the desired leaving water ▪...
-
Page 9: Multiple Rooms - One Lwt Zone
▪ The shut-off valve interface used as thermostat. ▪ A thermostatic valve is installed before the under floor heating in each of the other rooms. ERHQ011~016BA + ERLQ011~016CA + EHVH/X16S18+26CA Installer reference guide Daikin Altherma - Low Temperature Split 4P313777-1C – 2012.11... - Page 10 (X2M/1 and X2M/4). The indoor unit will only supply leaving water temperature when there is an actual demand. INFORMATION To increase comfort and performance, Daikin recommends to install the valve kit option EKVKHPC on each heat pump convector.
-
Page 11: Multiple Rooms - Two Lwt Zones
INFORMATION A Additional leaving water temperature zone B Room 1 To increase comfort and performance, Daikin recommends C Room 2 to install the valve kit option EKVKHPC on each heat pump D Main leaving water temperature zone convector. -
Page 12: Setting Up An Auxiliary Heat Source For Space Heating
▪ Under floor heating has the best performance with Altherma LT. Installer reference guide ERHQ011~016BA + ERLQ011~016CA + EHVH/X16S18+26CA Daikin Altherma - Low Temperature Split 4P313777-1C – 2012.11... - Page 13 ▪ Make sure the auxiliary boiler and its integration in the Only for EHBH/X system complies with applicable legislation. ▪ Daikin is NOT responsible for incorrect or unsafe situations in the auxiliary boiler system. ▪ Make sure the return water to the heat pump does NOT exceed 55°C.
-
Page 14: Setting Up The Domestic Hot Water Tank
55°C (50°C if outdoor temperature is low). The electrical resistance integrated in the heat pump can higher this temperature. However, this consumes more energy. Daikin recommends to set the desired DHW tank temperature below 55°C to avoid using the electrical resistance. -
Page 15: Setup And Configuration - Dhw Tank
▪ If energy prices are the same during the day and the night, water, see "8 Configuration" on page 33. Daikin recommends to heat up the DHW tank during the day. ▪ Connecting the electrical wiring of the standalone DHW tank to ▪... -
Page 16: Dhw Pump For Disinfection
One power meter that covers the entire system is sufficient. 5.5.1 Produced heat ▪ Applicable for all models. Setup Connect the power meter to X5M/7 and X5M/8. Installer reference guide ERHQ011~016BA + ERLQ011~016CA + EHVH/X16S18+26CA Daikin Altherma - Low Temperature Split 4P313777-1C – 2012.11... -
Page 17: Preferential Kwh Rate Power Supply
▪ The power limitation level can be activated: 5.5.4 Preferential kWh rate power supply ▪ Permanently ▪ By digital inputs General rule ▪ Power meter 1: Measures the outdoor unit. ERHQ011~016BA + ERLQ011~016CA + EHVH/X16S18+26CA Installer reference guide Daikin Altherma - Low Temperature Split 4P313777-1C – 2012.11... -
Page 18: Permanent Power Limitation
The outdoor unit has better efficiency than the electrical heaters. Therefore, the electrical heaters are limited and turned OFF first. The power or current of the entire Daikin system is limited The system limits power consumption in the following order: dynamically by digital inputs (maximum four steps). -
Page 19: Setting Up An External Temperature Sensor
Backup heater. ▪ That is NOT exposed to direct sunlight Result: The booster heater will ▪ If this is NOT possible, Daikin recommends to connect a remote be turned OFF first. outdoor sensor (option EKRSCA1). ▪ Setup: For installation instructions, see the installation manual of Turns OFF all electrical heaters. -
Page 20: Preparing Water Piping
▪ Only use appropriate tooling to handle brass, which is a soft material. If NOT, pipes will get damaged. Installer reference guide ERHQ011~016BA + ERLQ011~016CA + EHVH/X16S18+26CA Daikin Altherma - Low Temperature Split 4P313777-1C – 2012.11... -
Page 21: Formula To Calculate The Expansion Vessel Pre-Pressure
Use the following graph to determine the maximum water volume for the calculated pre-pressure. a Recirculation connection b Hot water connection c Shower d Recirculation pump ERHQ011~016BA + ERLQ011~016CA + EHVH/X16S18+26CA Installer reference guide Daikin Altherma - Low Temperature Split 4P313777-1C – 2012.11... -
Page 22: Changing The Pre-Pressure Of The Expansion Vessel
▪ Do NOT install a phase advancing capacitor, because this unit is equipped with an inverter. A phase advancing capacitor will reduce performance and may cause accidents. Installer reference guide ERHQ011~016BA + ERLQ011~016CA + EHVH/X16S18+26CA Daikin Altherma - Low Temperature Split 4P313777-1C – 2012.11... -
Page 23: About Preferential Kwh Rate Power Supply
3+GND The following illustration is an example and may NOT Power supply and match your system layout. interconnection cable to indoor unit ERHQ011~016BA + ERLQ011~016CA + EHVH/X16S18+26CA Installer reference guide Daikin Altherma - Low Temperature Split 4P313777-1C – 2012.11... -
Page 24: Installation
1 Loosen and remove the screws at the bottom of the unit. 2 Slide the front panel of the unit downwards and remove it. Installer reference guide ERHQ011~016BA + ERLQ011~016CA + EHVH/X16S18+26CA Daikin Altherma - Low Temperature Split 4P313777-1C – 2012.11... -
Page 25: To Lower The Sound Plate
2 Screw the indoor unit nuts on the shut-off valves. 3 Connect the domestic hot water in and out pipes to the indoor unit. a Sound plate 2 Tighten the 2 screws. ERHQ011~016BA + ERLQ011~016CA + EHVH/X16S18+26CA Installer reference guide Daikin Altherma - Low Temperature Split 4P313777-1C – 2012.11... -
Page 26: To Connect The Pressure Relief Valve To The Drain
3 Loosen and remove the 4 screws that fix the top panel. 4 Remove the top panel from the unit. 2 Open the fill valve. Installer reference guide ERHQ011~016BA + ERLQ011~016CA + EHVH/X16S18+26CA Daikin Altherma - Low Temperature Split 4P313777-1C – 2012.11... -
Page 27: Connecting The Electrical Wiring
NOT come in DANGER: RISK OF ELECTROCUTION contact with the piping and sharp edges. ERHQ011~016BA + ERLQ011~016CA + EHVH/X16S18+26CA Installer reference guide Daikin Altherma - Low Temperature Split 4P313777-1C – 2012.11... -
Page 28: To Connect The Main Power Supply
▪ if preferential kWh rate power supply is interrupted when active, OR ▪ if no power consumption of the indoor unit is allowed at the preferential kWh rate power supply when active. Installer reference guide ERHQ011~016BA + ERLQ011~016CA + EHVH/X16S18+26CA Daikin Altherma - Low Temperature Split 4P313777-1C – 2012.11... -
Page 29: To Connect The Backup Heater Power Supply
230 V 230 V 230 V 400 V 400 V K1M/1 K5M/13 52.9Ω 52.9Ω 52.9Ω ∞ ∞ K1M/3 ∞ ∞ ∞ 105.8Ω 105.8Ω ERHQ011~016BA + ERLQ011~016CA + EHVH/X16S18+26CA Installer reference guide Daikin Altherma - Low Temperature Split 4P313777-1C – 2012.11... -
Page 30: To Connect The User Interface
The PCB is mounted in the faceplate of the user interface. Be careful NOT to damage it. 2 Fix the wallplate of the user interface to the frontplate of the unit. Installer reference guide ERHQ011~016BA + ERLQ011~016CA + EHVH/X16S18+26CA Daikin Altherma - Low Temperature Split 4P313777-1C – 2012.11... -
Page 31: To Connect The Shut-Off Valve
2 Fix the cable with cable ties to the cable tie mountings. 7.4.6 To connect the shut-off valve 1 Connect the valve control cable to the appropriate terminals as shown in the illustration below. ERHQ011~016BA + ERLQ011~016CA + EHVH/X16S18+26CA Installer reference guide Daikin Altherma - Low Temperature Split 4P313777-1C – 2012.11... -
Page 32: To Connect The Alarm Output
NOT exceed 4.1 N•m. a Installation of EKRP1HB is required. 2 Fix the cable with cable ties to the cable tie mountings. Installer reference guide ERHQ011~016BA + ERLQ011~016CA + EHVH/X16S18+26CA Daikin Altherma - Low Temperature Split 4P313777-1C – 2012.11... -
Page 33: Configuration
3 Pay special attention to the position of the plug! EKRUCAL1. 1 When power is turned on for the first time, both user interfaces display: ERHQ011~016BA + ERLQ011~016CA + EHVH/X16S18+26CA Installer reference guide Daikin Altherma - Low Temperature Split 4P313777-1C – 2012.11... -
Page 34: To Copy The Language Set From The First To The Second User Interface
After first power ON of the system, you are guided on the user [A.1] Language interface to do initial settings: Time and date ▪ language, Installer reference guide ERHQ011~016BA + ERLQ011~016CA + EHVH/X16S18+26CA Daikin Altherma - Low Temperature Split 4P313777-1C – 2012.11... -
Page 35: Quick Wizard: Standard
▪ In room (default): the other user interface is automatically set to At unit and if RT control is selected to act as room thermostat. ERHQ011~016BA + ERLQ011~016CA + EHVH/X16S18+26CA Installer reference guide Daikin Altherma - Low Temperature Split 4P313777-1C – 2012.11... -
Page 36: Quick Wizard: Options
▪ 2 (Request): Pump operation based on request. Example: Using a room thermostat creates thermo ON/OFF condition. When there is no such demand, the pump is OFF. Remark: Installer reference guide ERHQ011~016BA + ERLQ011~016CA + EHVH/X16S18+26CA Daikin Altherma - Low Temperature Split 4P313777-1C – 2012.11... - Page 37 (X2M/1 and 2). "5 Application guidelines" on page 7. Select this value in case of connection with the wired (EKRTWA) or wireless (EKRTR1) room thermostat. ERHQ011~016BA + ERLQ011~016CA + EHVH/X16S18+26CA Installer reference guide Daikin Altherma - Low Temperature Split 4P313777-1C – 2012.11...
-
Page 38: Quick Wizard: Capacities (Energy Metering)
5°C. See the user reference guide and/or operation manual for more details about this function. Installer reference guide ERHQ011~016BA + ERLQ011~016CA + EHVH/X16S18+26CA Daikin Altherma - Low Temperature Split 4P313777-1C – 2012.11... - Page 39 [1-02] as for high outdoor Remark: This value can only be temperatures less warm water is set in leaving water temperature required. control. ERHQ011~016BA + ERLQ011~016CA + EHVH/X16S18+26CA Installer reference guide Daikin Altherma - Low Temperature Split 4P313777-1C – 2012.11...
- Page 40 (default: 18°C). control. Note: This value should be lower than [1-08] as for high outdoor temperatures colder water required. Installer reference guide ERHQ011~016BA + ERLQ011~016CA + EHVH/X16S18+26CA Daikin Altherma - Low Temperature Split 4P313777-1C – 2012.11...
- Page 41 1°C; default value: 5°C). [A.3.1.3.2] [9-0A] Cooling: required temperature difference between entering and leaving water. Range: 3~10°C (in steps of 1°C; default value: 5°C). ERHQ011~016BA + ERLQ011~016CA + EHVH/X16S18+26CA Installer reference guide Daikin Altherma - Low Temperature Split 4P313777-1C – 2012.11...
-
Page 42: Domestic Hot Water Control
[A.4.3.2.1] 1 person and how the unit acts upon it. The absolute desired tank temperature for 1 person. 30~80°C (default: 42°C) Installer reference guide ERHQ011~016BA + ERLQ011~016CA + EHVH/X16S18+26CA Daikin Altherma - Low Temperature Split 4P313777-1C – 2012.11... -
Page 43: Contact/Helpdesk Number
8.2.7 Contact/helpdesk number Code Description [6.3.2] Number that users can call in case of problems. ERHQ011~016BA + ERLQ011~016CA + EHVH/X16S18+26CA Installer reference guide Daikin Altherma - Low Temperature Split 4P313777-1C – 2012.11... - Page 44 [A.3.1.2.2.1] [9-05] Minimum temp (heating) Code Description 15~37°C (default: 25°C) [8-06] 1~5°C (default: 3°C) [A.3.1.2.2.4] [9-08] Maximum temp (cooling) 18~22°C (default: 22°C) Installer reference guide ERHQ011~016BA + ERLQ011~016CA + EHVH/X16S18+26CA Daikin Altherma - Low Temperature Split 4P313777-1C – 2012.11...
- Page 45 Only applicable in case of room thermostat control. The hysteresis this setting to: band around the desired room temperature is settable. Daikin advises NOT to change the room temperature hysteresis as it is set ▪ avoid leaving water supply to the heat emitters in the main LWT for an optimal use of the system.
-
Page 46: Domestic Hot Water Control: Advanced
Note that the ▪ storage economic outdoor temperature will be time-averaged (see "8 Configuration" ▪ storage comfort on page 33). Installer reference guide ERHQ011~016BA + ERLQ011~016CA + EHVH/X16S18+26CA Daikin Altherma - Low Temperature Split 4P313777-1C – 2012.11... - Page 47 In reheat mode, desired tank temperature weather dependent. Note: When displayed tank temperature is weather dependent, it cannot be adjusted on the user interface. ERHQ011~016BA + ERLQ011~016CA + EHVH/X16S18+26CA Installer reference guide Daikin Altherma - Low Temperature Split 4P313777-1C – 2012.11...
- Page 48 ON and booster always taken into account. heater OFF temperature. The minimum Range: 5~95 minutes (default: 30) hysteresis temperature is 2°C. Range: 2~40°C (default: 2) Installer reference guide ERHQ011~016BA + ERLQ011~016CA + EHVH/X16S18+26CA Daikin Altherma - Low Temperature Split 4P313777-1C – 2012.11...
- Page 49 ▪ Wednesday t Time ▪ Thursday [8-03]: Booster heater delay timer ▪ Friday ▪ Saturday ▪ Sunday [A.4.4.2] [2-01] Disinfection ▪ No ▪ Yes ERHQ011~016BA + ERLQ011~016CA + EHVH/X16S18+26CA Installer reference guide Daikin Altherma - Low Temperature Split 4P313777-1C – 2012.11...
-
Page 50: Heat Source Settings
[5-00] Is backup heater operation allowed above equilibrium temperature during space heating operation? ▪ 1: NOT allowed ▪ 0: Allowed Installer reference guide ERHQ011~016BA + ERLQ011~016CA + EHVH/X16S18+26CA Daikin Altherma - Low Temperature Split 4P313777-1C – 2012.11... - Page 51 — based on the outdoor temperature — which heating this temperature, bivalent heat source can/will provide the space heating, either the Daikin indoor source permission signal will be active. unit or an auxiliary boiler. [C-04] Hysteresis. The field setting "bivalent operation" apply only the indoor unit space Temperature difference between bivalent heating operation and the permission signal for the auxiliary boiler.
-
Page 52: System Settings
(because the function reapplies the remote controller settings at the time of the heat exchanger coil is not operational) power failure. Therefore, Daikin recommends to always enable the with a warmer top layer. function. Range: 0~20°C (default: 10). - Page 53 Defines whether the outdoor unit power supply can be interrupted (internally by indoor unit control) during stand-still conditions (no space heating/cooling nor domestic hot water demand). The final ERHQ011~016BA + ERLQ011~016CA + EHVH/X16S18+26CA Installer reference guide Daikin Altherma - Low Temperature Split 4P313777-1C – 2012.11...
- Page 54 Code Description [A.6.4] [1-0A] Outdoor average timer: ▪ No averaging (default) ▪ 12 hours ▪ 24 hours ▪ 48 hours ▪ 72 hours Installer reference guide ERHQ011~016BA + ERLQ011~016CA + EHVH/X16S18+26CA Daikin Altherma - Low Temperature Split 4P313777-1C – 2012.11...
- Page 55 This functionality is only valid in specific conditions where it is preferable to keep the pump active when <4°C (pump will be activated for 10 minutes and disactivated after 10 minutes). Daikin shall NOT be held liable for any damage resulting this functionality. Code...
-
Page 56: Menu Structure: Overview
LWT main LWT additional Tank temp. Booster heater permission Quiet mode DHW pump [7.4] Preset values Room temperature LWT main Tank temperature Quiet level Installer reference guide ERHQ011~016BA + ERLQ011~016CA + EHVH/X16S18+26CA Daikin Altherma - Low Temperature Split 4P313777-1C – 2012.11... -
Page 57: Menu Structure: Overview Installer Settings
[A.7] Commissioning kW value Test run Amp. limits for DI kW limits for DI UFH screed dryout Air purge Priority Actuator test run ERHQ011~016BA + ERLQ011~016CA + EHVH/X16S18+26CA Installer reference guide Daikin Altherma - Low Temperature Split 4P313777-1C – 2012.11... -
Page 58: Commissioning
Installer settings > Commissioning > Air purge > Circuit. There is NO water leak inside the indoor unit. 8 Select the desired circuit and press Installer reference guide ERHQ011~016BA + ERLQ011~016CA + EHVH/X16S18+26CA Daikin Altherma - Low Temperature Split 4P313777-1C – 2012.11... -
Page 59: To Perform An Automatic Air Purge
(heating/cooling mode) and tank temperature (domestic hot water mode). For monitoring the temperature, go to [A.6] and select the information you want to check. ERHQ011~016BA + ERLQ011~016CA + EHVH/X16S18+26CA Installer reference guide Daikin Altherma - Low Temperature Split 4P313777-1C – 2012.11... -
Page 60: To Program An Underfloor Heating Screed Dryout Schedule
Stop 11.1 Maintenance safety precautions 9.6.3 To readout the status of an underfloor DANGER: RISK OF ELECTROCUTION heating screed dryout 1 Press Installer reference guide ERHQ011~016BA + ERLQ011~016CA + EHVH/X16S18+26CA Daikin Altherma - Low Temperature Split 4P313777-1C – 2012.11... -
Page 61: Opening The Indoor Unit
When using means for descaling or chemical disinfection, hot! it must be ensured that the water quality remains compliant with EU directive 98/83 EC. Checkpoints are: ERHQ011~016BA + ERLQ011~016CA + EHVH/X16S18+26CA Installer reference guide Daikin Altherma - Low Temperature Split 4P313777-1C – 2012.11... -
Page 62: To Drain The Domestic Hot Water Tank
(see "6.2.3 To check the water volume" on page 21). Installer reference guide ERHQ011~016BA + ERLQ011~016CA + EHVH/X16S18+26CA Daikin Altherma - Low Temperature Split 4P313777-1C – 2012.11... -
Page 63: Symptom: The Compressor Does Not Start (Space Heating Or Domestic Water Heating)
"6.2.4 Changing the pre-pressure > Equilibrium temp. OR of the expansion vessel" on page 22). ▪ [A.8] > Installer settings > Overview settings [4-00] ERHQ011~016BA + ERLQ011~016CA + EHVH/X16S18+26CA Installer reference guide Daikin Altherma - Low Temperature Split 4P313777-1C – 2012.11... -
Page 64: Symptom: The Pressure At The Tapping Point Is Temporarily Unusual High
This chapter gives you an overview of all error codes and the content of the error code as it appears on the user interface. Installer reference guide ERHQ011~016BA + ERLQ011~016CA + EHVH/X16S18+26CA Daikin Altherma - Low Temperature Split 4P313777-1C – 2012.11... -
Page 65: Glossary
Equipment made or approved by Daikin that can be combined with the product according to the instructions in the accompanying documentation. EEPROM reading error. Field supply Equipment not made by Daikin that can be combined with product according instructions accompanying documentation. -
Page 66: Technical Data
Typical field installation is according to local and national regulations. For examples, refer t to installer reference guide. ONLY FOR EHVX MODELS 260L TANK 180L TANK 3D078519 Installer reference guide ERHQ011~016BA + ERLQ011~016CA + EHVH/X16S18+26CA Daikin Altherma - Low Temperature Split 4P313777-1C – 2012.11... - Page 67 14 Technical data MIN. 500 3D078541 ERHQ011~016BA + ERLQ011~016CA + EHVH/X16S18+26CA Installer reference guide Daikin Altherma - Low Temperature Split 4P313777-1C – 2012.11...
-
Page 68: Components
Drain collector (EHVX models only) i Terminal block X1M (to outdoor unit) u Drain gutter (EHVX models only) j Cable tie mountings Installer reference guide ERHQ011~016BA + ERLQ011~016CA + EHVH/X16S18+26CA Daikin Altherma - Low Temperature Split 4P313777-1C – 2012.11... - Page 69 I/O PCB kit) l Demand PCB for power limitation m Terminal block X5M (low voltage) n Main PCB A1P o PCB fuse FU1 ERHQ011~016BA + ERLQ011~016CA + EHVH/X16S18+26CA Installer reference guide Daikin Altherma - Low Temperature Split 4P313777-1C – 2012.11...
-
Page 70: Functional Diagrams
R1T Outlet water heat exchanger thermistor R2T Outlet water backup heater thermistor R3T Refrigerant liquid side thermistor R4T Inlet water thermistor R5T Tank temperature thermistor Heating Cooling Installer reference guide ERHQ011~016BA + ERLQ011~016CA + EHVH/X16S18+26CA Daikin Altherma - Low Temperature Split 4P313777-1C – 2012.11... -
Page 71: Piping Diagram
Outlet water backup heater thermistor FLARE CONN. QUICK COUPLING Outlet water heat exchanger thermistor THERMISTOR DESCRIPTION FLANGE CONN. SPINNED PIPE BRAZED CONN. PINCHED PIPE 3D077572 ERHQ011~016BA + ERLQ011~016CA + EHVH/X16S18+26CA Installer reference guide Daikin Altherma - Low Temperature Split 4P313777-1C – 2012.11... -
Page 72: Wiring Diagram
(*) : standard for *HV*, optional for *HB* On/OFF thermostat (wireless) # : field supply Ext. thermistor Heat pump convector 4D077028 page 1 Installer reference guide ERHQ011~016BA + ERLQ011~016CA + EHVH/X16S18+26CA Daikin Altherma - Low Temperature Split 4P313777-1C – 2012.11... - Page 73 EKBPHT* only if no EKBPHT* Options: bottom plate heater OR On/OFF output Only for digital I/O PCB option 4D077028 page 3 ERHQ011~016BA + ERLQ011~016CA + EHVH/X16S18+26CA Installer reference guide Daikin Altherma - Low Temperature Split 4P313777-1C – 2012.11...
- Page 74 Relay on PCB (*) = Standard for EHVH/X, optional for EHBH/X Main supply pump # = Field supply Domestic hot water pump Black Installer reference guide ERHQ011~016BA + ERLQ011~016CA + EHVH/X16S18+26CA Daikin Altherma - Low Temperature Split 4P313777-1C – 2012.11...
- Page 75 On/OFF thermostat (wired) On/OFF thermostat (wireless) On/OFF thermostat (wireless) Ext. thermistor Extended thermistor Heat pump convector Heat pump convector Add LWT Additional leaving water temperature ERHQ011~016BA + ERLQ011~016CA + EHVH/X16S18+26CA Installer reference guide Daikin Altherma - Low Temperature Split 4P313777-1C – 2012.11...
- Page 76 In case user interface is relocated 2x0.75 X5M: 1-2 A2P: P1-P2 user interface communication OPTIONAL PART Only for *KRCAL* 2 core 2x0.75 communication A2P: P1-P2 user interface 4D078494 Installer reference guide ERHQ011~016BA + ERLQ011~016CA + EHVH/X16S18+26CA Daikin Altherma - Low Temperature Split 4P313777-1C – 2012.11...
- Page 77 Regular kWh rate power supply Electrical 3~ balanced meter type 3~ unbalanced Benefit kWh rate power supply Electrical 3~ balanced meter type 3~ unbalanced 4D078288 ERHQ011~016BA + ERLQ011~016CA + EHVH/X16S18+26CA Installer reference guide Daikin Altherma - Low Temperature Split 4P313777-1C – 2012.11...
-
Page 78: Technical Specifications
(12) Refer to operation range detail for diferences between *RHQ* and *RLQ* models 3D077571_B page 1 (13) DB/WB 7°C/6°C - LWC 45°C (DT = 5°C) Installer reference guide ERHQ011~016BA + ERLQ011~016CA + EHVH/X16S18+26CA Daikin Altherma - Low Temperature Split 4P313777-1C – 2012.11... - Page 79 (**) : European/International Technical Standard setting the limits for harmonic currents produced by equipment connected to public low-voltage systems with input current >16A and ≤ 75A per phase. 3D077571_B page 2 (***) : System impedance ERHQ011~016BA + ERLQ011~016CA + EHVH/X16S18+26CA Installer reference guide Daikin Altherma - Low Temperature Split 4P313777-1C – 2012.11...
-
Page 80: Operation Range
In case such conditions ara expected, the *RLQ must be installed instead. These models contain countermeasures (insulation, heater sheet, ...) to prevent freeze up. 3TW60813-1A Installer reference guide ERHQ011~016BA + ERLQ011~016CA + EHVH/X16S18+26CA Daikin Altherma - Low Temperature Split 4P313777-1C – 2012.11... -
Page 81: Operation Range: Domestic Hot Water
–25 –25 tank temperature (°C) tank temperature (°C) 40 45 55 60 40 45 INDOOR UNITS: CA-SERIES 3TW60813-2B ERHQ011~016BA + ERLQ011~016CA + EHVH/X16S18+26CA Installer reference guide Daikin Altherma - Low Temperature Split 4P313777-1C – 2012.11... -
Page 82: Drain Pan Necessity
1. Refer to psychometric chart for more information. 2. If condensation is expected, installation of EKHBDPCA2 - drainpan kit must be considered. 4D078990 Installer reference guide ERHQ011~016BA + ERLQ011~016CA + EHVH/X16S18+26CA Daikin Altherma - Low Temperature Split 4P313777-1C – 2012.11... -
Page 83: Sound Spectrum
14 Technical data 14.8 Sound spectrum 14.8.1 Sound spectrum: Outdoor unit Not applicable. ERHQ011~016BA + ERLQ011~016CA + EHVH/X16S18+26CA Installer reference guide Daikin Altherma - Low Temperature Split 4P313777-1C – 2012.11... -
Page 84: Esp Curve
See also minimum and maximum allowed waterflow range in the technical specifications. 2) Water quality must be according to EN directive EC 98/83 EC. 4D078833 Installer reference guide ERHQ011~016BA + ERLQ011~016CA + EHVH/X16S18+26CA Daikin Altherma - Low Temperature Split 4P313777-1C – 2012.11... -
Page 85: Performance
14 Technical data 14.10 Performance ERHQ011~016BA + ERLQ011~016CA + EHVH/X16S18+26CA Installer reference guide Daikin Altherma - Low Temperature Split 4P313777-1C – 2012.11... - Page 86 14 Technical data Installer reference guide ERHQ011~016BA + ERLQ011~016CA + EHVH/X16S18+26CA Daikin Altherma - Low Temperature Split 4P313777-1C – 2012.11...
- Page 87 14 Technical data ERHQ011~016BA + ERLQ011~016CA + EHVH/X16S18+26CA Installer reference guide Daikin Altherma - Low Temperature Split 4P313777-1C – 2012.11...
-
Page 88: Combination Table
14 Technical data 14.11 Combination table Installer reference guide ERHQ011~016BA + ERLQ011~016CA + EHVH/X16S18+26CA Daikin Altherma - Low Temperature Split 4P313777-1C – 2012.11... - Page 92 4P313777-1C 2012.11...
Need help?
Do you have a question about the Altherma EHVH/X16S18+26CA and is the answer not in the manual?
Questions and answers