Sign In
Upload
Manuals
Brands
Canon Manuals
All in One Printer
i-SENSYS MF6180dw
Canon i-SENSYS MF6180dw Manuals
Manuals and User Guides for Canon i-SENSYS MF6180dw. We have
6
Canon i-SENSYS MF6180dw manuals available for free PDF download: Manual, User Manual, Getting Started, Service Manual, Getting Started Manual, How-To
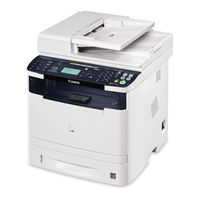
Canon i-SENSYS MF6180dw User Manual (1040 pages)
Brand:
Canon
| Category:
All in One Printer
| Size: 92.24 MB
Table of Contents
Table of Contents
2
Important Safety Instructions
12
Important Safety Instructions
13
Installation
14
Power Supply
16
Handling
17
Maintenance and Inspections
19
Consumables
21
Others
22
Legal Notices
23
Wireless LAN Regulatory Information (Mf6180Dw Only)
25
Installation and Handling
29
Basic Operation
32
Available Features
33
Parts and Their Functions
34
Front Side
35
Back Side
37
Interior
38
Operation Panel
39
LCD (Standby Mode)
42
Navigating the Menu
44
Entering Text
47
Registering Destinations in the Address Book
50
Registering and Editing One-Touch Keys
51
Registering and Editing Coded Dial Codes
58
Registering and Editing Destinations for Group Dialing
65
Toner Cartridges
76
Supplied Toner Cartridge
77
About Replacement Toner Cartridges
78
Handling Toner Cartridges
79
Storing Toner Cartridges
81
Using the Toner Saver Mode
82
Purchasing Consumables
84
Placing Documents
85
Placing Documents on the Platen Glass
86
Attention (Placing Documents on the Platen Glass)
88
Placing Documents in the Feeder
89
Attention (Placing Documents in the Feeder)
91
Loading Paper
92
In the Paper Drawer
93
In the Multi-Purpose Tray
96
Attention (Loading Paper)
99
Paper Loading Capacity
100
Paper Loading Orientation
101
Setting the Paper Size and Type
104
For the Paper Drawer
105
Registering the Default Paper Settings for the Multi-Purpose Tray
107
Setting a Custom Paper Size
110
Adjusting the Volume
112
Customizing Timer Settings
114
Setting the Current Date and Time
115
Setting the Sleep Timer
117
Attention (Sleep Timer)
119
Setting the Auto Reset Timer
120
Specifying the Screen that Is Displayed after Auto Reset Is Performed
122
Setting the Auto Offline Time
123
Customizing Display Settings
125
Setting the Default Screen
126
Switching the Display Language (Operation Panel or Remote UI)
128
Adjusting the Display (Brightness, Contrast, and Invert Screen Colors)
130
Changing Units of Measurement
132
Changing Message Display Time
134
Changing Scroll Speed
136
Changing Cursor Movement
138
Setting a Paper Source to be Used for each Function
140
Selecting the Print Side
142
Initializing the Settings
145
Initializing the Menu
146
Initializing the Network Settings
148
Initializing the Key and Certificate
150
Initializing the Address Book
152
Initializing the System Management Settings
154
Summary of Reports and Lists
156
Printing the Report Automatically
157
Fax Send Results Report
158
E-Mail/Windows (SMB) Send Results Report
160
Communication Management
162
Receive Results
164
Printing List
166
Printing the Address Book List
167
Printing the User Data List
169
Printing System Manager Data List
171
Printing a Communication Management Report
173
Printing Dept. ID Management Report
175
Printing the PCL/PS Font List
177
Viewing the Counter
179
Necessary Operations in Department ID Management
180
Locating the Serial Number
182
Specifications
183
Machine Specifications
184
Wireless LAN Specification (Mf6180Dw Only)
185
Copy Specifications
186
Printer Specification
187
Scanner Specifications
188
Fax Specifications
189
Telephone Specifications
190
Transmission Specification
191
Optional Drawer
193
Document Type
194
Supported Document Types
195
Scan Area
196
Paper
197
Supported Paper Types
198
Printable Area
201
Copy
202
Basic Copy Operations
203
Attention (Combination of Copy Settings)
205
Checking and Canceling Copy Jobs/Checking Copy Job History
206
Checking and Canceling Copy Jobs
207
Checking Copy Job History
209
Selecting Copy Papers
211
Adjusting the Density
212
Density Adjustment
213
Background
214
Selecting the Document Type
216
2-Sided Copying
218
Copying 1-Sided Document to 2 Sides
219
Copying 2-Sided Document to 2 Sides
222
Copying 2-Sided Document to 1 Side
225
Enlarging/Reducing Copies
227
Copying Multiple Documents Onto One Sheet (N on 1)
229
On 1/4 on
230
Copying an ID Card
233
Attention (ID Card Copy)
235
Copying by Saving Paper
236
Collating Copies
239
Erasing Dark Borders and Frame Lines (Frame Erase)
241
Emphasizing the Outline of the Image (Sharpness)
243
Registering and Using Combination of Copy Settings (Mode Memory)
245
Registering Mode Memory
246
Deleting Mode Memory
248
Calling and Copying Mode Memory
250
Changing the Default Settings
251
Viewing Copy Settings
253
Fax
254
Using the Fax Functions
255
Preparing to Use the Fax Functions
256
Registering Destinations in the Address Book
257
Basic Sending Procedure
258
Basic Procedures for Sending Faxes
259
Specifying Destinations
261
Changing the Scan Settings (Fax)
267
Canceling Fax Jobs
269
Redialing (Manual Redialing)
270
Attention (Manual Redialing)
271
Useful Features
272
Notifying the Recipient of an Incoming Fax by Telephone (Manual Sending)
273
Attention (Manual Sending)
275
Push-Button Telephone for Tone Dialing
276
Attention (Push-Button Telephone for Tone Dialing)
278
Sending a Fax Abroad (Adding Pauses)
279
Sending to Multiple Destinations at a Time (Sequential Broadcast)
281
Attention (Sequential Broadcast)
283
Changing the Default Fax Settings
284
Changing Fax Settings (Settings that Can be Specified Using the [Menu] Button)
286
Configuring Send Settings
287
Register Unit Telephone Number
289
Select Line Type
290
Off-Hook Alarm
291
Change Defaults
292
Register Unit Name (Fax)
293
Ecm Tx
294
Pause Time
295
Auto Redial
296
Sender ID
297
Check Dial Tone before Sending
298
Configuring System Settings
299
TX Start Speed
301
Address Book PIN
302
Restrict New Destinations
303
Allow Fax Driver TX
304
Restrict History TX
305
Fax No. Confirmation Re-Entry
306
One-Touch/Coded Dial TX Confirmation
307
Restrict Sequential Broadcast
308
Receiving Faxes
309
RX Mode
310
Changing the Receive Mode
313
Advanced Settings for the Fax/Tel Auto Switch Mode
314
Forwarding Fax Documents
316
Setting Document Transfer (Automatic Forwarding)
317
Forwarding Received Faxes Stored in Memory to Other Destinations (Manual Forwarding)
319
Configurating Operations for Transfer Errors
321
Re-Forwarding/Printing/Deleting Documents in Which Transfer Is Failed
323
Managing Faxes Stored in Memory
325
Checking and Canceling Fax Jobs
326
Combining and Printing the Received Documents You Saved
328
Checking and Deleting Received Faxes
330
Checking the History of Received/Sent Faxes
332
Changing Fax Settings (Settings that Can be Specified Using the [Menu] Button)
334
Configuring Receiving Settings
335
Ecm Rx
337
Incoming Ring
338
Remote RX
339
Auto RX Switch
340
2-Sided Printing
341
Reduce RX Size
342
RX Page Footer
343
Continue Printing When Toner Is Low
344
Configuring System Settings
345
RX Start Speed
347
Memory Lock Settings
348
Select Country/Region
349
R-Key Setting
350
Using PC Fax
351
Preparation to Use PC Faxing
352
System Requirements (PC Fax)
353
Where to Find Help (PC Fax)
354
Faxing Fundamentals (PC Fax)
355
Faxing (PC Fax)
356
Specifying the Default Fax Settings (PC Fax)
360
Setting up the Fax Configuration (PC Fax)
362
Viewing the Online Help (PC Fax)
364
Printing
365
Printing Documents from a Computer
367
Preparing to Print from Your Computer
368
Configuring Port Settings over a TCP/IP Connection
369
Setting up Printer Sharing
373
Printing Fundamentals
375
Printing
376
Configuring the Default Print Settings
379
Setting the Printer Options
381
Viewing the Online Help
383
Checking and Deleting Print Jobs/Checking Print Job History
384
Checking and Canceling Print Jobs
385
Checking Print Job History
387
Changing Printer Settings (Items to be Specified Using [Menu] Button)
389
Printing Documents from a USB Memory (Media Printing)
391
Summary of Media Printing
392
Printing Fundamentals (USB Memory)
393
Selecting a File to Print
396
Changing Print Settings
398
Attention (Changing Print Settings)
400
Printing Files as a List (Index Printing)
401
Changing File Name Display Formats
403
Changing the Default Values for Media Printing
404
Using Google Cloud Print
406
Preparing for Using Google Cloud Print
407
Printing with Google Cloud Print
411
Using Airprint
413
Scanning
420
Scanning Paper Documents and Saving Them to a Computer (USB & Network Connection)
422
Preparing to Scan Your Document (Saving to a Computer)
423
System Requirements (Scan)
424
Registering the Scanner in MF Network Scan Utility
425
Basic Scan Flow (Saving to a Computer)
426
Scanning Using Keys on the Operation Panel
427
Performing a Scan Using a Shortcut Key
430
Scanning with the MF Toolbox
434
Scanning an Image from an Application
437
Using the MF Toolbox
439
Creating One PDF File from Two or more Pages
446
Using the Scangear MF
448
Using the Simple Mode
449
Using the Advanced Mode
452
Creating a Cropping Frame
463
Determining Resolution
465
Saving Scanned Documents to USB Memory Device
466
Before Using USB Memory Device
467
Basic Scan Flow (Saving to USB Memory Device)
468
Changing the Scan Settings (Saving to USB Memory Device)
471
Attention (Changing the Scan Settings (Saving to USB Memory Device))
477
Changing the Default Scan Settings for Saving to USB Memory Device
478
E-Mailing Scanned Documents
480
Preparing to Use the E-Mail Functions
481
Scanning Fundamentals (E-Mail)
482
Specifying Destinations (E-Mail)
485
Changing the Scan Settings (E-Mail)
491
E-Mail Settings
497
Checking/Canceling Send Data (E-Mail)
499
Registering the E-Mail Sender Name
501
Changing the Default Scan Settings for Sending to E-Mail
503
Sending Scanned Documents to a File Server
505
Preparation for Scanning (File Server)
506
Scanning Fundamentals (File Server)
507
Specifying the Destination (File Server)
510
Changing the Scan Settings (File Server)
512
Checking/Canceling Send Data (File Server)
518
Changing the Default Settings for Sending to a File Server
520
Network Settings
522
Basic Network Settings
524
Switching the Connection Method to Wireless LAN or Wired LAN (Mf6180Dw Only)
525
Connecting to Wired LAN
527
Attention (Connecting to a Wired LAN)
528
Connecting to Wireless LAN (Mf6180Dw Only)
529
Attention (Security When Using a Wireless LAN Product)
531
Setting the Machine Using WPS (Push Button Mode)
532
Setting the Machine Using WPS (PIN Code Mode)
535
Entering the PIN Code in the Wireless LAN Router/Access Point
538
Setting by Manually Selecting an Access Point
539
Setting by Manually Entering SSID
543
Advertisement
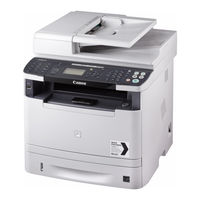
Canon i-SENSYS MF6180dw Manual (1040 pages)
Brand:
Canon
| Category:
All in One Printer
| Size: 19.38 MB
Table of Contents
Table of Contents
2
Important Safety Instructions
12
Important Safety Instructions
13
Installation
14
Power Supply
16
Handling
17
Maintenance and Inspections
19
Consumables
21
Others
22
Legal Notices
23
Wireless LAN Regulatory Information (Mf6180Dw Only)
25
Installation and Handling
29
Basic Operation
32
Available Features
33
Parts and Their Functions
34
Front Side
35
Back Side
37
Interior
38
Operation Panel
39
LCD (Standby Mode)
42
Navigating the Menu
44
Entering Text
47
Registering Destinations in the Address Book
50
Registering and Editing One-Touch Keys
51
Registering and Editing Coded Dial Codes
58
Registering and Editing Destinations for Group Dialing
65
Toner Cartridges
76
Supplied Toner Cartridge
77
About Replacement Toner Cartridges
78
Handling Toner Cartridges
79
Storing Toner Cartridges
81
Using the Toner Saver Mode
82
Purchasing Consumables
84
Placing Documents
85
Placing Documents on the Platen Glass
86
Attention (Placing Documents on the Platen Glass)
88
Placing Documents in the Feeder
89
Attention (Placing Documents in the Feeder)
91
Loading Paper
92
In the Paper Drawer
93
In the Multi-Purpose Tray
96
Attention (Loading Paper)
99
Paper Loading Capacity
100
Paper Loading Orientation
101
Setting the Paper Size and Type
104
For the Paper Drawer
105
Registering the Default Paper Settings for the Multi-Purpose Tray
107
Setting a Custom Paper Size
110
Adjusting the Volume
112
Customizing Timer Settings
114
Setting the Current Date and Time
115
Setting the Sleep Timer
117
Attention (Sleep Timer)
119
Setting the Auto Reset Timer
120
Specifying the Screen that Is Displayed after Auto Reset Is Performed
122
Setting the Auto Offline Time
123
Customizing Display Settings
125
Setting the Default Screen
126
Switching the Display Language (Operation Panel or Remote UI)
128
Adjusting the Display (Brightness, Contrast, and Invert Screen Colors)
130
Changing Units of Measurement
132
Changing Message Display Time
134
Changing Scroll Speed
136
Changing Cursor Movement
138
Setting a Paper Source to be Used for each Function
140
Selecting the Print Side
142
Initializing the Settings
145
Initializing the Menu
146
Initializing the Network Settings
148
Initializing the Key and Certificate
150
Initializing the Address Book
152
Initializing the System Management Settings
154
Summary of Reports and Lists
156
Printing the Report Automatically
157
Fax Send Results Report
158
E-Mail/Windows (SMB) Send Results Report
160
Communication Management
162
Receive Results
164
Printing List
166
Printing the Address Book List
167
Printing the User Data List
169
Printing System Manager Data List
171
Printing a Communication Management Report
173
Printing Dept. ID Management Report
175
Printing the PCL/PS Font List
177
Viewing the Counter
179
Necessary Operations in Department ID Management
180
Locating the Serial Number
182
Specifications
183
Machine Specifications
184
Wireless LAN Specification (Mf6180Dw Only)
185
Copy Specifications
186
Printer Specification
187
Scanner Specifications
188
Fax Specifications
189
Telephone Specifications
190
Transmission Specification
191
Optional Drawer
193
Document Type
194
Supported Document Types
195
Scan Area
196
Paper
197
Supported Paper Types
198
Printable Area
201
Copy
202
Basic Copy Operations
203
Attention (Combination of Copy Settings)
205
Checking and Canceling Copy Jobs/Checking Copy Job History
206
Checking and Canceling Copy Jobs
207
Checking Copy Job History
209
Selecting Copy Papers
211
Adjusting the Density
212
Density Adjustment
213
Background
214
Selecting the Document Type
216
2-Sided Copying
218
Copying 1-Sided Document to 2 Sides
219
Copying 2-Sided Document to 2 Sides
222
Copying 2-Sided Document to 1 Side
225
Enlarging/Reducing Copies
227
Copying Multiple Documents Onto One Sheet (N on 1)
229
On 1/4 on
230
Copying an ID Card
233
Attention (ID Card Copy)
235
Copying by Saving Paper
236
Collating Copies
239
Erasing Dark Borders and Frame Lines (Frame Erase)
241
Emphasizing the Outline of the Image (Sharpness)
243
Registering and Using Combination of Copy Settings (Mode Memory)
245
Registering Mode Memory
246
Deleting Mode Memory
248
Calling and Copying Mode Memory
250
Changing the Default Settings
251
Viewing Copy Settings
253
Fax
254
Using the Fax Functions
255
Preparing to Use the Fax Functions
256
Registering Destinations in the Address Book
257
Basic Sending Procedure
258
Basic Procedures for Sending Faxes
259
Specifying Destinations
261
Changing the Scan Settings (Fax)
267
Canceling Fax Jobs
269
Redialing (Manual Redialing)
270
Attention (Manual Redialing)
271
Useful Features
272
Notifying the Recipient of an Incoming Fax by Telephone (Manual Sending)
273
Attention (Manual Sending)
275
Push-Button Telephone for Tone Dialing
276
Attention (Push-Button Telephone for Tone Dialing)
278
Sending a Fax Abroad (Adding Pauses)
279
Sending to Multiple Destinations at a Time (Sequential Broadcast)
281
Attention (Sequential Broadcast)
283
Changing the Default Fax Settings
284
Changing Fax Settings (Settings that Can be Specified Using the [Menu] Button)
286
Configuring Send Settings
287
Register Unit Telephone Number
289
Select Line Type
290
Off-Hook Alarm
291
Change Defaults
292
Register Unit Name (Fax)
293
Ecm Tx
294
Pause Time
295
Auto Redial
296
Sender ID
297
Check Dial Tone before Sending
298
Configuring System Settings
299
TX Start Speed
301
Address Book PIN
302
Restrict New Destinations
303
Allow Fax Driver TX
304
Restrict History TX
305
Fax No. Confirmation Re-Entry
306
One-Touch/Coded Dial TX Confirmation
307
Restrict Sequential Broadcast
308
Receiving Faxes
309
RX Mode
310
Changing the Receive Mode
313
Advanced Settings for the Fax/Tel Auto Switch Mode
314
Forwarding Fax Documents
316
Setting Document Transfer (Automatic Forwarding)
317
Forwarding Received Faxes Stored in Memory to Other Destinations (Manual Forwarding)
319
Configurating Operations for Transfer Errors
321
Re-Forwarding/Printing/Deleting Documents in Which Transfer Is Failed
323
Managing Faxes Stored in Memory
325
Checking and Canceling Fax Jobs
326
Combining and Printing the Received Documents You Saved
328
Checking and Deleting Received Faxes
330
Checking the History of Received/Sent Faxes
332
Changing Fax Settings (Settings that Can be Specified Using the [Menu] Button)
334
Configuring Receiving Settings
335
Ecm Rx
337
Incoming Ring
338
Remote RX
339
Auto RX Switch
340
2-Sided Printing
341
Reduce RX Size
342
RX Page Footer
343
Continue Printing When Toner Is Low
344
Configuring System Settings
345
RX Start Speed
347
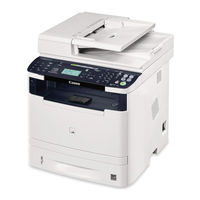
Canon i-SENSYS MF6180dw Getting Started (292 pages)
Brand:
Canon
| Category:
All in One Printer
| Size: 29.17 MB
Table of Contents
Table of Contents
6
About the Supplied Manuals
10
Navigating the Menu and Text Input Method
10
Attach the Optional Cassette to the Machine
11
Connecting the Power Cord and Turning on the Power
11
Specifying the Initial Settings
11
The Machine to the Computer
12
Connecting Via a Wired LAN
12
Connecting Via a USB Cable
12
Setting a Paper Size and Type
13
Specifying Initial Fax Settings and Connecting a Telephone Cable
13
Print/Scan
14
Remote UI
14
Copy/Fax
14
Perform Useful Tasks
14
Clearing Paper Jams
15
Replacing Toner Cartridge
16
Power Supply
18
Maintenance and Inspections
19
A Propos des Manuels Fournis
20
Navigation Dans Le Menu Et Méthode de Saisie du Texte
20
Monter la Cassette Optionnelle Sur la Machine
21
Branchement du Cordon D'alimentation Et Mise Sous Tension
21
Confi Guration des Réglages Initiaux
21
Choix de la Méthode de Connexion de la Machine À L'ordinateur
22
Connexion Via un Réseau Fi Laire
22
Connexion Via un Câble USB
22
Réglage du Format Et du Type de Papier
23
Confi Guration des Réglages de Fax Initiaux Et Connexion D'un Câble Téléphonique
23
Procédures Utiles
24
Résolution des Bourrages Papier
25
Remplacement de la Cartouche D'encre
26
Informationen zu den Mitgelieferten Anleitungen
30
Navigieren durch das Menü und Texteingabemethode
30
Bringen Sie die Optionale Kassette am Gerät an
31
Anschließen des Netzkabels und Einschalten des Geräts über den Netzschalter
31
Festlegen der Anfänglichen Einstellungen
31
Auswählen der Methode zum Herstellen einer Verbindung zwischen Gerät und Computer
32
Verbindung über ein LAN
32
Verbindung über ein USB-Kabel
32
Einstellen von Papierformat und Papiertyp
33
Festlegen der Anfänglichen Faxeinstellungen und Anschließen eines Telefonkabels
33
Ausführen Nützlicher Aufgaben
34
Beseitigen von Papierstaus
35
Austauschen der Tonerpatrone
36
Informazioni Sui Manuali in Dotazione
40
Esplorazione del Menu E Metodo D'immissione del Testo
40
Montare Il Cassetto Opzionale Sulla Macchina
41
Collegamento del Cavo DI Alimentazione E Accensione
41
Selezione Delle Impostazioni Iniziali
41
Selezione del Metodo DI Connessione Della Macchina al Computer
42
Connessione Tramite LAN Cablata
42
Connessione Tramite Cavo USB
42
Impostazione del Formato E del Tipo DI Carta
43
Selezione Delle Impostazioni Iniziali del Fax E Connessione DI un Cavo Telefonico
43
Attività Utili
44
Rimozione Degli Inceppamenti DI Carta
45
Sostituzione Della Cartuccia del Toner
46
Acerca de Los Manuales Suministrados
50
Navegación por el Menú y Método de Introducción de Texto
50
Acoplamiento de la Bandeja Opcional a la Máquina
51
Conexión del Cable de Alimentación y Encendido del Interruptor de Alimentación
51
Especifi Cación de la Confi Guración Inicial
51
Selección del Método para Conectar la Máquina al Ordenador
52
Conexión Mediante una Red LAN Cableada
52
Conexión con un Cable USB
52
Ajuste del Tamaño y el Tipo del Papel
53
Especifi Cación de la Confi Guración Inicial de Fax y Conexión del Cable del Teléfono
53
Tareas Útiles
54
Eliminación de Atascos de Papel
55
Sustitución del Cartucho de Tóner
56
Acerca Dos Manuais Fornecidos
60
Navegar no Menu E Método de Introdução de Texto
60
Instalar a Gaveta Opcional Na Máquina
61
Ligar O Cabo de Alimentação E a
61
Especifi Car as Defi Nições Iniciais
61
Selecionar O Método de Ligação da Máquina Ao Computador
62
Ligar Através de LAN Com Fi os
62
Ligar Através de um Cabo USB
62
Defi Nir um Tipo E Tamanho de Papel
63
Especifi Car as Defi Nições Iniciais de Fax E Ligar um Cabo Telefónico
63
Executar Tarefas Úteis
64
Retirar Papel Encravado
65
Substituir Uma Cartridge de Toner
66
Πληροφορίες Για Τα Παρεχόμενα Εγχειρίδια
70
Περιήγηση Στο Μενού Και Τη Μέθοδο Εισαγωγής Κειμένου
70
Τοποθέτηση Της Προαιρετικής Κασέτας Στη Συσκευή
71
Σύνδεση Του Καλωδίου Ρεύματος Και ΕΝΕΡΓΟΠΟΙΗΣΗ Της Ισχύος
71
Καθορισμός Αρχικών Ρυθμίσεων
71
Επιλογή Του Τρόπου Σύνδεσης Της Συσκευής Στον Υπολογιστή
72
Σύνδεση Μέσω Ενσύρματου LAN
72
Σύνδεση Μέσω Ενός Καλωδίου USB
72
Καθορισμός Μεγέθους Και Τύπου Χαρτιού
73
Καθορισμός Των Αρχικών Ρυθμίσεων Του Φαξ Και Σύνδεση Καλωδίου Τηλεφώνου
73
Εκτέλεση Χρήσιμων Εργασιών
74
Αφαίρεση Μπλοκαρισμένων Χαρτιών
75
Αντικατάσταση Κασέτας Γραφίτη
76
Om de Medfølgende Vejledninger
80
Navigation I Menuen Og Tekstindlæsningsmetode
80
Sæt den Ekstra Kassette I Maskinen
81
Tilslutning Af Netledningen Og AKTIVERING Af Maskinen
81
Angivelse Af Startindstillingerne
81
Valg Af Metode Til at Slutte Maskinen Til Computeren
82
Forbindelse Med Kablet LAN
82
Forbindelse Via USB-Kabel
82
Indstilling Af Papirformat Og -Type
83
Angivelse Af Startindstillinger for Fax Og Tilslutning Af en Telefonledning
83
Udfør Nyttige Opgaver
84
Udbedring Af Papirstop
85
Udskiftning Af Tonerpatronen
86
Informatie over de Meegeleverde Handleidingen
90
Navigeren in Het Menu en Tekstinvoermethode
90
De Optionele Cassette Op de Machine Bevestigen
91
Het Netsnoer Aansluiten en de Machine
91
De Begininstellingen Opgeven
91
Kiezen Hoe de Machine Met de Computer Wordt Verbonden
92
Verbinding Maken Via Een Bekabeld LAN
92
Verbinden Via Een USB-Kabel
92
Papierformaat en Type Papier Instellen
93
De Beginfaxinstellingen Opgeven en Een Telefoonkabel Aansluiten
93
Nuttige Taken Uitvoeren
94
Papierstoringen Verhelpen
95
Tonercartridge Vervangen
96
Om de Medfølgende Håndbøkene
100
Navigere I Menyen Og Tekstinnskrivingsmetode
100
Feste den Ekstra Kassetten Til Maskinen
101
Koble Til Strømledningen Og Slå PÅ Maskinen
101
Angi Oppstartsinnstillingene
101
Velge Metode for Å Koble Maskinen Til Datamaskinen
102
Koble Til Via Kablet LAN
102
Koble Til Via en USB-Kabel
102
Angi Papirformat Og -Type
103
Angi Oppstartsinnstillinger for Faks Og Koble Til en Telefonkabel
103
Utføre Nyttige Oppgaver
104
Fjerne Fastkjørt Papir
105
Bytte Tonerkassett
106
Om de Medföljande Handböckerna
110
Navigering I Menyn Och Textinmatningsmetod
110
Sätt I Tillvalskassetten I Enheten
111
Ansluta Nätkabeln Och Slå PÅ Strömmen
111
Ange de Inledande Inställningarna
111
Välj Metod För Att Ansluta Enheten Till Datorn
112
Ansluta Via Ett Trådbundet Nätverk
112
Ansluta Via en USB-Kabel
112
Ange Pappersformat Och -Typ
113
Ange Inledande Faxinställningar Och Ansluta en Telefonsladd
113
Använda Praktiska Funktioner
114
Ta Bort Papper Som Fastnat
115
Byta Tonerpatron
116
Tietoja Laitteen Mukana Toimitettavista Oppaista
120
Valikossa Siirtyminen Ja Tekstinsyöttötapa
120
Liitä Lisävarusteena Saatava Kasetti Laitteeseen
121
Virtajohdon Liittäminen Ja Virran
121
Perusasetusten Määrittäminen
121
Laitteen Ja Tietokoneen Välisen Kytkentätavan Valitseminen
122
Kytkeminen Langallisen Lähiverkon Kautta
122
Kytkeminen USB-Kaapelilla
122
Paperikoon Ja -Tyypin Määrittäminen
123
Perusfaksiasetusten Määrittäminen Ja Puhelinjohdon Kytkeminen
123
Päätoimintojen Käyttäminen
124
Paperitukosten Poistaminen
125
Väriainekasetin Vaihtaminen
126
Сведения О Входящих В Комплект Руководствах
130
Поиск В Меню И Способ Ввода Текста
130
Подсоедините Дополнительную Кассету К Устройству
131
Подсоединение Кабеля Питания И Включение Аппарата
131
Указание Начальных Параметров
131
Подключение С Помощью Кабеля USB
132
Подключение Через Проводную Локальную Сеть
132
Выбор Метода Подключения Аппарата К Компьютеру
132
Установка Формата И Типа Бумаги
133
Указание Начальных Параметров Факса И Подсоединение Телефонного Кабеля
133
Использование Полезных Функций
134
Устранение Замятия Бумаги
135
Замена Картриджа С Тонером
136
Посібники З Комплекту Поставки
140
Переміщення Між Пунктами Меню Та Спосіб Введення Тексту
140
Встановлення Початкових Параметрів
141
Підключення Шнура Живлення Й Увімкнення Живлення
141
Приєднання Додаткової Касети До Головного Блока
141
Вибір Способу Підключення Апарата До Комп'ютера
142
Підключення Через Дротову Локальну Мережу
142
Підключення Через Кабель USB
142
Установлення Розміру Та Типу Паперу
143
Зазначення Початкових Параметрів Факсу Та Підключення Телефонного Кабелю
143
Корисні Функції
144
Усунення Зминання Паперу
145
Заміна Картриджа З Тонером
146
Par Komplektācijā IekļautajāM RokasgrāmatāM
150
Naviģēšana Izvēlnē un Teksta Ievades Metode
150
Papildu Kasetes Pievienošana Iekārtai
151
Sākotnējo Iestatījumu NorāDīšana
151
Strāvas Vada Pievienošana un Iekārtas IESLĒGŠANA
151
Savienojuma Veida Starp Iekārtu un Datoru Izvēle
152
Savienojuma Izveide, Izmantojot Vadu LAN
152
Advertisement
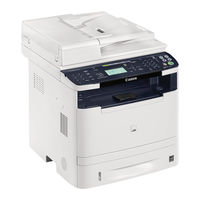
Canon i-SENSYS MF6180dw Service Manual (176 pages)
Brand:
Canon
| Category:
All in One Printer
| Size: 15.41 MB
Table of Contents
Table of Contents
4
Safety Precautions
9
CDRH Provisions
10
Laser Safety
10
About Laser Beams
10
Handling Laser Scanner Unit
10
Toner Safety
11
About Toner
11
Handling Adhered Toner
11
Notes When Handling a Battery
11
Notes on Assembly/Disassembly
11
Product Overview
12
Product Lineups
12
Main Unit
13
Options
14
Product Features
15
Features
15
Specifications
15
Main Unit Specifications
15
ADF Specifications
17
FAX Specifications
17
Print Speed
18
Paper Types
18
Paper Size
18
Name of Parts
19
External View
19
MF5900/6100 Series
19
D1300 Series
20
Cross Sectional View
21
MF5900/6100 Series
21
D1300 Series
22
Operation Panel
23
Main Operation Panel
23
FAX Operation Panel
24
Technical Overview
25
Basic Configuration
25
Configuration Function
26
Basic Sequence
26
Basic Operational Sequence
26
Print Sequence
27
Print Mode
28
Document Exposure / Delivery System
29
Specifications / Control / Function List
29
Major Components
29
Document Feeder System
30
Pickup/Feed/Delivery Operation
30
Original Detection
31
Jam Detection
32
Service Tasks
32
Action for Parts Replacement
32
Maintenance
32
Service Notes
32
Controller System
33
Outline
33
Controls
33
Motor / Fan Control
34
Failure Detection
35
Low-Voltage Power Supply
35
Outline
35
Low-Voltage Power Supply Unit Failure Detection
36
Power-Saving Mode
36
Protective Function
36
Safety
36
Service Tasks
37
Action for Parts Replacement
37
Maintenance
37
Service Notes
37
Laser Exposure System
38
Outline
38
Optical Unit Failure Detection
38
Service Tasks
38
Action for Parts Replacement
38
Maintenance
38
Service Notes
38
Image Formation System
39
Outline
39
Image Formation Process
39
Developing Block
40
Latent Image Formation Block
40
Drum Cleaning Block
41
Fixing Block
41
Transfer Block
41
High-Voltage Power Supply
42
Outline
42
Service Tasks
42
Action for Parts Replacement
42
Maintenance
42
Notes on Field Service
42
Fixing System
43
Outline
43
Fixing Control Circuit
44
Throughput Reduction Control
44
Fixing Temperature Control
45
Protective Function
45
Failure Detection
46
Service Tasks
46
At Parts Replacement
46
Maintenance
46
Notes on Service Works
46
Pickup / Feed System
48
Outline
48
Drive Configuration
48
Jam Detection
49
Outline
49
Delivery Delay Jam
50
Delivery Stationary Jam
50
Door Open Jam
50
Fixing Paper Wrap Jam
50
Internal Residual Jam
50
Pickup Delay Jam
50
Pickup Stationary Jam
50
Reverse Delay Jam
50
Reverse Stationary Jam
50
Service Tasks
50
Periodical Services
51
Periodically Replaced Parts
52
Consumable Parts
52
Periodical Service
52
Cleaning
52
Disassembly/Assembly
53
List of Parts
53
External View
54
MF5900/6100 Series
54
D1300 Series
55
Main Unit
56
Main Parts
57
Sensor / Switch
57
Motor / Fan
58
Other
58
Pcb
59
Connector Layout Drawing
60
External Cover (D1300 Series)
64
Removing the Left Cover Unit
64
Removing the Left Rear Cover
66
Removing the Right Cover Unit
67
Removing the Front Cover Unit
69
Removing the Rear Cover Unit
70
Removing the Upper Cover
71
External Cover (MF5900/MF6100)
72
Removing the Left Cover Unit
72
Removing the Left Rear Cover
73
Removing the Right Cover
74
Removing the Front Cover
76
Removing the Rear Cover Unit
76
Removing the Upper Cover
78
Document Exposure / Delivery System
79
Removing the ADF Unit + Reader Unit
79
Removing the ADF Roller Unit
81
Removing the ADF Pickup Roller
82
Removing the ADF Separation Roller
83
Removing the ADF Separation Pad
85
Removing the ADF Pickup Feed Unit
86
Removing the ADF Pickup Motor Unit
89
Removing the ADF Delivery Solenoid Unit
90
Removing the Reader Unit Upper Cover
90
Removing the CIS Unit
92
Controller System
94
Removing the Controller Cover
94
Removing the Main Controller Board
94
Removing the NCU PCB (FAX Model Only)
96
Removing the off Hook PCB (FAX Model Only)
96
Removing the Controller Box
97
Removing the Engine Controller Unit
98
Removing the Control Panel
101
Removing the Main Motor
103
Removing the Main Fan
104
Removing the Main Drive Unit
105
Removing the Duplex Drive Unit
107
Removing the Duplex Reverse Solenoid
108
Removing the Cassette Pickup Solenoid
109
Laser Scanner System
110
Removing the Laser Scanner Unit
110
Image Forming System
111
Removing the Transfer Roller
111
Removing the Registration Unit
112
Fixing System
113
Removing the Fixing Assembly
113
Pickup / Feed System
115
Removing the Duplex Feed Unit
115
Removing the Cassette Pickup Roller
117
Removing the Cassette Separation Pad
118
Removing the MP Pickup Roller
118
Removing the MP Separation Pad
119
Canon i-SENSYS MF6180dw Getting Started Manual (64 pages)
Brand:
Canon
| Category:
All in One Printer
| Size: 7.39 MB
Table of Contents
English
6
Table of Contents
6
About the Supplied Manuals
8
Navigating the Menu and Text Input Method
8
Connecting the Power Cord and Turning on the Power
9
Specifying the Initial Settings
9
Choosing the Method to Connect the Machine to the Computer
9
Choosing the Method to Connect: Via Wireless LAN or Other Method
9
Connecting Via a Wired LAN
10
Connecting Via a USB Cable
10
Connecting Via a Wireless LAN
10
Setting Wireless LAN
11
Checking the Router
11
Setting a Paper Size and Type
13
Specifying Initial Fax Settings and Connecting a Telephone Cable
13
Connecting Telephone Cable
13
Installing the Driver/Software
13
Perform Useful Tasks
14
Print/Scan
14
Copy/Fax
14
Remote UI
14
Clearing Paper Jams
15
Replacing Toner Cartridge
16
Power Supply
17
Maintenance and Inspections
18
Legal Limitations on the Usage of Your Product and the Use of Images
19
Users in Canada
20
Cdrh Regulations
21
French
22
A Propos des Manuels Fournis
22
Navigation Dans Le Menu Et Méthode de Saisie du Texte
22
Branchement du Cordon D'alimentation Et Mise Sous Tension
23
Confi Guration des Réglages Initiaux
23
Choix de la Méthode de Connexion de la Machine À L'ordinateur
23
Choix de la Méthode de Connexion : Par Réseau Sans Fi L Ou Via Une Autre Méthode
23
Connexion Via un Réseau Fi Laire
24
Connexion Via un Câble USB
24
Connexion Via un Réseau Sans Fi L
24
Confi Guration du Réseau Sans Fi L
25
Réglage du Format Et du Type de Papier
27
Confi Guration des Réglages de Fax Initiaux Et Connexion D'un Câble Téléphonique
27
Installation du Pilote Et/Ou du Logiciel
27
Procédures Utiles
28
Résolution des Bourrages Papier
29
Remplacement de la Cartouche D'encre
30
Spanish
36
Acerca de Los Manuales Suministrados
36
Navegación por el Menú y Método de Introducción de Texto
36
Conexión del Cable de Alimentación y Encendido del Interruptor de Alimentación
37
Especifi Cación de la Confi Guración Inicial
37
Selección del Método para Conectar la Máquina al Ordenador
37
Selección del Método de Conexión: a Través de Red LAN Inalámbrica U Otro Método
37
Conexión Mediante una Red LAN Cableada
38
Conexión con un Cable USB
38
Conexión Mediante una Red LAN Inalámbrica
38
Confi Guración de LAN Inalámbrica
39
Ajuste del Tamaño y el Tipo del Papel
41
Especifi Cación de la Confi Guración Inicial de Fax y Conexión del Cable del Teléfono
41
Instalación del Controlador/El Software
41
Tareas Útiles
42
Eliminación de Atascos de Papel
43
Sustitución del Cartucho de Tóner
44
Canon i-SENSYS MF6180dw How-To (4 pages)
How to fax to overseas fax number with password
Brand:
Canon
| Category:
Printer
| Size: 0.16 MB
Advertisement
Related Products
Canon imageCLASS Mf6160dw
Canon i-SENSYS MF6140dn
Canon MF6180dn
Canon MF6100 Series
Canon MF6150dw
Canon MF635Cx Series
Canon Color imageCLASS MF641Cw
Canon MF657Cdw
Canon MF655Cdw
Canon MF645Cx
Canon Categories
Printer
Digital Camera
All in One Printer
Camcorder
Scanner
More Canon Manuals
Login
Sign In
OR
Sign in with Facebook
Sign in with Google
Upload manual
Upload from disk
Upload from URL