Sign In
Upload
Manuals
Brands
AGFA Manuals
Measuring Instruments
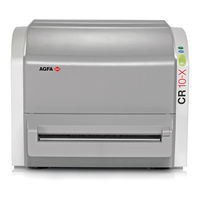
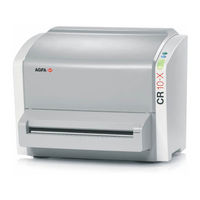
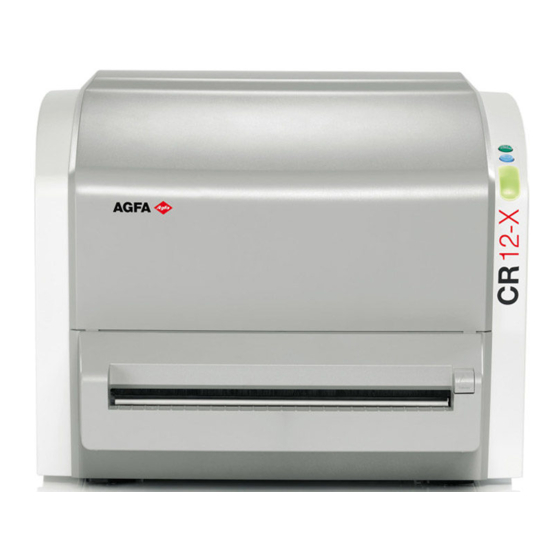
CR 10-X
AGFA CR 10-X Manuals
Manuals and User Guides for AGFA CR 10-X. We have
3
AGFA CR 10-X manuals available for free PDF download: Service Manual, User Manual
AGFA CR 10-X Service Manual (288 pages)
Digitizer
Brand:
AGFA
| Category:
Medical Equipment
| Size: 15 MB
Table of Contents
Table of Contents
11
About this Manual
6
Disclaimer
13
Used Icons
14
Labels
15
CE Mark
15
System Labels
15
System Labels Concerning Laser Radiation
16
Product Complaints
18
References
18
Intended Use
19
Intended User
19
Qualifications for Operation and Service Tasks
19
Environmental and Occupational Safety Instructions
20
Connections to Other Equipment
21
Accessories and Spare Parts
22
Compliance
22
Safety Directions for Operation
25
Radiation Protection
26
Safety Directions for Cleaning and Disinfection
26
General Safety Directions for Service Activities
27
Safety Directions for Installation Planning Activities
28
Safety Directions for Installation Activities
30
Safety Directions for Maintenance and Repair Activities
31
Safety Directions for Remote Service Activities
34
Safety Directions for Transport and Shipment of Spare Parts, Accessories and Devices
35
Safety Directions Concerning Modifications
35
Safety Directions Concerning Hazardous Materials
35
Recycling
35
Waste Disposal
36
Erasing Protected Health Information (Phi)
36
Table of Contents
39
1 Introduction
40
2 Installation Preparation
40
Checking Installation Site Prerequisites
41
Unpacking the Digitizer
41
Unpacking the NX Workstation and Monitor
42
Checking the Shipment Completeness
42
3 Performing the Installation Steps as Described in the Quick Installation Guide
43
4 Finalizing the Installation
46
Adding Windows and NX Users
47
If Required: Configuring Digitizer and NX for the Local Network
51
Setup of Connectivity to Additional System Components
53
Customizing System Components According to Customer Preferences
53
Finalizing the Workstation Installation
53
Checking Software Version
54
Performing Further Activities Depending on Local Regulations
54
Customer Training
54
Training for Operating the Digitizer
55
Training for Usage of Plates and Cassettes
56
5 Appendix: Installation of the Digitizer Without Using the CR 10-X / CR 12-X Configuration Wizard
57
5 Appendix: Installation of the Digitizer Without Using the Cr 10-X / Cr 12-
58
Installation Preparation
58
Connecting the Cables
58
Performing Setup of the NX Workstation
59
Control Panel
60
Verifying the Installation
79
Performing the Installation Wizard of the Digitizer
81
Performing a Backup
82
Finalizing the Installation
82
6 Installation Checklist
83
Table of Contents
87
1 The Digitizer System in a Nutshell
88
System Overview
88
Differences between Digitizer Subtypes 100, 110, 200 and 210
89
Applications
89
Main Components of the Digitizer
90
Main Components of the Cassette with Image Plate
91
Main Functions of the NX Workstation
92
2 Workflow of the Digitizer System
93
3 Hardware Components of the Digitizer
94
4 Boot-Up of the Digitizer
96
5 Description of the Image Plate Run
98
Image Plate Run Details
99
Clamping, Unlocking and Opening the Cassette
99
Taking the Image Plate out of the Cassette
99
Scanning the Image Plate
99
Table of Contents
107
1 Intended Use
108
2 Labels in and on the Device
108
Labels in the Rear
108
Labels Inside the Digitizer
109
Labels on the Erasure Unit
109
Labels on the Optic Module
109
3 Safety Notes for Service Activities
110
General Safety Notes for All Service Activities
110
Safety Notes for Installation Planning
110
Safety Notes for Installation
111
Safety Notes for Mobile Application
112
Safety Notes for Corrective Maintenance Work
113
Safety Notes When Working at the Erasure Unit
113
Safety Notes When Working at PMT with Light Collector
113
Safety Notes When Working at the Slow Scan Drum
114
Safety Notes When Working at the Drawer Unit
115
Digitizer Service User Interface
119
2 Digitizer Service User Interface
122
Logout
123
General Info
124
Device Info
124
Network Info
125
Reporting
126
Info Counter
126
Error Statistics
127
Service Activity Logfile
128
Install & Configure
129
Software Installation
129
Digitizer Settings
133
Destination Settings
133
Site Specific Data
133
Installation Wizard
133
Error Viewer Installation
134
Log Settings
135
Diagnose & Repair
136
Error Code Explanation
136
Device Test
137
Diagnose Cycle
137
Endurance Run Cycle
139
PMT High Voltage On/Off
140
Reset Relative Counters
141
Clear Image Queue
141
Maintain & Calibrate
142
Shading Calibration
142
Backup / Restore
144
Backup
144
Restore
145
3 Remote Service
146
Table of Contents
151
1 General Symptom Classification
152
2 Faults with Error Codes
153
3 No Error Code - Status Led Is off or Slow Red Blinking
154
4 No Error Code - Status Led Fast Red Blinking
156
5 No Error Code - Status Led Triple Red Blinking
158
6 Image Faults Parallel to Image Plate Run
161
Calibration Lines
161
Dust Stripes
162
7 Image Faults Vertical to Image Plate Run
163
Banding
163
8 Appendix: Using the Limit Pattern to Judge Image Flaws
164
Preparation
164
Comparing the Flatfield with the Limit Pattern
164
9 Appendix: Error Codes
165
Section 7
207
1 Overview of Adjustments and Calibrations
208
2 Shading Calibration
209
Checking and Erasing the Image Plate
209
Exposing the Cassette
210
Scanning the Image Plate
211
Verifying a Successful Shading Calibration
213
Appendix: Possible Reasons for a Failed Shading Calibration
214
Section 8
217
1 Software Release Arc_1103
218
Features of Software ARC_1103
218
Known Software Issues of Software ARC_1103
218
2 Software Release Arc_1201
219
New Features and Solved Issues of Software ARC_1201
219
Known Software Issues of Software ARC_1201
220
3 Software Release Arc_1202
221
Solved Software Issues in Software ARC_1202
221
4 Software Release Arc_1302
222
Solved Software Issues in Software ARC_1302
222
New Features of Software ARC_1302
223
5 Software Release Arc_1304
224
Solved Software Issues in Software ARC_1304
224
6 Software Release Arc_1404
225
Solved Software Issues in Software ARC_1404
226
New Features of Software ARC_1404
226
Installation Planning
258
1 Product Description
260
System Overview
260
Workflow of a Digitizer System
261
2 Scope of Delivery and Accessories
262
Scope of Delivery
262
Accessories
263
3 Installation Site Size Requirements
264
Minimum Required Free Space for Operation and Maintenance
264
Guidelines for Placing the Digitizer
265
4 System Integration
266
5 Ambient Conditions During Transport, Storage and Operation
267
Climatic Conditions
267
Mechanical Conditions
267
Light Conditions
267
X-Ray Radiation Conditions
268
6 Electrical Connections
268
Electrical Connections at the Digitizer
269
Installation Guidelines for Electrical Installations in the Installation Room
269
Mains Connection in the Installation Room
269
Network Connection in the Installation Room
270
Mains Cable
270
Electrical Connections of the Optional UPS
271
7 Digitizer Dimensions and Weight
272
Digitizer Dimensions
272
Dimensions of the Digitizer Packaging Incl. Pallet
272
Dimensions of the Pallet
272
Weight of the Digitizer
272
8 Specifications
273
Type Overview
273
Functional Data
273
Electrical Data of Digitizer
273
Functional Data of the Optional UPS
274
Heat Emission
274
Acoustic Noise Level
274
Boot-Up Time and Warm-Up Time
274
Interface Data
275
Service Data
275
Functional Data Image Plates
275
9 Safety Standards
275
10 Installation Planning Checklist
277
Installation Readiness Checklist
278
Advertisement
AGFA CR 10-X Service Manual (218 pages)
Brand:
AGFA
| Category:
Medical Equipment
| Size: 17 MB
Table of Contents
Table of Contents
3
About this Manual
9
Changes Compared to Previous Revision
9
Purpose of this Document
9
Referenced Documents
9
Conventions
10
Explanation of Notes
10
1 Product Description
11
Intended Use
11
Components of the System
11
Digitizer Subtypes Overview
13
Applications
15
Main Functions of the NX Workstation
15
Main Components of the Digitizer
16
Main Components of the Cassette with Image Plate
17
Workflow of the Digitizer System
18
User Interface and Electrical Connections
19
Digitizer Remote Display Messages
20
Status Indicator Light Signals
21
Reference Diagram
24
Hardware Architecture
25
Image Plate Run
28
Image Plate Run Details
29
Digitizer Boot-Up
36
2 Safety Directions
38
General Safety Notes for All Service Activities
38
Safety Notes for Installation Planning
39
Safety Notes for Installation
40
Safety Notes for Mobile Application
40
Safety Notes for Corrective or Preventive Maintenance Work
41
Safety Notes When Working at the Erasure Unit
41
Safety Notes When Working at PMT with Light Collector
41
Safety Notes When Working at the Slow Scan Drum
42
Safety Notes When Working at the Drawer Unit
43
Labels
43
3 Pre-Installation
44
Scope of Delivery
44
Items to be Organized Locally before Installation
45
Technical Data
45
Installation Site Requirements
45
Electrical Connections
47
Network Connection in the Installation Room
49
System Integration
50
Installation Planning Checklist
51
Installation Readiness Checklist
52
4 Installation and Configuration
53
Introduction
53
Installation Preparation
54
Checking Installation Site Prerequisites
54
Unpacking the Digitizer
54
Unpacking the NX Workstation and Monitor
55
Checking the Shipment Completeness
55
Performing the Installation Steps as Described in the Quick Installation Guide
55
Finalizing the Installation
59
Adding Windows and NX Users
60
If Required: Configuring Digitizer and NX for the Local Network
64
Setup of Connectivity to Additional System Components
66
Customizing System Components According to Customer Preferences
66
Finalizing the Workstation Installation
67
Checking Software Version
67
Configuring the Maintenance Indicator
67
Performing Further Activities Depending on Local Regulations
68
Customer Training
68
Training for Operating the Digitizer
69
Training for Usage of Plates and Cassettes
70
Appendix: Installation of the Digitizer Without Using the CR 10-X / CR 12-X / CR 15-X Configuration Wizard
71
4.7 Appendix: Installation of the Digitizer Without Using the CR 10-X / CR 12-X / CR 15-X
72
Installation Preparation
72
Connecting the Cables
72
Performing Setup of the NX Workstation
73
Verifying the Installation
92
Performing the Installation Wizard of the Digitizer
95
Performing a Backup
95
Finalizing the Installation
96
Installation Checklist
96
5 Calibration
97
Shading Calibration
97
Checking and Erasing the Image Plate
98
Exposing the Cassette
98
Scanning the Image Plate
99
Verifying a Successful Shading Calibration
101
6 Acceptance Test
102
7 Troubleshooting
103
Faults with Error Codes
104
No Error Code - Status LED Is off or Slow Red Blinking
105
No Error Code - Status LED Fast Red Blinking
107
No Error Code - Status LED Triple Red Blinking
109
Image Faults Parallel to Image Plate Run
113
Calibration Lines
113
Dust Stripes
114
Image Faults Vertical to Image Plate Run
115
Banding
115
Troubleshooting Shading Calibration Issues
115
Appendix: Using the Limit Pattern to Judge Image Artifacts
116
Preparation
116
Comparing the Flatfield with the Limit Pattern
116
Appendix: Error Codes
117
8 Repair
149
Required Tools
149
Service User Interface
150
Accessing the Service User Interface
150
DD+Dis155.11E Service Manual 8.2.2 Overview of the Digitizer Service User Interface Menus: Menu See Section
152
Overview of the Digitizer Service User Interface Menus
152
Digitizer Service User Interface Menu Details
153
Home
153
Logout
153
Device Info
154
Network Info
154
Info Counter
155
Error Statistics
156
Service Activity Logfile
156
Software Installation
157
Digitizer Settings
158
Destination Settings
159
Error Viewer Installation
160
Installation Wizard
160
Site Specific Data
160
Log Settings
161
Protection Mechanism
162
Device Test
163
Error Code Explanation
163
Diagnose Cycle
164
Endurance Run Cycle
166
PMT High Voltage On/Off
168
Clear Image Queue
169
Reset Relative Counters
169
Maintenance Indicator
170
Shading Calibration
172
Backup
174
Restore
175
Remote Access to the Service Functions
176
Replacements
178
9 Maintenance
179
Diagnostics
180
Questioning of the Customer
180
Analyzing the Info Counter
181
Analyzing the Maintenance Indicator
181
Documenting the Technical Image Quality of the System
181
Visual Checks and Cleaning
182
Checking the Condition of the Image Plates
182
Checking of Power and Network Cable
182
Checking the Condition of the Cassette Unit
183
Checking the Condition of the Digitizer Covers
183
Subtypes 300 and 310: Removing the IP Drawer Module and Checking Condition
183
Subtypes 100, 110, 200 and 210: Removing the IP Drawer Module and Checking Condition186
186
Cleaning the Inner Side of the Digitizer
187
Checking the Erasure Unit
188
Cleaning the Scan Drive
189
Using the Cleaning Brush to Clean the Light Collector and Mirror
191
Lubricating the Cassette Unit Multiformat
192
Exchanging Wear Parts
194
Reassembling the Digitizer
194
Checking Image Quality
195
Completing the Maintenance
196
Confirming the Preventive Maintenance
196
Informing the Customer
196
Maintenance Checklist
196
10 Release Information
197
Software Release ARC_1103
197
Features of Software ARC_1103
197
Known Software Issues of Software ARC_1103
197
Software Release ARC_1201
198
New Features and Solved Issues of Software ARC_1201
198
Known Software Issues of Software ARC_1201
199
Software Release ARC_1202
200
Solved Software Issues in Software ARC_1202
200
Software Release ARC_1302
201
Solved Software Issues in Software ARC_1302
201
New Features of Software ARC_1302
202
Software Release ARC_1304
203
Solved Software Issues in Software ARC_1304
203
Software Release ARC_1404
204
Solved Software Issues in Software ARC_1404
205
New Features of Software ARC_1404
205
Software Release ARC_2012
207
Solved Software Issues and Improvements in Software ARC_2012
208
Solved Software Issues with Software ARC_2012
208
Software Release ARC_2102
210
New Features of Software ARC_2102
211
Solved Software Issues with Software ARC_2102
211
11 Upgrade Procedure
212
12 Spare Parts
212
13 Wiring Diagram
213
Switches, Leds and Connectors on the PMI Board
216
Switches on the PMI Board
216
Leds on the PMI Board
217
Power Board / Power II Board
218
AGFA CR 10-X User Manual (84 pages)
Brand:
AGFA
| Category:
Measuring Instruments
| Size: 1 MB
Table of Contents
Table of Contents
2
Legal Notice
4
Introduction
5
Introduction to this Manual
6
Scope
7
About the Safety Notices in this Document
8
Disclaimer
9
Introduction to CR 10-X, CR 12-X and CR 15-X
9
Intended Use
10
Indications for Use
11
Intended User
12
Configuration
13
Operation Controls
15
System Documentation
17
Training
18
Product Complaints
19
Compatibility
20
Compliance
21
Connectivity
23
Installation
24
Labels
26
Serial Number
27
Cleaning and Disinfection
29
Patient Data Security
30
Maintenance
31
Recurrent Safety Tests
32
Environmental Protection
33
Safety Directions
34
General Safety Instructions
35
Quality Control
37
Getting Started
38
Starting the Digitizer
39
Basic Workflow
40
Step 1: Select a Patient and Start the Exam
41
Step 2: Digitize the Image
42
Step 3: Perform a Quality Control
45
Step 4: Remove the Cassette and Insert the Next One
46
Stopping the Device
47
Before Switching off
48
Switching off
49
Operating CR 10-X, CR 12-X and CR 15-X
50
Reading an Emergency Image Plate
51
Re-Erasing an Image Plate
52
Reading the Initialization Data of an Image Plate
54
Expiry of Image Plates
57
Upcoming Expiry of the Image Plate
58
Expired Image Plate
58
Troubleshooting
59
Digitizer Remote Display
60
Connection Problems
61
Cassette Could Not be Identified
62
Cassette Release Button Pressed before End of Cycle
63
Cannot Read Data on the Image Plate
64
Image Plate Transport Problems
65
Removing a Jammed Image Plate
66
Behavior in Case of Power Failure
70
Cleaning the Optical Unit
71
Technical Data
73
Specifications
74
Cassette Formats
78
Remarks for HF-Emission and Immunity
79
Advertisement
Advertisement
Related Products
AGFA CR 30-X
AGFA CR 12-X
AGFA CR 15-X
AGFA CR 75.0
AGFA CR 85-X
AGFA CR 25.0
AGFA CR 30-Xm
AGFA CR Advanced Reader
AGFA Crystal-M Imager
AGFA CR MM3.0T
AGFA Categories
Medical Equipment
Printer
Scanner
Digital Camera
Measuring Instruments
More AGFA Manuals
Login
Sign In
OR
Sign in with Facebook
Sign in with Google
Upload manual
Upload from disk
Upload from URL