
Related Manuals for Lilin ST1358 series


Summary of Contents for Lilin ST1358 series
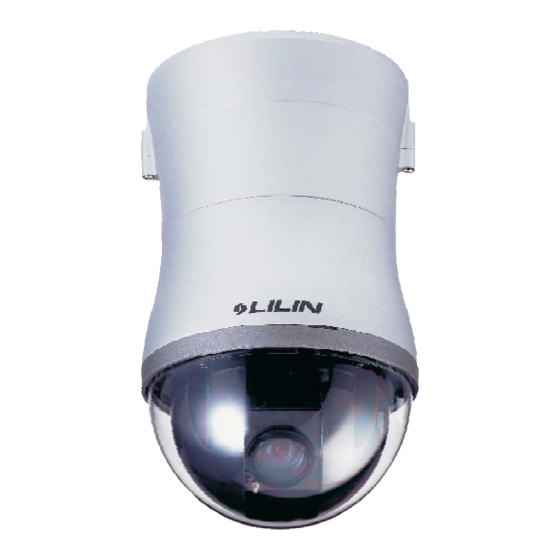
- Page 1 D/N SUPER HI-RES. FAST DOME CAMERA PIH-7625DH/7630DH/7635DH D/N SUPER HI-RES. FAST DOME IP CAMERA IPS1254/1258/1304/1308/1354/1358 Series D/N HUMAN TRACKING FAST DOME CAMERA ST1254/1258/1304/1308/1354/1358 Series INSTRUCTION MANUAL...
-
Page 2: Table Of Contents
CONTENTS Pages Preface Features Warnings & Cautions Structural Element Fast Dome Camera Set Up Alarm Out Mode Switch Setting RS-485 Protocol Switch Setting Fast Dome ID Address Setting Refer Chart Fast Dome Connection Jack and Cable Requirement Installation Indoor Installation Structural Drawing Embedded Mounting (False Ceiling) Attached Mounting (Fixed Ceiling) Wall Mounting (Fixed Bracket) - Page 3 Zoom Speed Setting Focus Speed Setting Auto Iris Setting Advanced Setting Exposure Mode Setting Backlight Compensation Setting Flicker Less White Balance Setting Day/Night Setting Night Environment Setting Synchronization Mode Setting Auto Gain Control Setting Image Setting Gamma Setting Pedestal Setting Mirror Setting Y Negative Setting Resolution Setting...
-
Page 4: Preface
Internet is a key factor of operating PTZ. Four PTZ web interfaces including lens absolution positioning are designed for easy-to-use purpose. D/N Human Tracking Fast Dome Camera series will all the features and function of LILIN's D/N Super Hi-Res. Fast Dome Camera and built-in intelligent video processing chip, which enhances the moving object analysis, improves the human feature distinguishing accuracy, and lowers the false action occurrence. -
Page 5: Features
FEATURES 25X Auto Focus Lens(PIH-7625DH&IPS1254/1258&ST1254/1258) Build-in 25X optical zoom lens with focal length 3.43~85.7mm 30X Auto Focus Lens (PIH-7630DH&IPS1304/1308&ST1304/1308) Build-in 30X optical zoom lens with focal length 3.43~102.9mm 35X Auto Focus Lens (PIH-7635DH&IPS1354/1358&ST1354/1358) Build-in 35X optical zoom lens with focal length 3.43~120mm 520 Horizontal TV lines Automatic / Manual Iris Control Preset ID / Name... - Page 6 Human Tracking Fast Dome Camera Function (ST1254/1258/1304/1308/1354/1358 series) 1. Human Tracking Fast Dome Camera series are smart sensor and built-in intelligent video processing which has surveillance applications on, (1) Detection motion object. (2) Tracking and zooming motion object. 2. Human Tracking Fast Dome Camera series have two modes: (1) Manual tracking mode (Keyboard mode).
-
Page 7: Warnings & Cautions
WARNINGS & CAUTIONS Please read the manual before attempting installation or operation 1. Please be aware to the warnings and cautions notice. 2. Don't use any chemical detergent to clean the machine surface, use a damp cotton cloth only. Regularly clean the dome cover to assure proper focus ability. 3. -
Page 8: Structural Element
STRUCTURAL ELEMENT Dome Cover RS-485 In/Out Terminal Camera Case Video Out Jack Bottom Chassis Alarm In/Out connector Power In Jack (AC100 ~ 240V) RJ45 Network Connector Power In Jack (AC24V) [IPS1254/1258/1304/1308/1354/1358]... -
Page 9: Fast Dome Camera Set Up
FAST DOME CAMERA SET UP DIP Switch Setting Camera ID Switch RS-485 Protocol Switch Alarm Out Mode Switch Alarm Out Mode Switch Setting Alarm Out Mode can be set as NC (normally close) or NO (normally open) RS-485 Protocol Switch Setting Explanation of DIP Switch Setting : : RS-485 IN Terminal Resistor ON/OFF 1. - Page 10 Please refer to MERIT LILIN PROTOCOL2 (MLP2) for detail of command format. RS-485 Protocol DIP Switch of LILIN D/N Super Hi-Res. Fast Dome (IP) Camera / D/N Human Tracking Fast Dome Camera Series Setting...
-
Page 11: Fast Dome Id Address Setting Refer Chart
Up to 64 Fast Dome Camera can be serial linking in one system. Therefore each dome is addressing by ID switch located at the base of the Fast Dome. When select MLP1 (MERIT LILIN PROTOCOL 1), Camera ID setting as followings: 1 2 3 4 5... - Page 12 When select MLP2 (MERIT LILIN PROTOCOL 2), Camera ID setting as followings:...
- Page 14 8 9 0 8 9 0 8 9 0 8 9 0...
-
Page 15: Fast Dome Connection Jack And Cable Requirement
Fast Dome Connection Jack and Cable Requirement AC100~240V Power Cable AC24V Power Cable RS-485 Twisted Pair Cable To Keyboard or Matrix . ..etc. Video Signal Cable To Monitor Alarm In/Out Cable To PIR CAT5 Network Cable 1. AC100 ~ 240V Power Cable 2. - Page 16 b. Prepare the individual conductors for clamping. After clamping the contacts, push them into the proper holes in the accessory connector of this camera until they snap in place. Contact CAUTIONS : CONNECT THIS TO 24V AC CLASS 2 POWER SUPPLY ONLY. 3.
-
Page 17: Installation
INSTALLATION Indoor Installation Structural Drawing Embedded Mounting Attached Mounting... -
Page 18: Embedded Mounting (False Ceiling)
Embedded Mounting (False Ceiling) Step 1 Ceiling Preparation Drill a 3/32" (2.4mm) hole at the center of the Use a pencil and a compasses to mark a circle 6.7" chosen area. (170mm) in diameter and cut the circle. Step 2 The Ceiling Ring 200mm 93mm Attach the ring to... - Page 19 Step 4 Attach the Camera Body and Base Attach camera body to Turn camera body Tighten the two screws base counter clockwise to to fix the camera body tight position Notice: position connector is correct or not. Step 5 The Fix Ring Put on the three L shape Attach fix ring with Tighten the three black...
-
Page 20: Attached Mounting (Fixed Ceiling)
Attach dome cover to Turn the dome cover Turn the ring clockwise to tight position camera body clockwise to tight position Note : After dome cover is attached, use glass-cleaning cloth to clean dome cover. Unclean dome cover may affect camera performance. Attached Mounting (Fixed Ceiling) Step 1 Fix The Base Turn the dome cover... - Page 21 Step 2 Camera Setting Setting Fast Dome ID, Alarm Out Mode, RS-485 Protocol Step 3 Attach the Camera Body and Base Attach camera body to Turn camera body Tighten the two screws base counter clockwise to to fix the camera body tight position Notice: position connector is...
-
Page 22: Wall Mounting (Fixed Bracket)
Wall Mounting (Fixed Bracket) Step 1 Fix The Bracket Fix bracket first, and Turn the dome cover Separate the dome Untighten the two pull control cable and counter clockwise cover from camera screws from base power cable from bracket cable outlet. Turn the camera cover Separate the camera Set all of control... - Page 23 Step 4 Camera Setting Setting Fast Dome ID, Alarm Out Mode, RS-485 Protocol Step 5 Attach the Camera Body and Base Attach camera body to Turn camera body Tighten the two screws base counter clockwise to to fix the camera body tight position Notice: position connector is...
-
Page 24: System Configuration
SYSTEM CONFIGURATION LILIN's integrated Fast Dome Surveillance System is suitable for a wide range of surveillance applications. The system can be as single fast dome with one keyboard or encompassing as 64 domes with comprehensive matrix switching, PC control and even Digital Video Recording. - Page 25 Multiple Domes means that more than one fast dome is linked in the system. Each dome connects to next dome forming a serial linking. Each dome has an individual ID dip switch, which allows the keyboard to identify each fast dome and make command. Sometimes it is more convenient to wire a telemetry system in star configuration rather than daisy chain.
-
Page 26: Fast Dome, Matrix And Keyboard
Fast Dome, Matrix and Keyboard Matrix System is designed to process multiple video systems and video switching. Its central process unit (CPU) can manage multiple video signals simultaneously and control other linking system, such as fast dome or PIH-820 telemetry receiver. All telemetry remote control and signal transmissions are through twisted pair. -
Page 27: Fast Dome With Pc Control
9600 bps). The PC control port RS-232 is converted to RS-485 format by interface. User may use their own software (protocol) or software provided by LILIN to control the dome. In this system up to 64 fast domes can be linked. -
Page 28: Fast Dome, Dvr And Keyboard
Fast Dome, DVR and Keyboard The DVR System is an advanced digital recording product, with long recording time and easy searching features. Telemetry remote control is twisted pair for data transmission to the fast dome. Fast Dome can be controlled directly from the control panel of the DVR, or from keyboard. Each DVR (Digital Video Recorder) can manage 16 video signals and via RS-485 ot daisy connection 16 sets of fast dome camera. -
Page 29: Fast Dome Ip Camera With Pc Control
Fast Dome IP Camera with PC Control The Fast Dome IP Camera can be connected via RJ-45 Ethernet cable that provides both Internet and/ or Intranet access. Multiple Fast Dome IP Cameras can be connected with in a Hub or multiple Hubs. Please consult your network administrator for network architecture and software settings. -
Page 30: Operation
OPERATION Initial Power Up Inspection After the power is first applied to a dome it will perform a self-test procedure. This calibrates and checks the basic functions of the dome, control is not possible during this self-test period. Once the camera has stopped moving, it will then be ready to control. If preset positions and tours have been programmed into a dome and the power is turned off, the dome will enter the Auto Scan mode once the power is turned on again (after self-test period). -
Page 31: Fast Dome Selection
Fast Dome Selection To call out a dome controlling or setting To select 1st Fast Dome LENS C.ESC ALARM MATRIX WIPER SPRAY LIGHT RESET Push key followed by key. C.SET SEARCH PRESET CTRL1 CTRL2 To select 64th Fast Dome AUTO Push key then followed by... -
Page 32: Iris Control
Iris Control The purpose of iris control is to adjust brightness on target. It can be set as Auto Iris or Manual Iris. 1. Iris Open Push key, to open the iris and brighten the picture. LENS C.ESC ALARM MATRIX WIPER SPRAY LIGHT... - Page 33 Joystick Control Move the Joystick to bring the camera to the desired view position. Adjusting Lens ZOOM IN / OUT, FOCUS NEAR / FAR / AUTO and IRIS O / C / AUTO keys. When set up preset point, using manual focus will LENS C.ESC ALARM...
-
Page 34: Recalling Preset Positions
Recalling Preset Positions Once the required preset positions have been stored in a dome, they may be quickly recalled, returning the dome to exact position. To recall 1st Preset Position: Push key followed by key. PRESET The dome will move to that position in speed of 360 /sec. PRESET keys Ex. -
Page 35: Activating Auto Pan
Activating Auto Pan When the Auto Pan function is activated, the fast dome will auto touring the preset groups entered. To activate Auto Pan: LENS C.ESC ALARM MATRIX AUTO Push key, confirming the activation of autopan. WIPER SPRAY LIGHT RESET C.SET SEARCH PRESET... - Page 36 Alarm Output Each fast dome has 1 alarm output. A dip switch can program the alarm output for NO (normally open) or NC (normally close), that can activate the linked devices. Alarm Release Setting The way to remove alarm after alarm issue as below: Push the joystick up, down, left, right or adjust the lens to remove the alarm issue.
-
Page 37: Setup Menu Tree
SETUP MENU TREE SETUP LANGUAGE MENU DISPLAY PRESET ID SETUP ZOOM RATIO ALARM MESSAGE DATE/TIME TIME DATE DATE FORMAT PAN/TILT ANGLE AUTO PAN DOME CAMERA AUTO FOCUS SETTINGS ZOOM SPEED FOCUS SPEED AUTO IRIS LEVEL ADVANCED EXPOSURE MODE AUTO SETTING MANUAL BACKLIGHT FLICKER LESS... - Page 38 TOURS NUMBER EDIT TOUR CLEAR ABOVE NUMBER DWELL TIME SPEED PRIVACY NUMBER ZONES EDIT ZONE CLEAR ALARMS IN 1 IN 2 IN 3 IN 4 IN 5 IN 6 IN MODE OUT TIME-OUT PASSWORD ENABLE PASSWORD EDIT PASSWORD FACTORY INITIAL CAMERA SCHEDULE ALARM IN...
-
Page 39: Fast Dome Camera Function Setup
Setup Menu. CTRL1 Press key to exit setup menu or push joystick down to select <EXIT>, and then press C.SET key to exit setup menu. CTRL1 MERIT LILIN FAST DOME NOTE LANGUAGE ENGLISH Enter Exit Buttons Description <DISPLAY SETUP>... -
Page 40: Display System Information
1. Fast dome model number 2. Camera, Pan/Tilt, Receiver version 3. Font of OSD version 4. Protocol rate and format 5. Fast dome ID number 6. Protocol version, LILIN717 (LILIN MLP1), LILIN MLP2 Display Character Setup Menu 1. Display Character Setup Menu Press C.SET key into Setup Menu. - Page 41 3. Zoom Ratio Setting Push joystick down to select <ZOOM RATIO>, and then push joystick left or right to make selection: OFF : No Zoom Ratio on the monitor screen. ON : Zoom Ratio on the monitor screen. 5~30 sec : Display elapsed time. Zoom Ratio will have been displayed on the monitor screen until elapsed time stops, when Zoom Ratio is operated.
-
Page 42: Display Function Setup Menu
C.SET Press key into Setup Menu. CTRL1 C.SET Push joystick down to select <DOME SETTINGS>, and then press key into dome setting CTRL1 menu. MERIT LILIN FAST DOME DOME SETTING LANGUAGE ENGLISH <CAMERA> <DISPLAY SETUP> <PAN/TILT> <DOME SETTINGS> <PRESETS> <SCHEDULE SETUP>... -
Page 43: Camera Setting Menu Display
Camera Setting Menu Display 1. Display the Camera Setting Menu After getting in dome setting menu, push joystick down to select <CAMERA>, and then press C.SET key into camera setting menu. CTRL1 CAMERA AUTO FOCUS AUTO ZOOM SPEED FOCUS SPEED AUTO IRIS LEVEL <ADVANCED SETTING>... -
Page 44: Exposure Mode Setting
ADVANCED SETTING EXPOSURE MODE <MANUAL> BACKLIGHT FLICKER LESS WHITE BALANCE DAY/NIGHT AUTO NIGHT ENV. NORMAL SYNC MODE AUTO GAIN CTRL 25 dB <IMAGE> BACK EXIT (1) Exposure Mode Setting Push joystick down to select <EXPOSURE MODE>, and then push joystick left or right to setup auto mode or manual mode. -
Page 45: White Balance Setting
(4) White Balance Setting Push joystick down to select <WHITE BALANCE>, and then push joystick left or right to select white balance mode. PUSH ATW: Auto Tracing White Balance, suitable for 2500~9500K color temperature environment. PUSH: Push mode, suitable for 2300~10000K color temperature environment. MWB: Manual White Balance, suitable for 2500~9500K color temperature environment. -
Page 46: Night Environment Setting
C.SET Push joystick down to select <NIGHT DAY>, and then press key into time CTRL1 C.SET setting. Push joystick left or right to select time of NIGHT DAY. Then press CTRL1 key again to next item. C.SET C.SET 06 : 00 06 : 00 06 : 00 CTRL1... -
Page 47: Gamma Setting
IMAGE GAMMA PEDESTAL MIRROR Y NEGATIVE HIGH RESOLUTION BACK EXIT (1) Gamma Setting Push joystick down to select <GAMMA>, and then push joystick left or right to make selection. (00 ~ 07) (2) Pedestal Setting Push joystick down to select <PEDESTAL>, and then push joystick left or right to make selection. -
Page 48: Home Position Setting
2. Home Position Setting Push joystick down to select <HOME POSITION>, and then push joystick left or right to select home position. OFF: NO action. 1 ~ 128: Home positions are preset position from fast dome. Note: When keyboard control isn't used, "Return Mode" is set for "HOME" and "Return Time" is over, "Return Mode"... -
Page 49: Auto Scan Mode Setting
TRACK: Perform human tracking mode. (The tracking functions are only for tracking models ST1254/1258/1304/1308/1354/1358) AUTO Note: 1. Press key on the keyboard to perform Auto mode function. 2. On tracking mode, once the object move out the traceable or discriminable area, the fast dome camera will back to the preset 1 to continue doing tracking function after 10 sec.. -
Page 50: Preset Function Setting Menu
(1) Patrol Learn Setting Push joystick down to select <LEARN>, and then press C.SET key into setting menu. CTRL1 Control joystick or press control key of lens to start patrol learn mode. (Count down time from 100% ~ 1%) C.SET Press key to end of patrol learn mode. - Page 51 PRESET POSITION PRESETS PRESET NUMBER <PRESET MAP> <EDIT POSITION> <EDIT ID> SCENE FILES 3 sec DWELL TIME SPEED 255 deg/sec <33-64> <65-96> <97-128> ABOVE NUM. CLR PRESET BACK EXIT BACK EXIT 3. Preset Position Setting C.SET Push joystick down to select <EDIT POSITION>, and then press key into preset position CTRL1 setting.
- Page 52 (3) Modify Preset ID Push joystick down to select <EDIT AREA> on the preset ID setting, and push joystick right to select modifiable characters. C.SET Push joystick down to select new characters, and press key to chose. CTRL1 (4) Cancel Preset ID C.SET Push joystick down to <CANCEL>, and then press key to cancel preset ID.
-
Page 53: Tour Function Setting Menu
Tour Function Setting Menu 1. Display the Tour Setting Menu After getting in dome setting menu, push joystick down to select <TOURS>, and then press C.SET key into tours setting menu. CTRL1 2. Tour Number Selection TOURS Push joystick down to select <NUMBER>, and then push NUMBER joystick left or right to select Tour1 or 2. -
Page 54: Privacy Zones Setting Menu
Privacy Zones Setting Menu 1. Display the Privacy Zones Setting Menu After getting in dome setting menu, push joystick down to select <PRIVACY ZONES>, and then press C.SET key into privacy zones setting menu. CTRL1 PRIVACY ZONES NUMBER <EDIT ZONE> CLEAR ABOVE NUM. -
Page 55: Alarms Setting Menu
Alarms Setting Menu 1. Display the Alarms Setting Menu After getting in dome setting menu, push joystick down to select <ALARMS>, and then press C.SET key into alarms setting. CTRL1 ALARMS POSI 1 POSI 2 POSI 3 POSI 4 POSI 5 POSI 6 IN MODE 100 MS... -
Page 56: Password Function Menu (Ip Camera Not Support)
4. Alarm Output Control Setting Push joystick down to select <OUT>, and then push joystick left or right to select alarm output mode: IN 1 IN 2 IN 3 IN 4 IN 5 IN 6 OFF: NO action. IN 1: Only alarm input 1 will be start. IN 2: Only alarm input 2 will be start. - Page 57 C.SET Push joystick down to select <OK>, and then press key to confirm and back to password CTRL1 function menu, or push joystick down to select <CANCEL>, and then press C.SET key to cancel CTRL1 password. These numbers of Edit column will be reset to "1111". Note: When edit password setting and camera recording function are simultaneously performed, please stop recording function first;...
-
Page 58: Restore Factory Defaults
Restore Factory Defaults 1. Display the Restore Function Initialization Menu After getting in dome setting menu, push joystick down to select <FACTORY INITIAL>, and then press C.SET key into factory initial setting. CTRL1 RESTORE FACTORY DEFAULTS RESTORE BACK EXIT 2. Factory Initial for All Push joystick down to select <RESTORE>, and then push joystick left or right to select <ALL>. -
Page 59: Schedule Setup Menu
Press key into setup menu. CTRL1 C.SET Push joystick down to select <SCHEDULE SETUP>, and then press key into schedule CTRL1 setting. MERIT LILIN FAST DOME SCHEDULE SETUP LANGUAGE ENGLISH <ALARM IN> <DISPLAY SETUP> <STARTUP AUTO OPTIONS> <DOME SETTINGS> <DAYLIGHT SAVING TIME>... -
Page 60: Startup Auto Options Menu
4. End Time Setting Push joystick down to select <END>, and then press C.SET key into time setting. Then push CTRL1 joystick left or right to select end time and press C.SET key for next item. CTRL1 : 00 08 : 00 08 : 00 C.SET C.SET... -
Page 61: Daylight Saving Time Menu
Example: 1. 12:00, perform SEQ. Mode 2. 13:00, STOP (If "self return mode" is home, "home position setting" is 1, and "self return time" is 10 min, camera will be performed "self return mode" function and recall preset position 1 by 13:10.) 3. -
Page 62: Specification
SPECIFICATION Operational Manual Pan / Tilt Speed 0.15 ~ 120 /sec (8 stages) Preset Position Pan / Tilt Speed 1 ~ 255 /sec Preset Position Dwell Time 1 ~ 255 sec Recall Preset Position Pan / Tilt Speed 360 /sec 180 Instant Flip Rotation Speed 360 /sec Pan Rotation... -
Page 63: Optical Lens
Optical Lens 25X Lens (PIH-7625DH&IPS1254/1258&ST1254/1258) Focal Length f = 3.43 ~ 85.7mm Aperture Max F1.6 (wide) ~ F3.7 (telephoto) W: 68.6 (D) 57.8 (H) 43.7 (V) View of Angle T : 3.12 (D) 2.53 (H) 1.83 (V) X Lens (PIH-7630DH&IPS1304/1308&ST1304/1308) f = 3.43 ~ 102.9mm Focal Length F1.6 (wide) ~ F4.1 (telephoto) -
Page 64: Appendix A Quick Reference Table
APPENDIX A Quick Reference Table Function Operation To Tilt Up Push Joystick Forward To Tilt Down Push Joystick Down Pan / Tilt Control To Pan Left Push Joystick Left Push Joystick Right To Pan Right Dome Selection Numeric Key + CAM Zoom In ZOOM IN Zoom Out... -
Page 65: Appendix B Trouble Shooting
APPENDIX B Trouble Shooting 1. No Power 1-1. Check power input connection 1-2. Check connection between camera body and base 2. No Video 2-1. Check camera video output on camera 2-2. Check cable (damaged cable) 2-3. Check video input connection on monitor 2-4. -
Page 66: Appendix C Preset Id Characters Table
APPENDIX C Preset ID Characters Table Page 1 " < > Page 2 Page 3 66-7625CSE-2... - Page 67 MERIT LILIN ENT. CO., LTD http://www.meritlilin.com 66-7625CSE...
Need help?
Do you have a question about the ST1358 series and is the answer not in the manual?
Questions and answers