Table of Contents
Advertisement
Quick Links
Advertisement
Table of Contents

Related Manuals for Avermedia AVerVision300


Summary of Contents for Avermedia AVerVision300
- Page 2 In no event will AVerMedia be liable for direct, indirect, special, incidental, or consequential damages arising out of the use or inability to use this product or documentation, even if advised of the possibility of such damages.
-
Page 3: Table Of Contents
Introduction....................1 Where to use the AVerVision300............2 What’s in the Package ................3 Hardware Installation and Setup ............4 Connection Ports ......................4 Connecting an IBM Compatible PC or Macintosh Computer ........4 Connecting a VGA, Mac or LCD/DLP Projector ............5 Connecting the Power Adapter ..................5... -
Page 4: Where To Use The Avervision300
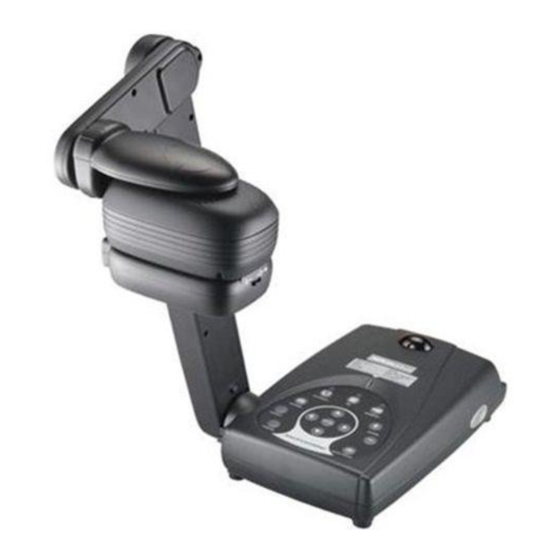
AVerMedia® Thank you for purchasing the AVerVision300 This document camera displays any document or 3D objects onto a LCD or DLP projector making product demos a snap. You can even switch between camera AVerVision300 or PC mode anytime. is so... -
Page 5: What's In The Package
0 provides a way to display courtroom proofs and Demonstrate your products with evidences. Additionally you can 0 . It easily displays even select to enhance your products to a large crowd. , and 0 makes it convenient for you image up to and your audience. -
Page 6: Hardware Installation And Setup
Using the VGA OUT port allows you to switch between camera or computer mode. Simply press the SOURCE button found on the unit’s control panel or remote control in order to select between PC or camera output. AVerMedia AVerVision300 IBM Compatible PC LIGHT... -
Page 7: Connecting A Vga, Mac Or Lcd/Dlp Projector
(optional) Plug to DVI IN Mac Mo nit or Use a standard 100V~240V AC power source. AVerMedia AVerVision300 Wa l l O u t l e t Po w e r A d a p t e r Po w e r C o r d... -
Page 8: Connecting To A Microscope
0 to a microscope allows you to examine microscopic objects on a VGA monitor or Connecting the a LCD/DLP projector without straining your eyes. P r o t e c t i v e L e n s A d a p t e r ( o p t i o n a l ) C a m e r a H e a d C o u p l e r... -
Page 9: Making Adjustments
This section provides illustrated useful tips on how to adjust the AVerVision300 to meet your needs. The camera head can be rotated 135 degrees from left to right. You can also manually adjust the focus from here to improve the quality of the pictures. -
Page 10: Light And Document Positioning Pointer
A unique feature of the AVerVision300 is the four (4) red diodes that demarcate the viewing area enabling you to correctly position the object. It even allows you to switch to three different lightings. W h i t e L E D a n d... -
Page 11: Using The Infrared Remote Control
AVer Vi s io n 3 0 0 RN-CJ GRAPHICS In the text mode, AVerVision300 corrects the intensity of the adjacent pixel making it more uniform which produces sharper and clearer images. While in graphics mode, AVerVision300 adjusts the gradient of the adjacent pixel that appears to have a smooth image. -
Page 12: The Control Panel Buttons And Their Functions
The Touch Button Control Panel located on the top and side of AVerVision300 provides quick access to commonly used functions. Power AVerMedia Turn the AVerVision300 on/off On normal operations a green LED will be lit, in standby mode the color of the LED will be red. -
Page 13: Menu Functions
WHITE Use ▲or▼ buttons to select between Auto or Manual. BALANCE AVerVision300 allows you to automatically or manually adjust the CCD camera to suit the lighting condition or color temperature. If you select to manually adjust the white balance, you can adjust the Red, Blue or use the system to measure the color temperature. - Page 14 EXPOSURE Use ▲or▼ buttons to select between Auto or Manual. AVerVision300 allows you to automatically or manually adjust the CCD camera to determine how much light is required. If you choose to manually adjust the exposure, press ►or◄ buttons to adjust the exposure level.
-
Page 15: Timer Function
0 allows you to control the pace of your presentation by showing the countdown screen display of the remaining time. This merely serves as a reminder. When the time is up, the presentation screen will not be affected in any way. 1. -
Page 16: Troubleshooting
This section provides many useful tips on how to solve common problems while using the There is no picture on the presentation screen. 1. Check all the connectors again as shown in this manual. 2. Check your display output device remote control’s on/off switch. 3. -
Page 17: Limited Warranty
LIMITED WARRANTY AVerMedia TECHNOLOGIES, Inc. warrants this product to be free of defects resulting from faulty manufacture or components under the following terms: WARRANTY LENGTH Labor is warranted for (3) three years from the date of purchase. Parts are warranted for (3) three years from the date of purchase. - Page 18 This warranty gives you specific legal rights, and you may also have other rights granted under state law. These rights vary from state to state. CONTACT INFORMATIONS: USA : www.aver.com UK : www.averm.co.uk Spain: www.avermedia.es Germany : www.avermedia.de China : www.averm.com.cn Taiwan & International : www.avermedia.com...
Need help?
Do you have a question about the AVerVision300 and is the answer not in the manual?
Questions and answers