
Related Manuals for Avermedia AVerVision330


Summary of Contents for Avermedia AVerVision330
- Page 1 ® ® User Manual AVerMedia ® D o c u m e n t C a m e r a...
- Page 2 In no event will AVerMedia be liable for direct, indirect, special, incidental, or consequential damages arising out of the use or inability to use this product or documentation, even if advised of the possibility of such damages.
-
Page 3: Table Of Contents
Installing JPEG Converter Applications................. 7 Converting JPEG File Formats..................8 Transferring the Pictures to a Computer via USB Connection........10 Using AVerVision330 as USB PC Cam................. 11 Using the AVerVision Application .................. 11 Installing the Software ....................11 Application User Interface ..................... 13 Installing the LED Lamp .................... - Page 4 LED Lamp........................18 Anti-glare ........................18 Using the Infrared Remote Control............19 Touch Button Control Panel ..............20 LED Panel ....................22 Infrared Sensor ..................22 OSD Navigation Tree ................23 RGB VIDEO OUTPUT OSD DISPLAY................23 TV OUTPUT OSD DISPLAY ..................24 Menu Functions ..................
-
Page 5: Introduction
Your AVerMedia® AVerVision330 package contains the following: Thank you for purchasing the AVerMedia® AVerVision330. This document camera displays any documents, negatives, transparencies and 3D objects onto a TV, LCD or DLP projector making product demonstration a LED Lamp snap. User Manual The AVerVision330’s... - Page 6 Light Box RCA to SCART Cable Required to view slides, transparencies and film or to display negative film as positive images. (For SCART TV) Monitor Adapter Computer Adapter Microscope Adapter (28mm) Microscope Adapter (34mm) (for MAC) (for MAC)
-
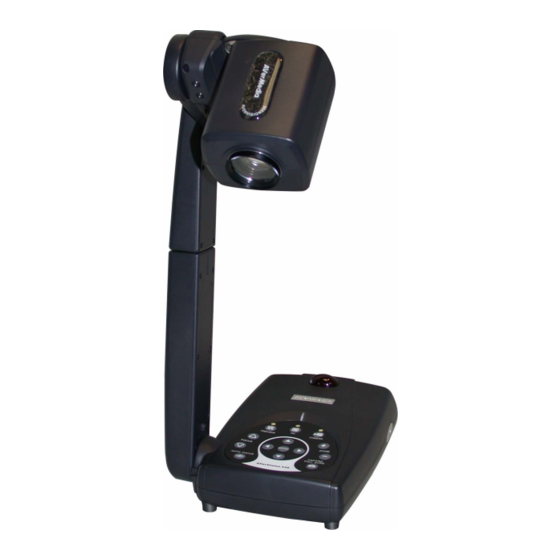
Page 7: Avermedia ® Avervision330 Components
® ® The following illustrations identify the key components of your AVerVision330. Circular Vial Camera Lens Extendable Arm Side Panel Control Panel IR Remote Sensor Side Panel Back Panel Power 10. TV/ RS-232 Port 11. USB 1.1 Port 12. SD Card Slot 13. -
Page 8: Technical Specification
Auto/ Manual The ports on the back and side panel of the AVerVision330 enable you to connect the unit to a computer, graphics display monitor or LCD/ DLP projector, TV or other device. Illustrated below are the ports that are located at the back and side panel of... -
Page 9: Setting The Dip Switch
Plug the power adapter into this port. 3. PC IN Port Use this port to connect the AVerVision330 to the VGA output port of your computer. This enables you to input your computer video signal and pass it through to the DVI/VGA out port. -
Page 10: Connecting A Tv
Connector To Computer COM PORT Note: The RS-232 adapter allows you to control AVerVision330 using a computer through an RS-232 connection. Refer to the RS-232 control instructions on your CD for more information. You can connect the AVerVision330 to an IBM compatible PC, Macintosh, or notebook (laptop) computer. After physically connecting the unit to your PC, you can display an image on your computer by pressing the PC button on the unit’s control... -
Page 11: Inserting And Ejecting A Memory Card
Insert the card fully with the label facing up until it reaches the end. To remove, pull the card out. SD Card CF Card (not supplied) (not supplied) Minimum System Requirements Pentium®-class processor 32 MB of RAM (64 MB recommended) Microsoft®... -
Page 12: Converting Jpeg File Formats
Use the JPEG Converter application provided to convert your JPEG files to a format that the AVerVision330 can read. Open the JPEG Converter application. Click on the Browser button to select the file(s) that you want to convert. You can choose more than one file at a time. - Page 13 The JPEG Converter application saves your converted files in the same folder as your source files. You can then copy the converted files to the "JPEG" folder on your memory card. Use the AVerVision330 PREVIEW Mode to view your converted image files.
-
Page 14: Transferring The Pictures To A Computer Via Usb Connection
To transfer pictures, you must set the DIP switch no. 3 to the UP position to use the AVerVision330 as a USB card reader/writer. USB Port Laptop USB Cable (sup plied ) Computer DIP SWITCH Computer Operating System Requirement Windows 2000 SP4 and XP No driver is required. -
Page 15: Using Avervision330 As Usb Pc Cam
To use AVerVision330 as USB PC Cam, set the DIP switch no. 3 DOWN. (For detailed PC Cam driver installation procedures, see the instruction provided in the CD and click User Manual.) USB Port Laptop USB Cable (sup plied ) - Page 16 To install PC Webcam Applications: Insert your Software CD into your CD-ROM drive, and click on "PC Camera Applications” and follow the instructions. Click “Finish” to complete installation. After the installation, connect the USB cable between the AVervVsion330 and your PC. Open the applications by clicking “VisionAP”...
- Page 18 A. Basic Setting Function Description Digital Zoom and Pan Control Auto Focus Return to normal view (1X) Optical/Digital zoom-in selection. Brightness adjustment Contrast adjustment Normal view without image rotate or mirror Rotate the image by 180°. Image mirroring Convert the image to Negative Convert the image to Black and White Back to the original image B.
-
Page 19: Installing The Led Lamp
A portable LED Lamp is provided to ensure adequate lighting. Focus the light towards the object to balance the distribution or range of luminance for better image projection. TURN ON Snap to hold. Stretch the arm and insert the LED lamp. PLUG HERE Press to release the latch and open. -
Page 20: Installing The Optional Light Box
PLUG IT HERE Connecting the AVerVision330 to a microscope enables you to examine microscopic objects on a big screen without straining your eyes. To view microscopic images, you must set the unit to microscope mode, and then adjust the microscope for a clearer image (refer to p26). -
Page 21: Adjusting The Avervision330
This section describes how your can adjust the AVerVision330 to meet your needs. You can rotate the camera head 125 degrees from left to right. As you rotate the camera head, the camera adjusts the focus automatically. 15 degrees To ensure proper camera head alignment; adjust the camera head until the air is inside the circle mark. -
Page 22: Led Lamp
Carefully adjust the light towards the object. 45 degrees 45 degrees The anti-glare sheet is a special coated film that helps eliminate the light reflection when you are displaying very shiny object or glossy surfaces such as magazines, etc. Simply place the anti-glare sheet on top of the shiny document to reduce reflected light. -
Page 23: Using The Infrared Remote Control
Use the AVerVision330 Remote Control to enhance your presentation, switch between (3) three presentation modes and access additional features. To use the remote control, first insert the batteries (2 size “AAA” batteries are provided) into the battery compartment at the back of the remote. Use the figure and descriptions below to help you use the remote control. -
Page 24: Touch Button Control Panel
Function Button Description FOCUS Press ! or " to manually adjust the focus. ! / " In Preview mode, press “+” or “–” to digitally zoom in and zoom out the picture. In Camera mode, press “+” or “–” to optically zoom in and zoom out the image. When the bar at the lower right corner of the screen reaches the maximum level of magnification about 500%, you can still continue to digitally zoom in the image up to 800%. - Page 25 Function Button Description Switches to Camera mode and displays the image from the AVerVision330’s built-in digital video camera. CAMERA MODE Switches to PC mode and displays the video signal coming from the PC IN port. PC MODE Switches to Preview mode and displays 16-thumbnail pictures from the memory card source.
-
Page 26: Led Panel
The chart below indicates the status of the AVerVision330. Color Description Green The unit is powered on. The unit is in standby mode. When using the remote control, aim it at the Infrared Sensor, which is located at the front panel of the AVerVision330. -
Page 27: Osd Navigation Tree
RGB VIDEO OUTPUT OSD DISPLAY BRIGHTNESS CONTRAST MENU MANUAL BRIGHTNESS TIMER : MIN. CONTRAST BLUE TIMER BLUE MEASURE WHITE BALANCE WHITE BALANCE EXPOSURE AUTO DEFAULT MANUAL MANUAL NEXT PAGE EXPOSURE AUTO MANUAL FLICKER FLICKER NIGHT VIEW 50 HZ 60 HZ DEFAULT TYPE SD CARD... -
Page 28: Tv Output Osd Display
DEFAULT The AVerVision330 provides MENU functions enabling you to fine-tune your screen display, set the timer, select OSD language and more. Press the MENU button to call up and exit from the main menu or sub-menu display. Then use ▲or▼ buttons to select the items in the menu list. -
Page 29: Exposure
EXPOSURE Use ▲or▼ buttons to select between Auto and Manual. AVerVision330 allows you to automatically or manually adjust the camera to determine how much light is required. If you choose to manually adjust the exposure, press ►or◄... -
Page 30: Card
Use ▲or▼ buttons to select between text, graphics and microscope image enhancement mode. In text mode, the AVerVision330 corrects the intensity of the adjacent pixel making it more uniform producing sharper and clearer images. While in graphics mode, the AVerVision330 adjusts the gradient of the adjacent pixel that appears to have a smooth image. -
Page 31: Timer Function
The AVerVision330 enables you to control the pace of your presentation by displaying the remaining time on the countdown screen. This merely serves as a reminder. When time is up, the presentation screen will not be affected in any way. -
Page 32: Troubleshooting
This section provides useful tips describing how to solve common problems while using the There is no picture on the presentation screen. Check all the connectors again as illustrated in this manual. Check the remote control’s on/off switch on your display output device. Verify the setting of the display output device. -
Page 33: Limited Warranty
This limited warranty extends only to You as the original purchaser. Except for the foregoing, the Product is provided “AS IS.” In no event does AVerMedia warrant that You will be able to operate the Product without problems or interruptions, or that the Product is suitable for your purposes. - Page 34 P / N 3 0 0 A A B 4 9 M a d e i n T a i w a n...
Need help?
Do you have a question about the AVerVision330 and is the answer not in the manual?
Questions and answers