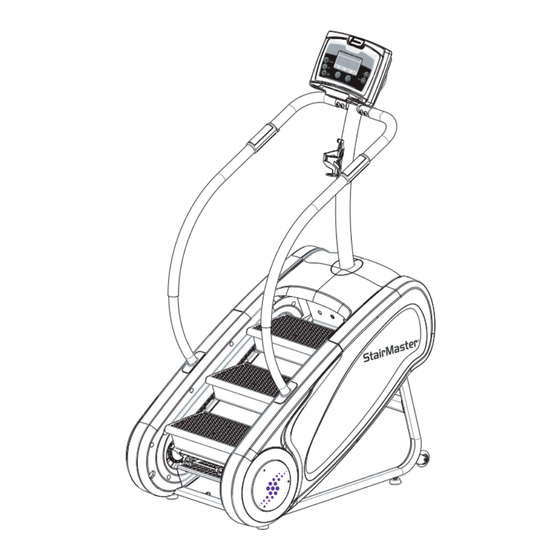
Stairmaster StepMill 3 Assembly Manual
Hide thumbs
Also See for StepMill 3:
- Owner's manual (12 pages) ,
- Assembly manual (16 pages) ,
- Assembly manual (17 pages)
Summary of Contents for Stairmaster StepMill 3
- Page 1 ® StepMill Assembly Manual 0300024A...
-
Page 2: Table Of Contents
Table of contents _____________________________________________________ Product Specifications..................2 Important Safety Instructions................3 Safety Warning Labels................... 5 Before You Start..................... 6 Hardware......................... 7 Box Contents......................8 Assembly........................ 9 Contact Information....................16 Product Specifications Model SM3 Dimensions: LWH 46” x 29” x 73” (117 cm x 74 cm x 185 cm) Unit Weight: 223 lbs (101 kg) -
Page 3: Important Safety Instructions
• Each time before using, examine this machine for loose parts or signs of wear. Pay special attention to the steps. Contact StairMaster Customer Service for repair information. Use only genuine StairMaster replacement parts. • Set up and operate your StepMill® 3 unit on a hard, level surface. - Page 4 • Do not operate this machine if it has a damaged cord or plug, if it is not working correctly, if it has been dropped or damaged, or exposed to water. Contact StairMaster Customer Service. • Do not operate where aerosol (spray) products are being used or where oxygen is being administered.
-
Page 5: Safety Warning Labels
Safety Warning Labels _____________________________________________________ Before using your product: Find and read all warning labels located on the StairMaster® StepMill® 3, prior to using your product. Be sure to replace any warning label if damaged, illegible, or missing. If you need replacement labels, contact StairMaster customer service. -
Page 6: Before You Start
IMPORTANT: Locate the area where you will assemble and use your StairMaster StepMill 3. We recommend you install it on a hard, level surface. Allow an assembly area of at least 36” (0.91m) on each side and behind the machine. You can put the rear of the machine closer to the wall during use. -
Page 7: Hardware
Hardware _____________________________________________________ Item # Part # Description 723-0242 M10 x 55mm Button Head Screw 723-0241 M10 x 25mm Button Head Screw 723-0240 M10 x 45mm Button Head Screw 40670 1/4-20 x 3/4, Phillips Head W/Lock Washer 723-0076 M6 x 15 Phillips Head Screw 21462 16mm Flat Washer 050-0049... -
Page 8: Box Contents
Box Contents _____________________________________________________ Item # Part # Description 030-0025 Owner’s Manual 030-0024 Assembly Manual 723-0253 Hardware Card 723-0229 Console 723-0171 Mast 723-0224 Mast Gasket 723-0197 Handrail, RH 723-0183 Handrail, LH 723-0219 Handrail Gasket 050-0236 Adapter Cord Pack 723-0212 Mast Shroud 723-0214 Front Shroud Item 15... -
Page 9: Assembly
_____________________________________________________ ® ® The following instructions provide direction to assemble the StairMaster StepMill 3. All instructions in the manual are given with the orientation of standing on a level surface and facing the machine. (See Figure 1) Step 1: Unpacking your SM3 Tools: •... - Page 10 Assembly _____________________________________________________ Step 3: Attach the Mast Ensure machine is stable and on a level surface. Adjust any or all four feet if necessary. (Figure 3a) Slide the Mast Shroud (item 22) onto the Mast (item 16). Rotate left to raise and right to lower (Figure 3b) FIGURE 3a Using the wire tie within the Mast, wrap the wire tie...
- Page 11 Assembly _____________________________________________________ Step 3: Attach the Mast Lift the Mast into location and secure to machine frame with bolts (item 2) and washers (item 6). Keep Mast in center with mating plate on machine (Figure 3e). Do not fully tighten the Mast bolts until completing step 3-6. Bring Mast Shroud (item 22) into position.
- Page 12 Assembly _____________________________________________________ Flange on Mast Shroud for secure Front Shroud tab for precise align- seal between both shrouds Step 4: Attach & Fasten Shrouds ment with Mast Shroud Item 22 Using screws (item 5), attach Front Shroud (item 23) to frame by positioning it into loca- tion and allowing it interlock with the Mast Shroud (item 22) as shown in figure 4a.
- Page 13 Assembly _____________________________________________________ Step 5: Attach the Handrails Item 19 Handrail HR Locate Handrail LH (item 19) and position into location by plugging in the Mast heart rate cable with the handrail heart rate cable (Figure 5a). Position into location by guiding the heart rate cables into the Mast handrail tube while sliding the Handrail LH Mast HR tube over the Mast handrail tube (Figure 5a).
- Page 14 Assembly _____________________________________________________ Step 6: Installing the console Holding the Console (item 15), connect the Communica- tion cable and Heart Rate cables to the corresponding locations on the back of the console (Figure 6a, 6b). Using screws (item 4), attach the Console to the Mast of the machine (Figure 6b).
- Page 15 Assembly _____________________________________________________ Step 7: Connecting Power to machine Select power cord that coincides to the local electrical standard outlets (Figure 7a). Check that the input AC power rating detailed on the se- rial number decal matches the available power. Insert power cord into the power source inlet (Figure 7b) To reduce the risk of electrical shock, fire, and to prevent severe damage to the machine, use only the power sup- ply approved for use with this equipment.
-
Page 16: Contact Information
Safety Warning Label information page. Serial Number Date of Purchase © 2012 Core Fitness, LLC, dba StairMaster. All rights reserved. ™ and ® indicates a trademark or registered trademark. Core Fitness, LLC trademarks include StairMaster®, StepMill®, and respective logos. 1.888.678.2476, www.stairmaster.com. AssemblyManual...


Need help?
Do you have a question about the StepMill 3 and is the answer not in the manual?
Questions and answers