Table of Contents
Advertisement
Quick Links
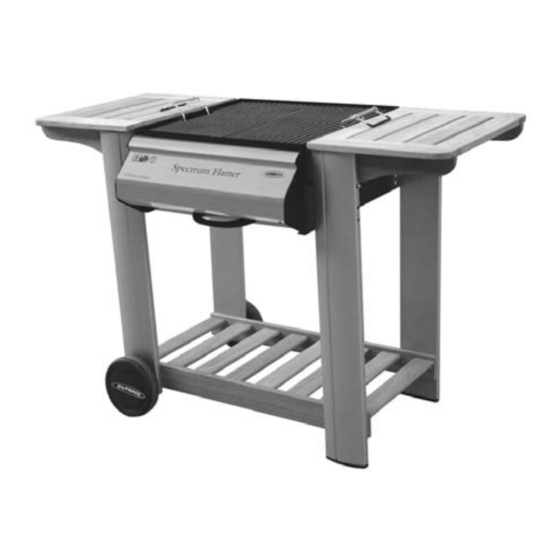
Assembly and Operating Instructions for
Outback® Spectrum Flamer Charcoal Barbecues
Photographs are not to scale.
Specifications subject to change
without prior notice.
WARNING
Charcoal Barbecues
•
For outdoor use only - do not use indoors! Not for commercial use.
•
Read instructions before using the appliance. Failure to follow instructions
could result in death, serious bodily injury, and/or property loss.
•
WARNING! Accessible parts may be very hot. Keep children and pets away!
•
CAUTION: Do not use spirit or petrol for lighting or re-lighting! Use only
firelighters complying to EN1860-3!
•
WARNING! This barbecue becomes very hot. Do not move it during operation!
•
Install this barbecue on a safe and even surface.
•
Any modification of the appliance, misuse, or failure to follow the instructions
may be dangerous and will invalidate your warranty. This does not affect your
statutory rights.
•
Retain these instructions for future reference.
Advertisement
Table of Contents

Related Manuals for Outback Spectrum Flamer


Summary of Contents for Outback Spectrum Flamer
- Page 1 Charcoal Barbecues Assembly and Operating Instructions for Outback® Spectrum Flamer Charcoal Barbecues Photographs are not to scale. Specifications subject to change without prior notice. • For outdoor use only - do not use indoors! Not for commercial use. • Read instructions before using the appliance. Failure to follow instructions could result in death, serious bodily injury, and/or property loss.
-
Page 2: Parts List
Quantities vary according to model purchased. Specifications subject to change without prior notice. For more details on hardware, please see ‘Hardware Reference Diagram’. Outback® CODE PART Spectrum Flamer Grill Lifting Handle Cast Iron Grill Charcoal Basket Handle Charcoal Basket BODY... - Page 3 B1. Spectrum Flamer Parts Diagrams Quantities vary according to model purchased. Specifications subject to change without prior notice. For more details on hardware, please see ‘Hardware Reference Diagram.’...
- Page 4 B2. Spectrum Flamer Hardware Reference Diagram Specifications subject to change without prior notice. Part C2 (8pcs) Part C3 (8pcs) Part C4 (8pcs)
-
Page 5: Tools Needed For Assembly
D. Assembly TOOLS NEEDED FOR ASSEMBLY: Medium size flat blade or Phillips/crosspoint screwdriver, adjustable spanner or metric spanner set (Photo depicts trolley from the reverse side) Attach the legs (B2, B3, B4,B5) as shown to the trolley base (B10) using the trolley bolts (C1). Slide the axle (B9) through the corresponding holes in the short legs. - Page 6 Attach the side shelves (B1) to the front/rear left legs (B2,B3) and front/rear right legs (B4,B5) using the trolley bolts (C1). Remove all cast iron cooking components, charcoal basket, ash tray, and any internal packaging from the barbecue body.
- Page 7 Lay the assembled trolley on its side. Lay the body (A5) on its back and slide into position between the trolley legs. With the barbecue laid on the ground, insert a body support bolt (C2) through the short leg, through a spacer (C3), through the sidewall of the body, and secure the bolt with a wing nut (C4).
- Page 8 Replace the ash tray (A7) by sliding it underneath the barbecue body (A5). Lay charcoal basket (A4) into body making sure the basket rests on the lowest level of hooks on the adjustable handles.
- Page 9 Lay cast iron grills (A2) into barbecue body (A5). ASSEMBLY IS NOW COMPLETE. PROCEED TO THE NEXT PAGE FOR INSTRUCTIONS ON OPERATION AND MAINTENANCE.
-
Page 10: Installation
design. recommend using charcoal E. Important Information briquettes. Use only enough briquettes to cover the bottom of the charcoal basket in a Please read and understand these instructions single layer. Do not overload the charcoal before assembly and use. basket. The maximum amount of briquettes to be used at any one time is 2.0kg. -
Page 11: Care And Maintenance
Specifications are subject to change without prior notice. outside for any length of time, especially during the winter months. A full range of heavy-duty Outback® covers is available for all models. Do not leave the barbecue exposed to outside... - Page 12 Porcelain coated barbecue bodies, porcelain coated roasting hoods and stainless steel roasting hoods are warranted for a period of ten (10) years from the date of pur- chase. OUTBACK UK will, within this period, supply replacements for defective parts free of charge provided that: ♦...
Need help?
Do you have a question about the Spectrum Flamer and is the answer not in the manual?
Questions and answers