Advertisement
Quick Links
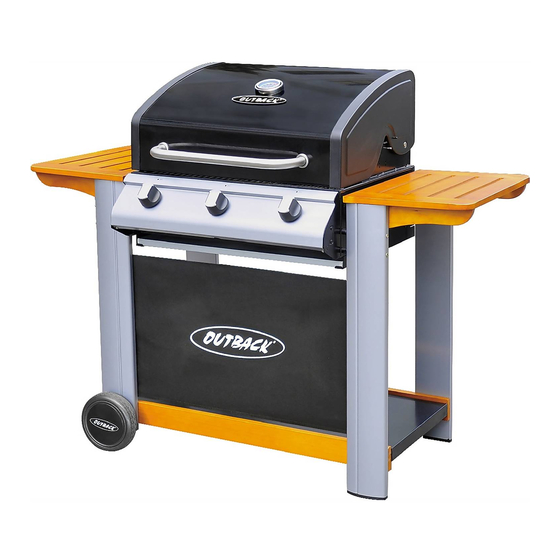
Spectrum 3 Burner Hooded Gas BBQ
Assembly Instructions
105336
- Please keep for future reference
343/0756
Dimensions
Width - 139.9cm
Depth - 59.1cm
Height - 111.6cm
Important
– Please read the instructions before using the appliance
If you need help or have damaged or missing parts, call the Customer Helpline:
08450 778888 (Homebase) / 08456 400800 (Argos)
Issue 2 - 21/11/12
Advertisement

Related Manuals for Outback Spectrum


Summary of Contents for Outback Spectrum
- Page 1 Spectrum 3 Burner Hooded Gas BBQ Assembly Instructions 105336 - Please keep for future reference 343/0756 Dimensions Width - 139.9cm Depth - 59.1cm Height - 111.6cm Important – Please read the instructions before using the appliance If you need help or have damaged or missing parts, call the Customer Helpline:...
- Page 2 Safety and Care Advice Important Information • Retain these instructions for future reference. • This product is for outdoor use only. Do not use indoors. • Do not use the barbecue or store gas bottles below ground level. LP gas is heavier than air so if a leak occurs the gas will collect at a low level and could ignite in the presence of a flame or spark.
- Page 3 Safety and Care Advice WILL INVALIDATE ANY WARRANTY. Please consult your local gas dealer for the most suitable gas bottles and regulators. Installation Selecting a Location This barbecue is for outdoor use only and should be placed in a well-ventilated area, and on a safe and even surface.
- Page 4 Safety and Care Advice may come off the cooking surface. This is normal and is not harmful. Line the drip tray with aluminium foil, then place a uniform layer of clean, dry sand 6-8mm deep into the tray. This will absorb excess cooking fat, thus making cleanup easy. Lighting the Barbecue •...
- Page 5 Safety and Care Advice position. Close the hood to cook the food ‘indirectly’. Avoid lifting the hood unnecessarily as heat is lost every time the hood is opened. If the hood is opened during cooking please allow extra time for the barbecue to regain its temperature and complete the cooking.
- Page 6 In order to extend the life and maintain the condition of your barbecue, we strongly recommend that the unit be covered when left outside for any length of time, especially during the winter months. Heavy-duty Outback® barbecue covers and other accessories are available from your local Outback® stockist.
- Page 7 Safety and Care Advice Drip Tray After every use, empty and clean the drip tray of any fat or food particles, using a plastic or wooden scraper if necessary. Failure to keep it clean, and excessive build up can result in a fat fi re. This can be hazardous and severely damage the barbecue.
- Page 8 If you have damaged or missing components, Components - Panels call the Customer Helpline: 08450 778888 (Homebase) / 08456 400800 (Argos). Please check you have all the panels listed below Hood and Body Assembly x1 Warming Rack x1 Large Cooking Grill x1 Small Cooking Grill x1 Small Cooking Griddle x1 Flame Tamer x2...
- Page 9 Components - Panels Please check you have all the panels listed below Left Front Leg x1 Left Rear Leg x1 Right Front Leg x1 Right Rear Leg x1 Trolley Base x1 Wheel x2 Hubcap x2 Axle x1 Screen x1...
- Page 10 Components - Fittings Please check you have all the fi ttings listed below Note: The quantities below are the correct amount to complete the assembly. In some cases more fi ttings may be supplied than are required. M5x15 Bolt x4 M5 Washer x4 M5 Nut x4 M6x25 Bolt x24...
-
Page 11: Assembly Instructions
Assembly Instructions Step 1 Attach left front leg and right front leg onto trolley base using M6x25 bolts FRONT Step 2 FRONT Attach left rear leg and right rear leg onto trolley base using M6x25 bolts Note: Ensure that the legs with the Velcro attached to them are at the front of... - Page 12 Assembly Instructions Step 3 Unscrew the locknuts from the axle remove the axles washers. Slide the axle through left front leg , trolley base and left rear leg . Place axle washers on each end of the axle. Slide the wheels over each end of the axle.
- Page 13 Assembly Instructions Step 5 Lay trolley assembly on its back, and insert M6x145 bolt through guide holes on top of each leg and body spacers Lay the hood and body assembly on its back, and slide in position between legs. CAUTION! Care must be taken to ensure the hood does not fall...
- Page 14 Assembly Instructions Step 6 Place the fl ame tamers over left and middle burners within barbecue body. Step 7 Lay the large cooking grill , small cooking grill and small cooking griddle in position. NOTE: Ensure that the fl ame tamers lie directly underneath the grills.
- Page 15 Assembly Instructions Step 8 Attach the drip tray left bracket onto barbecue body using M5x15 bolts , M5 washers and M5 Nuts NOTE: Ensure that the tabs of the brackets which to stop the drip tray are located at the back of the barbecue.
- Page 16 Assembly Instructions Step 10 Unscrew retaining bolts from drip tray handle Fix the drip tray handle onto drip tray using the retainning bolts. Step 11 Insert the drip tray sliding it underneath the barbecue body.
- Page 17 Assembly Instructions Step 12 Attach the warming rack to the hood and barbecue body. Make sure that the swing legs fi x to the body of the barbecue and the shorter fi xed legs go through the holes in the hood. Step 13 Attach the screen onto left front leg...
- Page 18 Assembly Instructions Step 14 Connect the hose and regulator assembly to the barbecue. Ensure the mating faces of the connection are clean and not damaged. Do not use any sealing tape, paste, or liquid on the connection. The nut must be tightened with the use of a spanner.
-
Page 19: Technical Specifications
Technical Specifi cations Heat Input Burners Injector Size Gas / Pressure Approval 1.05mm Butane: 28-30 mbar Outback® Propane: 37 mbar Spectrum 0359 11.88kW 1.05mm LPG mixture: 30 mbar 3 Burner 359BR665 1.00mm LPG mixture: 37 mbar Hooded 0.90mm LPG mixture: 50 mbar... -
Page 20: Troubleshooting
Troubleshooting Problem Possible Cause Solution Burner will not light using the LP gas bottle is empty Replace with full bottle ignition system Faulty regulator Have regulator checked or replaced Obstructions in burner Clean burner Obstructions in gas jets or gas Clean jets and gas hose hose Electrode or ignition button wire is...
Need help?
Do you have a question about the Spectrum and is the answer not in the manual?
Questions and answers