Advertisement
Quick Links
Download this manual
See also:
Owner's Manual
Advertisement

Summary of Contents for Xterra FS3.0
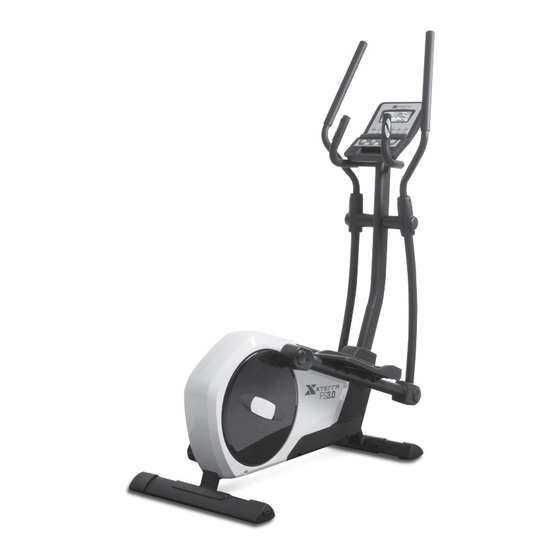
- Page 1 FS3.O ELLIPTICAL OWNER’S MANUAL PLEASE CAREFULLY READ THIS ENTIRE MANUAL BEFORE OPERATING YOUR NEW ELLIPTICAL...
-
Page 2: Table Of Contents
XTERRA Fitness will do all we can to make your ownership experience as pleasant as possible for many years to come. If you have questions, or if parts are missing or damaged, or you require customer service, call (870) 336-4286. -
Page 3: Product Registration
Serial Number Register Your Purchase The self-addressed product registration card must be completed in full and returned to XTERRA Fitness. You can also go to www.xterrafitness.com/warrantyreg.html to register online. Power This product uses an external power supply. The power supply must be plugged into the power jack, located on the front of the unit near the stabilizer tube. -
Page 4: Important Safety Instructions
Failure to follow all guidelines may compromise the effectiveness of the exercise experience, expose yourself (and possibly others) to injury, and reduce the longevity of the equipment. SAVE THESE INSTRUCTIONS - THINK SAFETY! CAUTION!! Please be careful when unpacking the carton. FS3.0 Elliptical... - Page 5 FS3.0 Assembly Pack Checklist Hardware Step 1 #43. 5/16” x 3/4” #44. 5/16” #45. 5/16” Button Head Socket Flat Washer Curved Washer Bolt (13 pcs) (8 pcs) (1 pc) #46. 5/16” #53. M5 x 12mm Split Washer Phillips Head (4 pcs)
-
Page 6: Assembly Tools
#52. 5 x 12mm #98. 5/16” x 1” Split Washer Sheet Metal Screw Button Head Socket (2 pcs) (2 pcs) Bolt (2 pcs) Assembly Tools #68. Combination M5 Allen Wrench #69. 19mm Wrench & Phillips Head Screw Driver (2 pcs) FS3.0 Elliptical... -
Page 7: Fs1.7 Assembly Instructions
FS3.0 Assembly Instructions Stabilizers, Console Mast & Console Hardware Step 1 #43. 5/16” x 3/4” Button Head Socket Bolt (13 pcs) #44. 5/16” Flat Washer (8 pcs) #45. 5/16” Curved Washer (1 pc) #46. 5/16” Split Washer (4 pcs) #53. M5 x 12mm... - Page 8 2. Slide the Swing Arm Axle (22) through the console mast bushings, then through the Handle Bar Cover (78) and Lower swing arm (6). Attach with one Button Head Socket Bolt (43) and one Flat Washer (100). Tighten using the M5 Allen Wrenches (68). FS3.0 Elliptical...
- Page 9 Note: If there is a gap after assembling the swing arm, please install a C-ring at Location B as shown above. 3. Install the outer covers (79) with four Sheet Metal Screws (52). Tighten using the Phillips Head Screw Driver (68). FS3.0 Elliptical...
- Page 10 Driver (68). 4. Attach Rear Cover (125) onto the Pedal Arm Assembly (2) with one Phil- lips Head Screw (53). Tighten with Phillips Head Screw Driver (68). 5. Repeat the steps above for the left side pedal arm assembly. FS3.0 Elliptical...
-
Page 11: Operation Of Your Console
Operation of Your Console FS3.0 Console Button Functions MODE: Used during setup, MODE is to confirm/enter all exercise data settings, and enter into the program. RESET: Return to main function mode and reset all function values at zero. START/STOP: To start or stop training. - Page 12 00:60 to 00:00.The screen will display your heart rate recovery status with the F1,F2….to F6. F1 is the best,F6 is the worst. User may keep exercising to improve the heart rate recovery status. (Press the RECOVERY button again to return the main display.) FS3.0 Elliptical...
-
Page 13: Program Operation
2. LOAD 1 (preset value) is displayed after training program is selected, you may press the button to select level from 1 to 16 and MODE button for confirmation. Load level can be adjusted during training. FS3.0 Elliptical... - Page 14 MODE button for training. Training in Watt mode The preset watt value 120 is flashing on the screen in WATT setting mod. Select MODE to set target value from 10 to 350. Press the START button to begin training. FS3.0 Elliptical...
- Page 15 You may press any button to awake the monitor display, and the previous training data will appear. When the training starts again, the data will keep accumulating from previous re- cords.When computer displays abnormally, please unplug the adapter and plug it in again. Power supply requires: Output : 9V, 1000mA. FS3.0 Elliptical...
-
Page 16: Manufacturer's Limited Warranty
Effective August 1, 2012 - ELLIPTICAL LIMITED WARRANTY XTERRA Fitness Inc. warrants all its home use elliptical parts for a period of time listed below, from the date of retail sale, as determined by a sales receipt or in the absence of a sales receipt, eighteen (18) months from the original factory shipping date. XTERRA Fitness’s responsibilities include providing new or remanufactured parts, at XTERRA Fitness’s option, and technical support to our independent... - Page 17 FS3.0 Elliptical...
- Page 18 3000 Nestle Road Jonesboro, AR 72401 - Phone:870-336-4286 - Fax:870-935-7611 www.xterrafitness.com ©2014 All RIghts Reserved. FS1.7 Owner’s Manual...


Need help?
Do you have a question about the FS3.0 and is the answer not in the manual?
Questions and answers
Where is the battery located
The Xterra FS3.0 elliptical does not use an internal battery. It operates using an external power supply that must be plugged into the power jack located on the front of the unit near the stabilizer tube.
This answer is automatically generated