Advertisement
Advertisement

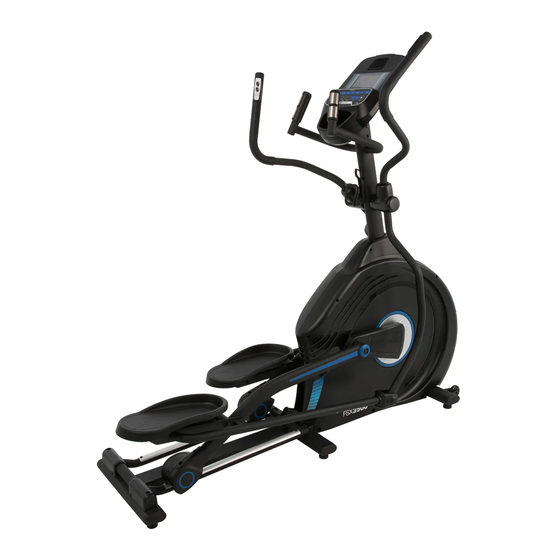
Related Manuals for Xterra FSX3500


Summary of Contents for Xterra FSX3500
- Page 1 FSX3500 ELLIPTICAL...
-
Page 2: Table Of Contents
Table Of Contents Safety hints Assembly Pack Checklist Assembly Instructions Transportation Operation of Your Console Exploded View Diagram Parts List ATTENTION THIS ELLIPTICAL IS INTENDED FOR RESIDENTIAL USE ONLY AND IS WARRANTED FOR THIS APPLICATION. ANY OTHER APPLICATION VOIDS THIS WARRANTY IN ITS ENTIRETY . XE560-GE004_1812(XL)A... -
Page 3: Safety Hints
Safety hints WARNING - Read all instructions before using this appliance. ■ Do not operate elliptical on deeply padded, plush or shag carpet. Damage to both carpet and elliptical may result. ■ Keep children away from the elliptical. There are obvious pinch points and other caution areas that can cause harm. -
Page 4: Assembly Pack Checklist
Assembly Pack Checklist Hardware Step 1 #136.3/8" × 2T_ #133. 3/8" × 19 × 1.5T_ #132. Ø 8.5 × 26 × 2.0T_ Spring Washer (4 pcs) Flat Washer (4 pcs) Flat Washer (2 pcs) #111. M5 × 10m/m #114. Ø 3.5 × 12m/m_ #99. - Page 5 Assembly Tools #146. 12/14m/m_Wrench #145. 13/14m/m_Wrench #150. Short Phillips Head Screw Driver #147. Phillips Head Screw Driver #148. L Allen Wrench...
-
Page 6: Assembly Instructions
Assembly Instructions 1-1 Console Mast 1. Pull the tie on Console Mast (12) to have Computer Cable (39) go through the mast from bottom and out of the mast on top. Secure the Console Mast on the mounting plate on the Main Frame with four 3/8"... - Page 7 1-2 Connecting Arm & Lower Handle Bar 1. Release Axles (20) which are on left and right connecting arms(8.9). Connect the left and right connecting arm(8.9) with left and right lower handle bar(10.11) and secure with Axles (20) and the screw by using 12/14m/m_Wrench (146). 2.
- Page 8 2-1 Left Handle Bar 1. Insert left Handle Bar (14) onto left Lower Handle Bar and secure with three Hex Head Bolts (101), two Curved Washers (135) and three Nyloc Nuts (120) by using Wrench (146/145). Same way to secure right Handle Bar (15) on right Lower Handle Bar 2.
- Page 9 2-2 Plastic Covers 1. Match right and left Connecting Arm Covers (97, 96) on left Connecting Arm and fix with two Phillips Head Screws (111) by using Phillips Head Screw Driver (147). Fix right and left Connecting Arm Covers (97, 96) on right Connecting Arm with the same way and hardware.
-
Page 10: Transportation
Transportation The elliptical is equipped with transport wheels, which are engaged when the rear of the elliptical is lifted. Elliptical Lubrication Pour 2c.c of the lubricant under the middle of the rail. You must be lubricate the rails every three months. -
Page 11: Operation Of Your Console
Operation of Your Console Console Power up: This model requires AC 220V power supply. Connect the power cable to the socket on the left side of the machine near the front and turn on the switch.When user turn on the switch , console will be turned on, and have a long beep sound with LCD full display for 2 seconds. - Page 12 Button Functions: 1. START:Start workout 2. STOP:Workout pause, and press again back to standby mode. Press and hold the button, console will restart. 3. ENTER:Confirm the function or setting value, switch LEVEL / INCLINE display (grade mode) 4. LEVEL +:Increase the load or upward the setting value such as TIME. 5.
- Page 13 In the standby mode, press【START】to QUICK START, and enter Manual mode to start workout. Or, press【LEVEL+/LEVEL-】to select Manual , Program , Fat burn , Cardio , Hill , Interval , HRC and User define (image 6~image 13), then press【ENTER】to confirm. Or, directly press fuction Quick key to quick enter.
- Page 14 Program mode:In standby mode, press 【LEVEL+/LEVEL-】 to select PROGRAM, and press 【ENTER】. Or, press【P】 quick key to enter this mode directly. First, select program profiles (image 18) total 18 sets. Press 【 ENTER】 to confirm the profiles, and set target TIME (image 19) by pressing 【LEVEL+/LEVEL-】...
- Page 15 Hill mode:In standby mode, press 【LEVEL+/LEVEL-】 to select HILL, and press 【ENTER】 . Or, press【HILL】quick key to enter this mode directly. Then, set target TIME (image 22) by pressing【LEVEL+/LEVEL-】to adjust. After setting, press【START】to start workout, and press 【LEVEL+/LEVEL-】 to adjust the load during workout. Press 【INCLINE+/ INCLINE-】 to adjust incline, press【ENTER】to switch LEVEL / INCLINE display, press【STOP】to pause workout, and press 【STOP】...
- Page 16 HRC mode:In standby mode, press【LEVEL+/LEVEL-】to select HRC, and press 【ENTER】.Or, press【HRC】quick key to enter this mode directly. First, select HRC 50%, 60%, 70%, 80%, 90%, or TARGET HRC (image 24~image 29) total 6 sets. TARGET HRC is able to set the target pulse value. After entering to the TARGET HRC, you need to set the target pulse value (image 30), and press【ENTER】to confirm, then enter to the target Time setting (image 31).
- Page 17 User Define mode:In standby mode, press【LEVEL+/LEVEL-】to select USER DEFINE, and press 【ENTER】. Or, press【INTERVAL】quick key to enter this mode directly. User may press【LEVEL+/LEVEL-】and then press【ENTER】to create his own profile from column 1 to column 20 (image 33). The heart rate window will display the number of rows, and the load window will display the load value for the current setting.
- Page 18 Bluetooth connection : Fuel fitness App Fitness Program Instructions To help you get your workout goals done, Our product adds a new feature. The sports equipment you purchased is equipped with a Bluetooth device, let you use your fitness app with your phone or tablet to show more sports messages.
- Page 19 Note: 1. PROGRAM MOTION PROFILES 1~18 : PROGRAM 1, Muscle Endurance Muscle endurance is the ability of a muscle tomaintain for a long time under load resistance. The muscular endurance program utilizes overload resistance training to allow the muscles to withstand high loads, stimulate physiological disturbances, and enhance muscle tissue adaptability, which is the most effective way to increase muscle endurance.
- Page 20 : PROGRAM 6, X-sport The X-sport program is designed to increase muscular strength in your lower body with extreme resistance. This program will steadily increase in resistance to high level and then keeps you there. This is to enhance the design of your legs and hips. :...
- Page 21 : PROGRAM 11, Low-intensity Training The low-intensity training program is a comfortable speed. When you maintain this level of strength, it is not only easy to fatigue, but also allows users to spend more time training without any burden. Such training is very burdensome on the body and safe. The sex is high and it is not easy to increase the lactic acid value in the blood, so it is suitable for mass sports.
- Page 22 PROGRAM 16,Cross-training: The balanced muscle training model is a kind of training constructed by a variety of movements. Systemic development does not limit special parts or energy systems, which is highly beneficial to the development of comprehensive physical fitness. PROGRAM 17,Downhill special training: Different grades can help exercise the calf, thigh, and buttock muscles.
- Page 23 HILL: The Hill program simulates going up and down a hill. The resistance in the pedals will steadily increase and then decrease during the program. INTERVAL: The Interval program takes you through high levels of intensity followed by periods of low intensity.
- Page 24 AEROBIC EXERCISE Aerobic exercise is any sustained activity that sends oxygen to your muscles via your heart and lungs. Aerobic exercise improves the fitness of your lungs and heart - your body’s most important muscle. Aerobic exercise fitness is promoted by any activity that uses your large muscle -arms, legs, or buttock, for example.
- Page 25 Quadriceps Stretch With one hand against a wall for balance, reach behind you and pull your right foot up. Bring your heel as close to your buttocks as possible. Hold for 15 counts and repeat with left foot up. Inner Thigh Stretch Sit with the soles of your feet together with your knees pointing outward.
-
Page 26: Exploded View Diagram
Exploded View Diagram... -
Page 27: Parts List
Parts List Q’TY KEY NO. Description Main Frame Rear Rail Assembly Idler Wheel Assembly Crank Arm Assembly Bushing Housing, Pedal Arm Pedal Arm(L) Pedal Arm(R) Connecting Arm (L) Connecting Arm (R) Lower Handle Bar (L) Lower Handle Bar (R) Console Mast Locking Tube Assembly Left Handle Bar (Top) Right Handle Bar (Top) - Page 28 Q’TY KEY NO. Description 38~12 Sound Board 38~13 Interface Board 38~14 400m/m_Fan Assembly 38~15 Bluetooth 38~16 Bluetooth W/Cable 38~17 USB Charging module 38~18 USB Board W/Cable 1600m/m_12P Computer Cable 800m/m_5P Computer Cable 850m/m_Handpulse Assembly 400m/m_Audio Cable Resistance Button W/Cable 450m/m_Handle Wire (Upper), Resistance(White) 450m/m_Handle Wire (Upper), Incline(Red) 900m/m_Switch Cable (Lower),Resistance/Incline 700m/m_Sensor W/Cable...
- Page 29 Q’TY KEY NO. Description Front Handle Cover (R) Rear Handle Cover (R) Switch Wire Cap Left Upright Cover Right Upright Cover Side Case (L) Side Case (R) Side Case Pad Slide Wheel Cover (L) Slide Wheel Cover (R) Rear Slide Wheel Cover (L) Rear Slide Wheel Cover (R) Crank Arm End Cap Round Cap...
- Page 30 Q’TY KEY NO. Description Ø 8.5 × 26 × 2.0T_Flat Washer 3/8" × 19 × 1.5T_Flat Washer Ø 17 × 23.5 × 1T_Flat Washer 5/16" × 19 × 1.5T_Curved Washer 3/8" × 2T_Spring Washer Woodruff Key M8 × 20m/m_Carriage Bolt M8 ×...
Need help?
Do you have a question about the FSX3500 and is the answer not in the manual?
Questions and answers