Table of Contents
Advertisement
Quick Links
Download this manual
See also:
Technician Manual
Advertisement
Table of Contents
Troubleshooting

Related Manuals for Nanoptix PayCheck


Summary of Contents for Nanoptix PayCheck
- Page 1 First Edition: December 2008 Latest update: February 2009 Document #: 720002-0000R...
-
Page 2: Legal Notices
Legal Notices Disclaimer Information in this document is subject to change without notice. Consult your Nanoptix Inc. sales representative for information that is applicable and current. Nanoptix Inc. reserves the right to improve products as new technology, components, software and firmware become available. - Page 3 UL Listed power supply with standard 60Hz-50Hz, 100-240VAC input and 24VDC output equipped with AC line filtering, over-current and short-circuit protection. Use of this product with a power supply other than the Nanoptix Inc. power supply will require you to test the power supply and Nanoptix Inc. printer for FCC and CE mark certification.
-
Page 4: Table Of Contents
Table of Contents Table of Contents ......................iv About the Printer .......................1 Description of Printer ........................1 Nanoptix PayCheck High Speed Couponing Thermal Printer ..........1 General Specifications ........................2 Printer Controls ......................3 Paper Loading ..........................3 Calibrate Printer ...........................6 Resetting Printer ...........................7 Paper Feed Button ........................7 Status LED.............................8... - Page 5 Figures 1: N ...........1 IGURE ANOPTIX HECK PEED OUPONING HERMAL RINTER 2: (L . (R ..3 IGURE OADING APER IGHT OP VIEW WITH ARROW POINTING TOWARDS OUTPUT TRAY 3: A ......................4 IGURE LIGNING APER 4: C ........................5 IGURE LOSING OVER 5: T .
- Page 6 Tables 1: S .........................2 ABLE PECIFICATIONS 2: LED I ......................8 ABLE NFORMATION 3: I ......................11 ABLE NTERFACE ORTS 4: 9 P RS232 S ..................12 ABLE ERIAL NTERFACE 5: S & S ....................12 ABLE ENSORS WITCHES 6: T ................
-
Page 7: About The Printer
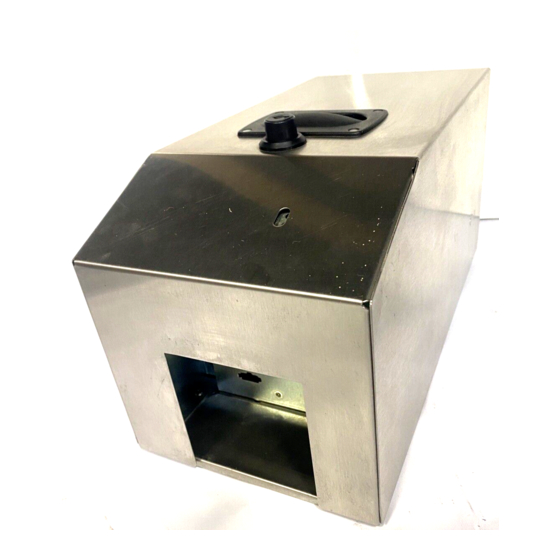
1. About the Printer 1.1 Description of Printer The Nanoptix PayCheck High Speed Couponing Thermal Printer is extremely fast, quiet and very reliable. With the technology of thermal printing, there is no cassette or ribbon to change and paper loading is extremely simple. The printer is portable and is easy to use with the ticket exiting from the front. -
Page 8: General Specifications
1.3 General Specifications Print Method Direct Thermal Resolution 8 dot/mm (203 dpi) Print Width 62.5 mm ( 2.46 in ) Paper Width 65 mm ( 2.56 ) Max Ticket Capacity 800 Tickets Max Sequence Printed Max 200 Tickets Max Operating Temperature 0°... -
Page 9: Printer Controls
2 Printer Controls 2.1 Paper Loading Caution: Do not operate the printer if it runs out of paper. The printer will not operate without paper, but it may continue to accept data from the host computer. Because the printer cannot print any transactions, the data may be lost. 1. -
Page 10: Figure 3: Aligning Paper Edge
3. Lift the top ticket from the stack and align the left edge of the ticket to the left edge of the input paper guide. Figure 3: Aligning Paper Edge Slowly slide the paper towards the output tray. The printer will grab the paper and advance until one full ticket has passed and cut the first ticket. -
Page 11: Figure 4: Closing Cover
5. Close the top cover making sure the button is latched. Figure 4: Closing Cover Note: In the event of a paper jam, see section 2.7: Clearing jams December 2008 Document #: 720002-0000R... -
Page 12: Calibrate Printer
2.2 Calibrate Printer Depending on the manufacturing of the paper, there may be small variations in the intensity of the index mark located on the back of each ticket. If the intensity falls outside of the pre-calibrated range of the printer, the printer will need to be re- calibrated. -
Page 13: Resetting Printer
2.3 Resetting Printer In the event of a fault condition, simply disconnect the printer’s power connector to reset. Once the printer is re-connected, it will go through a startup routine and reset itself. Figure 6: Resetting Printer 2.4 Paper Feed Button Use the Paper Feed Button to advance the paper by one complete ticket. -
Page 14: Status Led
2.5 Status LED Condition LED Status (Green) LED Status (Red) Unit Ready Unit Reset Unit Booting Unit Standby Unit Powered Off Paper Low Paper Out Slow Blink Paper Jam Fast Blink Black Index Mark Missing Fast Blink Temperature Error Medium Blink Voltage Error Slow Blink Print Head Error... -
Page 15: Testing The Printer
2.6 Testing the Printer Run this test to check the printer. The test prints and cuts a resident test ticket. Verify this ticket to judge the printing quality. Model: PAYCHECK HSC Firmware: HSC-3.58Z (0xD5F7) Protocol: ITHACA 950 COMMUNICATION Interface: Serial... -
Page 16: Clearing Jams
2.7 Clearing Jams Figure 10: Remove paper output tray. Open top cover and unlatch the front mech assembly (see Latch Figure 11: Front assembly ), then lift up (see ). Finally, clear jam from the paper path (see Figure 12: Clear Jam Figure 10: Latch Figure 11: Front assembly Figure 12: Clear Jam... -
Page 17: Troubleshooting The Printer
3 Troubleshooting the Printer 3.1 Printer Interface Ports Port Identification Connector Type Function USB Type Mini B USB Communication DB9 Receptacle RS-232 Communication Molex 2 Pin Latching 24 VDC Table 3: Interface Ports Figure 13: Interface Ports December 2008 Document #: 720002-0000R... -
Page 18: Pin Designation Of Communication Interfaces
3.2 Pin Designation of Communication Interfaces 3.2.1 RS-232 (DB-9) Signal Name Printer I/O Host I/O Printer Function AUX_PWR 5V Output Aux Power (100mA) RS232_TXD Output Input Data Transmit RS232_RXD Input Output Data Receive No Connect DGND Ground Ground Signal Ground/Aux Ground No Connect RS232_CTS Input... -
Page 19: Printing Problems
3.4 Printing Problems The table below can be used to determine the cause and resolution of the most common problems that may occur. If the information in this section does not correct the problem, contact your authorized service representative. Problem Possible Causes What to Do Receipt does not come... -
Page 20: Media And Supplies Guide
4 Media and Supplies Guide 4.1 Media Specifications The printer requires qualified thermal paper with the following specifications: • Ticket dimensions shall be 65mm +/- 1mm (2.56” +/- 0.040”) x 156mm +/-1mm (6.14” +/- 0.040”) • Paper stock shall be furnished in bulk stacks of 800 tickets. •... -
Page 21: Mechanical Drawings
5 Mechanical Drawings Figure 15: Side View with Cover Open (in mm) December 2008 Document #: 720002-0000R... -
Page 22: Figure 16: Side View With Cover Closed (In Mm)
Figure 16: Side View with Cover Closed (in mm) Figure 17: Front View with Cover Closed (in mm) December 2008 Document #: 720002-0000R... -
Page 23: Print Cleaning Instructions
Note: Under normal operating conditions, the minimum interval for cleaning the Nanoptix PayCheck printer is 3 months or 5 km of paper printed, which ever comes first. Note: Pre saturated cleaning cards are also available for cleaning the thermal print head and platen roller. -
Page 24: Figure 20: Clean Printing Head
3. Follow steps in section 2.7 to access printing mechanism area. Remove paper dust and clean the printing elements line (black line on the print head) with a cotton swab and (IPA) isopropyl alcohol Figure 20: Clean printing head 4. Clean the platen roller with a cotton swab and (IPA)isopropyl alcohol Figure 21: Clean roller 5. -
Page 25: Service & Support
7 Service & Support 7.1 Returning Printers back to Nanoptix for Repairs (RMA) • Send repair approval request to Nanoptix Inc. which should include: Printer Model Number Printer Serial Number Brief problem description • Ship defective products to Nanoptix Inc.
Need help?
Do you have a question about the PayCheck and is the answer not in the manual?
Questions and answers