Messoa NCB750 User Manual
Hide thumbs
Also See for NCB750:
- User manual (50 pages) ,
- Quick start manual (13 pages) ,
- Quick start manual (24 pages)

Related Manuals for Messoa NCB750


Summary of Contents for Messoa NCB750
- Page 1 Network Camera NCB750 / NCB752 NDR720 / NDR722 NCR770 / NDR772 NDR721 User Manual 201504 A2...
-
Page 2: Table Of Contents
Configuration of Event Handling 6. Event Management Examples of Event Handling 7. System Options 8. Connectors & LED 9. Focus Assist Button (For NCB750&NCB752) 10. Desiccant Bag Replacement (For NCR770&NCR772) 11. Troubleshooting Check firmware version Upgrade device firmware Recover device settings... -
Page 3: Important Notices
Important Notices – Read Before Use This instruction manual is intended for administrators and users of the network camera, including instructions for using and managing the camera on your network. The use of video surveillance devices can be prohibited by laws that vary from country to country. -
Page 4: Viewing Preparation
Please note that IP Finder works only on Microsoft Windows XP, Microsoft Windows Vista, and Microsoft Windows 7. Steps to get the utility program running are listed below. Download IP Finder from MESSOA Website to the computer. Double click on IPFinder.exe in the IP Finder folder, and the IP Finder window should pop out. -
Page 5: Discovering Devices In Windows Network
Discovering devices in Windows Network If the IP camera is installed in a network with DHCP and UPnP services, after obtaining an IP address from DHCP server, it can then be discovered in “Windows Network” of a client PC, see figure below. The reason for being automatically discovered is that the IP camera’s UPnP is default enabled (see Network →... -
Page 6: Activex Add-On Installation
ActiveX add-on Installation It is recommended to use Internet Explorer 8 or later as the primary browser to access the IP cameras website. The first-time access to the camera webpage will be prompted to install the ActiveX. To allow the installation, click “Install” on the message bar and follow the instructions to complete ActiveX installation. - Page 7 <Example> Internet Explorer 9: Internet Options → Security → Custom level Ensure the “Download signed ActiveX controls” setting is either “Enable” or “Prompt” selected.
-
Page 8: Accessing The Camera
2. Accessing the camera Viewing the live video With the correct installation and IP settings, the camera device can be approached via network. There are three ways to view the live video from the camera, Internet Explorer - Launch IE browser and input the IP address of the camera . - Page 9 NOTE: IP cameras also support the other web browsers for viewing the live video such as Firefox, Google Chrome or Safari. RTSP Player The live video of the camera can be played with RTSP players, such as VLC or QuickTime. The camera supports two simultaneous video streaming (see Video &...
-
Page 10: The Live View Page
The Live view page The following illustration shows the front page of IP camera website, Options within each item may differ slightly among different products (Here takes NDR721 as an example to illustrate the UI functions of the camera). Quick Index Video Stream Operations Live Window Live Video Window... - Page 11 Manual trigger: Press the button as triggering an event. See Event Management for detail. Listen: Enable / Disable to receive video from camera. (NCR770, NCR772 do not support) Talk: Enable / Disable to send audio to camera. (Only for NCB750, NCB752) Digital Zoom: toggle the digital zoom function.
-
Page 12: Video & Audio
Click on “Setup” of Quick Index to enter the Video & Audio page shown as below. The sub-settings under “Video & Audio” are: - Camera Setting - Video Setting - ROI (Region Of Interest) (NCB750, NCR770 and NDR720 Excluding) - Audio Setting (NCR770 and NCR772 Excluding) - Page 13 Camera Setting Image Setting Brightness: the luminance of image view. Default value is 8; adjustable from 0 to 16. Contrast: the ratio of luminance of white to black. Default value is 8; adjustable from 0 to 16. Saturation: colorfulness of a color related to its own brightness. Default value is 8, adjustable from 0 to 16. Sharpness: refer to image acutance, which presents in the edges contrast of an image.
- Page 14 Day/Night Day/Night Mode: Switch the video images for Day (plenty of light) or Night (Low light) scene. In default “Auto” mode, camera will switch to Day or Night vision according to the light intensity. The Day / Night modes contain 2 actions: switching IR Filter On / Off, and image hue Color / Mono.
- Page 15 : represents the Day mode : represents the Night mode The setting items with the Day or Night mode symbol will be altered along with the setting of Day/Night mode. The examples are illustrated as below. Video Setting Video Stream This tab provides detailed stream configurations.
- Page 16 Resolution Ratio(Only for NDR721): 16:9 or 1.3M mode is selectable. The image ratio of Stream1 to Stream 3 will change at the same time based on a pre-defined table if user changes the ratio mode. Video Format: H.264, MPEG4 and MJPEG are available for the selection. The demand of bandwidth and storage requirement differs from the selection of video format.
- Page 17 15fps 15fps 30fps 30fps HD720 15fps 15fps 30fps 30fps 30fps 800x450 30fps 30fps Mode ID NCB750, NDR720, NCR770 Stream Stream1 (Main Stream) Stream2 (Sub Stream) Compression H.264 MPEG4 MPEG4 H.264 1280x800, HD720, 800x450, 800x450, Resolutions 640x360, 320x180 640x360, 320x180 30fps...
- Page 18 Enable ROI(NCB750, NCR770 and NDR720 Excluding): Once the ROI function enabled, relative ROI area could be setup under the “ROI” page. Frame Rate: It represents the number of frames that are displayed per second. The higher the frame rate is the better/ smoother the video stream can be obtained.
- Page 19 To create Privacy Mask, simply input Privacy Mask Name and click “Add New” button and then apply it to complete the addition. ROI(NCB750, NCR770 and NDR720 Excluding) The checkbox of “Enable ROI” under Video Setting page should be clicked before active the function of ROI.
- Page 20 Audio Setting (NCR770 and NCR772 Excluding) Check the “Enable Audio” checkbox to enable the video streaming with audio. The audio encoding supports G.711 ulaw and AAC. For Audio Input Setting, the input source can only be Internal Microphone.
-
Page 21: Network Configuration
4. Network Configuration The IP Camera acts as one of the network devices. It allows user to configure the network functionalities based on applications. This section will describe the network configurations. The subdirectories in “Network” are: - Network Type - Network Connectivity - Quality Service - Access Port - Access IP Filter... - Page 22 NOTE1: To connect camera with IPv6 address, please note that this only works if the network environment and hardware equipment support IPv6. The browser should be Microsoft® Internet Explorer 6.5, Mozilla Firefox 3.0 or above. NOTE2: (Link with IPv6 address as following steps) Go to Setup ->...
- Page 23 Network Connectivity This page provides the connectivity configuration, so that IP camera can be accessed without necessarily providing the numerical IP address. Enable UPnP Service: with UPnP enabled, IP camera device can be easily discovered in Windows Network (My Network Places).
- Page 24 Access Port This page provides the ports configuration for requesting the services from the camera device. These services include Web Page access, HTTP and RTSP streaming services. HTTP port / HTTPS port: By default, the HTTP and HTTPs ports are set to 80 and 443 respectively. They can also be assigned to another port number between 1025 and 65535.
- Page 25 Access IP Filte This setting also provides a basic security by filtering the accesses from other hosts. Enable this function and choose “Allow / Deny” of the listed IP addresses. Up to 15 IP address can be added in the list for IPv4 and IPv6.
-
Page 26: Recording
(Samba) according to a time based schedule. The subdirectories in the “Recording” category are: - Recording Plan - SD Storage (For NCB750, NCB752 and NDR721) - SD File List (For NCB750, NCB752 and NDR721) - Samba Recording Plan Recording Plan List It lists the created/scheduled recording plan(s). - Page 27 Add / Edit Recording Plan Plan Name: Identifier of the recording plan Video Source: The selection of the video source to be recorded. Options: Stream1 / Stream 2 / Stream 3 for NDR721 and Stream1 / Stream 2 for others. Maximum File Size: This option defines the maximum file size of each video clip.
- Page 28 SD Storage (For NCB750, NCB752 and NDR721) This page shows the SD card information when it is attached to the IP camera. Normally, inserting the micro SD card will be done before entering this page and obtain the card information as below.
- Page 29 SD File List (For NCB750, NCB752 and NDR721) This page provides the search of records. The SD storage may contain both “triggered-by-schedule” recordings and “triggered-by-events” snapshot / video. There are search conditions used to narrow down the search results. The latest 10 Records The most recent 10 records are listed in this table.
- Page 30 Searching the Records The SD storage would keep massive records after the “recording plan” and/or “event handling” (see Event Management) has been launched. The search criteria are provided to look for particular records in the SD card. Example: Trigger Type – Schedule Recording There are 3 categories of search criteria: Trigger Type: It includes Motion Detection, Digital Input, Manual Trigger, Network Fail, Audio Detection and Periodically as the...
- Page 31 Samba This page allows user to configure the file storage via Samba. To begin with it, click Enable Samba and then input the related information. NOTE: Samba can only support mounting a shared folder located in the root directory. For example, to mount a folder called “Shared”...
-
Page 32: Configuration Of Event Handling
- Event Server & Media - Motion Configuration - Audio Detection (For NCB752, NDR721 and NDR722) - DI/DO Setting (For NCB750, NCB752 and NDR721) - Tamper Detection (For NDR722, NCB752 and NCR772) - Event List Event Server & Media The “Event Server”... - Page 33 Server Name: Identifier of the event server Server Type Email: Send the media file via email when an event is triggered. • Mail Server Address: Enter a host name or IP address of the email server. • User Name: Enter the user name of the email account. •...
- Page 34 Motion Configuration There are three MD (Motion Detection) areas can be enabled. Each MD can be individually enabled/disabled, defined the covering range and trigger sensitivity. To enable and verified the MD, follow the steps provided below. Check the box to enable the motion area Drag and drop to move the motion window Hold and drag any corner of the rectangle to resize the window.
- Page 35 This could be an event source to trigger event notification and alarms. DI/DO Setting (For NCB750, NCB752 and NDR721) The DI/DO setting provides the function of Digital I/O’s trigger condition configuration and current status information. The trigger condition can be configured while current status is detected by the IP camera system.
- Page 36 Tamper Detection (For NCB750, NCB752 and NDR721) With tamper detection, the camera is capable to detect tampering and could be event source to trigger event notification and alarms.
- Page 37 Event List List a summary of configured events. That is the selection of trigger condition(s) and the corresponding actions, as well as the scheduling. To begin with it, click on “Add New” button to extend for the detailed configurations. Event Name: Enter an event name, e.g. Motion Detection, to identify this configured event. Select All: 24 hrs/ 7days (Mon-Sun) continuous recording Scheduled Pattern: User-defined time frame...
- Page 38 Triggered by: This describes the selection of trigger conditions which include: • Motion Detection: Select the motion detection area(s) used for trigger condition. To enable and configure the motion detection areas, go to Motion Configuration. • Digital Input: Enable the system to detect the DI (Digital Input) status as a trigger condition. For more details about the DI setting, go to DI/DO Setting if the mode support.
-
Page 39: Examples Of Event Handling
Examples of Event Handling The following cases are provided as the examples of Event Handling. Scenario 1 While viewing live video, user can manually trigger an event anytime simply by pressing the button, on the web page. It will send email to the specified email accounts with the captured pictures. The configurations are illustrated as below: Step 1: Add Event Server Go to Event →... - Page 40 • Click on “Apply” to save the email server and media settings. Step 3: Configure Event List • On Event List page, click on “Add New” button. • Enable and configure this event • Click on “Apply” to save the settings of this page.
- Page 41 Scenario 2 A user is to define the motion detection area(s) in the camera view. When someone goes across these areas, the camera is aware of the trigger activated and starts generating video clips to the SD card if the camera support local storage.
-
Page 42: System Options
7. System Options System Options provide users to obtain and configure the system settings of the IP camera system. It contains the page of System Information, Date and Time, User Management, Maintenance and Log Service. The details about each subcategory will be described as below. - Page 43 Date and Time This section describes the date/time adjustment for the IP camera system. The ways to adjust the IP camera’s date/time can be Synchronize with NTP Server, Synchronize with PC or Set Manually. Current Date & Time Display current system date/time of the IP camera. The date format can be changed from the drop-down list under Configure Date &...
- Page 44 User Management By default, the access to the camera is not user authenticated. For security, the IP camera should be restricted only authenticated accounts to access. It is able to enable/disable user accounts, as well as to manage the added users in this page.
- Page 45 Maintenance This page provides tools for camera system maintenances. Reboot: Restart the camera system Restore to Factory Default: Restore camera factory default settings. The network setting can be kept by checking the “Except Network Type” checkbox. Backup Configurations: The system settings can be backed up and exported to a file. The file can be applied to upload the previous user settings to the camera, or other cameras.
-
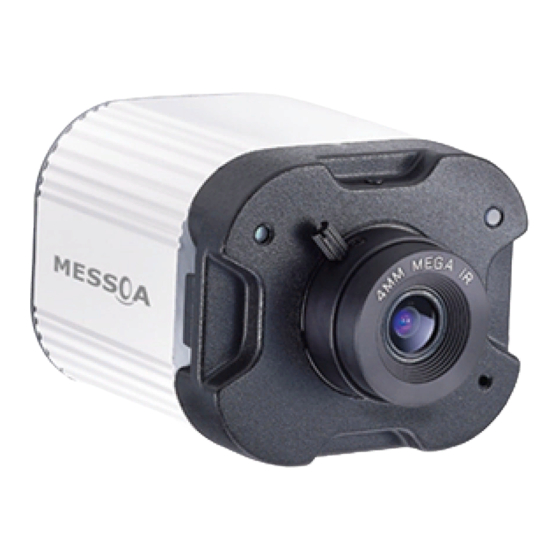
Page 46: Connectors & Led
8. Connectors & LED NCB750 & NCB752 Front and Back Panels I/O connectors – Pin definitions Signals Function RX-IN Digital Input Ground DO-OUT Digital Out Schematic diagram of Digital I/O... -
Page 47: Led Indicators
LED Indicators There are 2 type of LED indicators; RJ45 LEDs (back panel) and System LED (front, bicolor). These LEDs can help to recognize the current device status. RJ45 LEDs for Network Status: LED1 (Green) LED2 (Amber) 10 Link / Traffic Steady ON / Flashing 100 Link / Traffic Steady ON / Flashing... - Page 48 NDR720 & NDR722 Physical appearance and connectors Reset button Light Sensor System LED Indicator LED Indicators There are 2 type of LED indicators; RJ45 LEDs (back panel) and System LED (front, bicolor). These LEDs can help to recognize the current device status. RJ45 LEDs for Network Status: LED1 (Green) LED2 (Amber)
- Page 49 NDR721 Connectors Schematic diagram of Digital I/O...
- Page 50 LED Indicators Bicolor LED indicator for Power & System Status: Power On / System Reboot Steady ON with Amber LED Initial Process Ready 3 Flashing then ON with Green LED Normal Operation Steady ON with Green LED Firmware Upgrade Flashing per second with Red LED Internal (Hardware) Failure Steady ON with...
-
Page 51: Focus Assist Button (For Ncb750&Ncb752)
9. Focus Assist Button (For NCB750&NCB752) Focus Assist Button allows users to adjust the camera focus with precision by a simple click. [Steps of Process] Step 1: "Press" Focus Assist Button ● Rotate the lens focus clockwise or anticlockwise to either end (N or ∞) ●... -
Page 52: Desiccant Bag Replacement (For Ncr770&Ncr772)
10. Desiccant Bag Replacement (For NCR770&NCR772) The Camera comes with a desiccant bag placed inside. It is not necessary to replace it until the rear cover of the camera has been opened for some reasons. The SOP is described below for users to complete the replacement. Step 1: Unscrew the rear cover of the camera Step 2: Carefully open the rear cover and find the location as the red box shown below for installation. -
Page 53: Troubleshooting
11. Troubleshooting Check firmware version Firmware version may imply the functionalities’ updates or availability in the camera system. Therefore, in the first step of troubleshooting and then reporting, it helps to locate the found issues. Newer version firmware may have these issues corrected. - Page 54 Figure 1 Figure 2 Figure 3...
-
Page 55: Recover Device Settings
Recover device settings In some cases, camera system does not respond to any operation. A certain recovering processes would help to get the unit back to initial status, so that it can resume operable / configurable. This will be the operations on the “Reset Button”. Before executing hardware reset, please make sure the system booting process is completed. -
Page 56: Appendix A: Specifications Of Fixed Network Camera
Appendix A: Specifications of Fixed Network Camera Video Model Type NCB750 NCB752 Sensor Type 1/4" 1M progress scan CMOS sensor 1/2.7” 2MP progressive scan CMOS sensor Active Pixels 1280 x 800 (HxV) 1920 x 1080 (HxV) Compression H.264 / MPEG4 / Motion JPEG... - Page 57 Local Storage Memory Card Slot Micro SD / Micro SDHC Card up to 32 GB Memory Card Overwrite Network IPv4, IPv6, HTTP, HTTPS, SMTP, FTP, DHCP, NTP, TCP/IP, UPnP, RTSP/RTP/RTCP, DNS, DDNS, PPPoE, IGMP, Protocol QoS, Bonjour, Samba, Multicast. Ethernet 10Base-T/100Base-TX Ethernet connection for LAN / WAN, RJ-45 IEEE 802.3af ONVIF...
-
Page 58: Appendix B: Specifications Of Ir Bullet Network Camera
Appendix B: Specifications of IR Bullet Network Camera Video Model Type NCR770 NCR772 Sensor Type 1/4" 1M progress scan CMOS sensor 1/2.7” 2MP progressive scan CMOS sensor Active Pixels 1280 x 800 (HxV) 1920 x 1080 (HxV) Compression H.264 / MPEG4 / Motion JPEG Streaming Dual simultaneous streams (WXGA)1280x 800, 1280x 720, 800x450, 640x360,... - Page 59 Network IPv4, IPv6, HTTP, HTTPS, SMTP, FTP, DHCP, NTP, TCP/IP, UPnP, RTSP/RTP/RTCP, DNS, DDNS, PPPoE, IGMP, Protocol QoS, Bonjour, Samba, Multicast. Ethernet 10Base-T/100Base-TX Ethernet connection for LAN / WAN, RJ-45 IEEE 802.3af ONVIF Browser IE Browser 8.0 or 9.0 IE Browser 8.0 or above, Chrome, Firefox, Safari Security Three-level access with password protection I/O &...
-
Page 60: Appendix C: Specifications Of Indoor Ir Dome Network Camera
Appendix C: Specifications of Indoor IR Dome Network Camera Video Model Type NDR720 NDR721 NDR722 1/2.7” 2MP progressive scan Sensor Type 1/4” image sensor CMOS sensor Active Pixels 1280 x 1024 (HxV) 1920 x 1080 (HxV) Compression H.264 / MPEG4 / Motion JPEG Simultaneously multi-profile Streaming Dual simultaneous streams... - Page 61 Intelligent Video & Event Management Up to 3 customized threshold detection windows, Motion Detection 101 (0~ 100) detectd object size or level sensitivity Audio Detection 101 (0~ 100) level threshold Ethernet Detection Network Fail detection Others Snapshot, digital Zoom, Optimized i-frame setting Motion detection, Audio Motion detection, Manual Motion/Tamper detection,...
Need help?
Do you have a question about the NCB750 and is the answer not in the manual?
Questions and answers