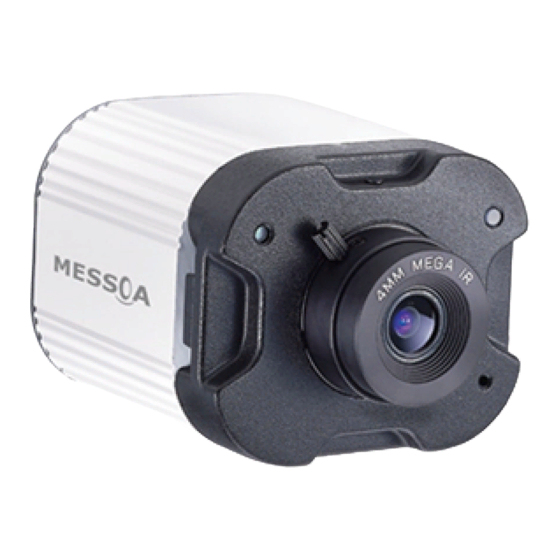
Messoa NCB750 Quick Start Manual
Fixed network camera
Hide thumbs
Also See for NCB750:
- User manual (50 pages) ,
- User manual (61 pages) ,
- Quick start manual (13 pages)
Advertisement
Available languages
Available languages
Quick Links
Advertisement

Summary of Contents for Messoa NCB750
- Page 1 Quick Start Guide Fixed Network Camera 201305. 750. A1...
-
Page 2: Package Contents
Quick Start Guide Quick Start Guide Package Contents Quick Start The Camera Camera Stand Screws Pack Fixed Lens Guide screws Product CD Power Adapter... - Page 3 Quick Start Guide Physical Description & Connection RJ-45 LED Indicator AC-24V Light Sensor Terminal Block DC-12V Reset Micro SD Focus Microphone Assist Video DC IRIS MIC in Button 65.5 66.0 Audio Connections Define the type of network device. If the network device supports PoE (Power over Ethernet) function, simply connect the camera to it via Ethernet cable.
-
Page 4: Assigning Ip Address
Quick Start Guide Assigning IP address Launch Discovery Tool (Discovery.exe). The tool will start searching and then displaying the cameras on the Device List after they are found. Check the checkbox to select a camera device from the list. The IP Camera may be assigned with a valid IP address via DHCP server. It can be also manually given a static IP address. -
Page 5: Accessing The Camera
Quick Start Guide Accessing the camera Launch IE browser and input the IP address of the camera, or click on “Browse” button on Discovery Tool. The web page with video will then be shown as below. (Default ID/Password: admin/1234) The live video of the camera can be played with a RTSP player, such as VLC or QuickTime. The network URL is rtsp://Camera IP/stream1. -
Page 6: Cable Management
Quick Start Guide Cable Management A considerate design of groove located on the sides. Users can arrange the DC-Iris cable neatly. - Page 7 Quick Start Guide Focus Assist Button Focus Assist Button allows users to adjust the camera focus with precision by a simple click. Step 1: "Press" Focus Assist Button ● Rotate the lens focus clockwise or anticlockwise to either end (N or ∞). ●...
- Page 8 Quick Start Guide...
- Page 9 クイックスタートガイド 固定式ネットワークカメラ 201305. 750. A1...
- Page 10 クイックスタートガイド クイックスタートガイド パッケージ内容 クイックスタート カメラ本体 カメラスタンド ネジパック 固定式レンズ ガイド ネジ プロダクト CD 電源アダプター...
- Page 11 クイックスタートガイド 各部説明&接続 RJ-45 LED Indicator AC-24V Light Sensor Terminal Block DC-12V Reset Micro SD Focus Microphone Assist Video DC IRIS MIC in Button 65.5 66.0 Out Audio Out 接続 ネットワークデバイスのタイプを確認します。 ネットワークデバイスの PoE(パワー · オーバー · イーサネット)機能をサポートしている場合、単にイーサ ネットケーブルを介してカメラを接続してください。 PoE 機能を使用しない場合、ネットワークデバイスへの接続(イーサネットケーブルを介して)および AC ま たは DC アダプターが必要となります。...
- Page 12 クイックスタートガイド IP アドレス配置 起動検出ツール(Discovery.exe)。このツールでカメラを検索します。検索されたカメラがデバイスリスト に表示されます。 リストからカメラデバイスを選択し、チェックボックスをオンにします。 IP カメラは DHCP サーバーを介して有効な IP アドレスが配置されます。また、手動で IP アドレスを付与す ることができます。そのためには、“Set IP”をチェックして IP を入力します。サブネットマスク、ゲート ウェイ、アカウント情報はパスワードで保護されています。( 初期 ID/ パスワード:admin/1234) “Browse”ボタンをチェックして、カメラの Web ページへのアクセスを取得します。...
- Page 13 クイックスタートガイド カメラ配置 IE ブラウザにカメラの IP アドレスを入力して起動し、或は検出ツールの“Browse”ボタンをチェックしま すると、下図のように表示されます。( 初期 ID/ パスワード:admin/1234) カメラのライブ映像は、VLC や QuickTime などの RTSP プレーヤーで再生することができます。ネットワー ク URL は rtsp://Camera IP/stream1 です。下図では、ライブ映像がの QuickTime プレーヤーで表示され ている状態です。...
- Page 14 クイックスタートガイド ケーブル管理 クループ設計を配慮して両側に位置しています。ユーザーは DC アイリスケーブルを手配することができます。...
- Page 15 クイックスタートガイド フォーカスアシストボタン フォーカスアシストボタンはユーザーがクリックするだけでカメラのフォーカスを調整することができます。 ステップ 1: フォーカスアシストボタン " 押す " ● いずれかの端部に時計回りまたは反時計回りにレンズのフォーカスを回転させます (N または ∞ )。 ● LED インジケーター表示 グリーンライトからオレンジ色ライトになるまで 3 秒間ボタンを押し続け ます。 グリーン点滅→オレンジ色点灯 Focus Assist Button ステップ 2: フォーカス調整 ● 調整する際、カメラのポインティングをキープして同じシーンを映してください。 ● フォーカスチューニング開始する時、LED にグリーンが点灯されます。 ●ディスプレイの LED ライトに赤色が点灯される場合、それは回転方向が逆と示します。 フォーカスコントローラ ステップ 3: ベストフォーカス値取得 ●...
- Page 16 クイックスタートガイド...
- Page 17 快速安装指南 固定式网络摄像机 201305. 750. A1...
- Page 18 快速安装指南 快速安装指南 标准配备 摄像机外观图 摄像机支架 螺丝包 定焦镜头 快速安装指南 螺丝 *3 产品 CD 电源适配器...
- Page 19 快速安装指南 产品特征 & 连接 RJ-45 AC-24V LED 工作指示灯 接线端子 光感应器 DC-12V 复位 Micro SD 对焦辅助按钮 麦克风 MIC 输入 视频输出 DC IRIS 65.5 66.0 音频输出 连接摄像机 请确认将要连接的网络设备的类型。 如果该网络设备支持 POE(通过以太网供电)功能,那么只需使用一条网线连接摄像机即可。 如果不支持 POE 供电,用户需连接网线与 DC 电源适配器。...
- Page 20 快速安装指南 分配 IP 地址 在电脑上安装搜索工具 (Discovery.exe)。 该搜索工具执行搜索动作后,窗口将显示已搜索到的摄像机列表。 从列表复选框中勾选摄像机。 若使用 DHCP 服务器,摄像机会自动获取 DHCP 服务器分配的动态 IP 地址。手动设置静态 IP 地址,可在“设 置 IP”选项中手动输入 IP,子网掩码与网关信息。如果摄像机设置了密码保护,请先输入账户信息。(默认用户 名 / 密码:admin/1234) 点击“浏览”按钮进入摄像机网页页面。...
- Page 21 快速安装指南 访问摄像机 安装 IE 浏览器后在地址栏键入摄像机的 IP 地址,或在搜索工具页面点击“浏览”按钮,进入如下如所示的网页 视频画面。(默认用户名 / 密码:admin/1234) 该实时视频可通过 RTSP 播放器播放,如 VLC 播放器或 QuickTime 播放器。网络 URL 为: rtsp:// 摄像机 IP 地址 / 码流 1。图示例子采用的播放器为 QuickTime 播放器。...
- Page 22 快速安装指南 线缆管理 摄像机两侧的槽位专门设计用于方便用户整齐防止 DC-Iris 线缆。...
- Page 23 快速安装指南 对焦辅助按钮 对焦辅助按钮使用户能够通过一个简单的点击来实现对焦点精度的调整。 第一步:" 按 " 对焦辅助按钮 ● 顺时针或逆时针旋转镜头的对焦杆至两端 (N 或 ∞ )。 ● 按下并保持住此按钮 3 秒直到 LED 指示灯从闪烁绿灯转为黄灯。 闪烁绿灯 → 黄灯 对焦辅助按钮 第二步:调整焦点 ● 调整过程中请保持摄像机所拍摄的位置不变。 ● 开始调整焦点直至 LED 灯变为绿色。 ● 如果 LED 灯转为红色,表明调整方向错误,应为反向。 对焦操作杆 第三步: 获取最佳焦距值 ● 当摄像机对焦正确时,LED 灯将闪烁绿色。 ●...
- Page 24 快速安装指南...


Need help?
Do you have a question about the NCB750 and is the answer not in the manual?
Questions and answers