Table of Contents
Advertisement
Quick Links
Advertisement
Table of Contents

Related Manuals for Messoa NOD316


Summary of Contents for Messoa NOD316
- Page 1 Mini Outdoor IR Dome Network Camera NOD316 User Manual 201511 316 A1...
-
Page 2: Table Of Contents
Table of Contents Product Overview Physical Characteristics Installation Package Content Installation 2.2.1 Checking Appearance 2.2.2 Disassembling the Camera 2.2.3 Wiring the Camera 2.2.4 Mounting the Camera 2.2.5 Desiccant Placement 2.2.6 Adjusting the Camera Position Connection Network Topology System Requirements Connecting Process 3.3.1 Default IP address 3.3.2 Connecting from a computer &... - Page 3 WARNING ● This camera operates at PoE (IEEE 802.3af Class 3) only. ● Installation and service should be performed only by qualified and experienced technicians and comply with all local codes and rules to maintain your warranty. ● To reduce the risk of fire or electric shock, do not expose the product to rain or moisture. ●...
-
Page 4: Fcc Compliance Statement
FCC Compliance Statement Information to the user: This unit has been tested and found to comply with the limits for a Class B digital device pursuant to Part 15 of the FCC Rules. Operation is subject to the following two conditions: (1) this device may not cause harmful interference, and (2) this device must accept any interference received, including interference that may cause undesired operation. -
Page 5: Product Overview
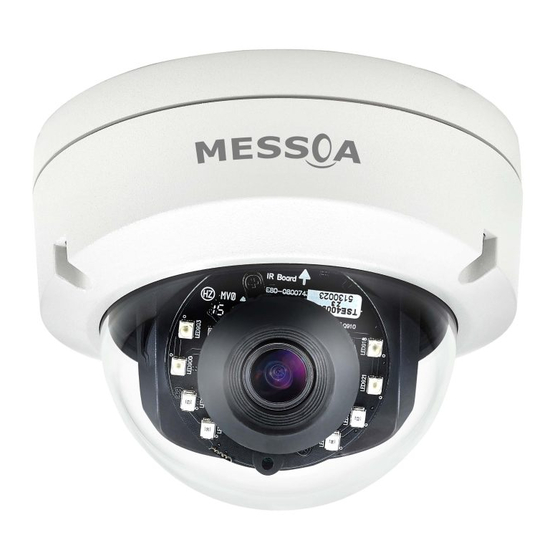
Product Overview Physical Characteristics Unit: mm Figure 1 - 1: Physical Dimension Table 1 - 1: Pictorial Index Definition Name Conduit Hole Inner Liner Camera Body Top Cover Figure 1 - 2: Pictorial Index... - Page 6 Figure 1 - 3: Internal Interface Pictorial Index Interface Description Insert an Ethernet cable into the port for network connection as well as PoE RJ-45 Ethernet PoE Port (Power over Ethernet) capability. Press the button for below 1 second to reboot the camera. Reset &...
-
Page 7: Installation
Installation Package Content Check if everything in the packing box matches to the order form and the packing slip. All items listed below should be included in the packing box. • Network Mini Outdoor Dome Camera x1 • Printed Quick Guide x1 •... -
Page 8: Disassembling The Camera
2.2.2 Disassembling the Camera Please refer to the steps with figures below for correct disassembling order. Loosen the 3 torx screws counter-clockwise by the torx wrench. Gently pull the top cover downward to take it apart from the camera body. Lift to open the inner liner coating on the lens for adjustment later. -
Page 9: Mounting The Camera
2.2.4 Mounting the Camera Step 1. Mounting Preparation Paste the included guide pattern onto a wall/ceiling where the IP camera is about to be located, and drill 3 hole patterns in accordance with the indications on the guide pattern (3-Ø4.5 Holes) followed by hammering the 3 plastic anchors into the drilled holes. -
Page 10: Desiccant Placement
Step 3. Assembling the Camera Please refer to the following steps with figure for correct assembling order. After adjustment, fit the inner liner over the camera lens until it clicks into the place. Gently put the top cover upward to attach with the camera body. Fasten the 3 torx screws with the camera body clockwise to complete the mounting. -
Page 11: Adjusting The Camera Position
2.2.6 Adjusting the Camera Position The camera has three axes to adjust field of view for different applications. While screening live view on your monitor, adjust the axes by the procedures below simultaneously for desired coverage of field of view. •... -
Page 12: Connection
Connection Network Topology The camera, which is equipped with Ethernet RJ-45 network interface, can deliver live view image in real time via both Internet and Intranet manners. Please refer to the skeleton drawings shown below for understanding. Figure 3 - 1: Network Topology System Requirements Below table lists the minimum requirement to implement and operate the camera. -
Page 13: Connecting Process
Connecting Process 3.3.1 Default IP address Since this is a network-based unit, an IP address must be assigned at the very first. The unit’s default IP address is 192.168.1.30 and sub mask is 255.255.255.0. However, if you have a DHCP server in your network, the unit would obtain an IP address automatically from the DHCP server so that you don’t need to change the camera’s IP address. -
Page 14: Viewing Preparation
Viewing Preparation Images of the unit can be viewed through Microsoft Internet Explorer 8 or above. Before viewing, follow these steps to enable the display. Enable Cookies as instructions below In Internet Explorer, click Internet Options on the Tools menu. ... - Page 15 Scroll down to the ActiveX controls and plug-ins radio buttons and set as follows: 【 Download signed ActiveX controls 】 Prompt (recommended) 【 Download unsigned ActiveX controls 】 Prompt 【 Initialize and script ActiveX not marked as safe for scripting 】 Prompt Figure 3 - 4: Security Settings 2/4 【...
- Page 16 【 Run ActiveX controls and plug-ins 】 Enable 【 Script ActiveX controls marked safe for scripting* 】 Enable Figure 3 - 6: Security Settings 4/4 Press OK to save the settings. Close all Microsoft Internet Explorer Windows and restart a new window. This will allow the new settings taking effect. ...
-
Page 17: Ip Finder
IP Finder works only in Microsoft Windows XP, Microsoft Windows Vista, and Microsoft Windows 7 or above. Steps to get the utility program running are listed below. Download IP Finder from MESSOA Website to the computer. Double click on IPFinder.exe in the IP Finder folder, and the IP Finder window should pop out. -
Page 18: Administration And Configuration
Administration and Configuration Live View Figure 4 - 1: First Login Page After accessing and login to the IP address of the camera, the screen will be shown as the screenshot above. There’re 2 main options on the upper left side: “Live View” and “Configuration”. The upper right corner, on the other hand, indicates the current user level and the “Logout”... - Page 19 The following icons within the table, which are in the left-side window and on the top of Live View screen, are for several functions activation and statuses indication. Please refer to the detailed definitions below for more understanding. Icon Definition The “Snapshot”...
-
Page 20: Configuration
Configuration After clicking the “Configuration” option, the screen will be shown as below with several menu options for users to configure on the left side. We will thoroughly introduce them one by one in the following chapters. Figure 4 - 3: Configure 4.2.1 Encode Figure 4 - 4: Encode By default, there are up to 3 profiles to be selected from and each profile contains 3 streams individually for further... - Page 21 Table 4 - 2: Edit Profile Options Item Option Description In certain of the vertical oriented shape applications, e.g., sideway, aisle, corridor, because of the attribute that requires more details in vertical areas, the prevailed 16:9 aspect ratio is not that appropriate and large portion of bandwidth are wasted in landscape field of view.
- Page 22 Table 4 - 3: Correlations of Resolution/Streams/FPS/Codecs – NTSC/PAL Stream 1 (H.264/MJPEG) Stream 2 (H.264/MJPEG) Stream 3 (H.264/MJPEG) 800x600@30/25fps 800x600@30/25fps 2048x1536@30/25fps 640x480@30/25fps 640x480@30/25fps 1920x1080@30/25fps 640x360@30/25fps 640x360@30/25fps 1280x960@30/25fps 320x240@30/25fps 320x240@30/25fps 1280x720@30/25fps 320x176@30/25fps 320x176@30/25fps 800x600@30/25fps 800x600@30/25fps 640x480@30/25fps 640x480@30/25fps 640x360@30/25fps 640x360@30/25fps 800x600@30/25fps 320x240@30/25fps 320x240@30/25fps 320x176@30/25fps 320x176@30/25fps...
-
Page 23: Image
4.2.2 Image Exposure This section mainly allows user to control the settings pertaining to exposure mode and day night modes. Figure 4 - 5: Exposure Basic Settings ● Exposure Mode There are 4 modes to select from as follows: • Auto: with certain pre-settings, the camera automatically determines the correct exposure for pictures without user input settings for further exposure before taking videos. - Page 24 ● BLC Set an area for Backlight Compensation. Backlight Compensation is a function that achieves the brightness of a selected area to optimal image level. This function is necessary when an auto iris lens tends to close quickly due to an intense light coming from back of object in the area wished to view, resulting in the area is too dark and difficult to see.
- Page 25 ● Day Night Switch Control – Mode Set Day Night mode from 3 options, Auto, Color and B/W. When Color mode is selected, the camera is forced to stay in Color mode permanently. On the other hand, the camera keeps within black and white mode when B/W is selected. Auto simply let the camera to, based on different intensity of lights, switch between 2 modes automatically.
- Page 26 Basic Setting Figure 4 - 9: Basic Settings ● Sharpness Increasing the sharpness value will sharpen the edges and small feature of viewing images. If the edges appear too smooth or blurred, increase the sharpness; otherwise, decrease the sharpness. Sharpness value can be set from 0 to 100. The 100 offers the sharpest image.
-
Page 27: Video
4.2.3 Video Privacy Zone Privacy Zone enables user to black out a specific portion of the screen for privacy concern. There are up to 8 sets of privacy zones for users to define. After setting up a privacy zone, the live view image will appear a frame, whose color, size and position can be customized by user’s preference. -
Page 28: Network
4.2.4 Network General This section is for users to set detailed settings related to wired network condition for the camera. Figure 4 - 12: Network ● Basic Settings • Device Name: Input your preferred name for the camera.. • HTTP Port: This protocol allows for TCP protocol quality without having to open specific ports for streaming. Users inside a firewall can utilize this protocol to allow streaming data through. -
Page 29: Ftp Server
• IPv4 Default Gateway: Leave blank as default setting. No Default Gateway address required if not used. Ask your network administrator for further information. • Primary DNS: Same as the above. • Secondary DNS: Same as the above. • IPv6 Enable: Check the box to enable IPv6 protocol. •... - Page 30 RTSP RTSP is a standard protocol for connecting a client to establish and control streaming data over the web. If you want to allow third-party devices or software to access video/audio streams from the IP camera over the network, you must configure the RTSP ports.
- Page 31 ● Multicast URL Differing from URL, Multicast URL can transmit data from one host to a single host or to all hosts, thus consuming less network bandwidth with more flexibility. However, it is required to make sure if the peripherals connected with the camera are all compatible with Multicast in advance.
- Page 32 ● SNMP V3 SNMP V3 provides more security features than SNMP v1/SNMP v2. Tick “ON” to enable the function. Input User Name for SNMP v3 first. Then select desired modes for “Authentication” with “Privacy” and enter passwords paired with both protocols individually.
- Page 33 Firewall Under this menu, users can manually define several IP addresses to be allowed or denied to access camera. Figure 4 - 17: Firewall Settings ● Allow: Select this option to make inputted IP addresses allowed to access IP camera. ●...
- Page 34 LDAP For accessing and maintaining distributed directory information services over an Internet Protocol network, the Lightweight Directory Access Protocol (LDAP), an open, vendor-neutral, industry standard application protocol, have a major role in both intranet and internet applications to facilitate information sharing between devices. Figure 4 - 19: LDAP Settings ●...
- Page 35 Secure Sockets Layer (SSL), the standard security technology for establishing encryption, allows sensitive information such as login credentials to be transmitted securely. Figure 4 - 20: SSL Settings ● Self Signed Self-signed certificate is a private own key that has no connection with person or organization that perform authorized certificate signing procedure.
-
Page 36: System
4.2.5 System Date & Time Figure 4 - 23: Date & Time Settings ● Current Server Time The current date/time is displayed here. ● Synchronization Mode There’re 3 modes for users to set date/time. • Sync With Manual: Manually set date and time individually. •... - Page 37 Firmware The information about the camera are explicitly written under this page. Also, users can manually update System Firmware if available. All motions of camera will be stopped during the firmware update. Please close any other screens before firmware update. Never disconnect power or LAN cable during the updating process. It takes approximately 3 minutes for the unit to reboot after firmware update process.
- Page 38 This section allows user to enable OSD (On Screen Display) settings. In addition, it extends the OSD function to accord with the occurrence of events. Figure 4 - 26: OSD Settings ● Basic Settings There are up to 2 sets of OSD settings can be enabled concurrently as the following details: •...
-
Page 39: Account
4.2.6 Account Account Management Figure 4 - 27: Account Settings ● User Levels • Admin: The highest privileged control for the camera is “Admin” level, which can handle both live view and all the configuration settings. The default username and password for Admin are “admin” and “1234” respectively. •... - Page 40 ● Modify & Delete Users: Figure 4 - 29: Modify & Delete Admin/Operator/User • Delete: Choose one of the users from the list and then click “Delete” to remove it instantaneously. (The default Admin is not available to be deleted.) •...
-
Page 41: Event Source
4.2.7 Event Source Defocus This function is designed to establish related actions when the camera is subject to the event of defocus. Figure 4 - 30: Defocus Settings ● Basic Setting • Enable: Check the box to enable the function. ●... - Page 42 ● Arming Schedule Setting Under this section, user can freely set up an ideal combination to record defocus events. The following table includes 7 days a week from the upper Monday to the lower Sunday with the hour group from the left 00 to the right 24. Click the “Edit” button at the upper-left corner to enter the setting page.
- Page 43 Motion This function is designed to establish related actions when the camera detects motion issues. A maximum of 4 sets of motion detection areas can be customized by users. Figure 4 - 33: Motion Detection Settings ● Motion Zone Area Setting •...
- Page 44 ● Arming Schedule Setting Under this section, user can freely set up an ideal combination to record motion events. The following table includes 7 days a week from the upper Monday to the lower Sunday with the hour group from the left 00 to the right 24. Click the “Edit” button at the upper-left corner to enter the setting page.
- Page 45 Network This function is designed to establish related actions when the camera is subject to network conflict or network lost events. Figure 4 - 36: Network Event Settings ● Wire Network Issues • Network Lost: Check the box to enable the detection of network lost. When the camera loses internet access, the network lost event will be detected and recorded.
- Page 46 Schedule This function is designed to establish related actions for schedule recording. Figure 4 - 37: Schedule Recoding Settings ● Basic Setting • Enable: Check the box to enable schedule recording function. • Trigger Interval: This relates to the following handler actions. The available range is from 1 to 3600 seconds. For example, if enabling the “Snapshot –...
- Page 47 ● Arming Schedule Setting Under this section, user can freely set up an ideal combination for schedule recording. The following table includes 7 days a week from the upper Monday to the lower Sunday with the hour group from the left 00 to the right 24. Click the “Edit” button at the upper-left corner to enter the setting page.
- Page 48 Tamper This function is designed to establish related actions when the camera is subject to tamper events. Figure 4 - 40: Tamper Detection Settings ● Basic Setting • Enable: Check the box to enable the tamper detection. • Sensitivity: Set the sensitivity for tamper detection. High stands for that camera is prone to be triggered with slight tamper issue, while Low means that camera is triggered with only major tamper issue.
- Page 49 After clicking “Edit”, the prompt setting page will be shown as follows. User is able to individually establish up to 3 sets of time range for each day, where start and end time can be separately defined. Check the box at the right side to concretely enable the defined time range followed by clicking “Apply”...
-
Page 50: Event Handler
4.2.8 Event Handler Email This section is designed to set up detailed settings for email notification when events occur. Make sure you have enabled email sending function in each event section in advance. Figure 4 - 43: Email Record Setting ●... - Page 51 ● E-mail Address List: This function is designed to notify multiple users via email when events occur. Figure 4 - 44: Email Address List • Check “Enable” to send email to the selected address. • Email Address: Input an email address to which events will be sent. There’re maximum 10 email addresses can be defined here.
-
Page 52: Record Setting
Record Setting This section is designed to set up detailed settings for video recording. Make sure you have enabled recording function in each event section in advance. Figure 4 - 46: Record Setting ● Basic Setting • Record Type: Select the recording content. Video: camera will only record the video information . Audio and Video: camera will record both audio and video. - Page 53 Snapshot This section is designed to set up detailed settings for snapshot capture when events occur. Make sure you have enabled Snapshot function in each event section in advance. Figure 4 - 48: Snapshot Setting ● Basic Setting • Pre Event Capture Count: Set a number of snapshots to be captured prior to an event. •...
-
Page 54: Appendix: Specifications Of Mini Outdoor Dome Camera
Appendix: Specifications of Mini Outdoor IR Dome Camera Video Sensor Type 1/2.8" image sensor optimized for low-light performance Active Pixels 2065 x 1553 (HxV) Compression H.264 / Motion JPEG Streaming Triple simultaneous streams Resolution 3MP(2048x1536), Full HD 1080P, 1.3MP(1280x960), HD 720P to 320x176 Max. - Page 55 Storage Temperature Regulatory CE, FCC, RoHS Approvals Order Information NTSC: NOD316-N3-MES; Model No. PAL: NOD316-P3-MES 1. Memory card not included. 2. No memory card slot & local storage function for Argentina and Ecuador. Note: Product specifications and pictures are subject to change without prior notice.
Need help?
Do you have a question about the NOD316 and is the answer not in the manual?
Questions and answers