
Related Manuals for Messoa NCC800


Summary of Contents for Messoa NCC800
- Page 1 1080p Cube Network Camera NCC800/NCC800WL User Manual 5300-00000001-21Y A1...
-
Page 2: Safety Notice
The camera should be protected from water and moisture, excessive heat, direct sunlight and cold. „ The installation should be made by a qualified service person and should conform to all local codes. „ Unplug the camera during lightning storms or when unused for long period of time. „ NCC800/NCC800WL User Manual... -
Page 3: Table Of Contents
4.2 Image Settings ..................... 20 4.2.1 Codec ......................20 4.2.2 Exposure ......................23 4.2.3 White Balance ....................25 4.2.4 Basic Setting ......................26 4.2.5 Smart Encoding ....................27 4.2.6 Smart Focus .......................28 4.2.7 Privacy Zone ......................28 4.2.8 ePTZ .........................29 4.3 Network ....................... 30 4.3.1 Basic .........................30 NCC800/NCC800WL User Manual... - Page 4 4.5.6 Ethernet Detection ....................46 4.5.7 Event Management ....................47 4.6 Recording ..................... 48 4.6.1 Settings – Video File ....................48 4.6.2 Settings – FTP ....................48 4.6.3 Settings – SMTP ....................49 4.6.4 SD Card Storage Format Selection .................50 4.6.5 Period Setting.....................51 NCC800/NCC800WL User Manual...
-
Page 5: Overview
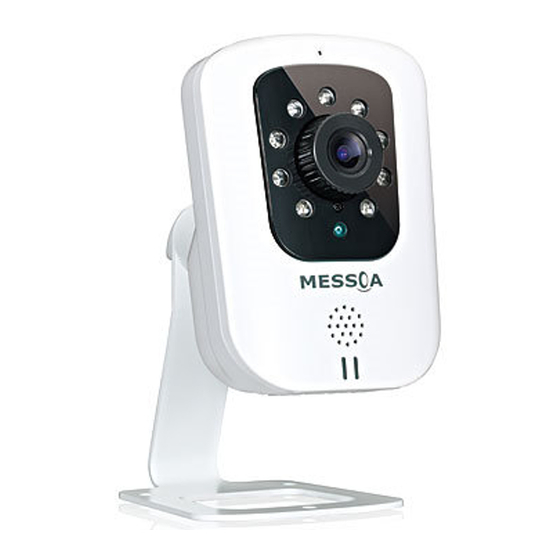
1. Overview 1.1 Introduction Featuring 2-megapixel Full HD resolution at full frame rates, the NCC800/NCC800WL is designed for professional indoor surveillance, targeting retail shops, small businesses or offices where image quality is emphasized. The built-in infrared LED gives true, maximized night visibility in complete darkness up to 10 meters. -
Page 6: Front And Side View
4. Ethernet/PoE: Connects to the LAN port of a standard 10Base/100Base-TX device, e.g., hub, switch or router. 5. I/O: Connect your external devices, e.g., sensor and alarms to the corresponding I/O terminal block. The pins of the I/O terminal block controls the following signals: Signal Connection Ground (electricity) in electrical circuits. NCC800/NCC800WL User Manual... - Page 7 10. MAC address: The MAC (Media Access Control) address of the camera's Ethernet interface is displayed on the camera's label. If your camera comes with a wireless dongle, then the MAC address is displayed on the dongle's label. NCC800/NCC800WL User Manual...
-
Page 8: Specifications
Alarm / Motion / Schedule/ Un-interrupt recording Power Supply Power Requirement DC 12V ± 10% / PoE (IEEE 802.3af) Power Connector DC Jack (2.0mm) Power NCC800: 7W, NCC800WL:7.5W Consumption(Max) LED Indicator x1 Power LED (Red) Environment Operating Tempera- -10ºC ~ 50ºC (-14ºF ~ 122 ºF) -
Page 9: Camera Installation
Ethernet cable. 4. Optionally connect a video monitor if you want to perform focus and iris adjustments during the installation. 5. For NCC800WL, connect the USB Wi-Fi dongle to the USB port of the camera for wireless capability. NCC800/NCC800WL User Manual... -
Page 10: Adjusting The Focus
2. Camera Installation 2.3 Adjusting the Focus Loosen the Focus Adjustment Ring screw first and then rotate the ring to adjust the focus. After adjustment, fasten the screw. NCC800/NCC800WL User Manual... -
Page 11: Network Connection And Configuration
To add the camera(s) to an existing LAN, just connect the camera(s) to the hub or switch on your network. If you want to provide the camera power via the Ethernet connection, a PoE-enabled hub/switch is required. NCC800/NCC800WL User Manual... - Page 12 (192.168.1.30). So you need to configure your wireless PC’s IP address as 192.168.1. X (where X is a number between 2 to 254, excluding 30 and subnet mask as 255.255.255.0. Must use the same SSID and channel number as the camera. „ NCC800/NCC800WL User Manual...
-
Page 13: Infrastructure Mode
Typically a broadband router has a built-in DHCP function to assign a local IP address to your camera. You can alternatively assign a fixed IP address to the camera to prevent it from frequently changing. Router xDSL/Cable Modem To access the camera from a local PC, simply use the local IP address of the camera. NCC800/NCC800WL User Manual... -
Page 14: Accessing The Camera For The First Time
Subnet mask: 255.255.255.0. „ Ignore all other settings and click OK. Step 3: Verify the connection between the PC and the IP Cam 6. Launch the Command Prompt by clicking the Start menu, Programs, Accessories and then Command Prompt. NCC800/NCC800WL User Manual... - Page 15 Open the IE browser and enter the IP address of the camera in the URL field. The default is 192.168.1.30. When prompted to login, enter the user name and the password. (The defaults: admin, 1234). Note that the password is case-sensitive. NCC800/NCC800WL User Manual...
-
Page 16: Using "Ip Finder" To Manage Cameras
Clicking a target camera will show the live view (if available) and the detailed information of the camera, including the MAC address. Each camera comes with a unique MAC address, which is indicated on the product label. It helps identify which camera is currently accessed, particularly when multiple cameras are connected on your network. NCC800/NCC800WL User Manual... - Page 17 For an individual camera, right-click the camera and a menu will provide these options: Go to Presentation URL: Launch IE browser to access the web-based utility of the camera. „ Set Device ID and Password: Set the login ID and password for managing the camera with IP Finder. „ NCC800/NCC800WL User Manual...
- Page 18 3. Network Connection and Configuration Network Information: Allows you to configure the camera’s network settings. „ NCC800/NCC800WL User Manual...
-
Page 19: Using Web-Based Control Utility
Recording Indicator: Turns red when the recording is proceeding. „ Alarm Indicator: Appears when an alarm is triggered. „ Live view video: Shows the live view of the camera. „ Note that the accessibility to the options varies according to the login account. NCC800/NCC800WL User Manual... -
Page 20: Setup Menu
Each configuration page provides a Save button. Settings are applied right after you press the Save button. And the browser will refresh to load the latest setting or otherwise pop up the “Save OK” message to indicate that settings have been applied. NCC800/NCC800WL User Manual... -
Page 21: Image Settings
Camera Name Settings Enter a descriptive name of the camera. Note that if you want to make the camera ONVIF compliant (see „ Network > ONVIF ), no space is allowed in the camera name. NCC800/NCC800WL User Manual... -
Page 22: Stream Settings
I-Frames are longer, the less I-Frames are needed and thus consuming less bandwidth and storage space. Recommended settings are as below: • Longer I-Frame interval: For normal scenes where there is less motion and sufficient lighting. • Shorter I-Frame interval: For scenes with lots of motion, or under poor lighting conditions. NCC800/NCC800WL User Manual... -
Page 23: Rate Control
Constant Bit Rate (CBR): CBR maintains a specific and constant bit rate by varying the stream „ quality. With CBR, streaming is smooth and network throughput is stable for any scene. This mode is typically used with a limited bandwidth environment. NCC800/NCC800WL User Manual... -
Page 24: Exposure
Max Gain: Specify the maximum amount of amplification applied to the image. A high level of gain „ allows images to be viewable in very low light, but will increase the image noise. Manual Exposure Settings Exposure Time: Enter a desired exposure time. „ NCC800/NCC800WL User Manual... - Page 25 Level: Depending on the contrast/dynamic range of a scene, you can select different level of WDR. „ Higher level of WDR suits for higher contrast/dynamic scene. If you select Auto mode, the camera will automatically adjust the WDR level by itself depending on the light of the scene. NCC800/NCC800WL User Manual...
-
Page 26: White Balance
Manual White Balance: With any special light in the environment, you can use this option to manually „ adjust the red, green and blue channels, which are mostly affected by the special light. For example, if red color is too bright, then you should lower the R Gain value. NCC800/NCC800WL User Manual... -
Page 27: Basic Setting
Contrast: Adjust the image contrast level. „ Saturation: Adjust the image saturation level. „ Sharpness: Adjust the image sharpness level. „ Default All Image parameters: Pressing this button will restore all the image settings to the „ defaults. NCC800/NCC800WL User Manual... -
Page 28: Smart Encoding
Save Window to save the region. Click anywhere on the image to cancel the current defined area. Mode: Select Fixed ROI to enable smart encoding function. „ Priority: Select a priority level for the ROI. „ NCC800/NCC800WL User Manual... -
Page 29: Smart Focus
To turn on the privacy zone function: 4. Click and drag your mouse on the image to define the region to be masked and then click Save Window. 5. Select ON to enable Privacy Zone. This will turn the masked area to black. NCC800/NCC800WL User Manual... -
Page 30: Eptz
To tilt up/down: Click the up/down indicator to tilt the viewing area. The tilt function does not work if the video is not zoomed-in (no zoom status). • To preset to home: Click the home indicator and the image will return to the original view. NCC800/NCC800WL User Manual... -
Page 31: Network
4. Using Web-based Control Utility 4.3 Network 4.3.1 Basic DHCP: If there is a DHCP server on the network and you enable this option, the server will „ automatically assign an IP address and related information to the camera. NCC800/NCC800WL User Manual... -
Page 32: Wlan
After scanning, available wireless networks will appear in the drop-down list. You can select one from the list to see related Access Point (AP) information, including signal strength, BSSID (the MAC address of the wireless interface) and wirless mode. NCC800/NCC800WL User Manual... -
Page 33: Advanced Settings
When setting WEP keys for data encryption, make sure to use the same encryption key values in identical order as used by the target wireless network. Shared key: If you use AES or TKIP as the encryption method, enter the shared key used by your „ tarket wireless network. Advanced Settings NCC800/NCC800WL User Manual... -
Page 34: Ftp
User Name: Enter the user name to logon to the FTP server. „ Password: Enter the password to logon to the FTP server. „ File Upload Path: Specify the folder which has been created under FTP server root directory. „ NCC800/NCC800WL User Manual... -
Page 35: Smtp
Time Zone: Select a time zone in which the camera is located. „ DST - Automatically Adjust for Daylight Saving Time Changes: Check to apply the daylight saving „ time automatically if the camera is uesd in an area that is affected by DST. Then specify the month, NCC800/NCC800WL User Manual... -
Page 36: Rtsp
ONVIF is a standard that ensures interoperability between IP-based physical security products regardless of the manufacturers. This camera is ONVIF compliant and you can configure whether the camera can be found by other ONVIF compliant products and the related settings. NCC800/NCC800WL User Manual... -
Page 37: Basic Settings
Accept command/functionality outside of Discovery capability: If checked, the camera is allowed „ to accept commands from ONVIF compliant device thus changing the camera’s functionality. User Authentication: If an ONVIF compliant device needs authentication for communication, enable „ this option. NCC800/NCC800WL User Manual... -
Page 38: System
Synchronize with NTP Server: Use this option to synchronize the camera’s date and time with an „ NTP (Network Time Protocol) server, which can be configured under Network > NTP. Date Format: Allows you to specify a desired date format. „ NCC800/NCC800WL User Manual... -
Page 39: Time Stamp
„ DO NOT turn off or restart the camera during the firmware update process. „ To update the firmware: 1. Click the Browse button to locate the firmware file. 2. Click the Update button to start update. NCC800/NCC800WL User Manual... - Page 40 When complete, you will return to the live view page. Hardware Factory Default: Reset all of the camera parameters to the defaults, including the network „ settings. NCC800/NCC800WL User Manual...
-
Page 41: User Management
The Language drop-menu allows you to change the language of the web interface. Supported languages include English, Spanish, Italian, Simplified Chinese and Traditional Chinese. Click Save to apply the language setting, and the browser will automatically refresh to reflect the change. NCC800/NCC800WL User Manual... -
Page 42: Log
This page displays detailed information about the camera’s operations and activities, including all the login and alarm records. Clear Log File: Allows to clear the log on the camera. „ Download Log File: Allows to save the log file to a specified location. „ NCC800/NCC800WL User Manual... -
Page 43: Audio
4. Speak into the microphone and the person(s) around the camera should hear your voice. 5. When people around the camera are talking to you, you should hear them from the speaker that is connected to the computer. NCC800/NCC800WL User Manual... -
Page 44: Event
2. You must select H.264 or MPEG4 codec for one of the streams to process the motion detection. Configuration Motion Sensitivity: Specify the sensitivity to moving objects before the camera triggers an alarm. The „ higher the sensitivity, the slighter the movement is required to set off an alarm. You can alternatively NCC800/NCC800WL User Manual... -
Page 45: External Alarms
Specify the action to be taken when external alarm is triggered: OFF: No action will be taken, but an alarm will be logged. „ FTP: Recorded video clips/JPEG files will be uploaded to the FTP server when alarm is triggered. „ NCC800/NCC800WL User Manual... -
Page 46: Blur Detection
FTP: Recorded video clips/JPEG files will be uploaded to the FTP server when alarm is triggered. „ SMTP: Notification email with the recorded JPEG files attached will be sent to the SMTP server. „ SD Card: Recorded video clips will be saved to the SD card when the alarm is triggered. „ NCC800/NCC800WL User Manual... -
Page 47: Audio Detection
To perform a video recording, you must select MJPEG codec for one of the streams. 4.5.6 Ethernet Detection With Ethernet detection enabled, when the camera detects an Ethernet disconnection, the camera will generate an alarm and then take a specified action. NCC800/NCC800WL User Manual... -
Page 48: Event Management
AVI format. 4.5.7 Event Management Basic Setting Alarm Duration: Specify the duration of the alarm when an event is triggered. „ Alarm Reset: Use this button to stop the current alarm and to restart event detection again. „ NCC800/NCC800WL User Manual... -
Page 49: Recording
AVI Format: Select a desired video format. Available formats depend on the primary and the „ secondary streaming codec/resolution settings. 4.6.2 Settings – FTP FTP Networking Displays the current FTP settings, which are specified via Network > FTP. NCC800/NCC800WL User Manual... -
Page 50: Settings - Smtp
Displays the current SMTP settings, which are specified via Network > SMTP. Storage Setting Attached File Numbers: Enter the number of JPEG images that will be attached to the notification „ email. Set a lower number if SMTP server has an email size limit. NCC800/NCC800WL User Manual... -
Page 51: Sd Card Storage Format Selection
SD Card Unmount: Click this button before safely removing the SD card. This option is not available if „ an SD card has not been inserted in the camera. SD Card Overwrite: Select ON to enable overwriting once the storage is full. „ NCC800/NCC800WL User Manual... -
Page 52: Period Setting
Check Save to SD Card should you wish to save the recorded video clips to the SD card. Caution Note The scheduled recording always demands higher priority than the alarm-based recording. When a scheduled recording is proceeding, the alarm-based recording will be disabled but the alarms will be logged. NCC800/NCC800WL User Manual... - Page 53 MESSOA TAIWAN, R.O.C. 6F, No.26, Wuquan 6th Rd., Wugu District, New Taipei City 248, Taiwan (R.O.C.) Tel: +886-2-2298-3908 Fax: +886-2-2298-3909 E-mail: info@messoa.com MESSOA USA 13611 12th St, Unit B Chino, CA 91710, USA Tel: +1-909-590-5955 Fax: +1-909-590-2374 E-mail: info@messoa.com MESSOA SHANGHAI INC.
Need help?
Do you have a question about the NCC800 and is the answer not in the manual?
Questions and answers