
Related Manuals for Lincat Opus 700 OE7008


Summary of Contents for Lincat Opus 700 OE7008
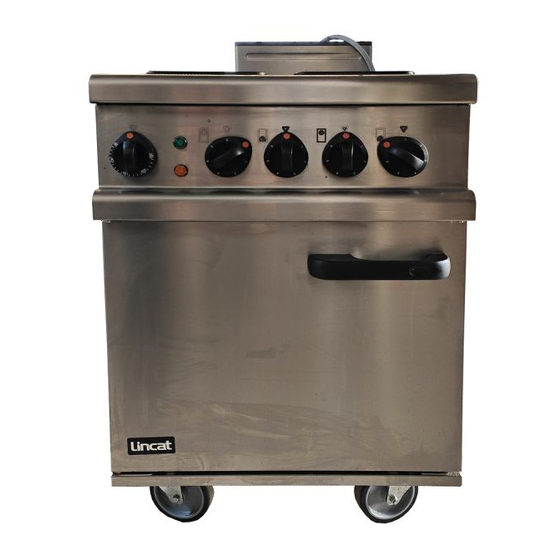
- Page 1 User, Installation and Servicing Instructions Opus 700 Electric Oven Ranges OE7008 and OE7010 IS397 ECN3694...
-
Page 2: Customer Information
Used for the purposes for which it is intended, and with careful maintenance as outlined in this User Guide, your Lincat product will give you years of trouble free service. For use in GB & IE... -
Page 3: Table Of Contents
CONTENTS Contents Page Customer Information………………………………………………………. Warnings and Precautions………………………………………………… Technical Data……………………………………………………………….. Commissioning………………………………………………………………. Check List of Enclosures…………………………………………………... Installation…………………………………………………….……………… User…………………………………………………………………………….. 8 - 10 Component Replacement ………………………………………….……… 10 - 12 Spare Parts List……………………………………………………………… Wiring Diagrams………………………………………………………………. 13 - 14 Service information………………………………………………………….. Guarantee………………………………………………………….………….. IS397 ECN 3694... -
Page 4: Warnings And Precautions
WARNINGS AND PRECAUTIONS It is mandatory that all appliances are installed, commissioned and serviced by a qualified and competent person as defined by the regulations in force in the country of installation. Failure to comply will invalidate the warranty. WARNING! This appliance must be installed by a competent installation engineer in accordance with the installation instructions, and should conform to the following requirements: ... -
Page 5: Technical Data
TECHNICAL DATA Model OE7008 OE7010 Dimensions Overall Height (mm) Width (mm) Depth (mm) Weight (kg) Hob Cooking Surface w x d (mm) 900 x 600 600 x 600 Usable Oven Capacity w x d x h (mm) 715 x 540 x 400 500 x 540 x 400 Oven Shelf Size (mm) w x d 770 x 530... -
Page 6: Commissioning
Warranty Card User Instructions SERIAL NUMBER Each appliance manufactured at Lincat has a unique identifying number found in the top NOTE right hand corner of the data plate attached at the rear of the appliance. Please record that number in the space provided should it be required for future reference. -
Page 7: Installation
INSTALLATION SITING The appliance must be installed in accordance with the appropriate regulations listed prior. The appliance should be installed on a level surface ensuring the unit is stable, firmly located and positioned to minimise the possibility of accidental touching. A clear space of at least 100mm must be left to the rear of the appliance to allow for servicing with a clear space of 600mm to the front to allow for safe operation. -
Page 8: User
USER INSTRUCTION APPLIANCE USE This appliance is only for professional use and should only be used by qualified personnel. Ensure that the person responsible understands how to safely operate, clean and shut down the appliance and is made aware of the position and operation of the isolating switch in the event of an emergency. - Page 9 Lift off each of the side liners from the unit. External surfaces can be cleaned using a cloth moistened with a warm detergent solution. For heavy, stubborn deposits a de-greasing agent ‘CARBON-OFF’ is available from Lincat upon request.
-
Page 10: Component Replacement
External Cleaning Do not use abrasives on stainless steel or enamelled parts. Do not use any products containing chlorine or hydrochloric acid to clean stainless steel surfaces. Do not clean the appliance using a water jet. COMPONENT REPLACEMENT Hotplate Switch 1. - Page 11 Hotplate 1. Remove the control knobs and fascia panel, by firstly removing fixing screws. 2. Protect the surrounding area panel work with soft material and support the fascia panel against it. Access to the hotplate switches is now possible. Remove completely the component screws from the fascia.
-
Page 12: Spare Parts List
Control Thermostat 1. Ensure that the electrical supply is disconnected. 2. Remove the thermostat bulb from the top of the oven. 3. Remove the control knobs B from the front of the unit. 4. Remove the two screws holding the control thermostat to the control panel. 5. -
Page 13: Wiring Diagrams
OE7010 Range Wiring (E357) FACIA TO CHASSIS LEFT HAND SIDE BONDING RIGHT HAND SIDE SW14 SW14 NE39 (IDENTICAL TO SW58 LEFT HAND SIDE) NE40 TH46 FRONT REAR 2 3 1 4 TH63 EL188 L1 - OVEN FRONT L2 - LHS HOBS L3 - RHS HOBS FA12... - Page 14 OE7008 Hob Wiring (E329) TO CENTRE FRONT & REAR HOBS RIGHT SIDE FRONT & REAR HOBS TO LEFT SIDE FRONT & NOTE: There are three identical L & N REAR HOBS cable sets for each OE7008 range, one set of which is illustrated. Each live input cable pair (cables 1 &...
-
Page 15: Service Information
Catering equipment should be routinely serviced to ensure a long trouble free life. It is recommended that this appliance is serviced every 6 months by a competent engineer. For help regarding the installation, maintenance and use of your LINCAT equipment, please call:- LINCAT SERVICE HELP DESK ...
Need help?
Do you have a question about the Opus 700 OE7008 and is the answer not in the manual?
Questions and answers